The 2023 Experimental Weaving Residency, featuring Elizabeth Meiklejohn, has come to a close and left us with new understandings about electromagnetics and cloth movement.
The 12-week residency took on the challenge of actuating, which is fancy for moving, a piece of cloth though a combination of complex structures and electrical components. The project emerged organically as we shared some ideas and ongoing projects of the lab with Elizabeth, who took a fondness to the idea of cloth that could hold two distinct states (e.g. a flap opened or closed, a cell extended or collapsed). With this in mind the first 4 weeks focused on a wide array of structures that we could imagine having two-states (known more broadly as bi-stable mechanisms), next, we joined forces with Irene Posch to think through how we might use electromagnetic coils to push and pull the cloth in different directions. We ultimately set ourselves a challenge to create an exhibition piece that showcases electromagnetic movement of a cloth. We added a challenge that the cloth needed to be woven in one piece with all electronics embedded into its structure.
By approaching programmable movement as a provocation, this project explored fabric elements capable of oscillating between two states. Collectively, we used our knowledge of weaving, electronics, and programming woven drafts to generate a series of samples that fold, flap, and collapse before arriving at a vision for an interactive textile component. The prompt: reimagine Posch and Kurbak’s 1-bit embroidered controllers within the vernacular of woven structure. The result, an e-textile woven in a single piece that, when removed from the loom, can be cut apart into flaps. When connected to electronics and a custom interface we built to control its motion, the cloth performs gestures. This lets the fabric behave like rustling, flickering and slow rhythmic opening and closing, suggesting a passage of wind or sunlight across the piece bringing it to life.

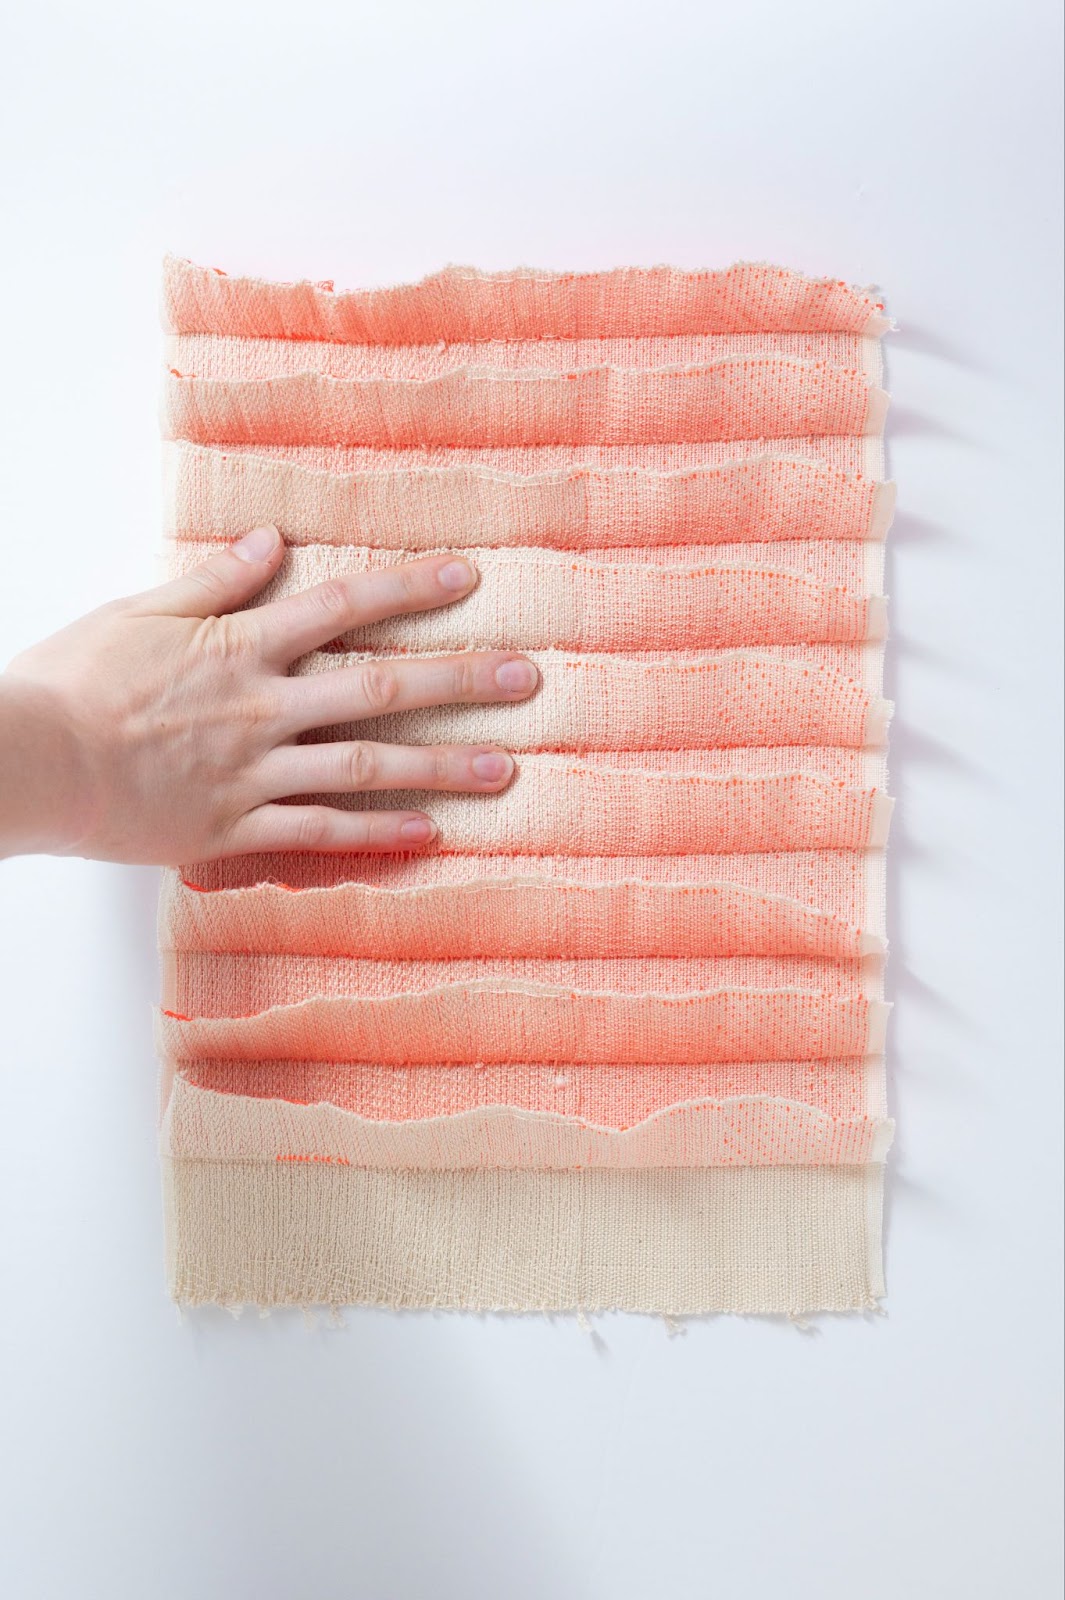
Each flap is controlled by two electromagnetic coils, one at either side of the flap. A strong neodynium magnet is also integrated into the base structure, directly under the coil when the flap is closed. When the coil is powered, it produced a magnetic field which attracts it to the neodynium magnet. When the wire that forms the coil is connected to power it becomes attracted to a magnet, and thus the flap closes and the cloth appears white. When power is disconnected, the attraction no longer holds and gravity opens the flap, letting light bounce from the flap’s bright orange interior onto the base cloth, creating a warm neon glow – effectively changing the color of the fabric in a large-scale, structural manner.
Through close collaboration and extensive prototyping, we developed weaving strategies in which disparate elements – neutral base, neon flaps, copper coils – are fully integrated into a single-piece fabric on the loom. Designing a woven fabric that not only contains actuators, but lends itself easily to actuation through zones of rigidity and softness, was an equally important part of this process, developing from conversations with engineers and designers in our lab. We centered diagramming and process documentation throughout our collaborative process, maintaining a record of “design bookkeeping” that led us through iterations in coil form-factor, neon color composition and weave structure, finally converging as a color-shifting, actuating woven fabric.
In the following sections, we’ll break down the project into its components, photos of all of our samples, ideation, and methods are included in the 2023 residency catalog (coming soon_.
Sampling
To get started thinking through ideas and concepts, we began sampling in two directions. The first explored structures capable of collapsing and springing back into shape. And the others drew from the research in the lab on force sensing textiles to explore different structures that could sense pressure. While there are so many to explore, we’ll focus on one sample from each direction.
Exploring Lattice Structures
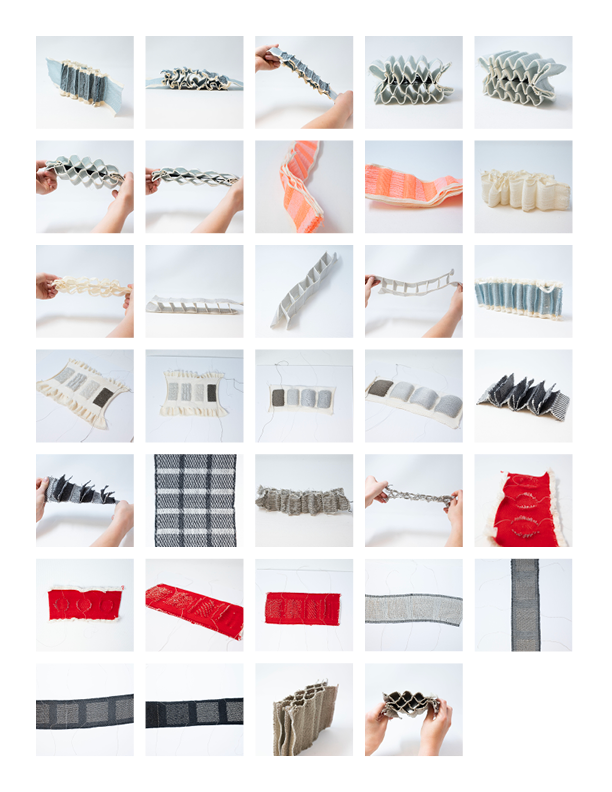
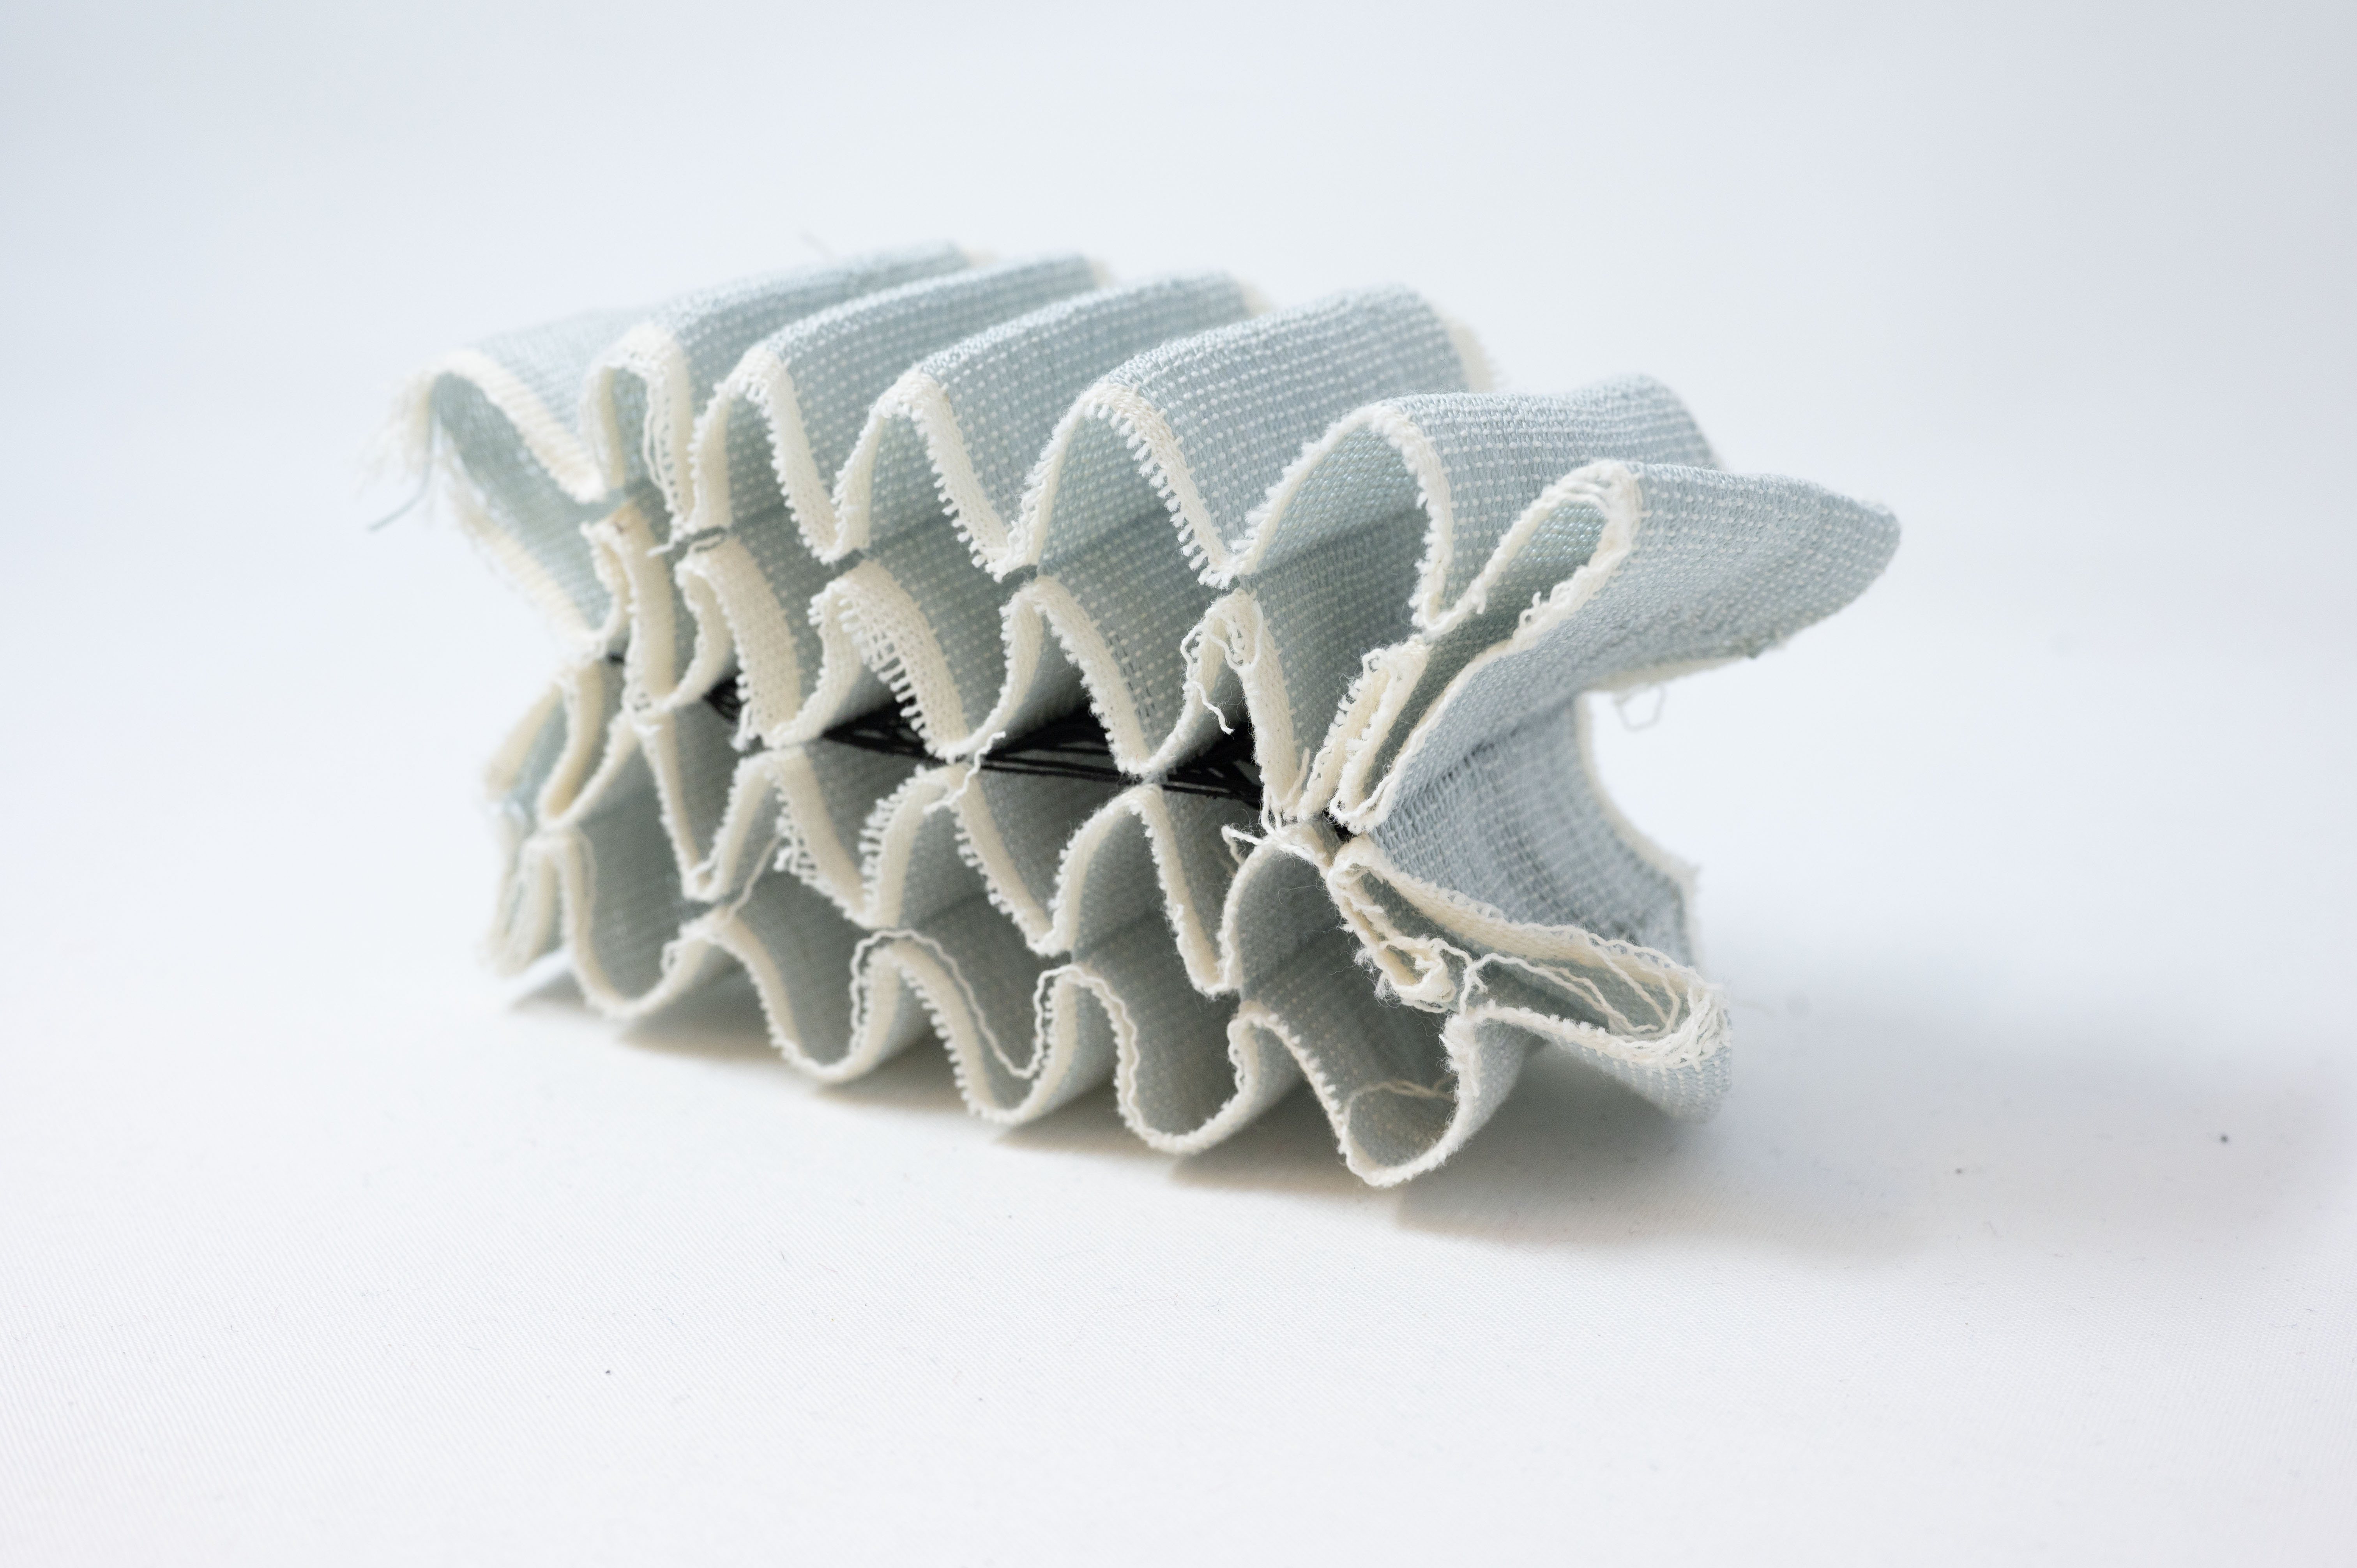
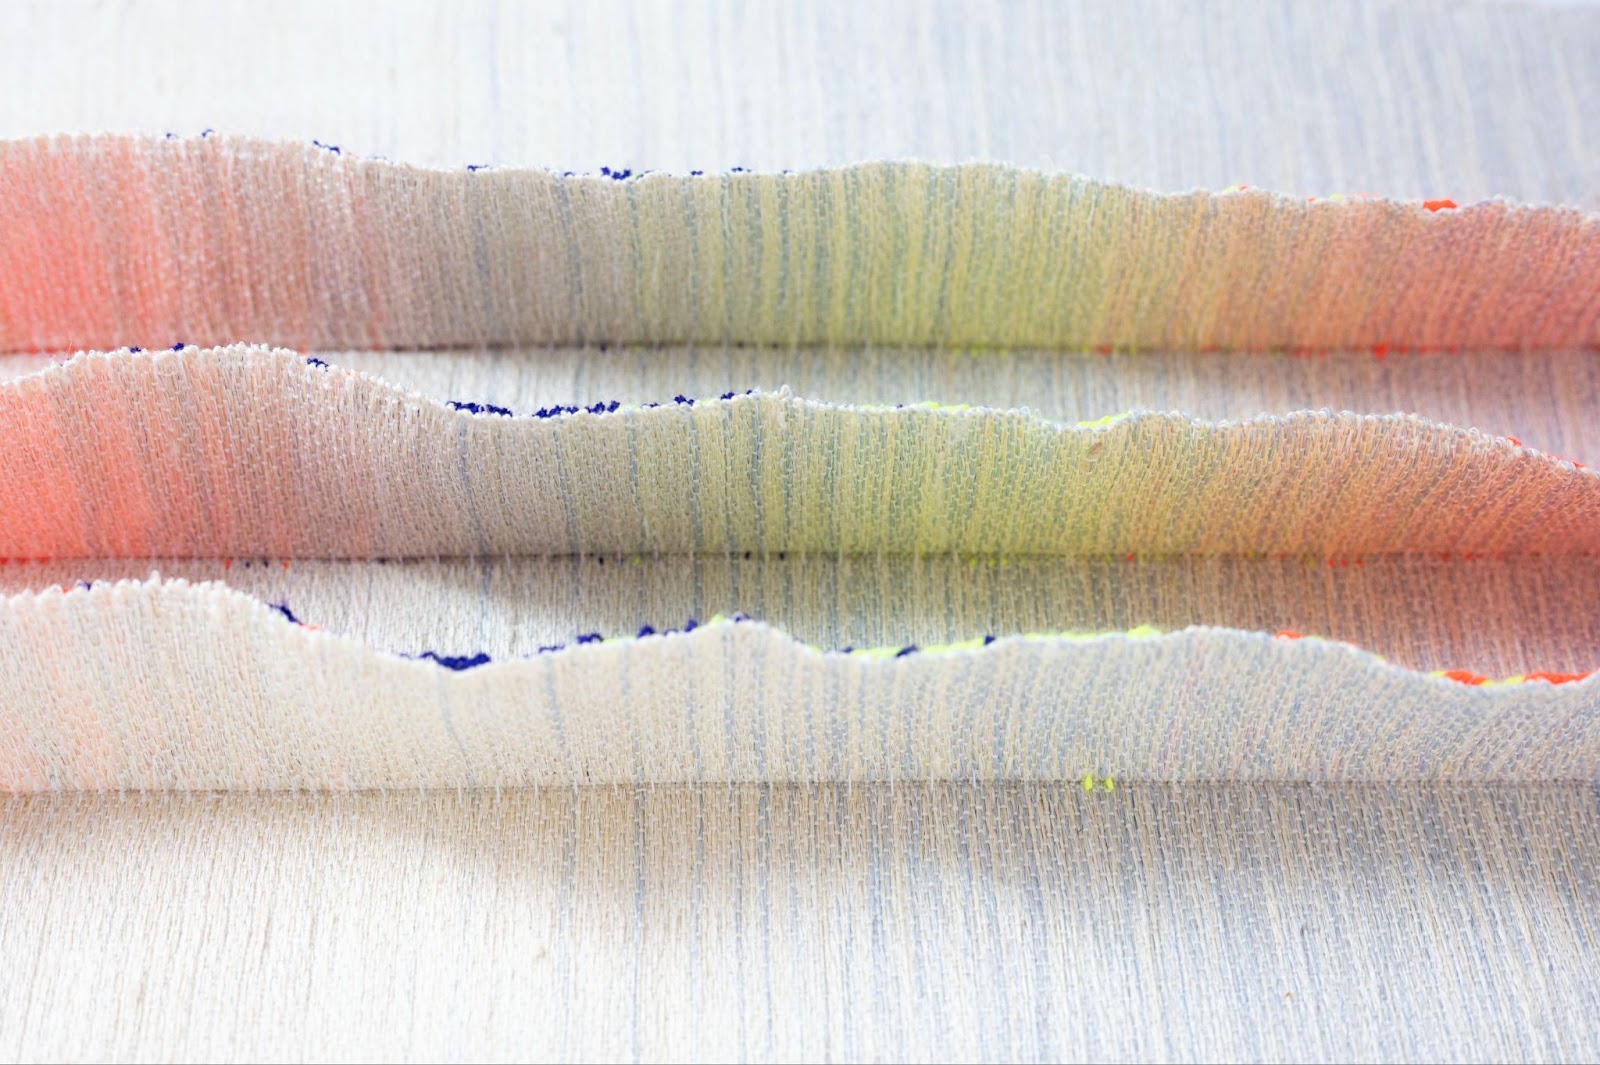
This sample was my (Laura’s) personal favorite in the way that it held dimension and stretch, reminding me of a little sea creature walking along the ocean floor. Elizabeth designed it as a four layer structure of overlapping curves, such that, the binding points between the layers are made only from the layers passing through each other. Elastic floats are inserted between layers 2 and 3 to pull the lattice open. Laura translated this into AdaCAD to understand and communicate the structure to other weavers.
Each sample Elizabeth created for the Residency was also carefully tagged with information about its structure and construction.
Sample 7b – EWR 2023
4-layer lattice with elastic floats, 0 offset
Techniques: multi-layer, shrinking floats
Weft 1 (w1): 200 tex bonded nylon
Weft 2 (w2): black elastic
Base: plain weave in w1, 15 epi per layer
Floats: w2 running through the center of the layer stack, not interlacing with anything.
Because Elizabeth uses a weaving software called PointCarre, we explored how we might make the same structure in AdaCAD using the layer notation feature and offer it to this audience for reference and play.
Try it in our Beta Version of AdaCAD: https://adacad-beta-fa4dc.web.app/?ex=sample7b
Or learn more about how to create this structure: https://docs.adacad.org/docs/howtouse/sample7b
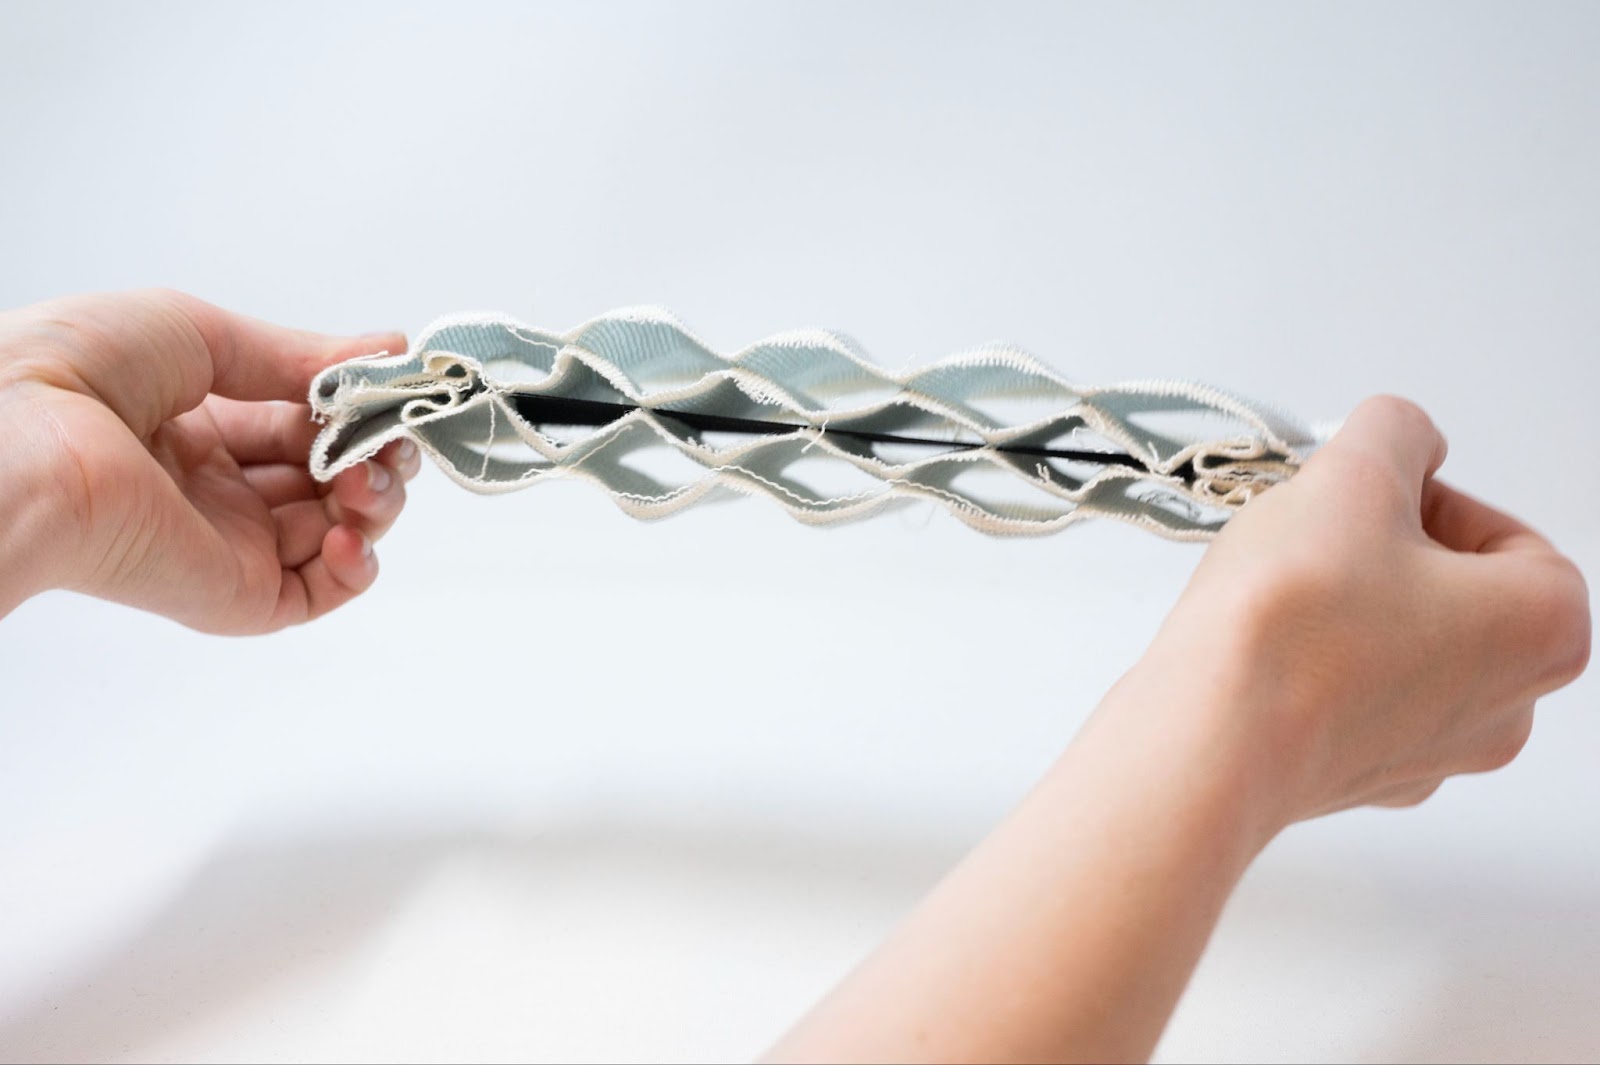
Making Force Sensors from Pile Weaving Techniques
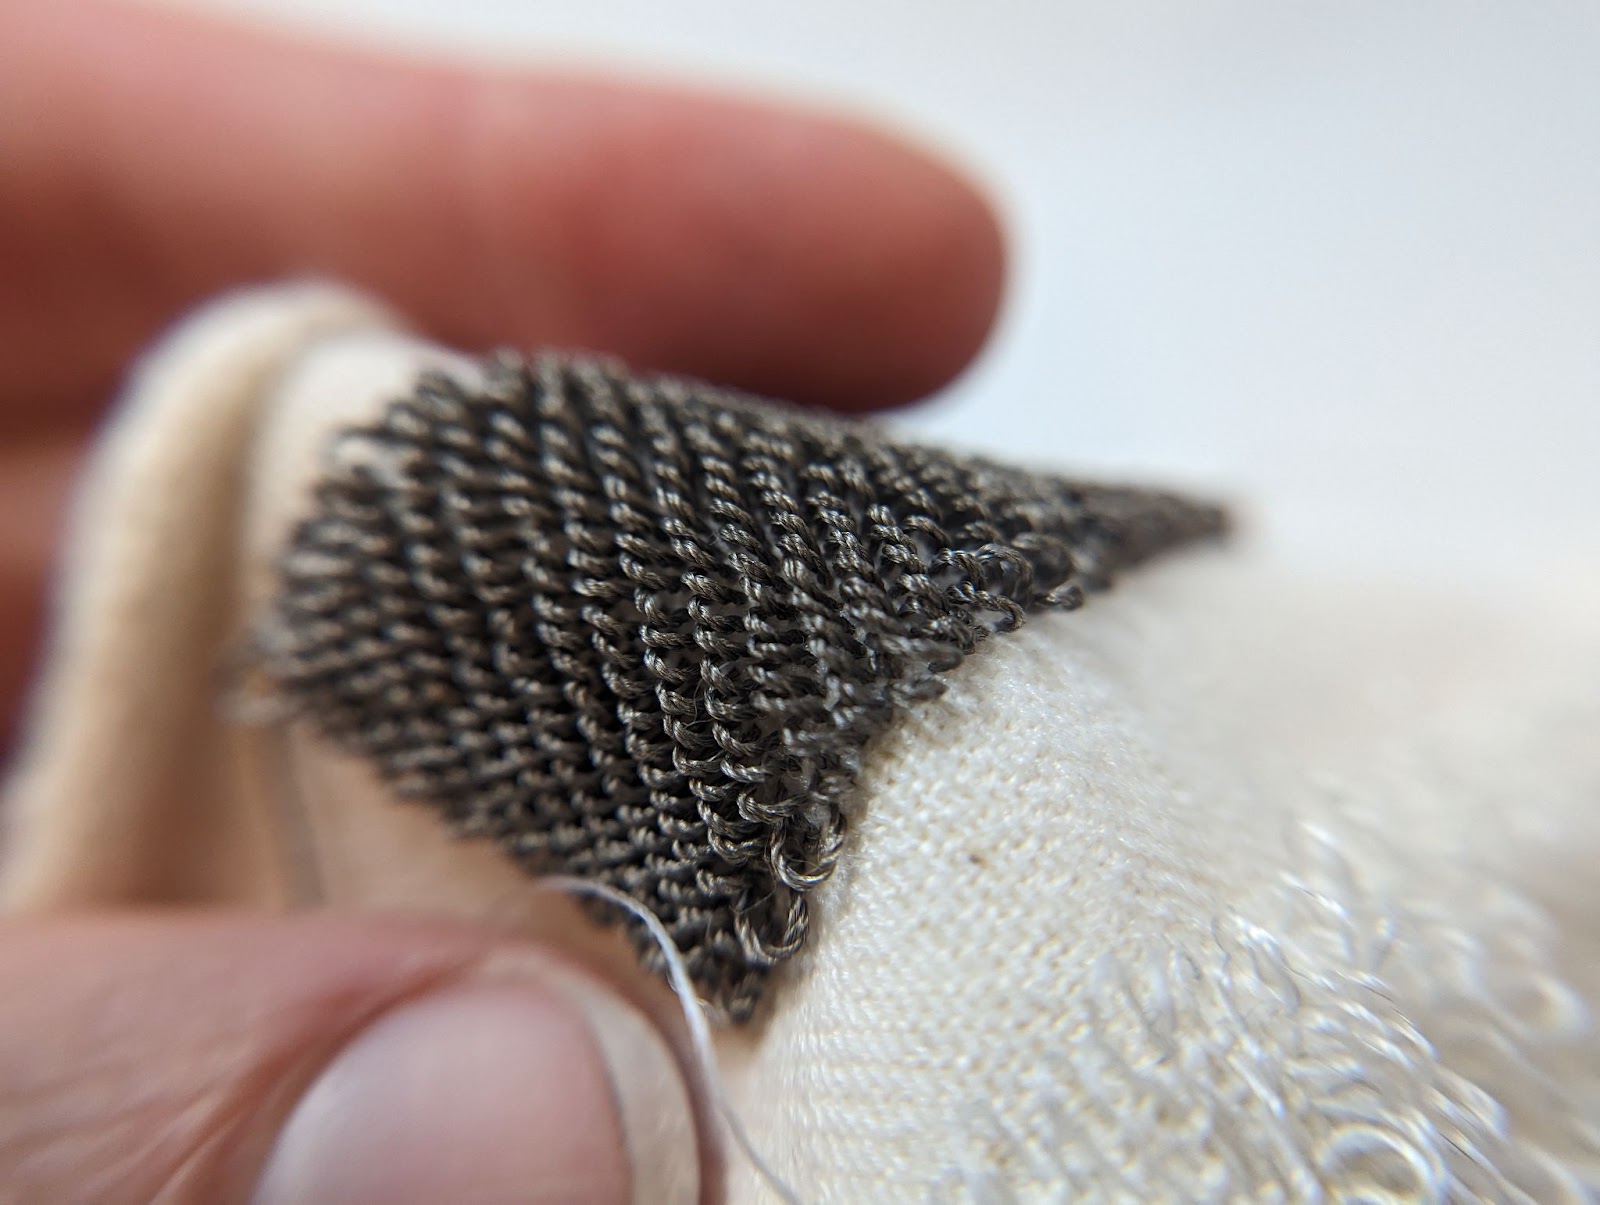
The principle of resistive sensing guides many e-textile projects. This form of sensing happens when fibers (specifically metal fibers) make contact with each other when they are subjected to external pressures. The closeness of the fibers changes the material’s resistance, which can be measured by a computer. If you’d like to read more about this phenomena, we wrote a paper about it with our former experimental weaver in resdiency Etta Sandry. While we have been using felt as a force sensing structure, Elizabeth experimented with structures that would pile the metal yarns in loops on the surface of the cloth such that when they are not pressed, the loops remain isolated from each other. When they are pressed, the loops collapse and change resistance.
Understanding Movement
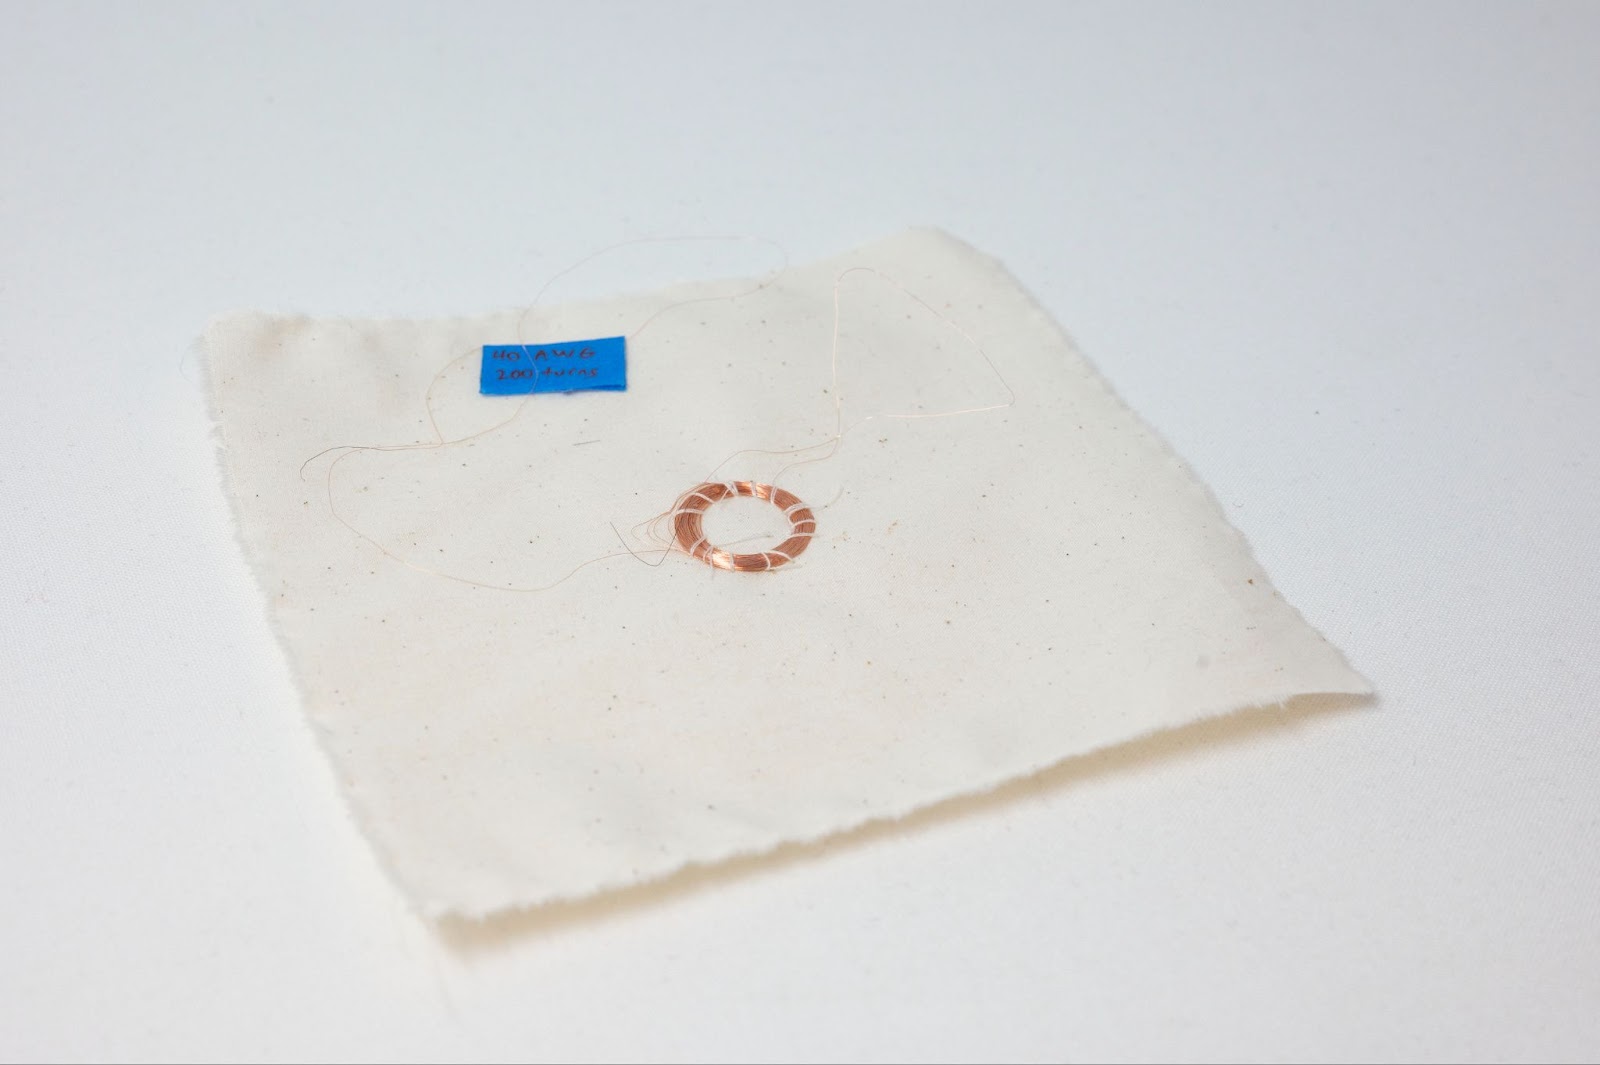
To understand how the cloth might move, we repeated instructions provided to us by Irene Posch which allow you to use an electromagnetic coil and strong neodymium magnet to produce movement. To test this, we created our own coils (e.g. about 200 loops of 36AWG magnet wire around a Boba straw (sourced from the cafe downstairs). We stitched the coil to a cloth and put a strong magnet on top of it, attached to another cloth. When we attach the ends of the coil to a 9 Volt battery, it repels. If we flip the ends of the coil when we connect to the 9V, it attracts.
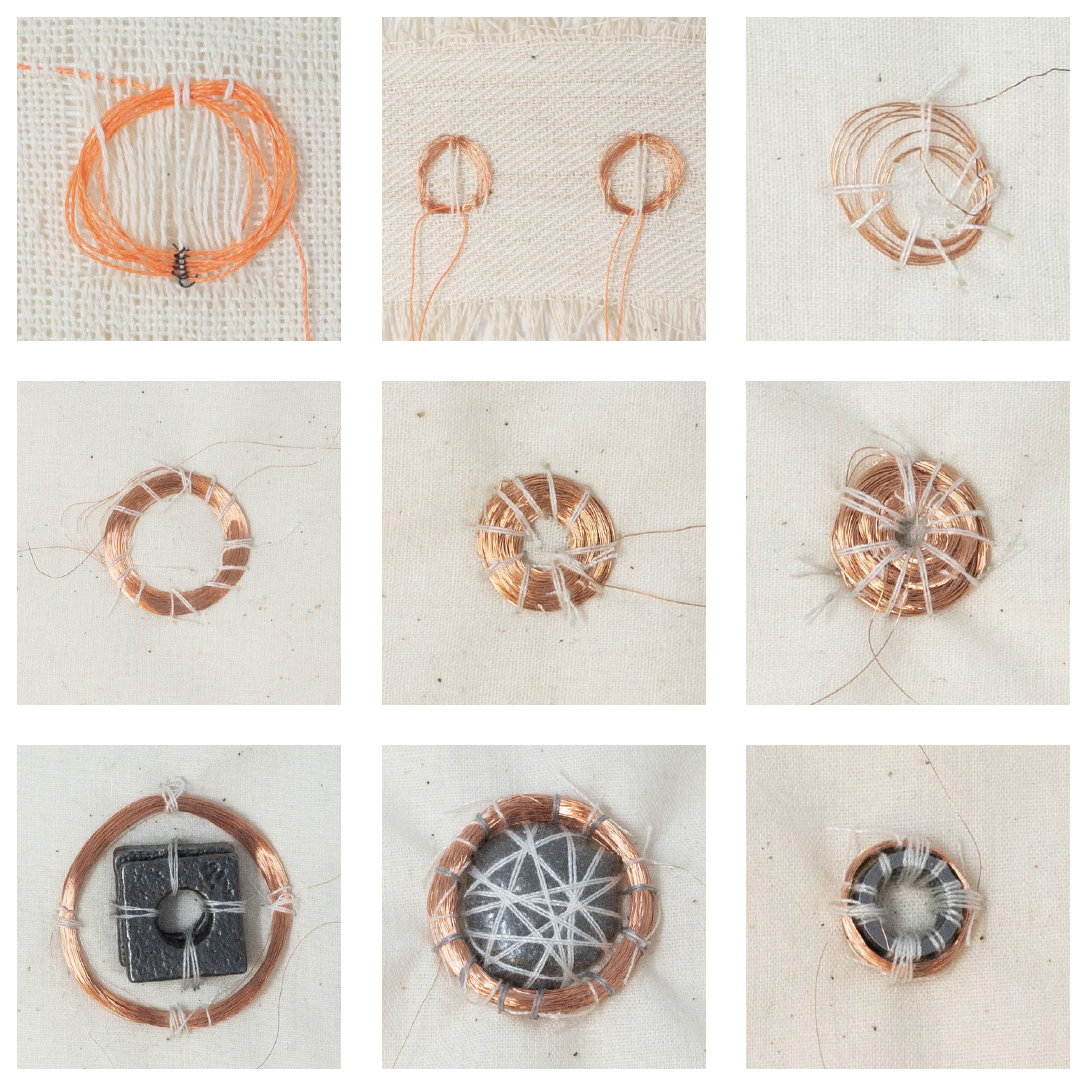
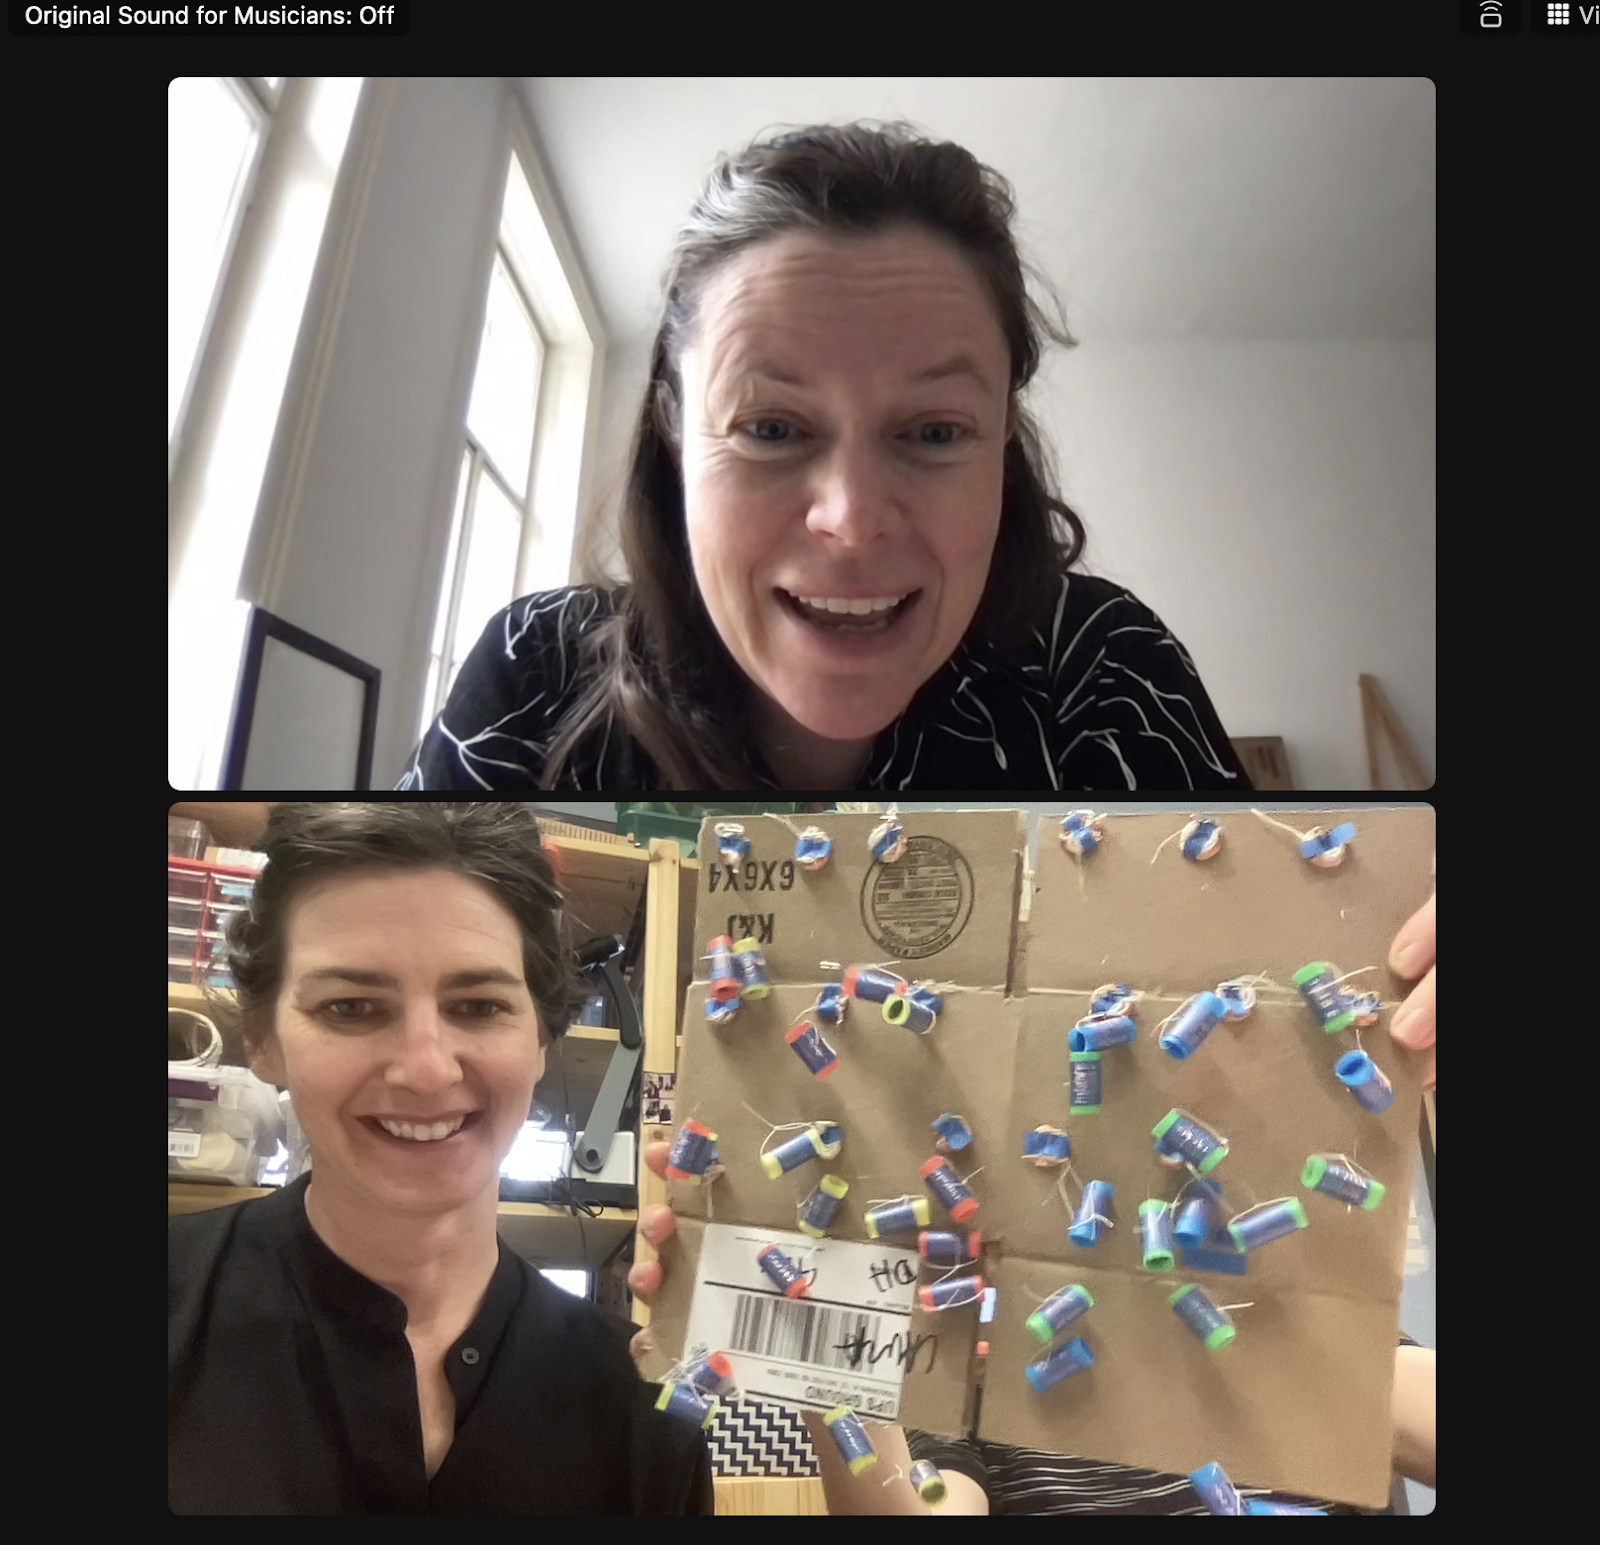
Elizabeth tested a bunch of coil shapes and sizes to study their effects, and to see what kind of movement we could induce upon a magnet in a cloth. Simple helical or spiral coils create push-and-pull actuation; arrays of multiple coils can create side-to-side sliding actuation when powered in a specific sequence. Ferrous metal cores increase the strength of cylindrical electromagnets, but had no effect on our flat versions.. Handmade coils inevitably have overlaps where successive wire wraps cross each other, diminishing the strength of the magnetic field.
As we researched magnetic coils, we took special inspiration from fellow e-texitles community member Cindy Harnett and her team:
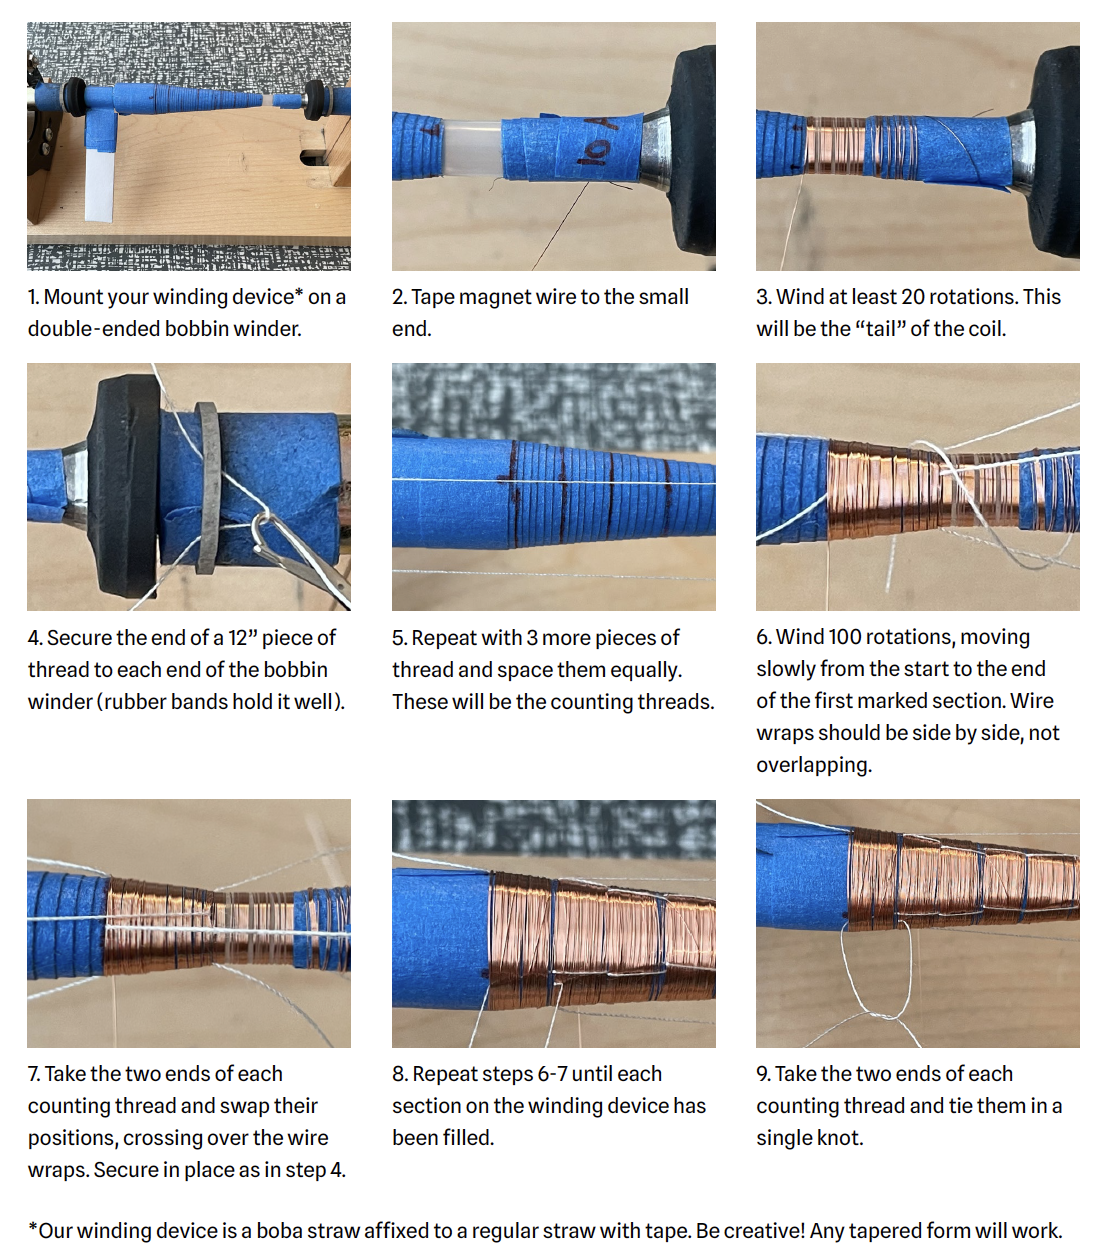
We chose to maximize the number of turns that would fit in a small low-profile coil by using thin magnet wire and a solid disk form factor rather than a hollow ring. We experimented with forming coils on table and Jacquard looms, constrained by the mechanics of typical loom weaving that makes any type of circle or spiral shape highly challenging to construct.
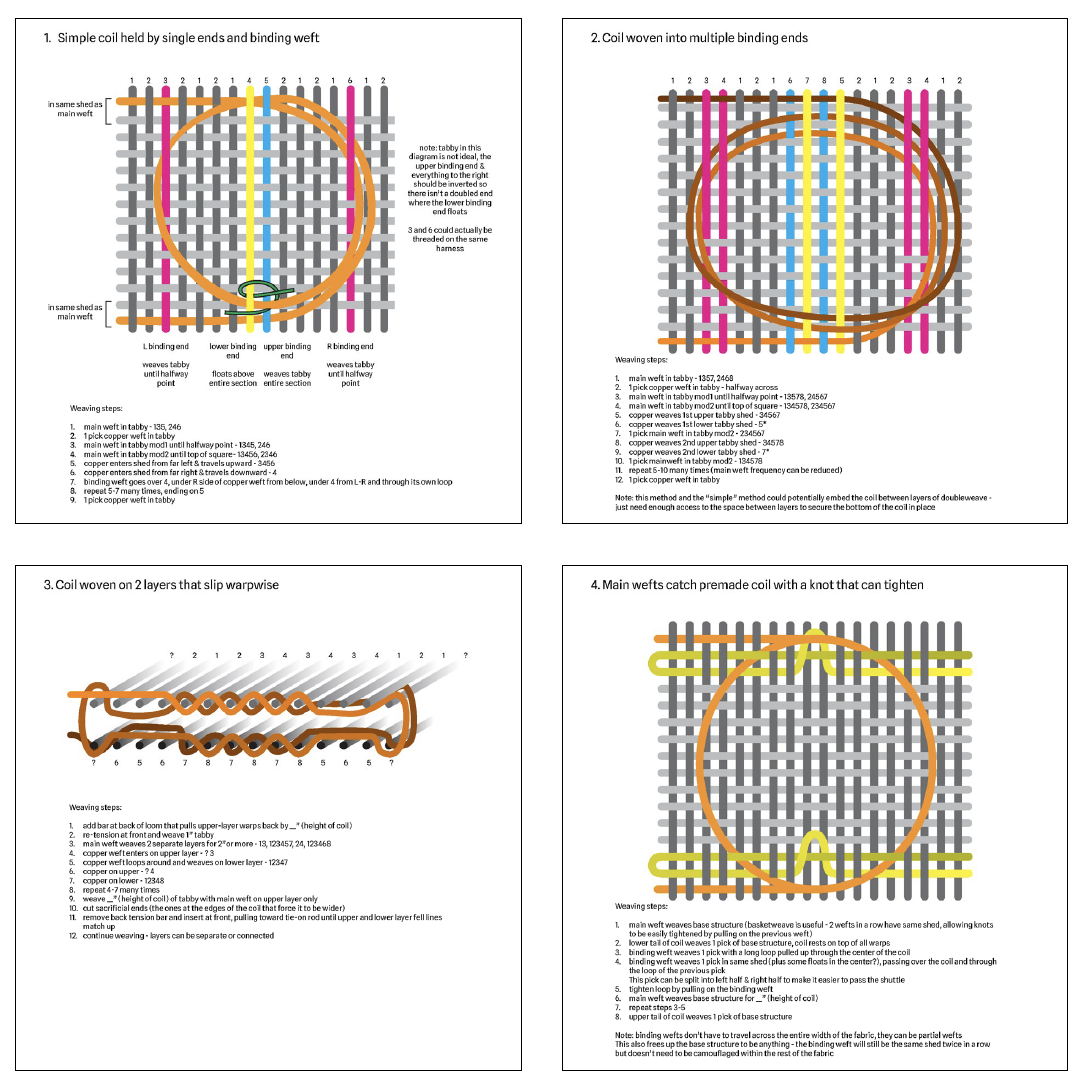
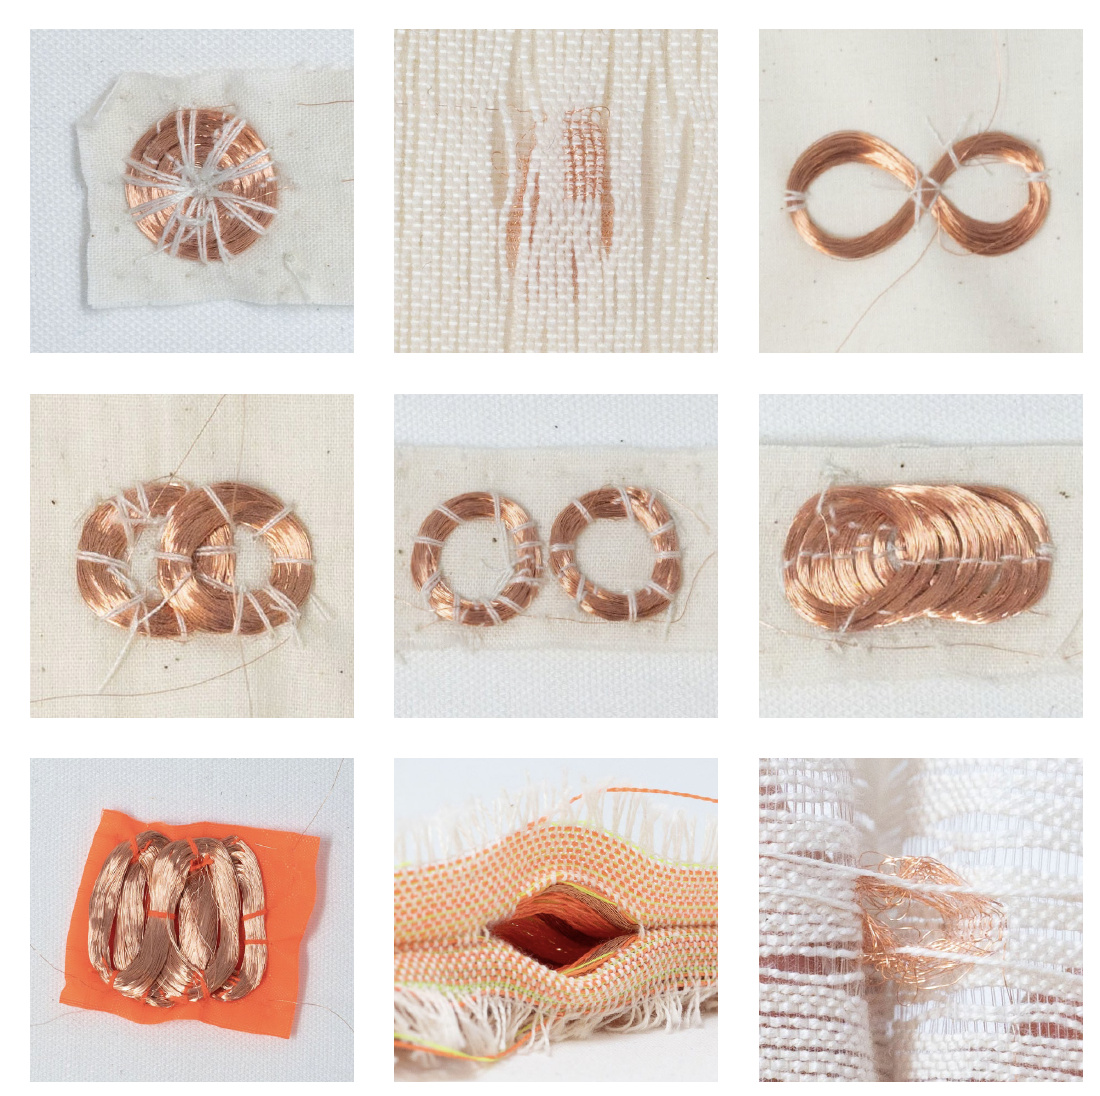
Weaving is like Tetris: you can’t go back and insert more material into fabric you’ve already woven, because more recent wefts block the shed from opening in that section. A coiled wire, repeatedly traveling between the fell line (the most recent part of the cloth that’s been woven) and a previously woven section, would be difficult to weave without breaking or bending some of the foundational rules. Adding supplementary wefts, whose motions are more like knotwork or embroidery than weaving, was one strategy to fix the coil to the cloth. Another approach (shown in variation 3) was to weave the coil within the cross-section of the fabric, rather than on its face, as a doubleweave tunnel. These precisely choreographed movements, and the wire coil’s continuity, are only possible on shuttle looms.
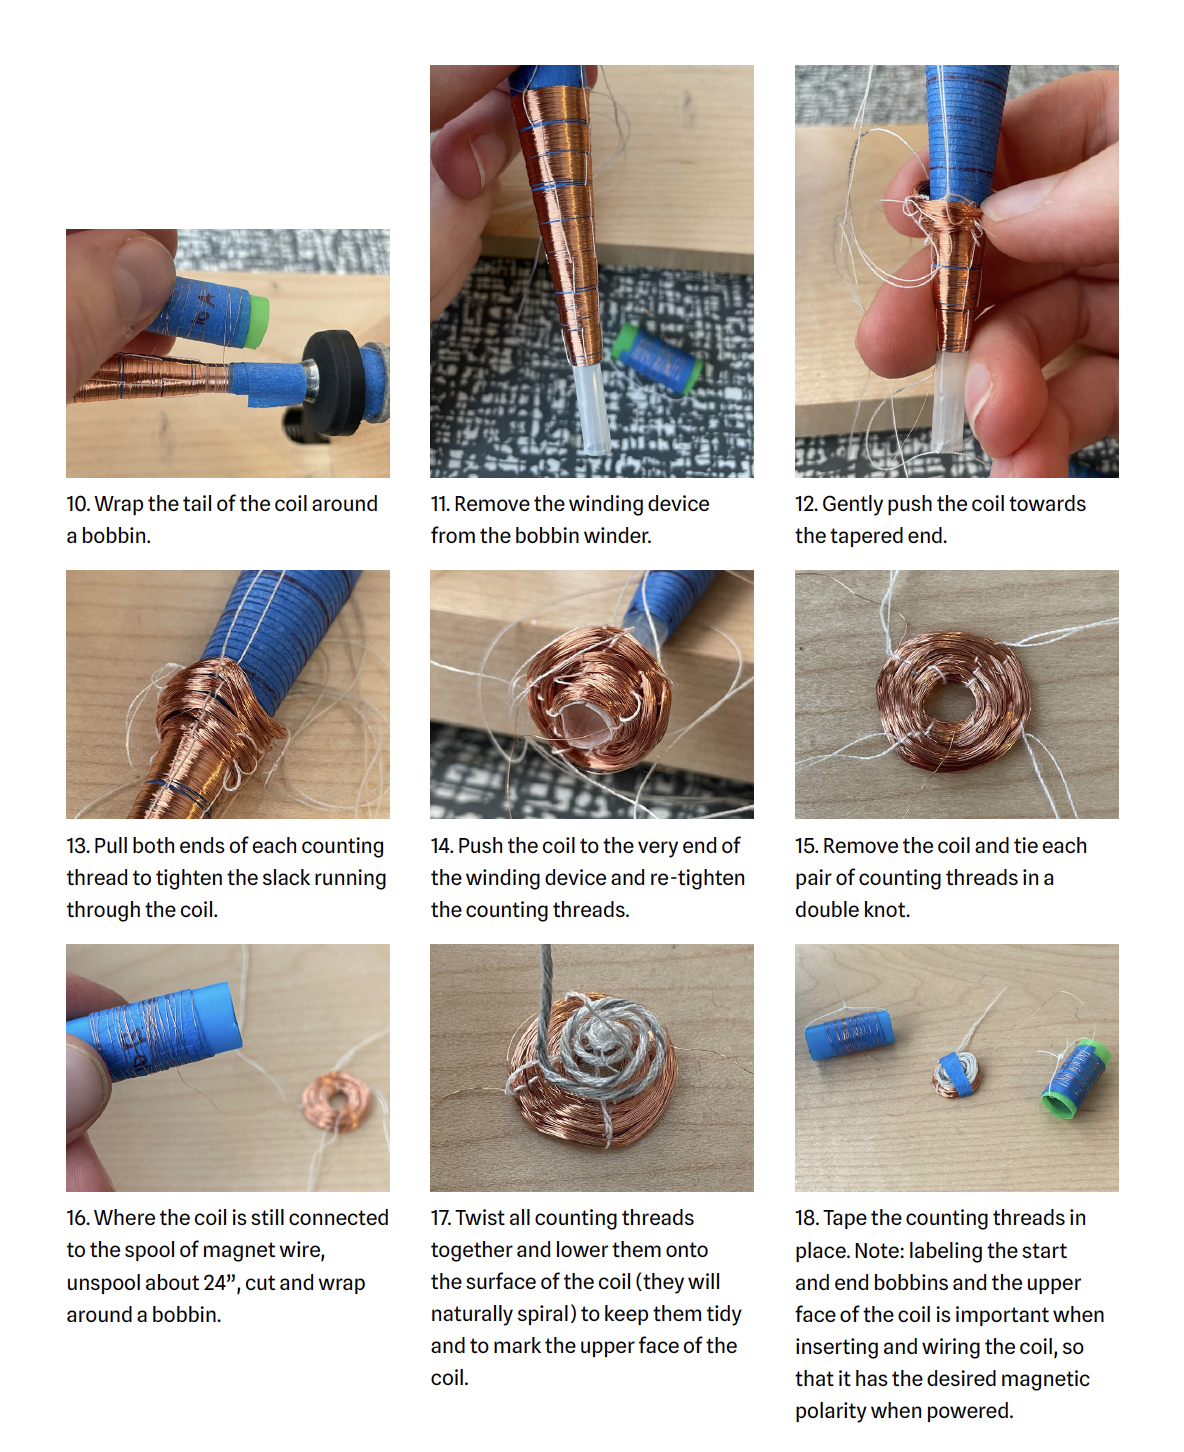
Want to make some of your own coils – you can try these steps:
Prototyping Cloth Movement and Structure
To help us understand what we needed from our coils, we decided that we must develop them in the context they would be used. From sampling and testing, we had some notions of what we might explore, and considered a cloth with multiple flaps. We decided to integrate a bright color on the back of the flap to amplify the visual effects of the flap moving.
We began exploring the vision for the final piece by mocking up our concept in muslin and stitching orange rip-stop nylon to the back of each muslin flap. We would hand sew on different magnets and electromagnets to explore what might happen, how far we could get a flap to move. The general finding is that the stronger the magnet, the more the force of attraction and repulsion, but also the heavier the cloth. This meant that we needed to embed the magnet in the base cloth rather than the flap to eliminate the weight it would cause.
Translating into Woven Structure
We began translating this structure to the loom by exploring partial weft insertions that, when worked back and forth across the loom, would create flaps in place.
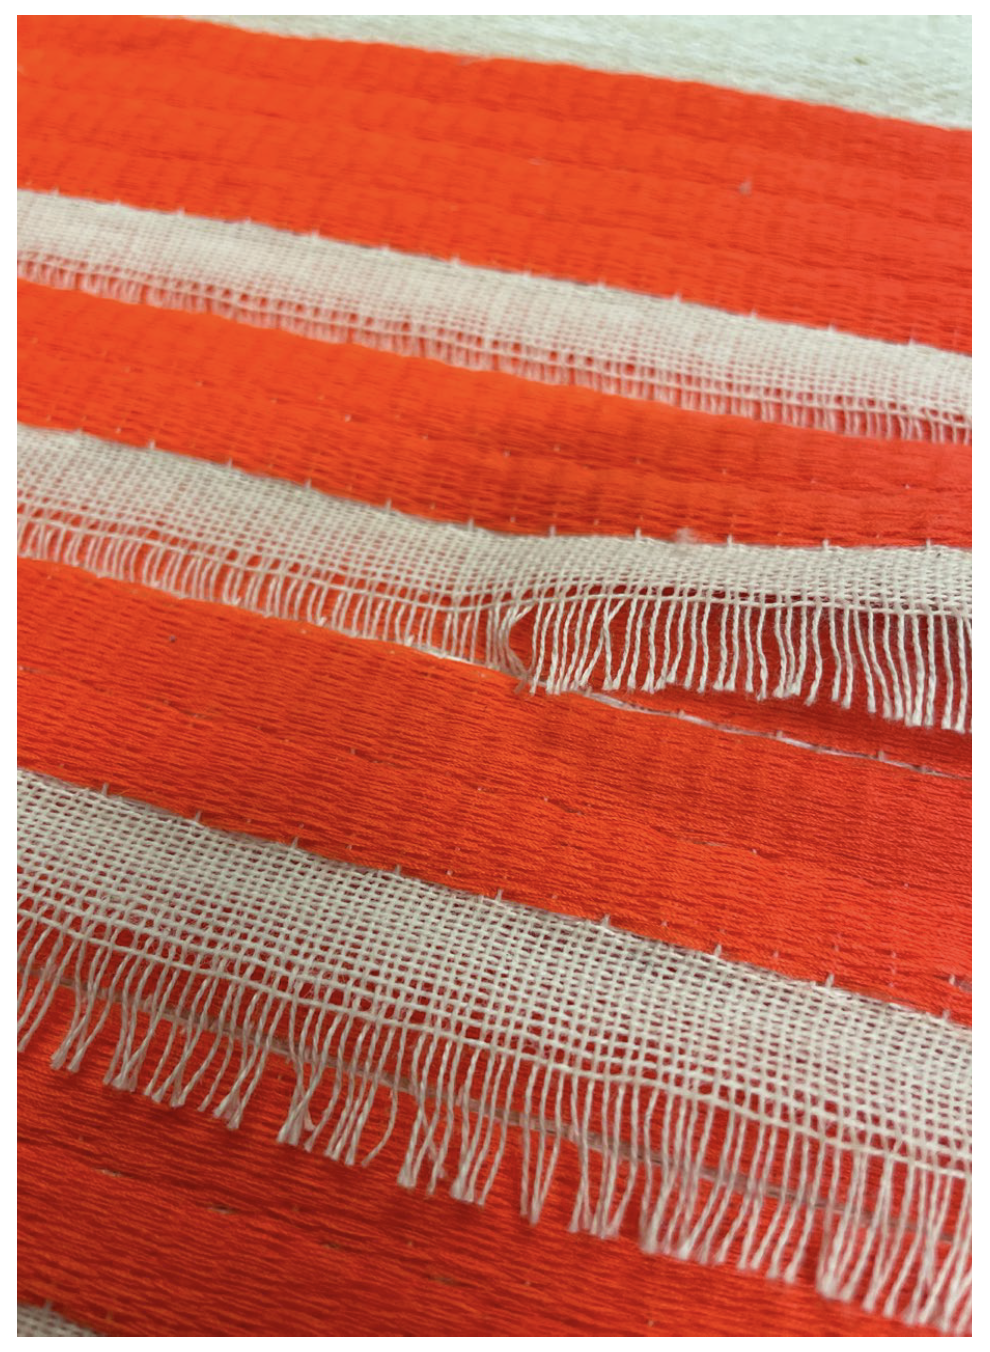
This piece is worked from the bottom to top edge on the loom, woven in one piece, so the flaps open in the direction of the weft. You can see if you look closely that we experimented with different structures for the orange flaps to minimize the appearance of orange on the surface of the flap, and maximize on it on the back of the flap. Ultimately, we found the flaps to be too rigid. The insertion of the flaps in the weft direction created too much weft yarn movement in the joints.
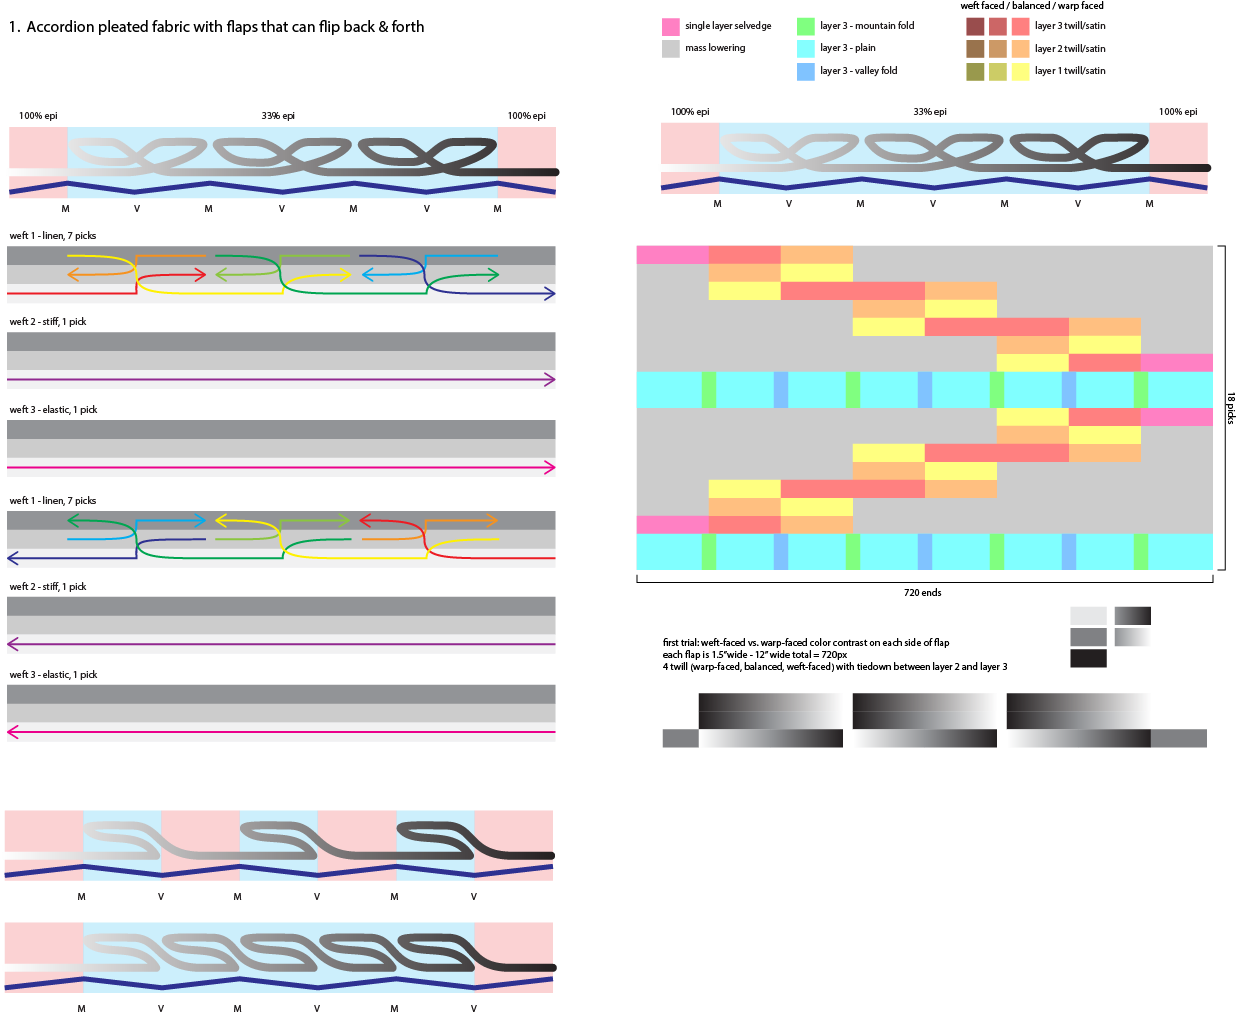
These are Elizabeth’s design files used for understanding how to implement the flaps along the weft direction by moving partial wefts sequentially to the right and left in different segments across the width.
We explored different materials and also different colors, as well as integrations for the magnetic wire used in the coils in the next sample, but the flaps, still felt too rigid.
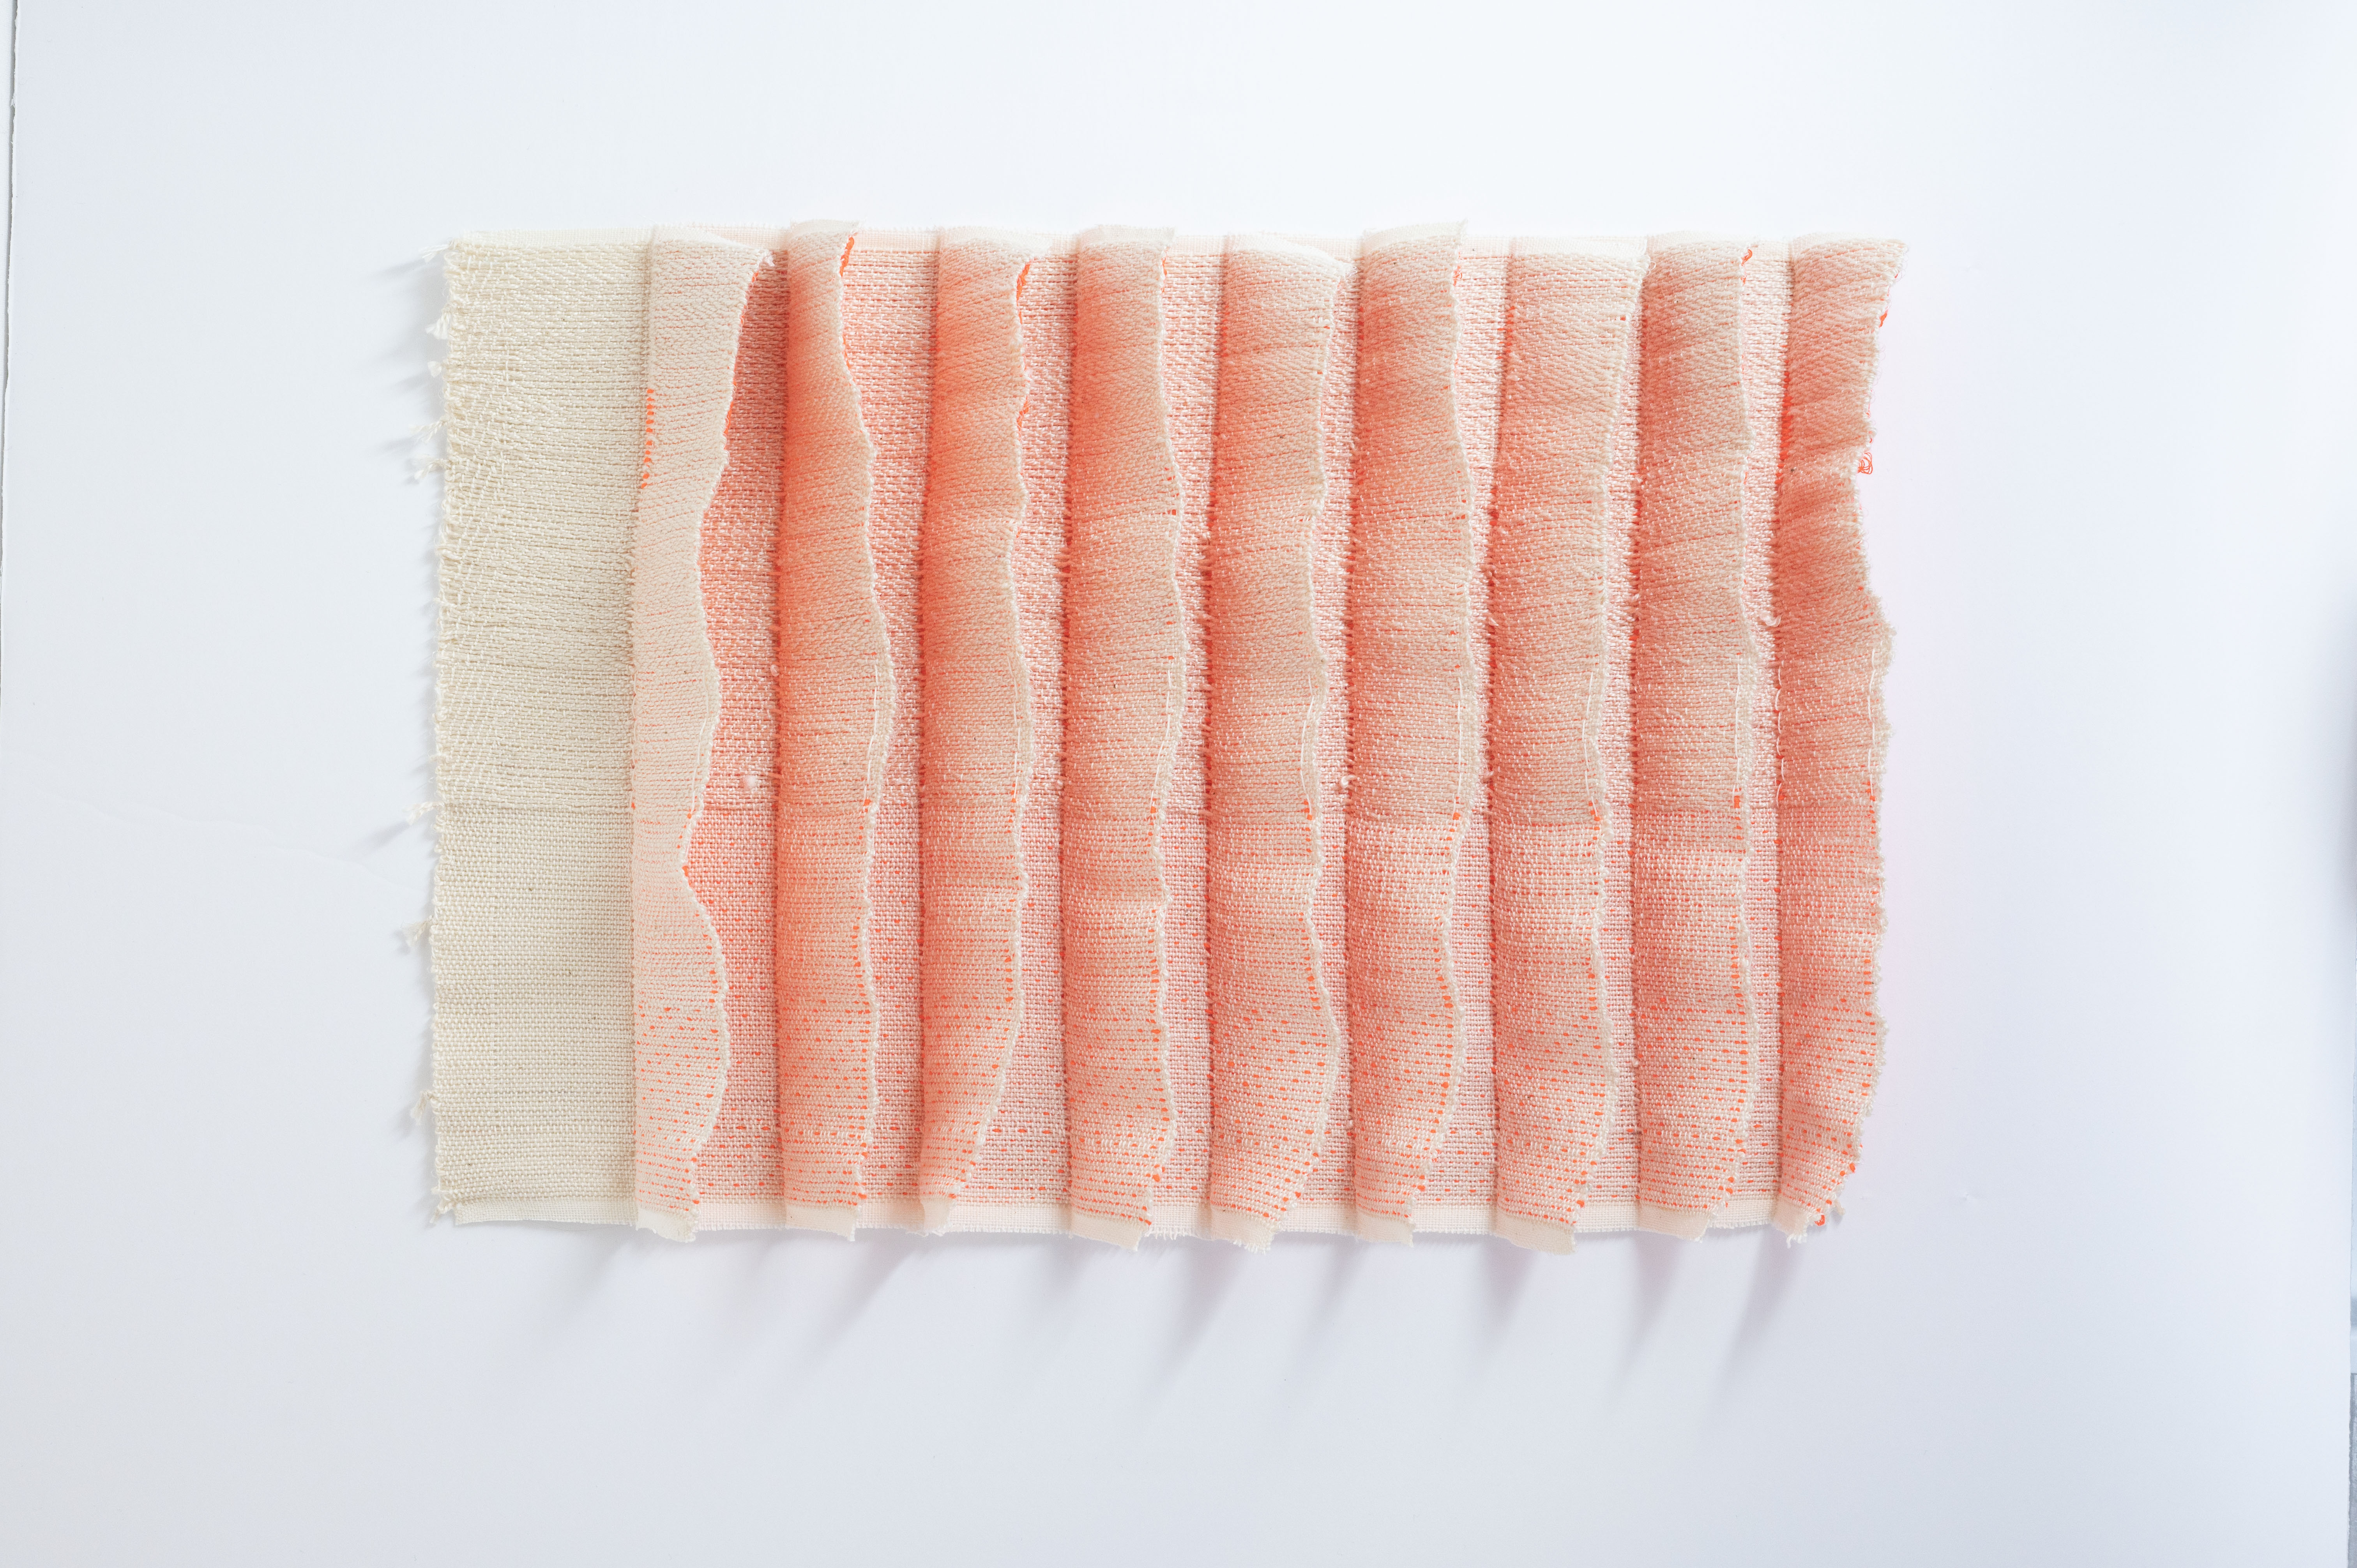
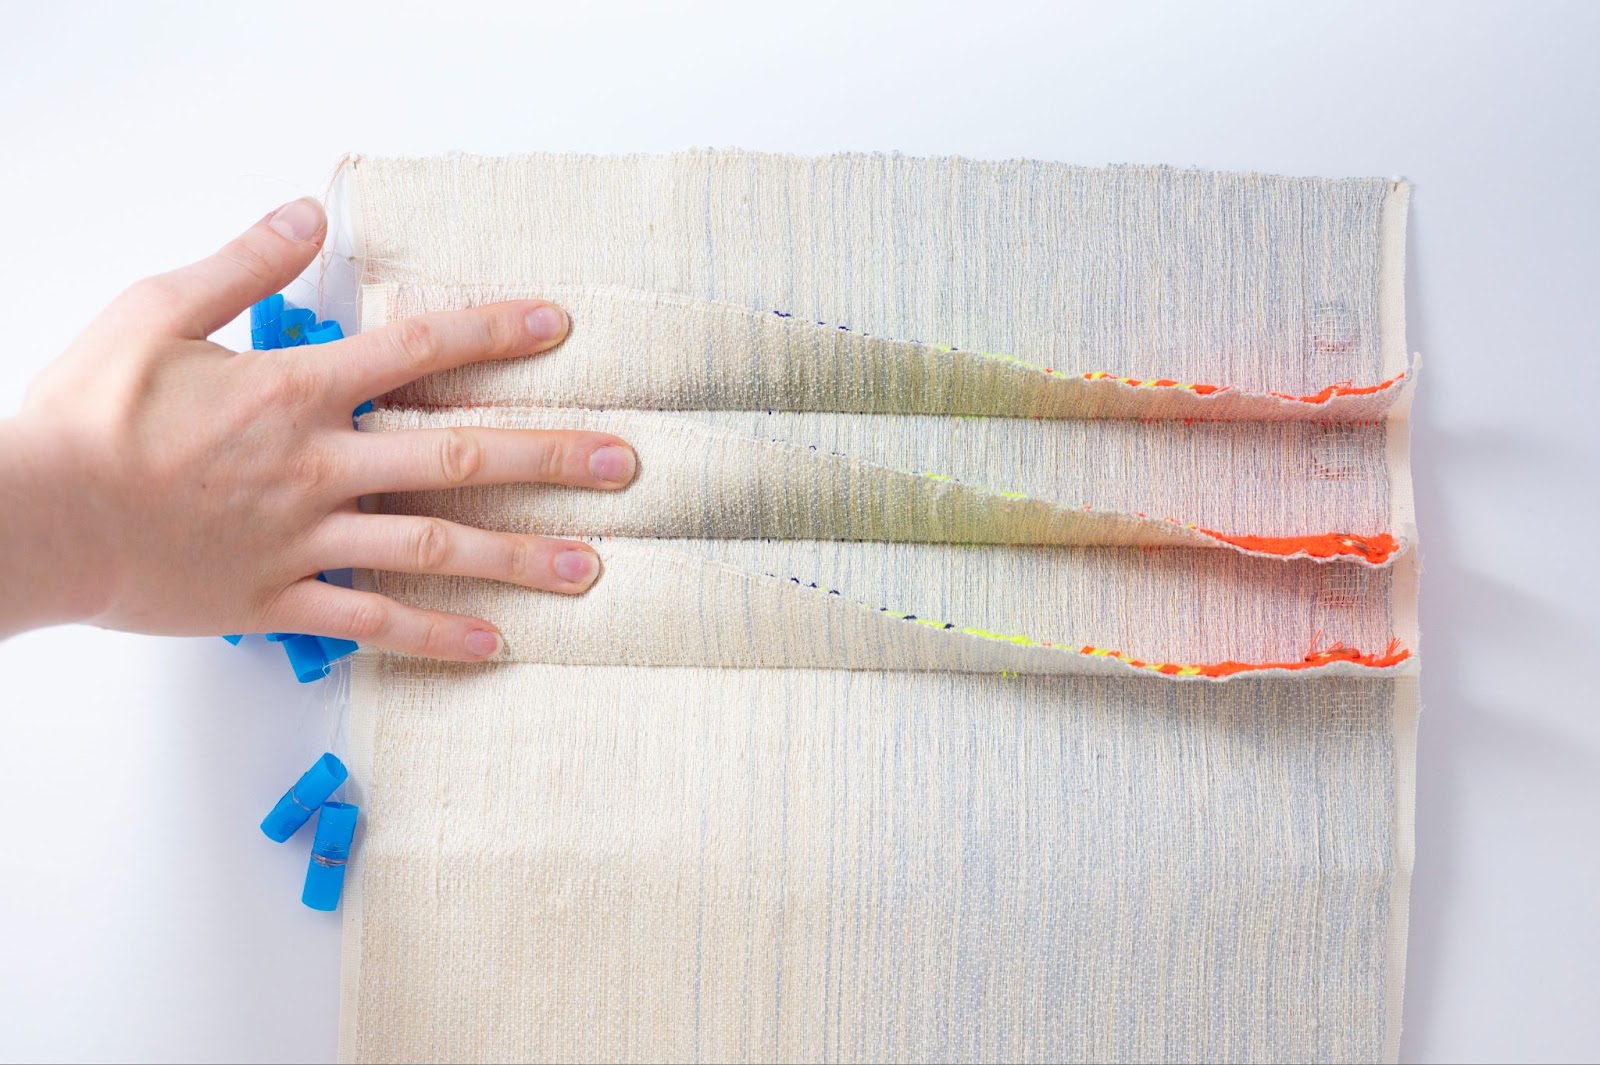
To ease the stiffness in the joints of the flaps, Elizabeth turned the design by 90 degrees, making flaps in the warp direction instead of weft. This design ultimately gave us the movement in the flaps we were looking for, but also made us add a section above each flap that needed to be “cut” to release the flap from the backing. We cut and finished these edges.
The Final Product

We initially used nylon monofilament, combined with undyed cotton, to lend stiffness to the fabric but found it too rigid and a bit unwieldy to work with. Instead, we shifted toward a “kitchen-sink” weft with many yarns bundled together, eventually choosing a mix of bleached and unbleached linen, paper and raw silk. Thin elastic yarn was briefly tested as a supplemental warp to help flap hinges snap closed, but we moved away from this idea when we rotated the design for the final iteration. Neon polyester sewing thread, strong neodymium magnets and 40-gauge magnet wire (copper with an enamel coating to prevent coils from shorting) were selected to maximize the visual impact and actuation strength of the fabric.
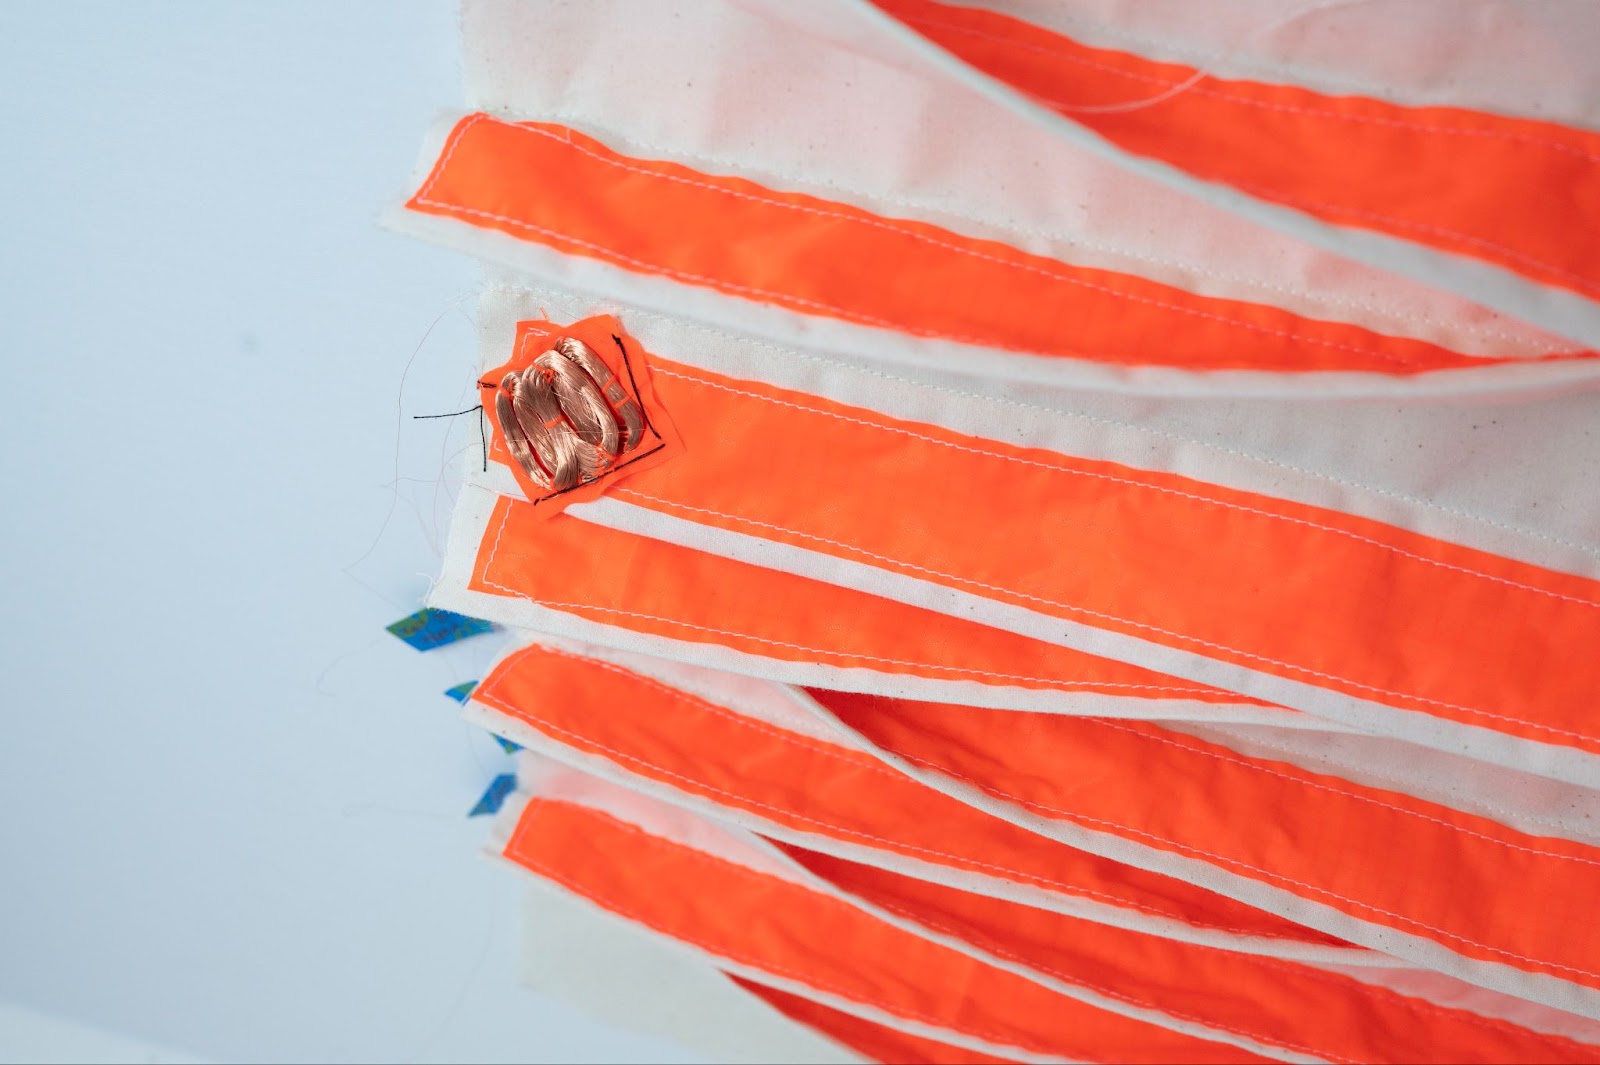
During the weaving process, we integrated the coils and long ends of the coils into the cloth itself, pulling them all to the top left corner of the cloth for each connection. Again, boba straws came in handy, as Elizabeth attached each long and very delicate string of magnet wire to a tape covered straw segment to manage the wires while weaving. Coils were integrated and then taped in place to hold them during the rest of the weaving process.

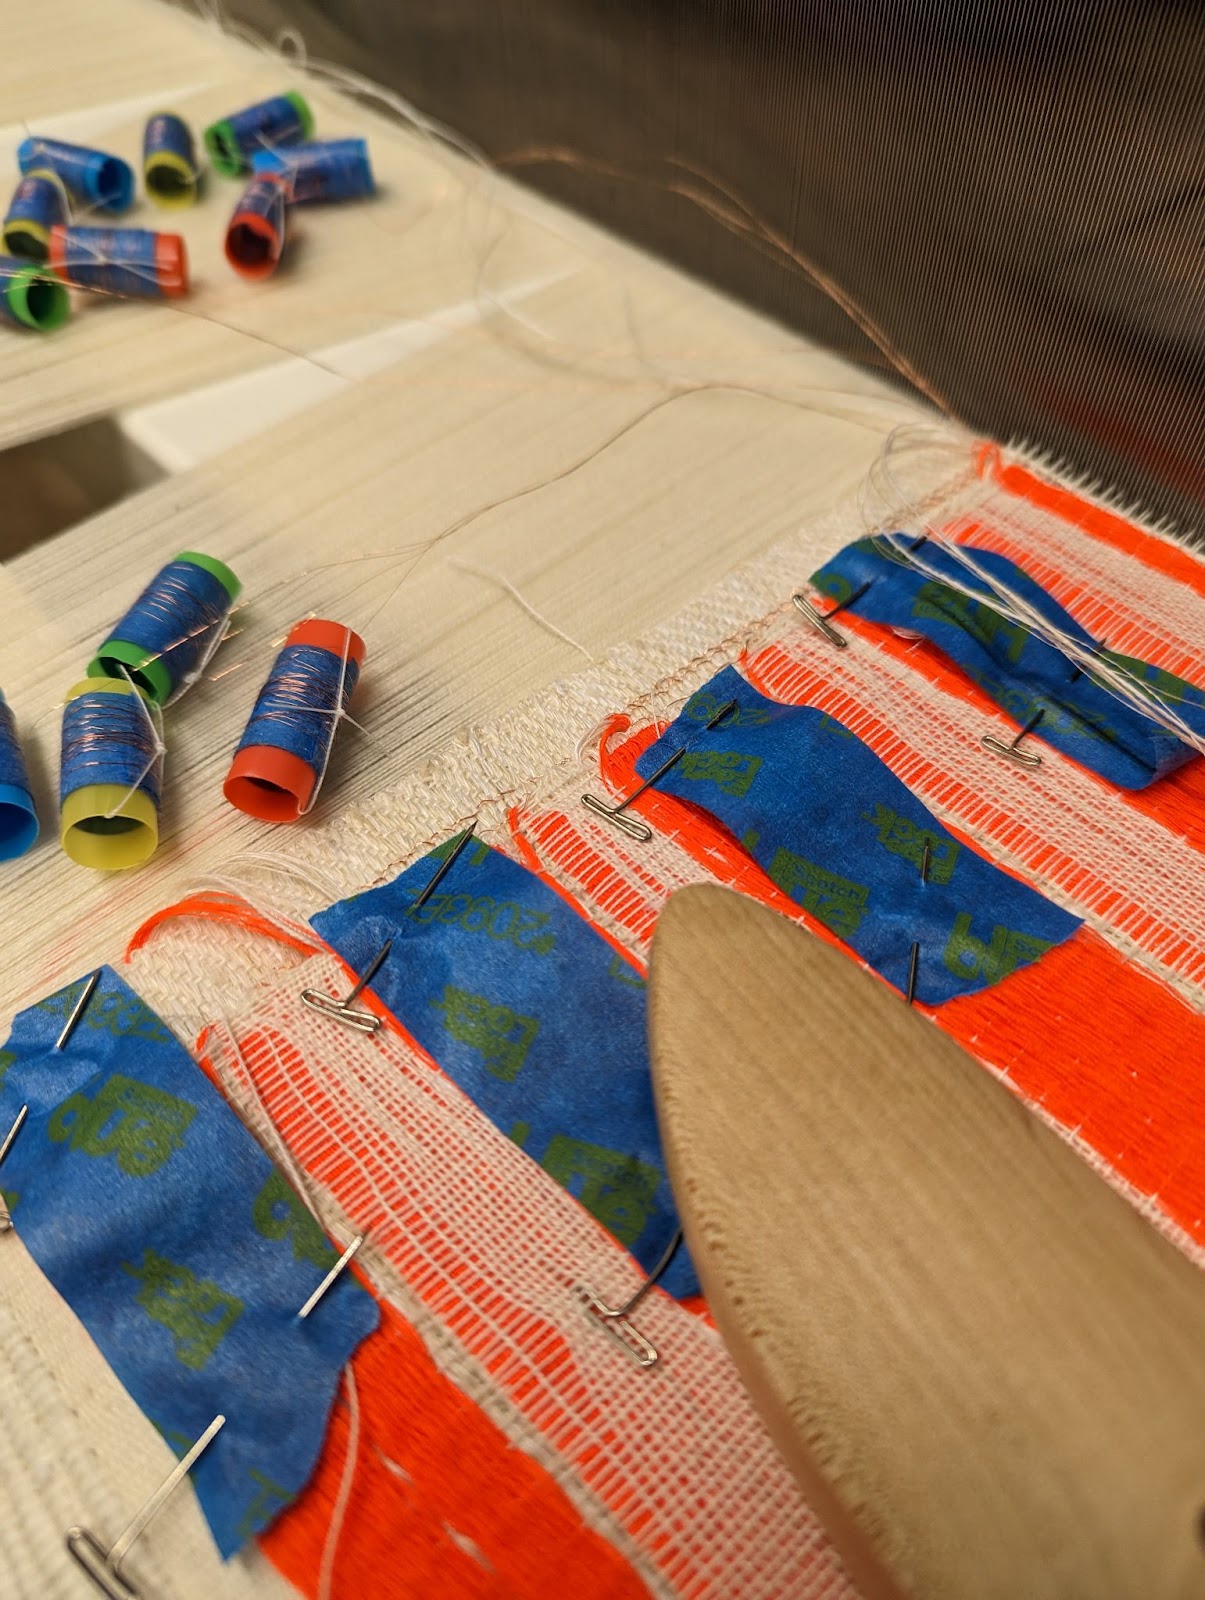
We can also see small bobbins of wire being worked through the warp here using the technique we’ve found in the lab to be most robust for routing, simply adding a pic or weft system designated to picking one end every so many wefts and slipping the supplemental wires under the raised ends at those points. This process allows one to gradually carry the traces through the cloth while ensuring they are firmly embedded into the cloth structure itself.
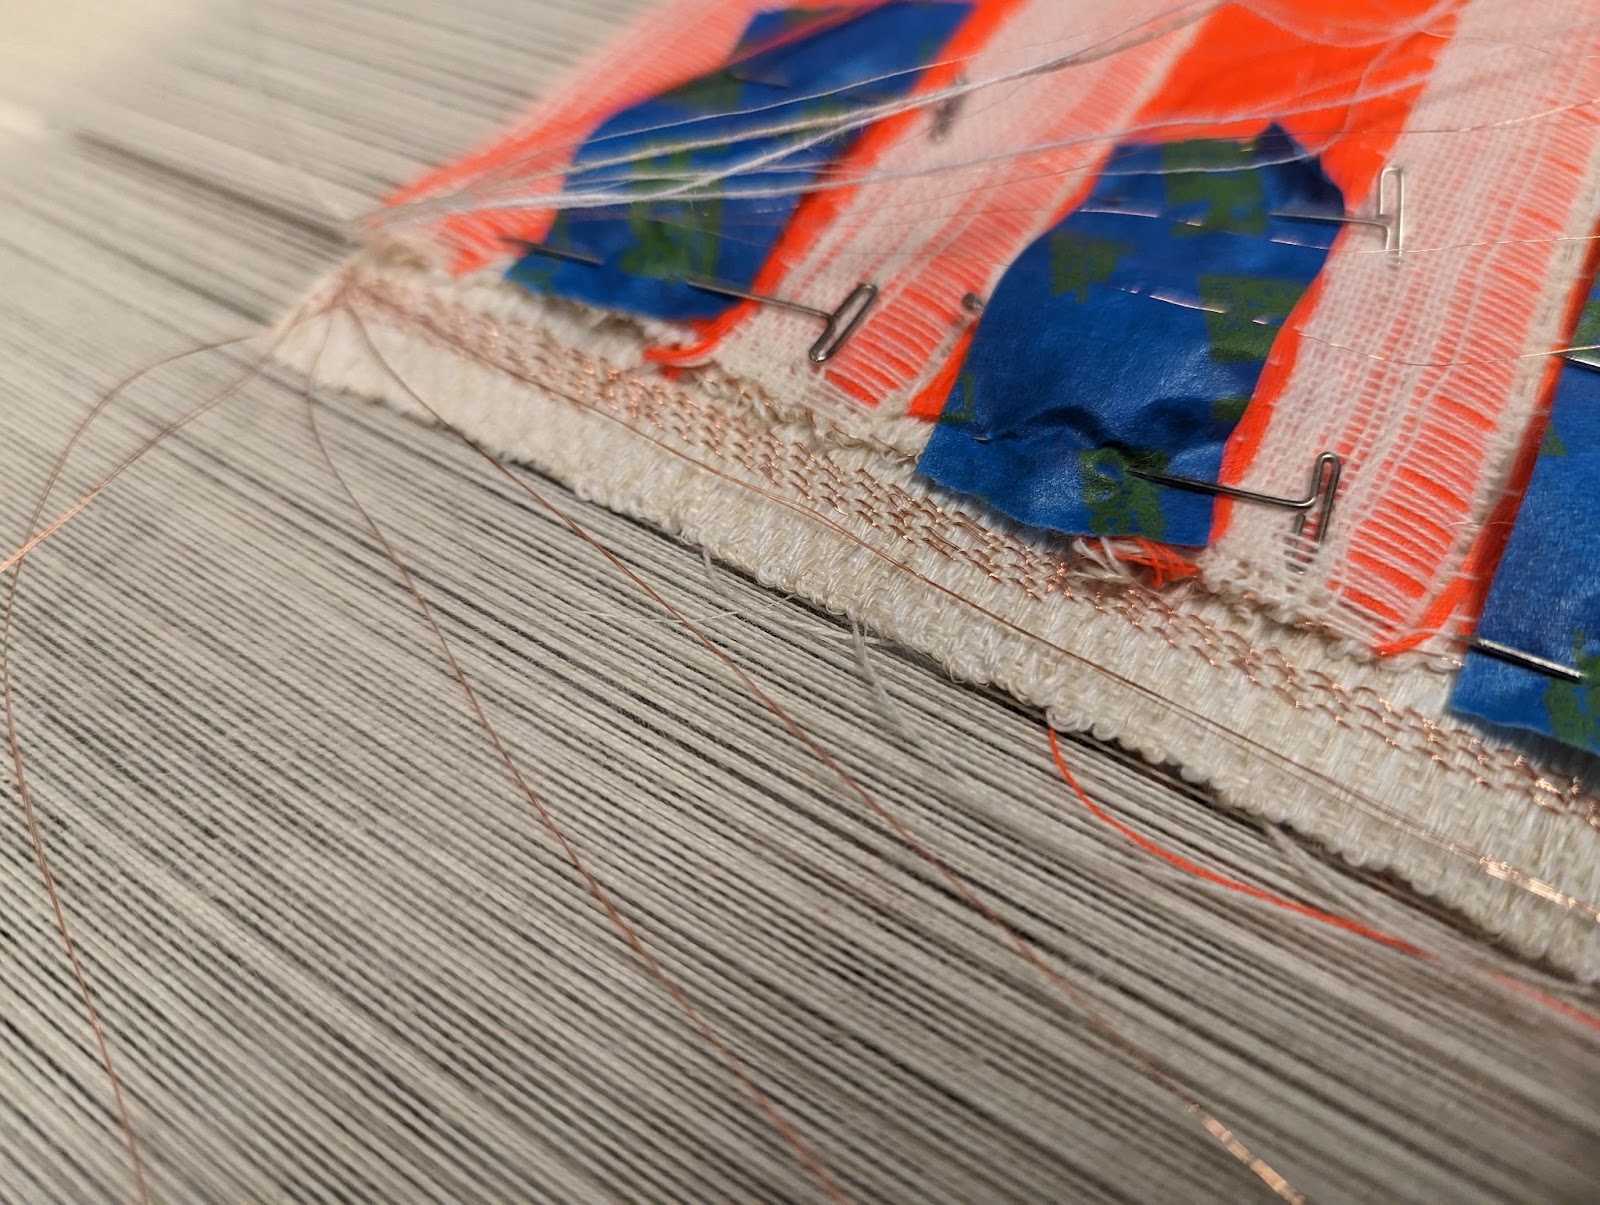
Here you can see how the wires follow the edge of the cloth structure.
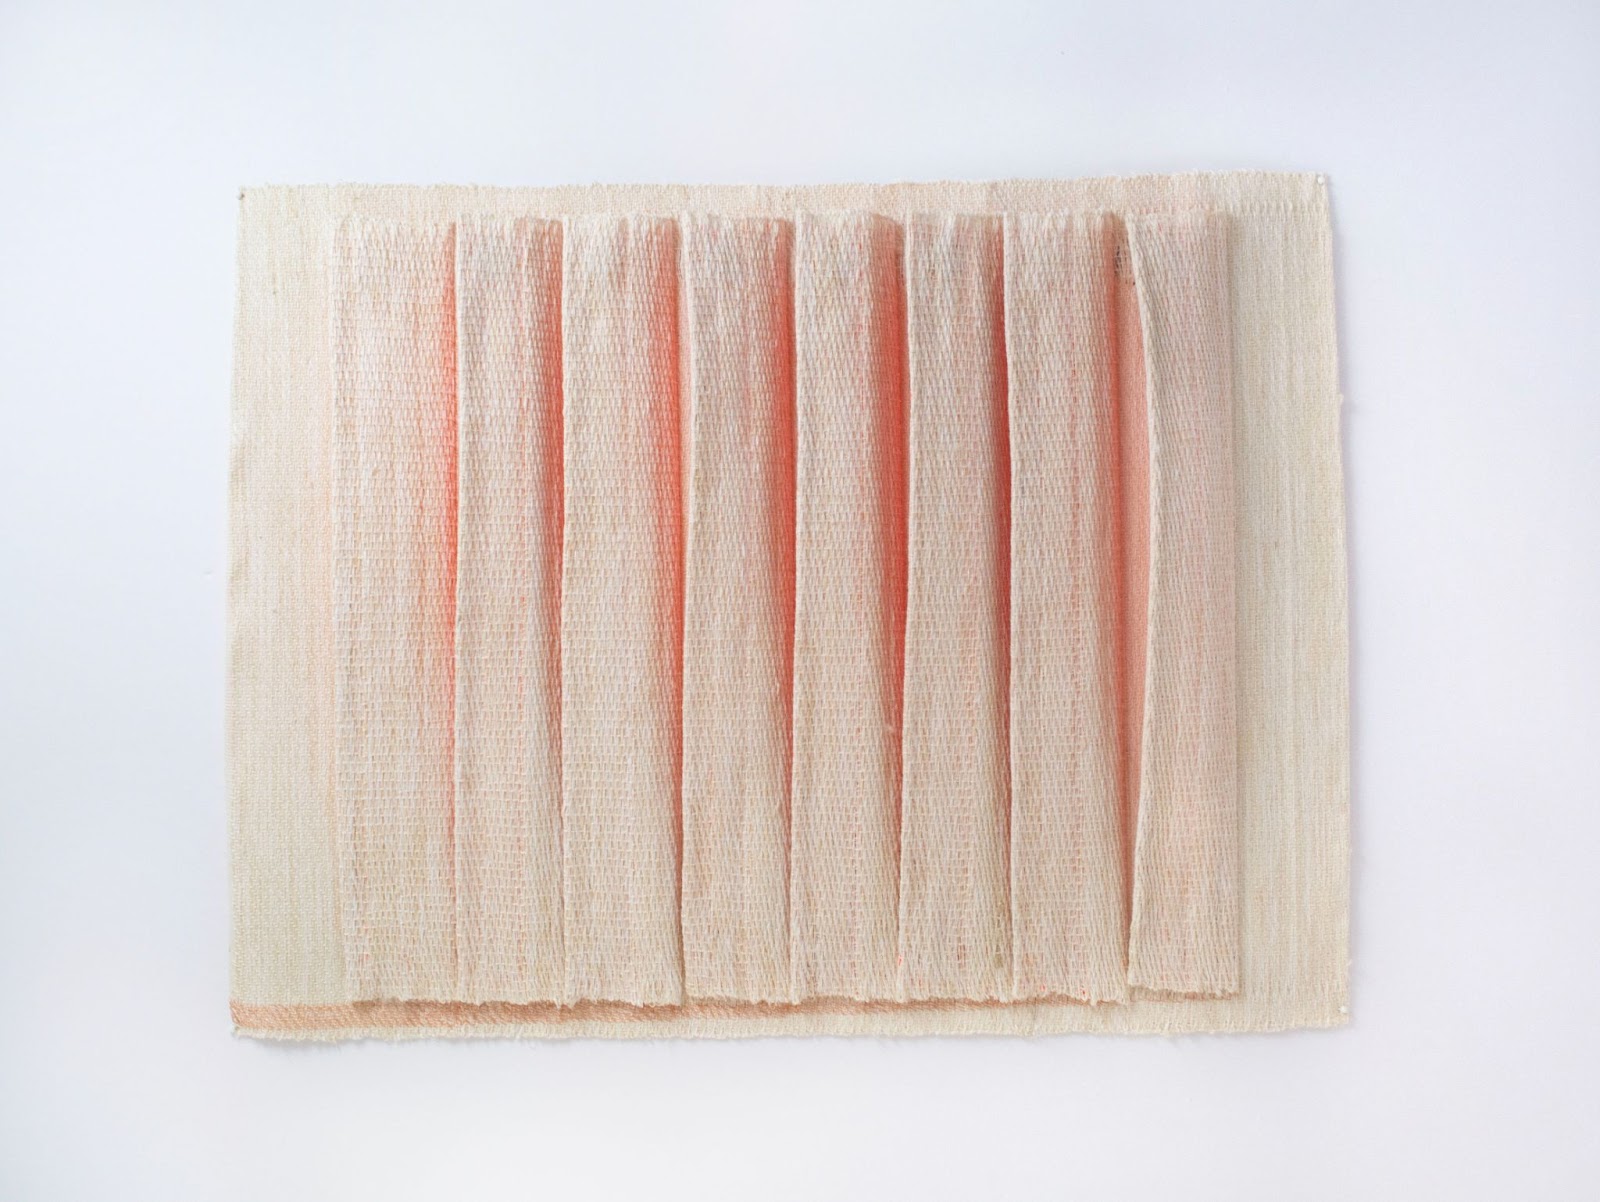
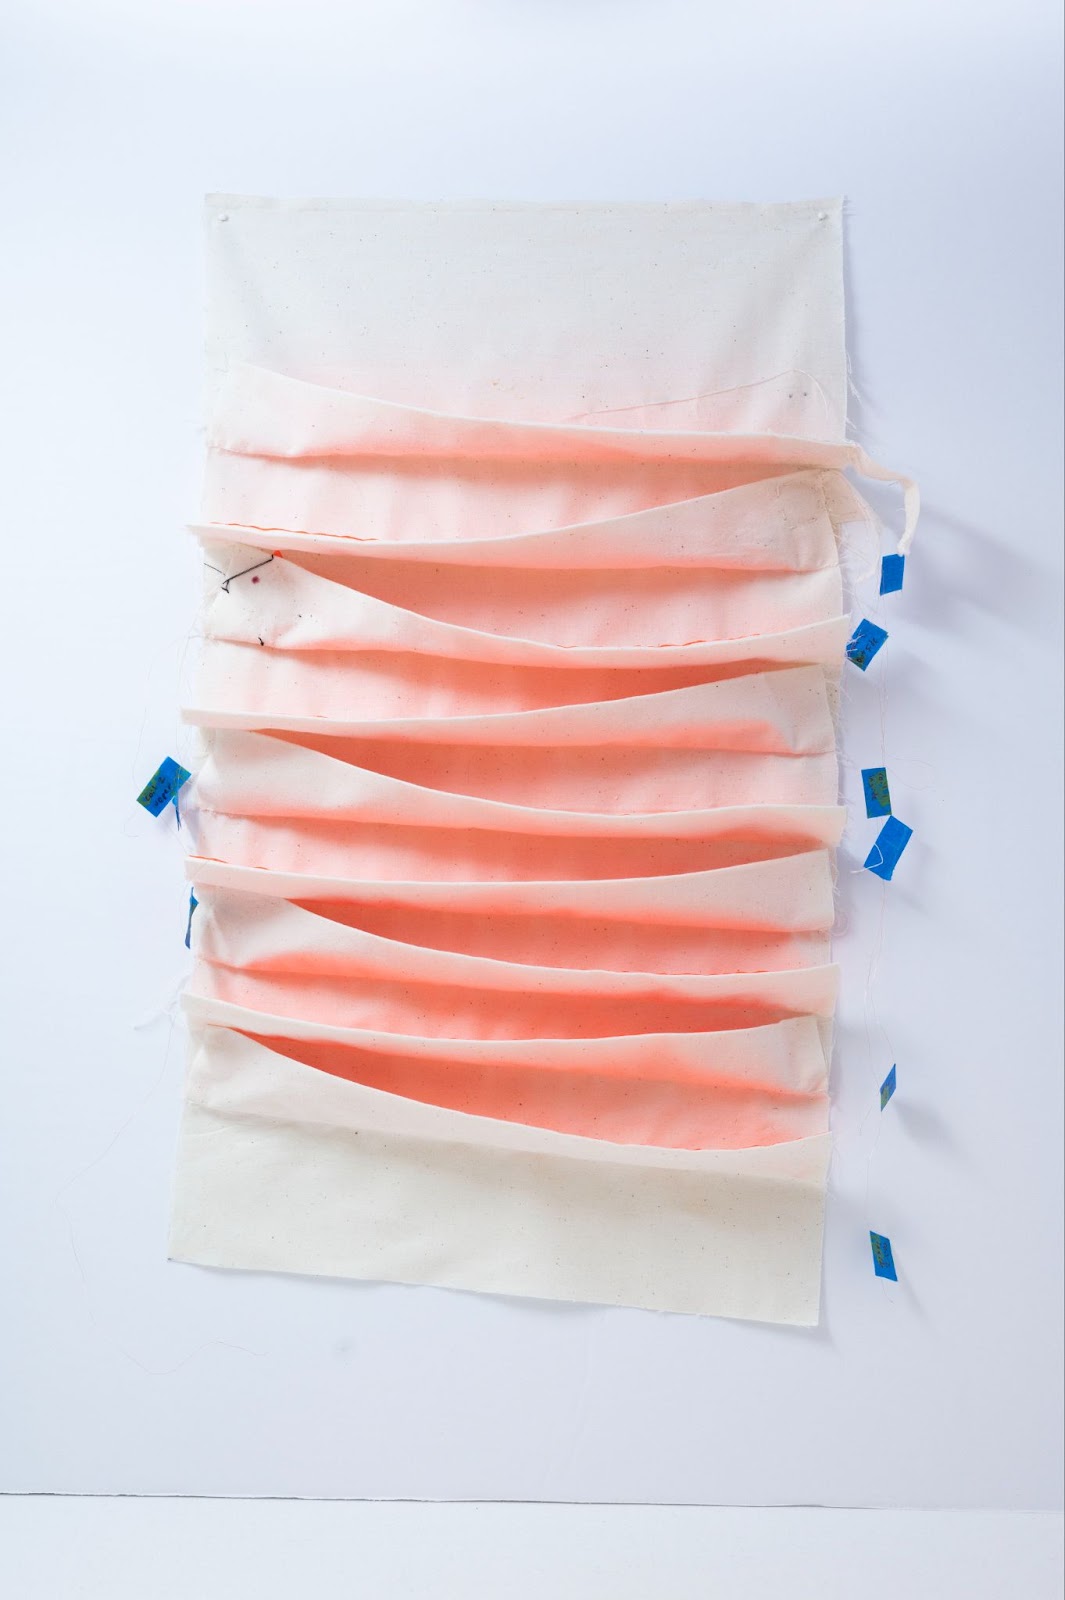
To finish the piece, Elizabeth cut the flaps to release them from the base cloth and finished their edges.
After the flaps were cut and finished, the final outcome emerged:

Programming and Electronics
Laura took the lead on programming an interface to control the coils, as well as the electronics to route power to each coil. We’ll share our design here for those who might already be savvy with microcontroller platforms like Arduino and the basics of working with transistors to control high-power components.

The electronics include:
- Sparkfun Thing ESP 32 Microcontroller Board
- 16 N-Channel MOSFETs (
- And AdaFruit Boost/Buck Power Controller
- 16 10 KOhm Resistors
1 MOSFET and one resistor are used to control power to each coil. The MOSFET works by acting a low voltage switch (controlled by a digital pin on the ESP32 board), to open a channel for a high-voltage/high-current stream of power required by the coil. The barrel jack means we can plug it all into the wall and the Boost/Buck converter makes sure to regulate the wall power to the level used by the Microconroller.

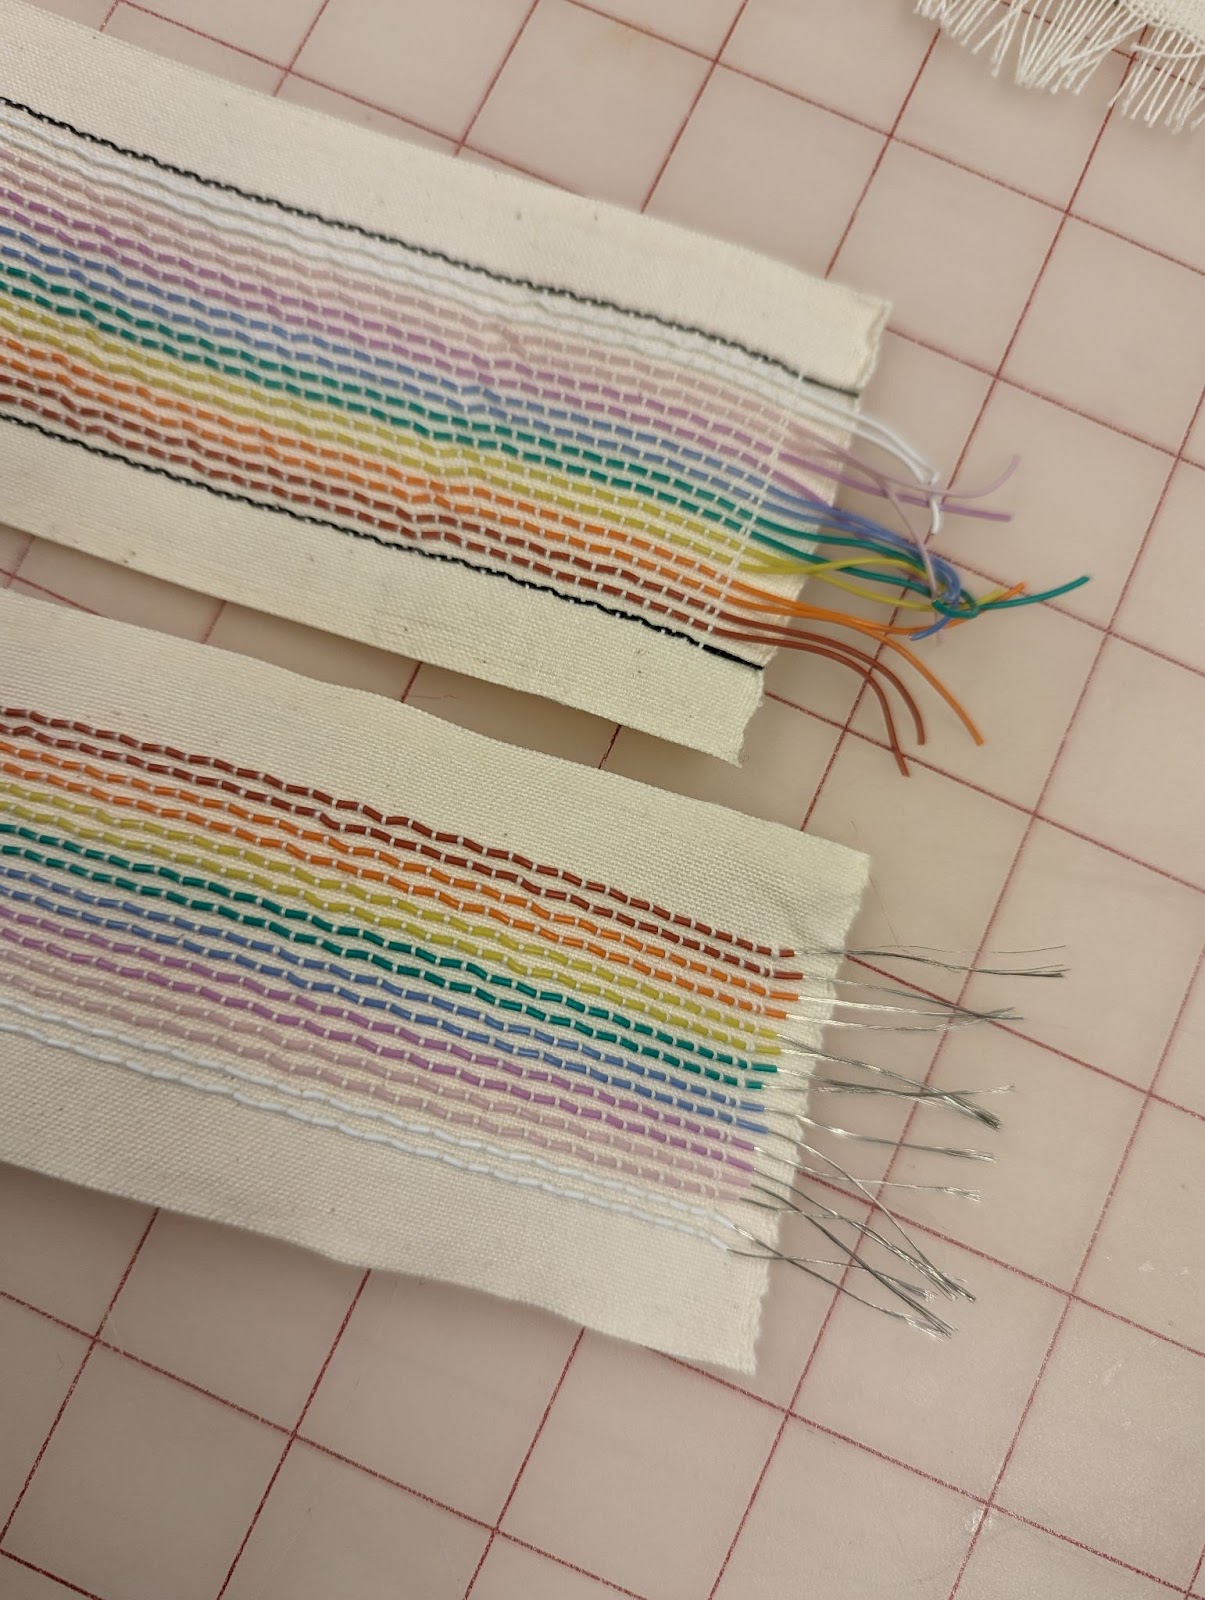
The most difficult part of the circuitry is perhaps just getting the cloth to have stable connections without breaking any of the 32 incredibly fragile magnet wires extending out of the cloth. Elizabeth and I approached this by weaving our own ribbon cables and hand sewing the magnet wire from the fabric to the cable to form stable connections. Each ribbon cable had 16 silicone coated wires woven into the structure. We created 2 such cables, 16 to attach to one end of the coils, and 16 to attach to the other end. The pattern for the ribbon cable used a few pics of tabby in cotton, before attaching the wire as a supplemental weft using a satin stitch.
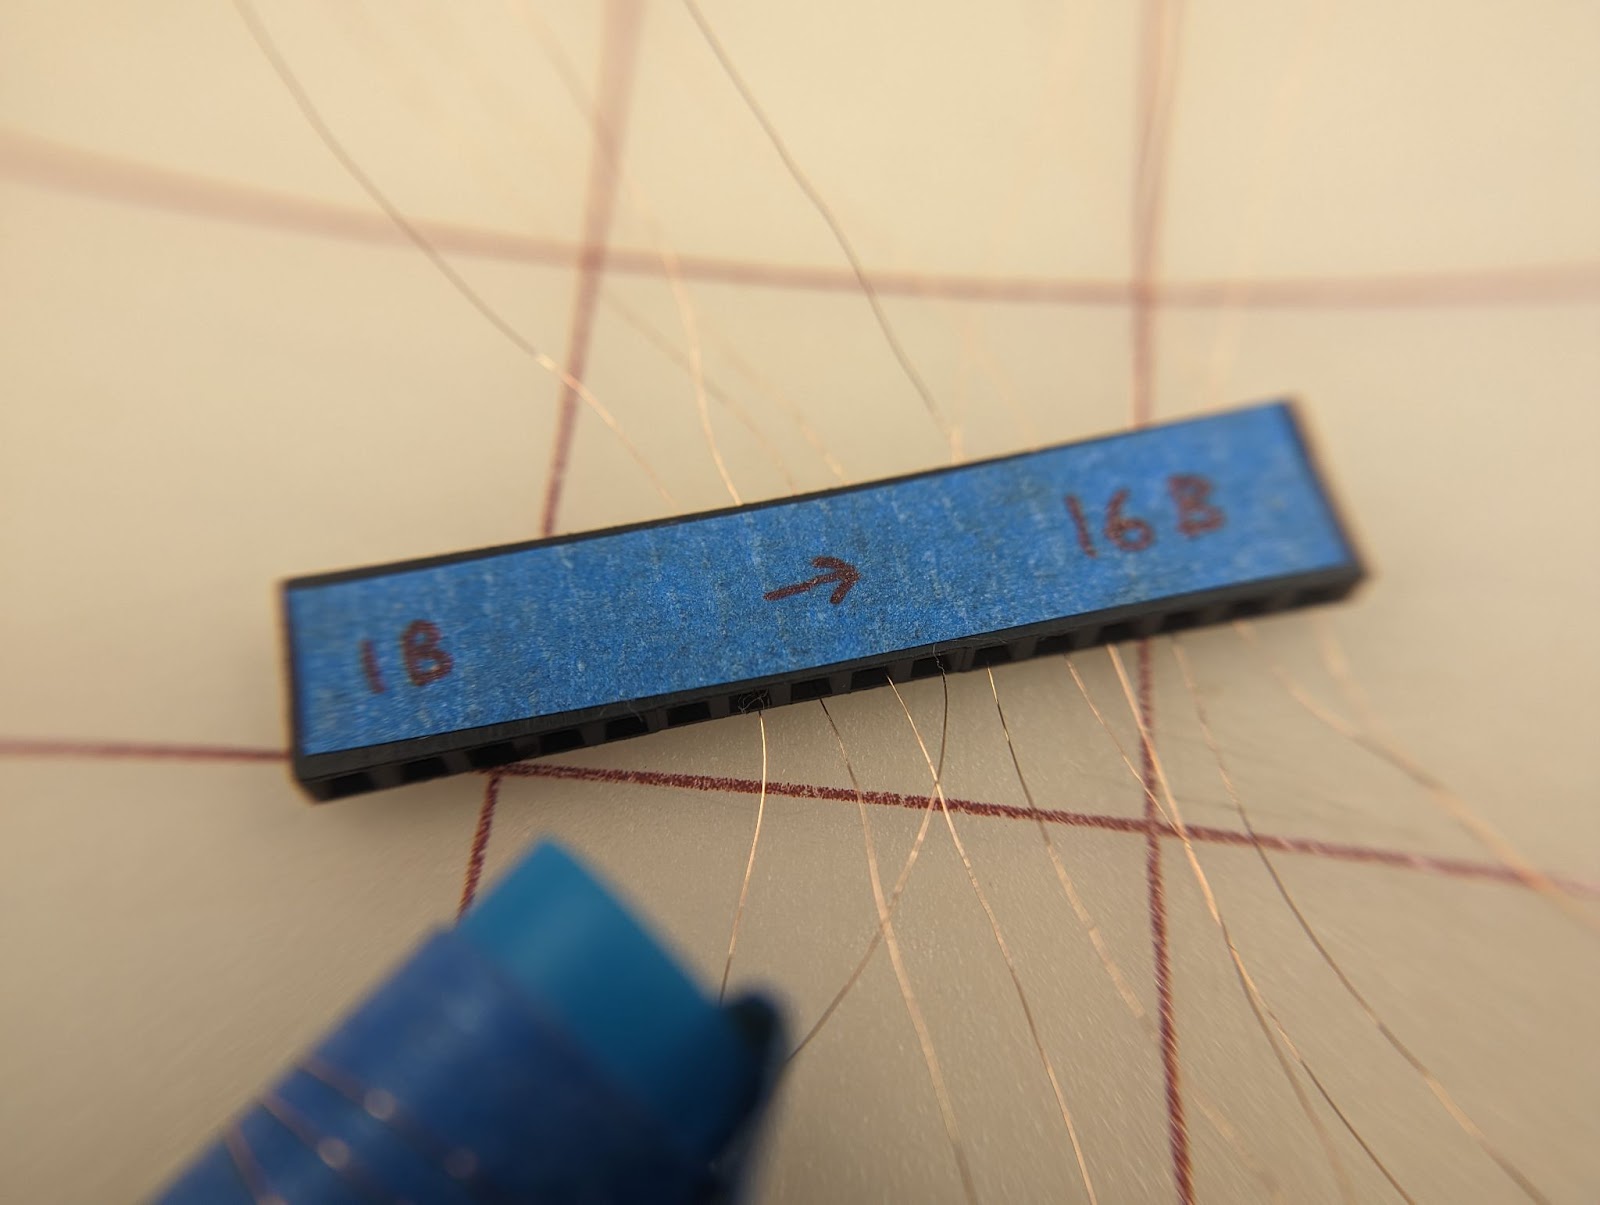
Before attaching the wires, we threaded each magnet wire through the plastic header usually used for electronics connections, though, with the metal tines removed. This essentially created one little “hole” for each wire that would be spaced in standard spacing as other electrical components. This also let us organize the wires, making sure that we were keeping track of coil 1, 2, 3 and so on.
We stripped and soldered the tips of each wire integrated into our cable, before twisting them together with the stripped ends of the magnet wire. Using no solder, we fastened the connections in place by folding the twisted wires back on themselves and stitching any exposed metal down with thread. It worked quite amazingly and created really strong and stable connections.

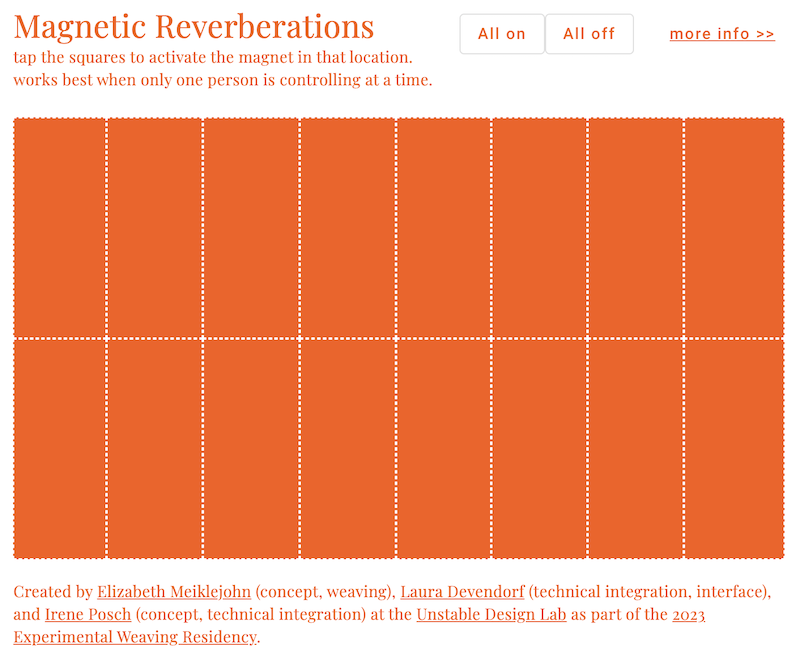
Because we used an ESP 32 board, our fabric could talk to the internet. In fact, it has its own website, where interactions upon the website control the movement of the cloth (if it is plugged in). This was accomplished using a connecting a simple Angular website to a web-based database, specifically, a Firebase Realtime Database. The ESP 32 is also connected to this database, and listens for changes which occur when someone selects flaps to open and close on the website. You can find all the code at: https://github.com/UnstableDesign/Flappable
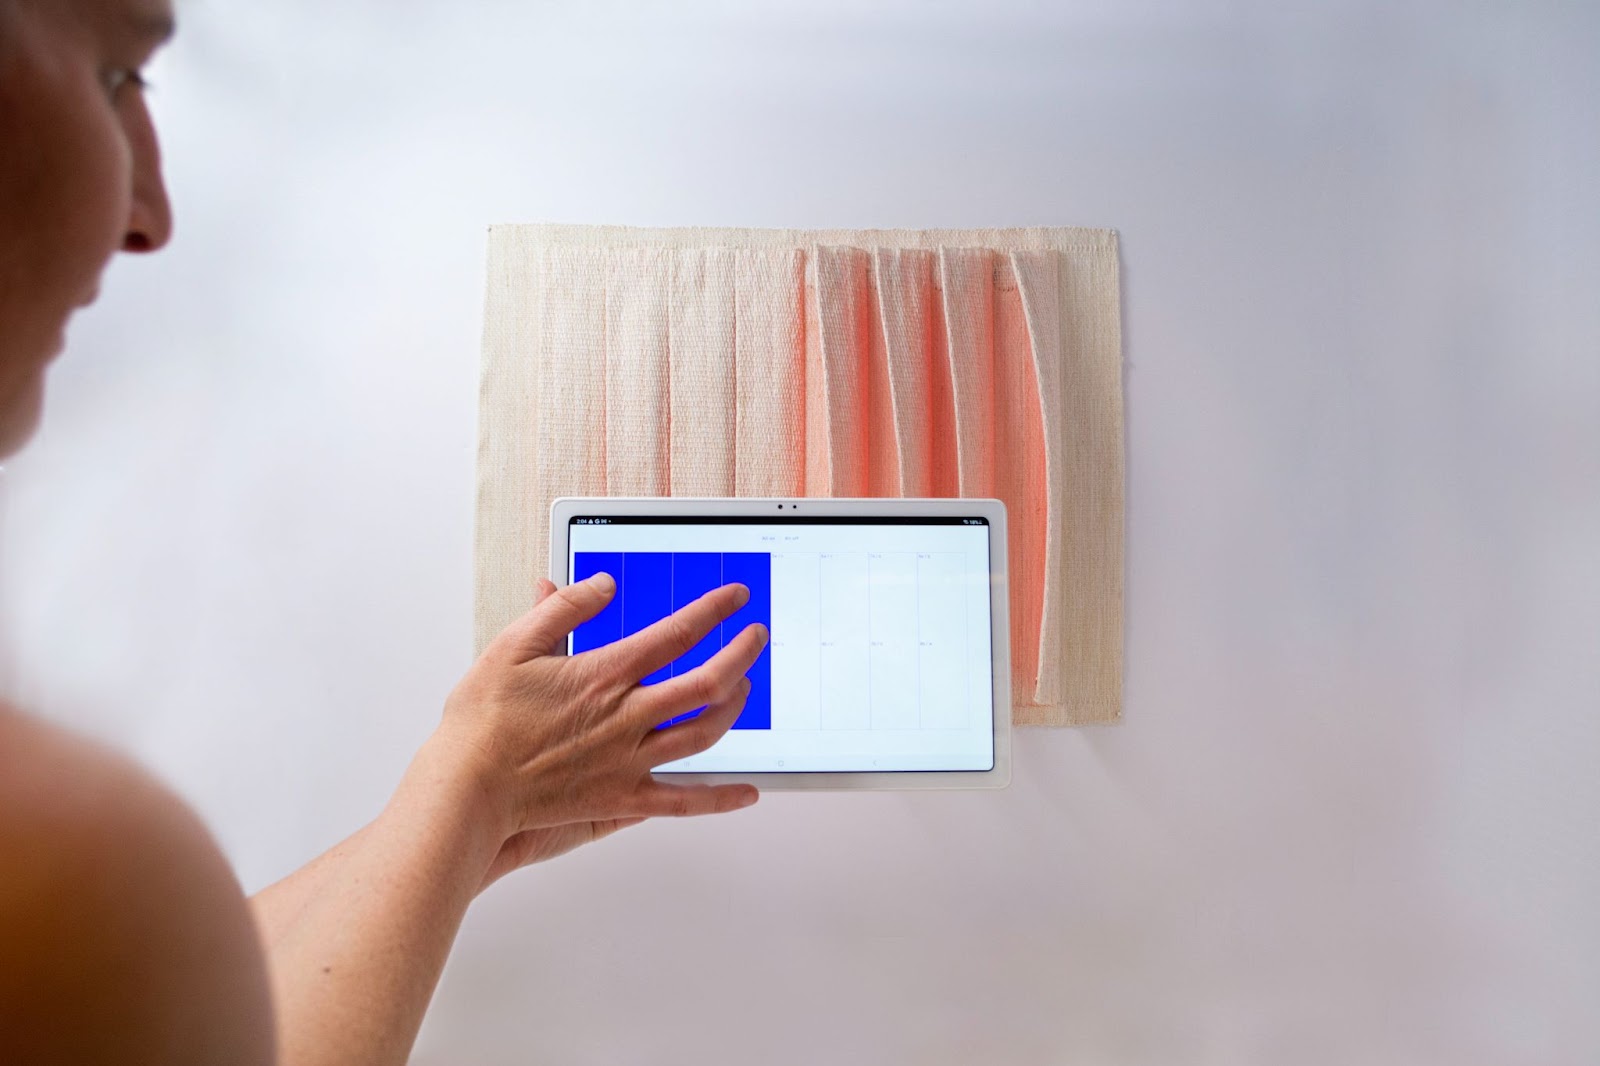
We loaded the interface on a tablet to showcase how touching regions on the interface closes the associated flaps. Voila! Thanks Internet.

There is so so so so much content, ideas, and inspiration generated through this process. So much so that it’s taken us over 3 months just to put this blog post together. At the same time, we have been designing a catalog to print and offer to the community and preparing the piece for exhibition at Textile Intersections in London on Sept 20, 2023. Please follow us on Instagram for more updates.

Acknowledgements
This Experimental Weaving Residency has been supported by the National Science Foundation Grant #1943109. The project was a collaboration led by Elizabeth Meiklejohn, Laura Devendorf and Irene Posch with support from the Unstable Design Lab and ATLAS Institute more broadly. Special thanks to Hunter Allan-Bonney for Photography support and Deanna Gelosi and Atlas Zaina for preparing the “Magnetic Reverberations” for installation and shipping.