Plying
Plying consists of twisting multiple singles together. You can make cores and core-spun yarns using plying, but you cannot make hollow structures. You can ply with 2, 3, or however the hell many yarns you like, but its probably best to stay on the small side (under 6) to keep structure if you are doing this somewhat freehand.
Plying is most often used to make a yarn "balanced." Meaning that the yarn contains twists in two directions that hold it a steady structure. Thus, plying yarns must occur in the opposite direction that they were spun. The twist of yarns is described as "Z-twist" or "S-twist" and it is a measure relative to your own body.
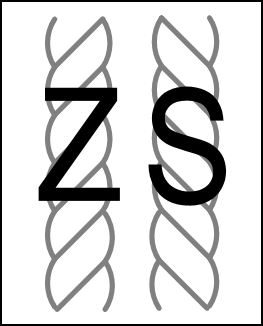
If you want to ply yarns together, here is what you do. Each of the singles strands is already contains a twist (lets say Z-twist) in one direction. Align all your singles so they are oriented in the same direction (all Z-twist) and then join them together by twisting them together in the opposite direction (the S-direction). If plying already plied yarns, add twist in one direction to each strand independently and then, starting from their shared end, twist them in the opposite direction to allow them to form onto each-other.
| Structure | Ability to be Plied |
|---|---|
| Raw Fiber | no, needs to be in the form of singles first |
| Filament | yes |
| Roving & Top | yes?, for a more open and loose structure |
| Singles | yes |
| Plied Yarn | yes |
| Braided Rope | yes (I don't see why not?) |
| Knits | yes for tubular knits or narrow flat knits |
| Woven | yes for narrow, flat, or tubular weaves |
| Non-Wovens | yes, if sliced or rolled into thin long pieces |
| Solid Objects | yes, often if integrated as a core and plied around |
Process
Start with singles:
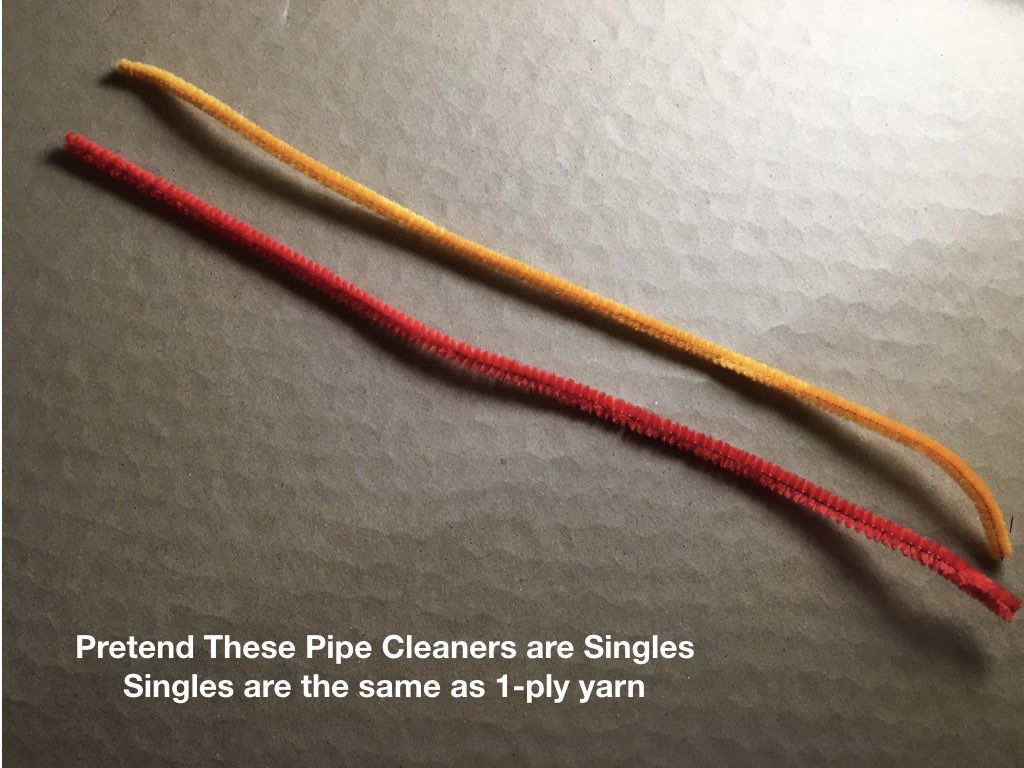
Ply them together in the direction opposite of their twist (since our pipe-cleaners don't have twist, we'll discuss twist next step).
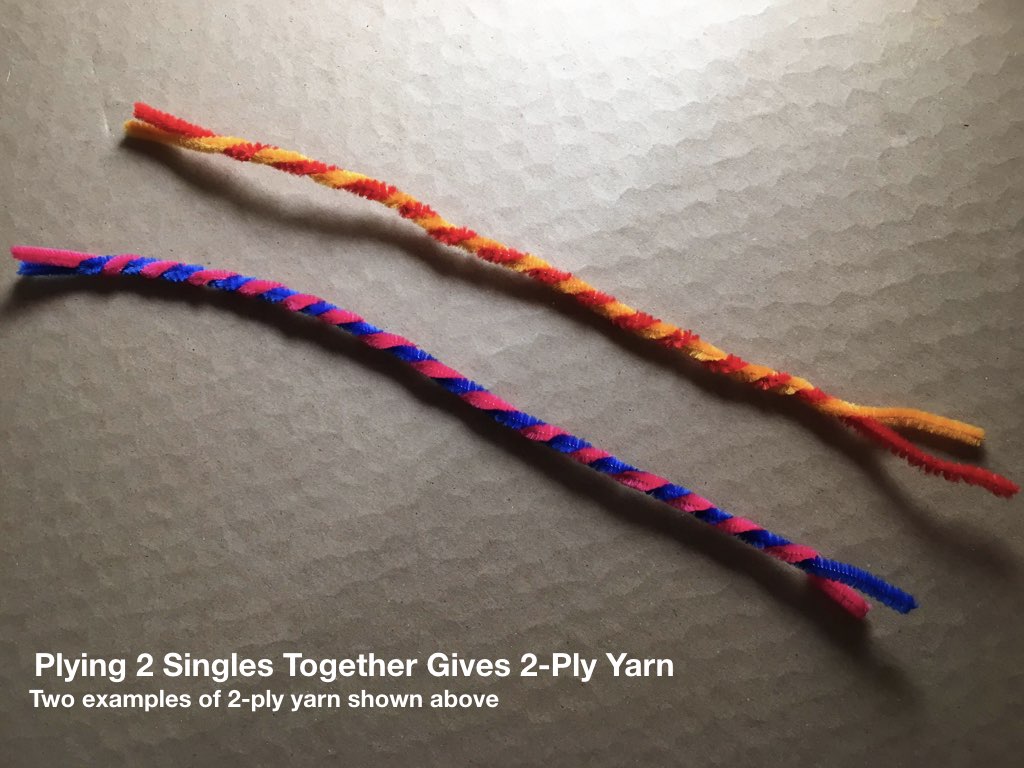
This image above shows two singles that have been twisted (plied) into a 2-ply yarn.
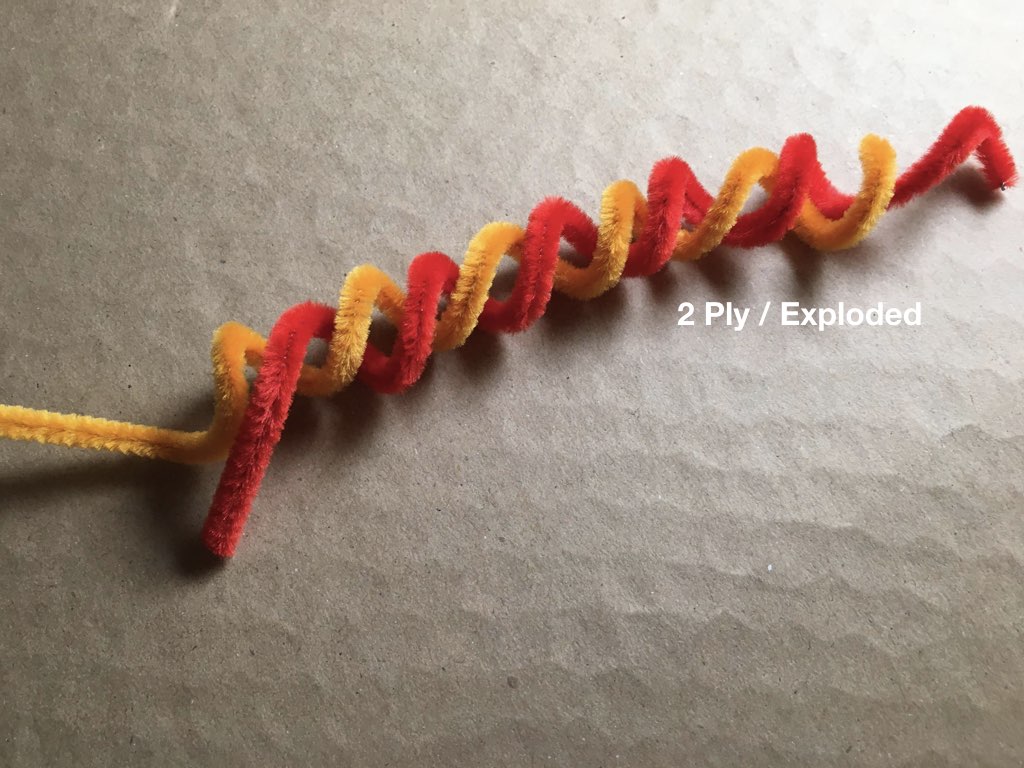
The image above shows what this might look like if we exploded it's structure to see it more clearly. In a well formed yarn, the two strands will always coil nicely around each-other, here shown as regularly alternating color. If you did a 3-ply, you would see the three colors repeated regularly, meaning that the yarns do not intersect each-other perpendicularly within a ply. In some cases, this feature can be exploited for insulation.
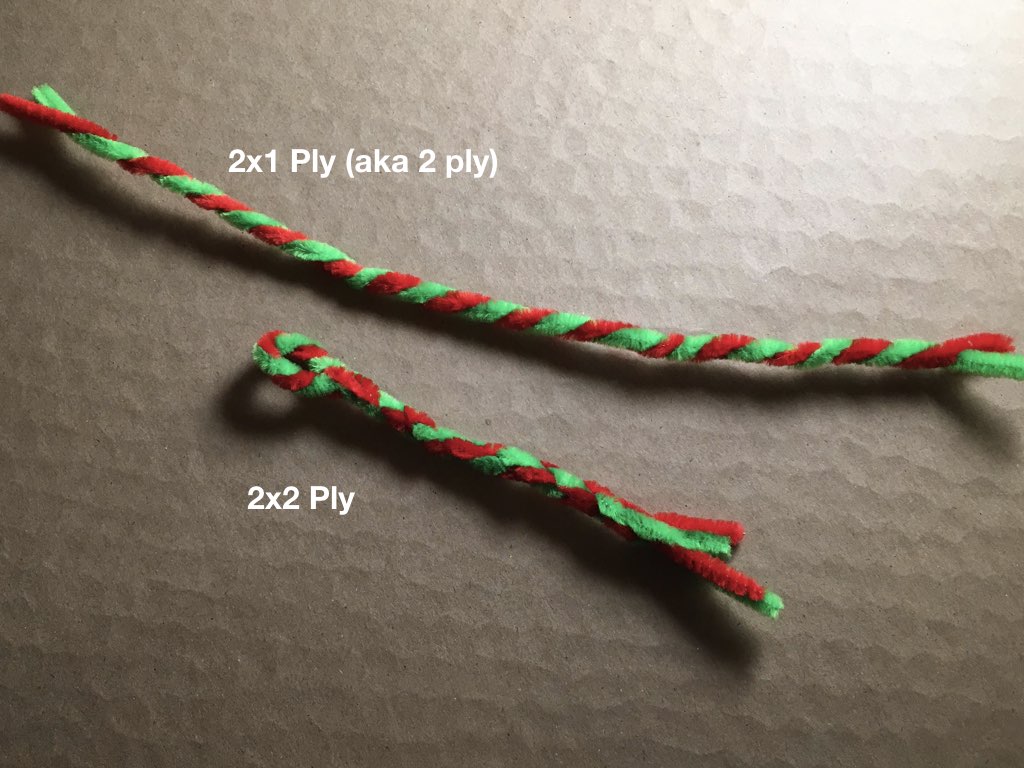
If you are spinning two ply, and you find that as you relax the yarn, it curls up on itself, that is called "ply-back" and it creates a plied structure of your already plied yarn - turning a 2-ply into a 2x2 ply or cabled structure from a continuous yarn.
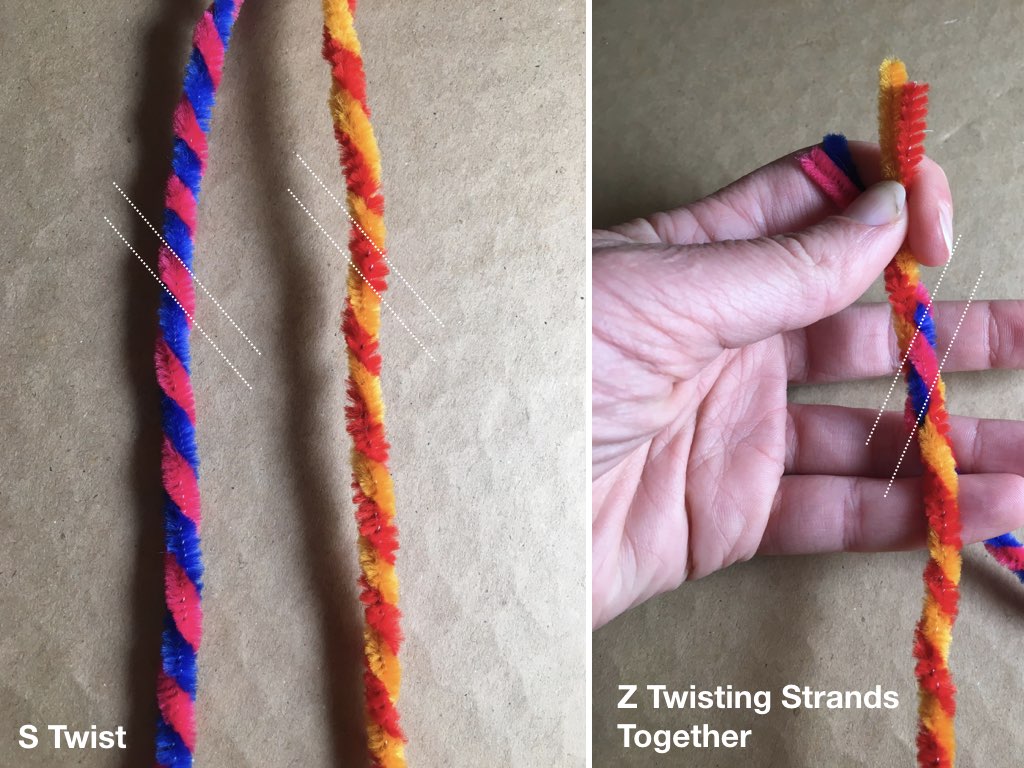
If we look closely at our 2-ply, you can see that the twist goes in the direction of an "S" twist. When we ply those 2-plys on each other again (shown in right), we twist them in the "Z" direction to form a balanced yarn that is stronger and holds its structure.
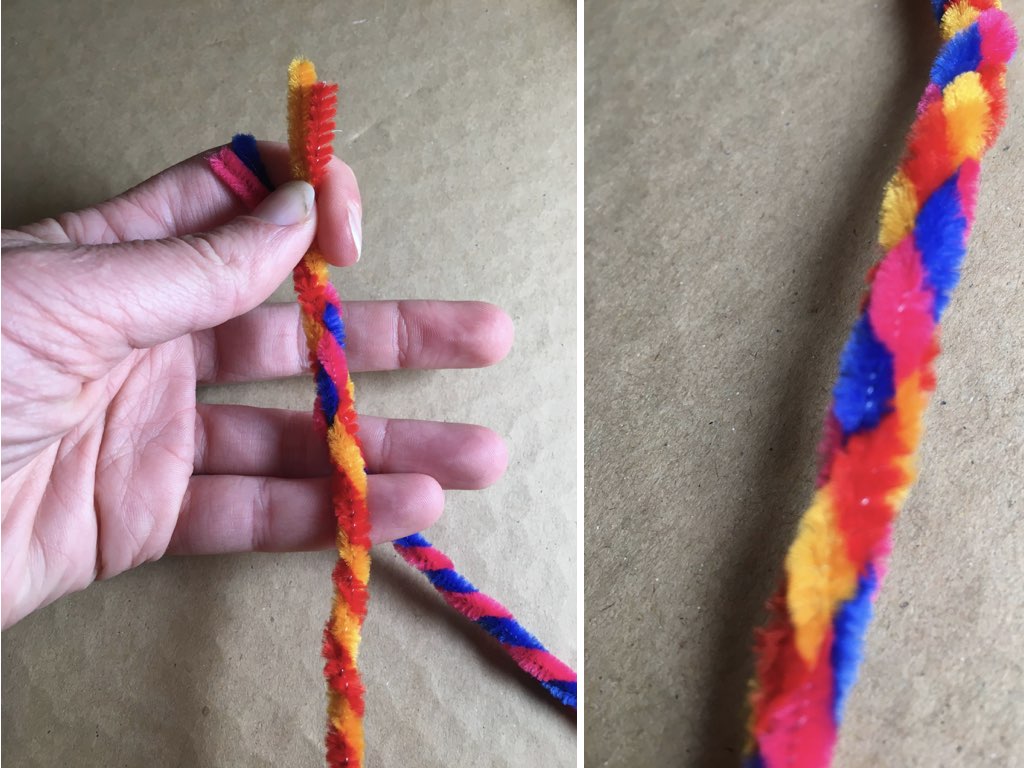
This produces a 2x2 cabled yarn, as you see in the right. Here you can see that the structure looks like a braid (as we have plied in materials again in the other direction). This puts all the materials in contact with each other.
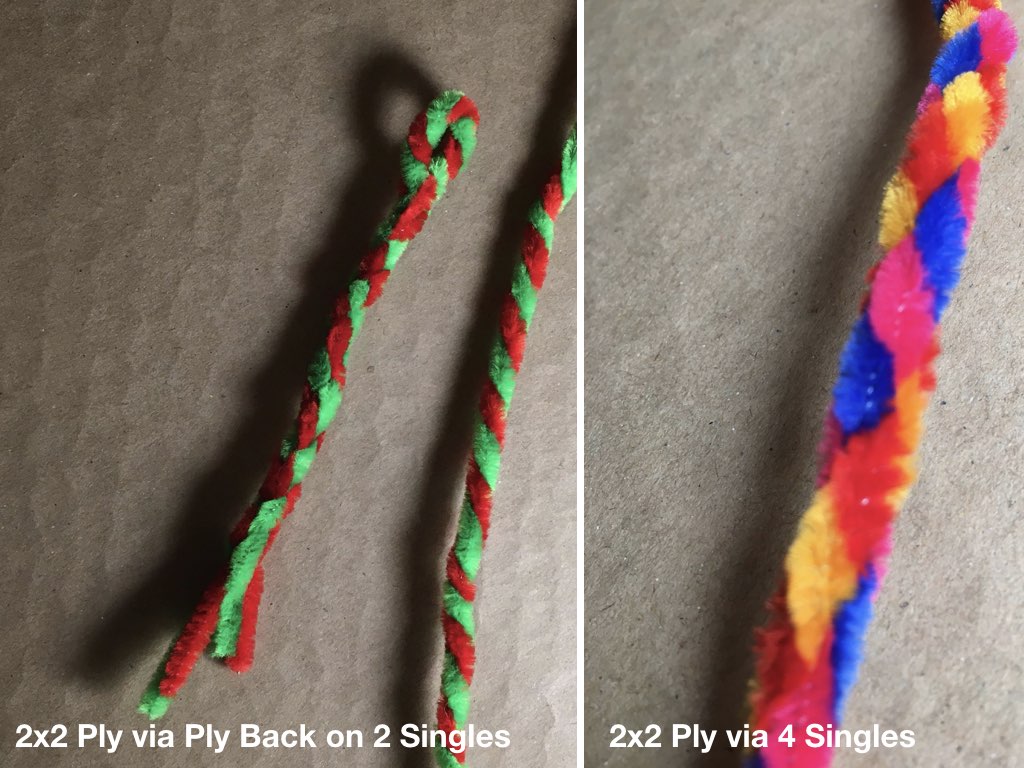
This image is to note that the 2x2 structure you get from ply-back is the same as if you plied two singles into two 2-ply yarns, and then plied them together.
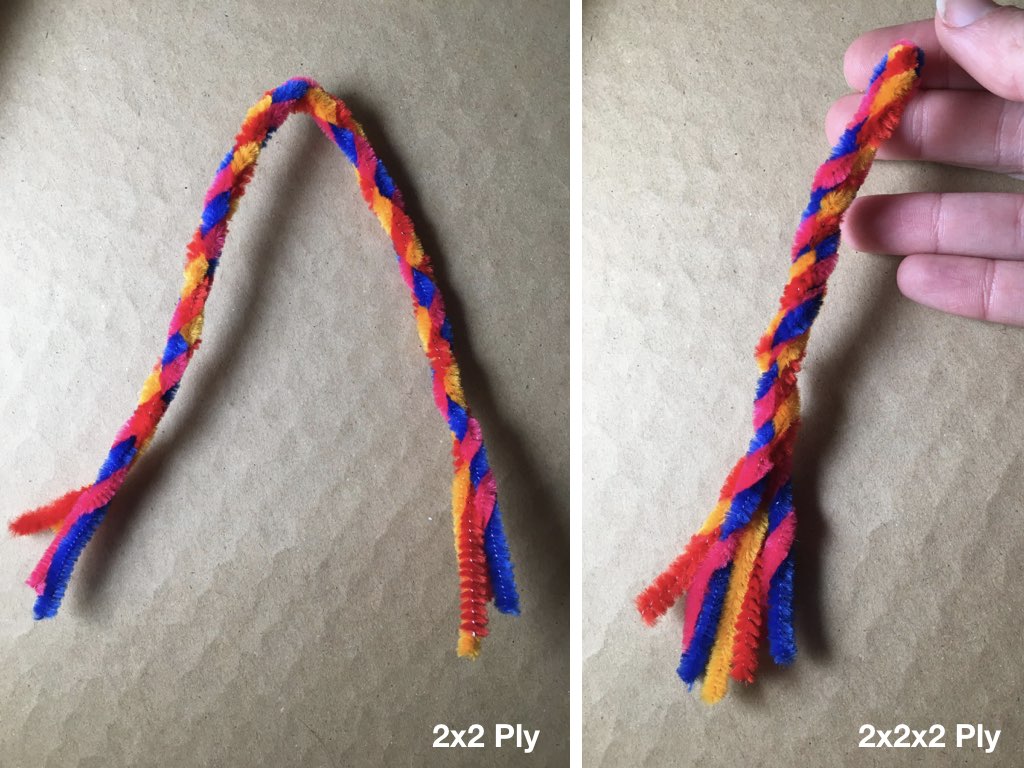
And if we want to take it one step further, we can ply-back on our 2x2 ply and add another 2 to the equation for a 2x2x2 yarn with 8 ends.
Historical Connections
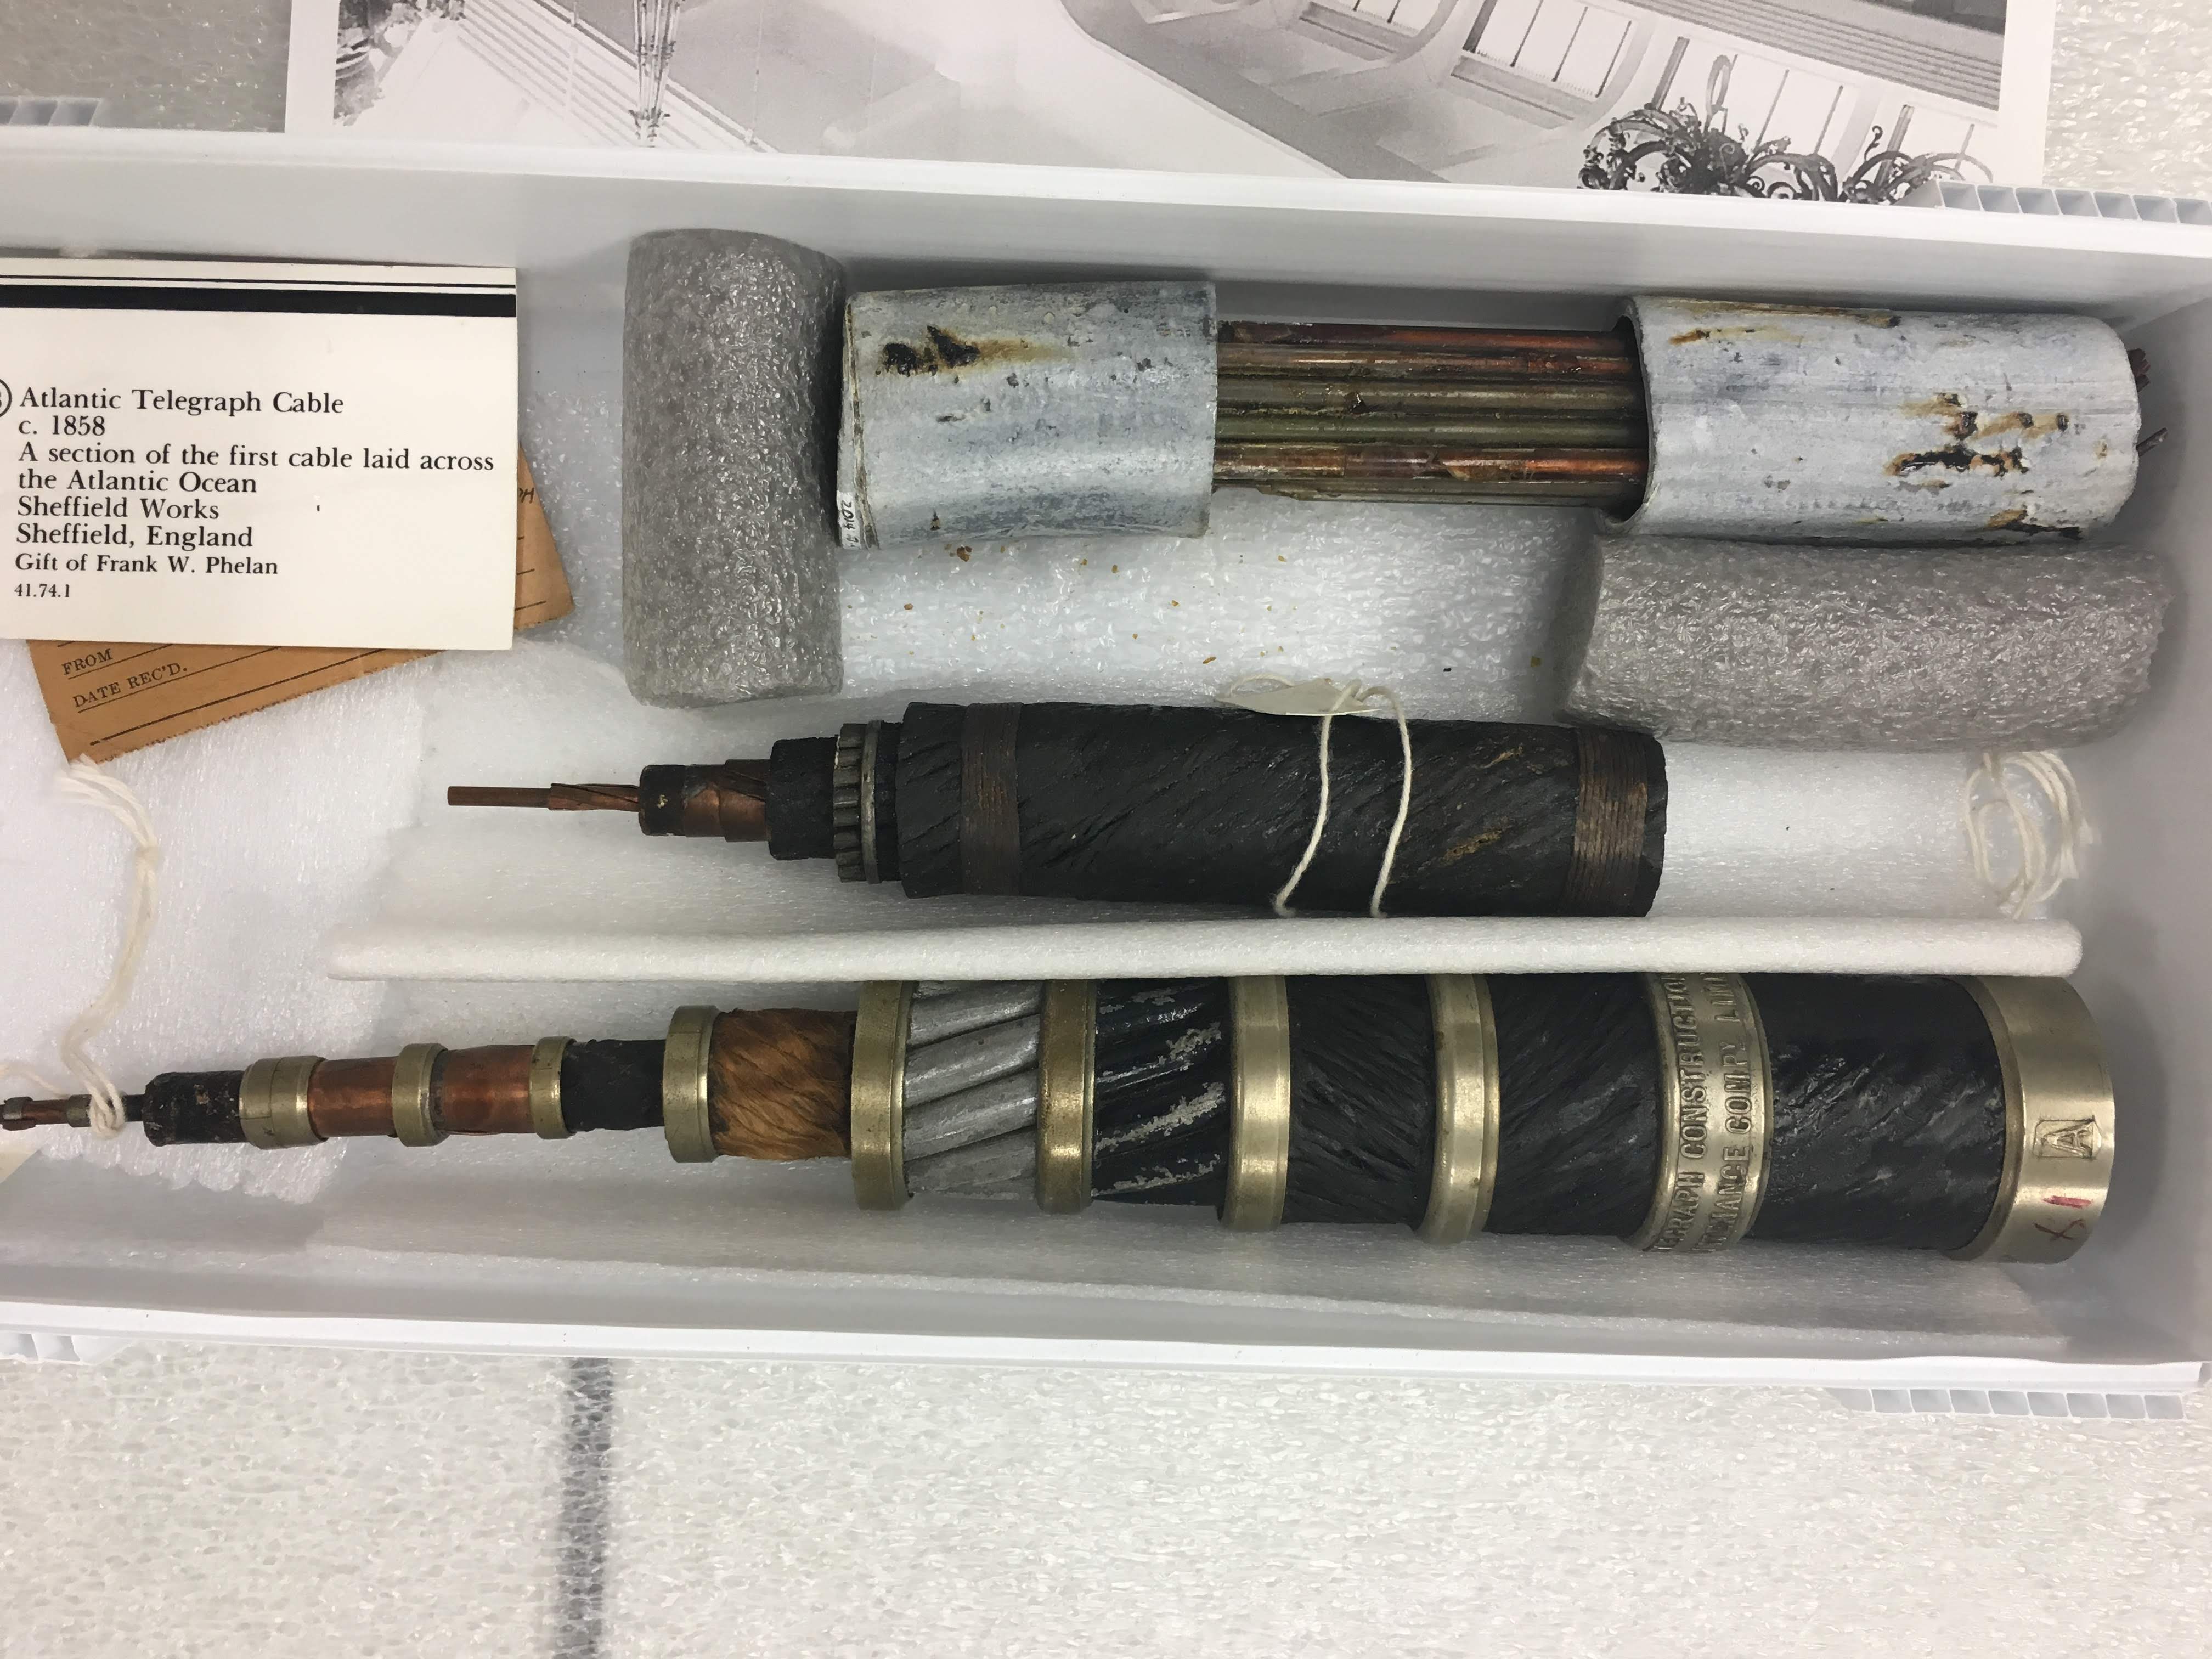
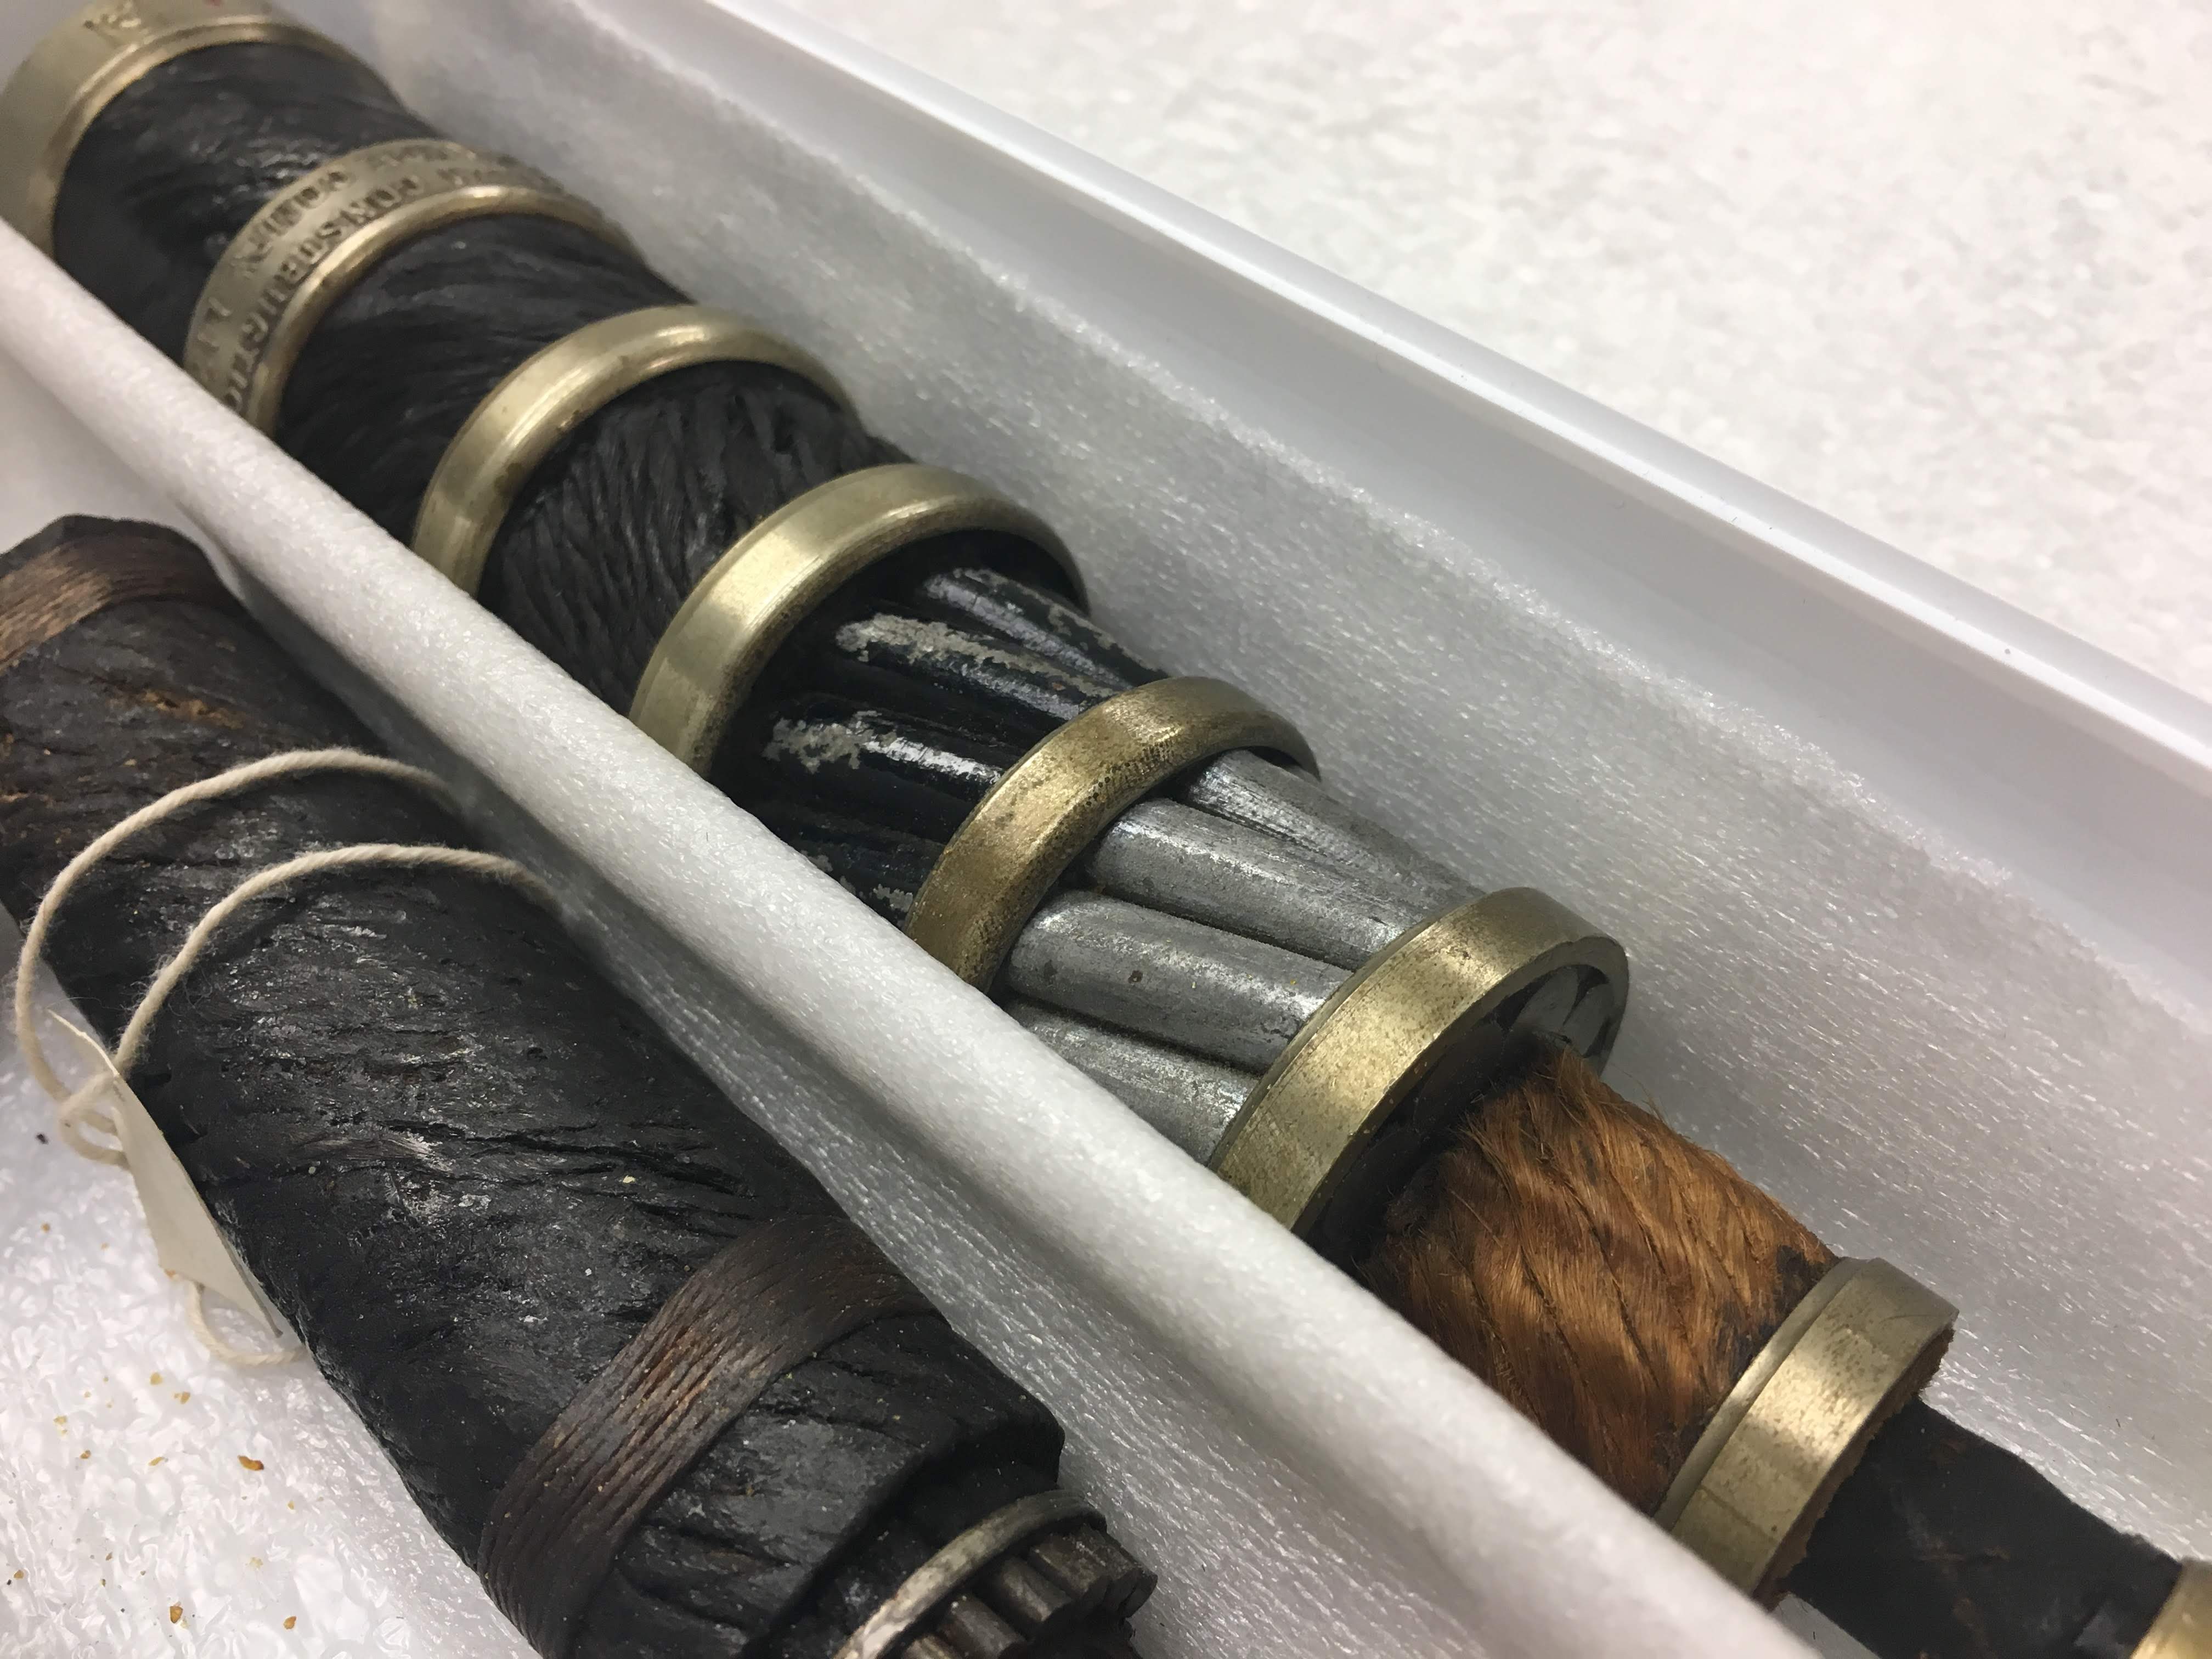
Sections of the transatlantic cable photographed at the Henry Ford Museum
I was lucky enough to be able to see one of the original pieces of the transatlantic cable at Henry Ford Museum. I couldn't help by love that this cable, this massive innovation moment, was just coils on coils on oils of wire and cable, spun just like yarn. Sometimes we need to look back in order to find ideas for the future and I like to see this as an example of the ways that "smart textile" structures and concepts have been embedded within our society long before the present moment.
