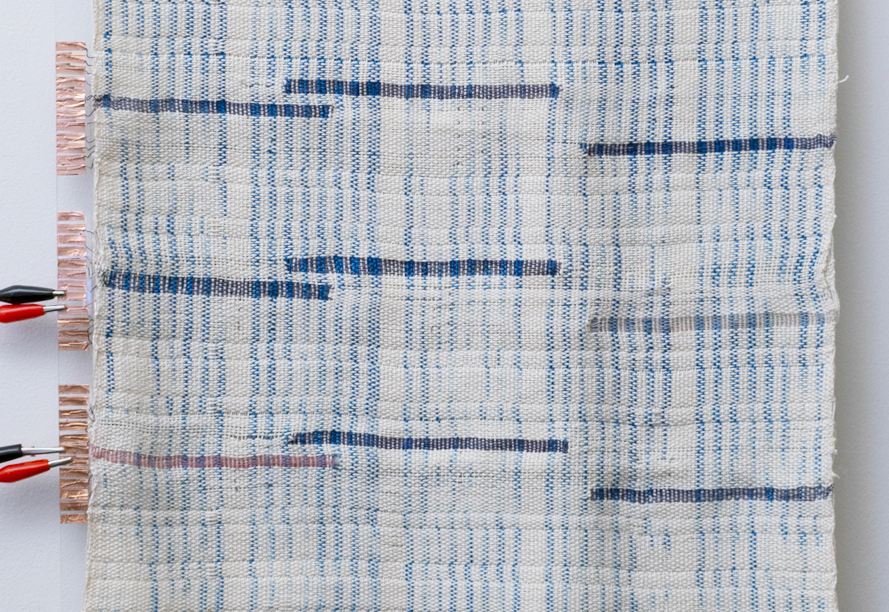
This is a first prototype of a vision of a force-fabric. When integrated into a garment, this textile could capture and replay how your body made contact with other bodies in the world. Those bodies may be human, created through the experiences of hugs or holding children, but they may also be of nonhuman forces – heavy winds or couches pressed upon ones back. The concept is to think of ways technology can make us aware of how we are physically supporting and supported by other objects and environmental forces. It sees garments as a interesting surfaces of intersection between self and other.
We created this first textile by double weaving sections of color changing yarn (resistive heating wire painted with a mixture of thermochromic pigments that change at different temperatures) on the front face and then integrating conductive pads on the back or under layer of the fabric. We used a tapestry technique to integrate a second piece of conductive yarn along a segment of the warp above the touchpad such that when it is pressed it completes the circuit. The double weaving structure makes the connective “guts” invisible from the front. Thus, the textile does not invite you to touch and poke it (how would you know where to touch), it simply captures a “picture” of the different press regions.
For those interested in recreating something like this, here are some information to work from. This draft shows the general structure of each touch pad, which leverages the structure of double weave to hide the conductive pads on the back of the fabric and highlight the thermochromic on the top.

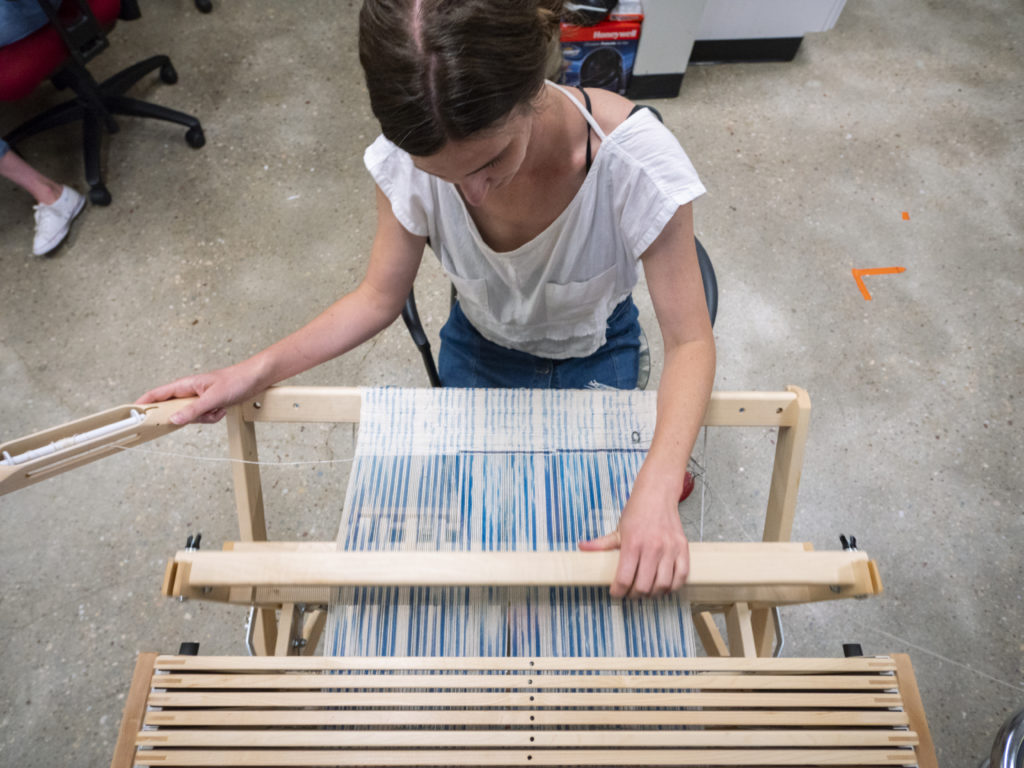
Loom Setup
This was woven on a Schacht 8-Shaft Baby Wolf, warped with 10/2 pearl cotton in natural color at 20 ends per inch.
Yarn Selection
I hand dyed sections of the warp to achieve something ikat-like, largely taking inspiration from documentation of a warp painting class at my local weaving shop. The colors turned out so much darker and astro-pop looking than I was hoping but, luckily, when I mixed them into the warp, they mellowed out. The idea was to make the overall feel of the fabric less square and more painterly. I chose the colors to complement the transition states of the thermochromic yarns.
We used the conductive yarn we had on hand for the sensing (and sadly, we don’t know where it came from) but it appears to be entirely made of stainless steel fibers which have been spun. The fibers like to “grab” the other yarns and they feel really nasty in the hand. I did one experiment adding them along the warp, which was a disaster as they grabbed the other yarns creating massive knots during warping and then broke frequently. On the plus side, they are easy to repair by just trying them back together.
We experimented with several methods for creating the color changing yarns. Playing around with combinations that could couple the painted fiber with a heating element. In some cases, we hand-spun the fibers together (shown in the figure below) with a conductive wire (38, 40AWG magnet wire) but that was finicky and prone to breaking.

We had the best results hand painting a cotton covered copper yarn we sourced from wires.co.uk. The thinner the wire, the better the heating. What seems to make this yarn work so well is that the copper inside the cotton covering is uninsulated, so lots of heat travels between the wire and cotton. It also makes for much more pleasant soldering and attaching.
Thermochromic Paint Mixture
We created our final paint mixture by mixing:
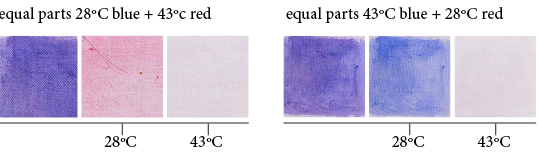
3 parts blue thermochromic that activates at 28°C;
1 part red thermochromic that activates at 43°C;
4 parts liquitex clear acryllic gel medium.
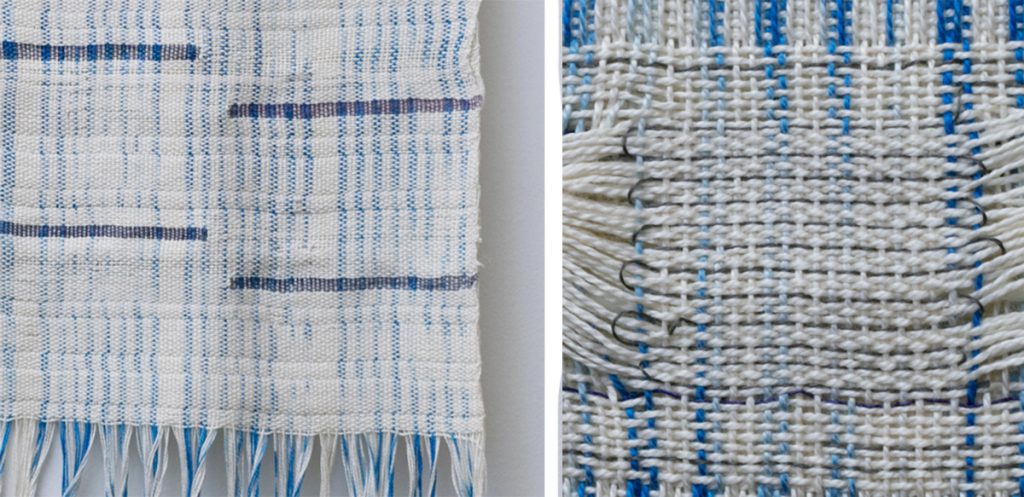
We cut lengths of our wire/yarn and then painted by hand. This makes it a little gloopy and uneven, but it works. The transition from purple to red to blue was the most notable in our experiments. The image below shows two different transitions between purple, blue or red, and white. You can see how the pink/red transition is much more visible.
The general structure of the weave puts the thermochromic sections on the top of the fabric while hiding the conductive yarns behind the fabric. The design follows the schematic outlined below:

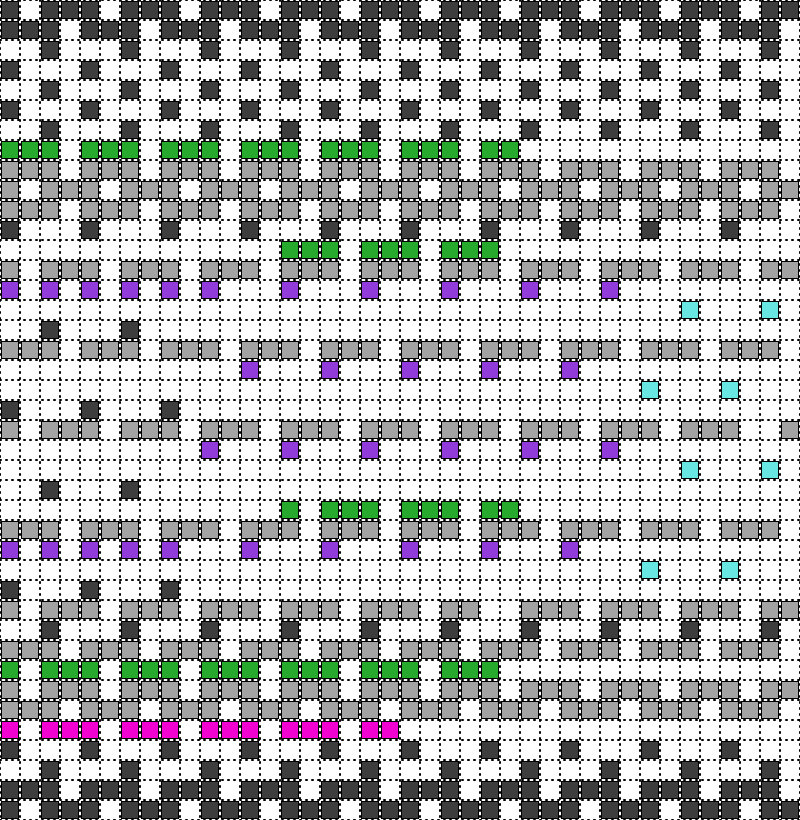
The general rule of thumb was that one needed two rows of cotton yarn in between a conductive yarn to prevent unintended crossing. Here is a structural view of the yarn paths and draft of the top layer yarn for a SINGLE section of color change:
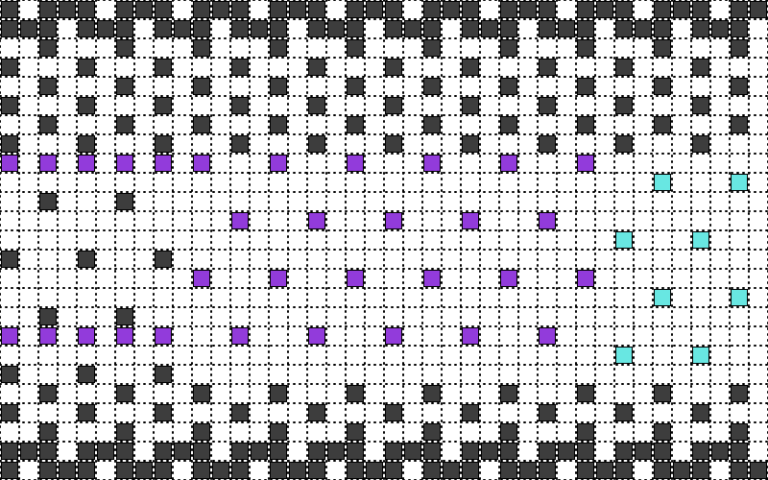
You can see the black yarn is the cotton, the purple is the thermochromic, and the teal is a second segment of cotton. The thermochromic leads are routed through the “middle” or between the two layers until their are integrated into the visible surface of the yarn.
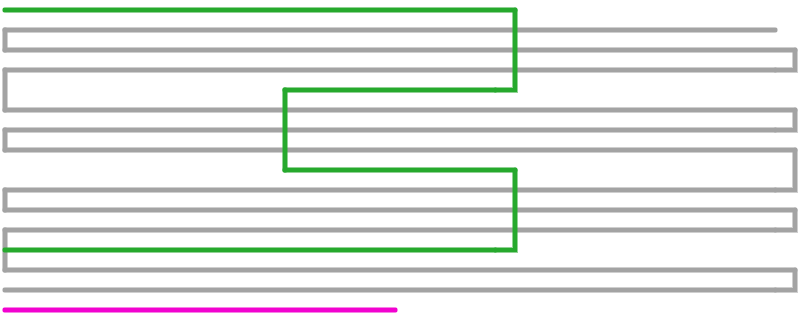
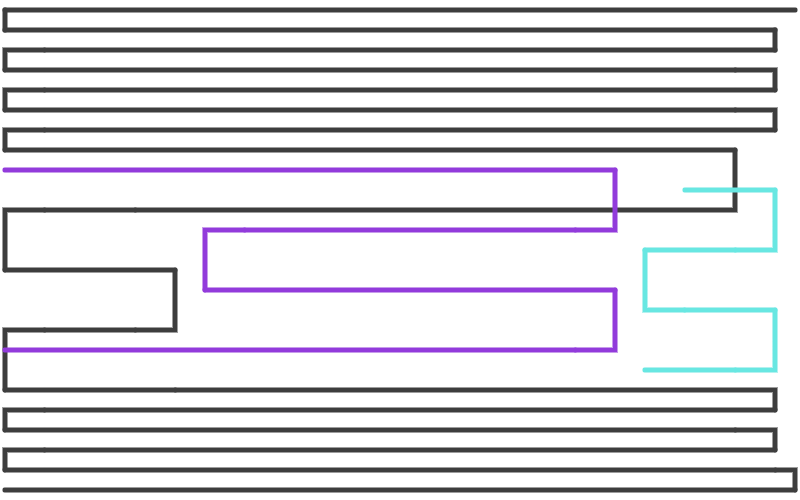
Here is a draft and yarn paths for the BOTTOM layer that has the press pads. The green is our conductive yarn, the grey is the cotton yarn, and the red is a funny little yarn we call a “warp insertion.” basically, it is a yarn we route through the bottom of the weave to reach the center point of the press pad and then manually pull through the warp using a crochet hook. This adds the yarn to the surface while making it very hidden.

PCB
We are in the process of making a PCB that can interface with the entire textile, in the meantime, we have added PCBs to control a single spot or 3 spots on our lab GitHub page. Thank you Chad Di Lauro. More files should be there as we continue development. Right now, they are powered by the wall, using 12V 5A power supplies and are controlled via Arduino Pro Mini.
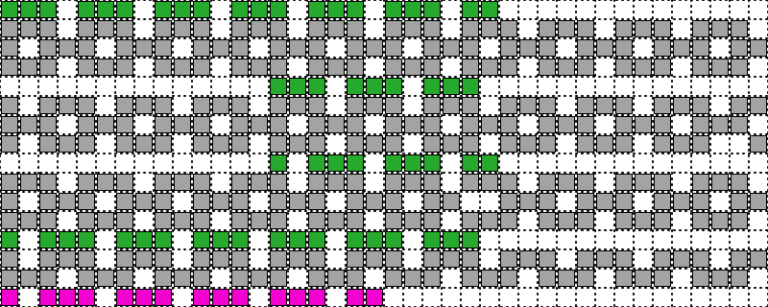
Tie Ups
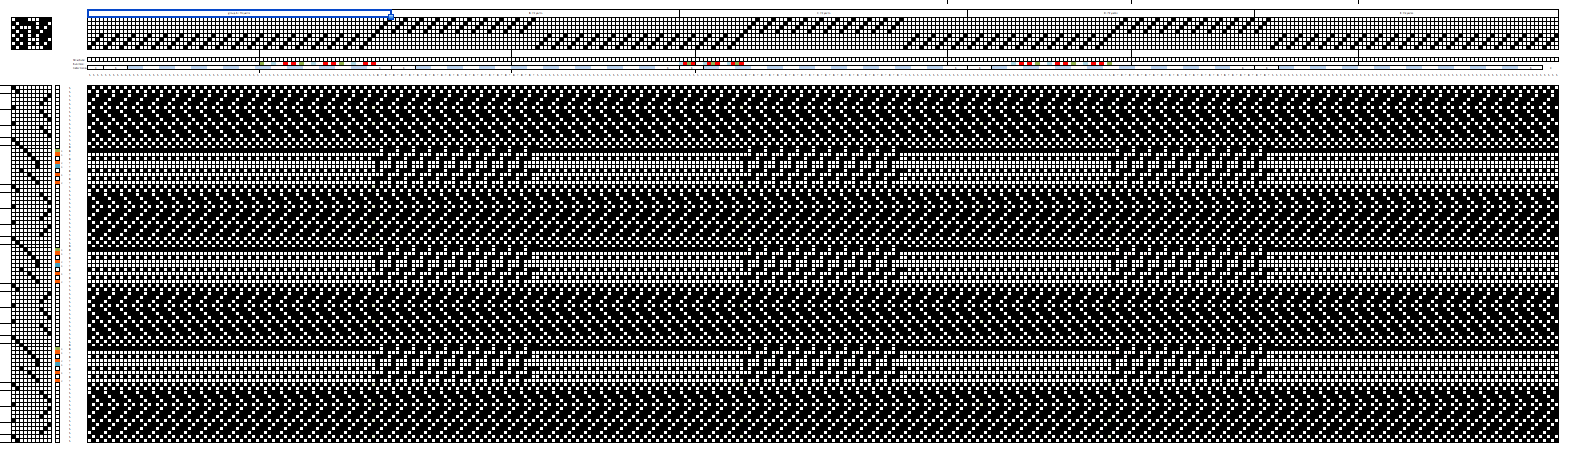
Here is a tie up for the pattern. The frame threading is correct but I did lots of improvising on the treadles, so that is not correct for the drafts you see above. I also had to do lots of manipulations by hand.I made this in Excel, which can BARELY handle all of the information. Again, click to make larger.
Next Steps
We have created our own smart textiles design software, AdaCAD, that helps immensely with drafting smart textiles. We expect to release this on GitHub once we have it fully integrated and talking to our TC2 loom. It will be released with a GPL license and we would like the community to get involved in development.
With the TC2 loom, we hope to recreate this general structure to create a wearable garment with custom placed sensing and actuating regions.
Acknowledgements
This work was supported by lots of folks including: Chad Di Lauro, Clement Zheng, Shanel Wu, Mikhaila Friske, Gaspard Bos, and the Schacht Spindle Company.
Video