How to Weave on Floor Loom #
Anatomy #
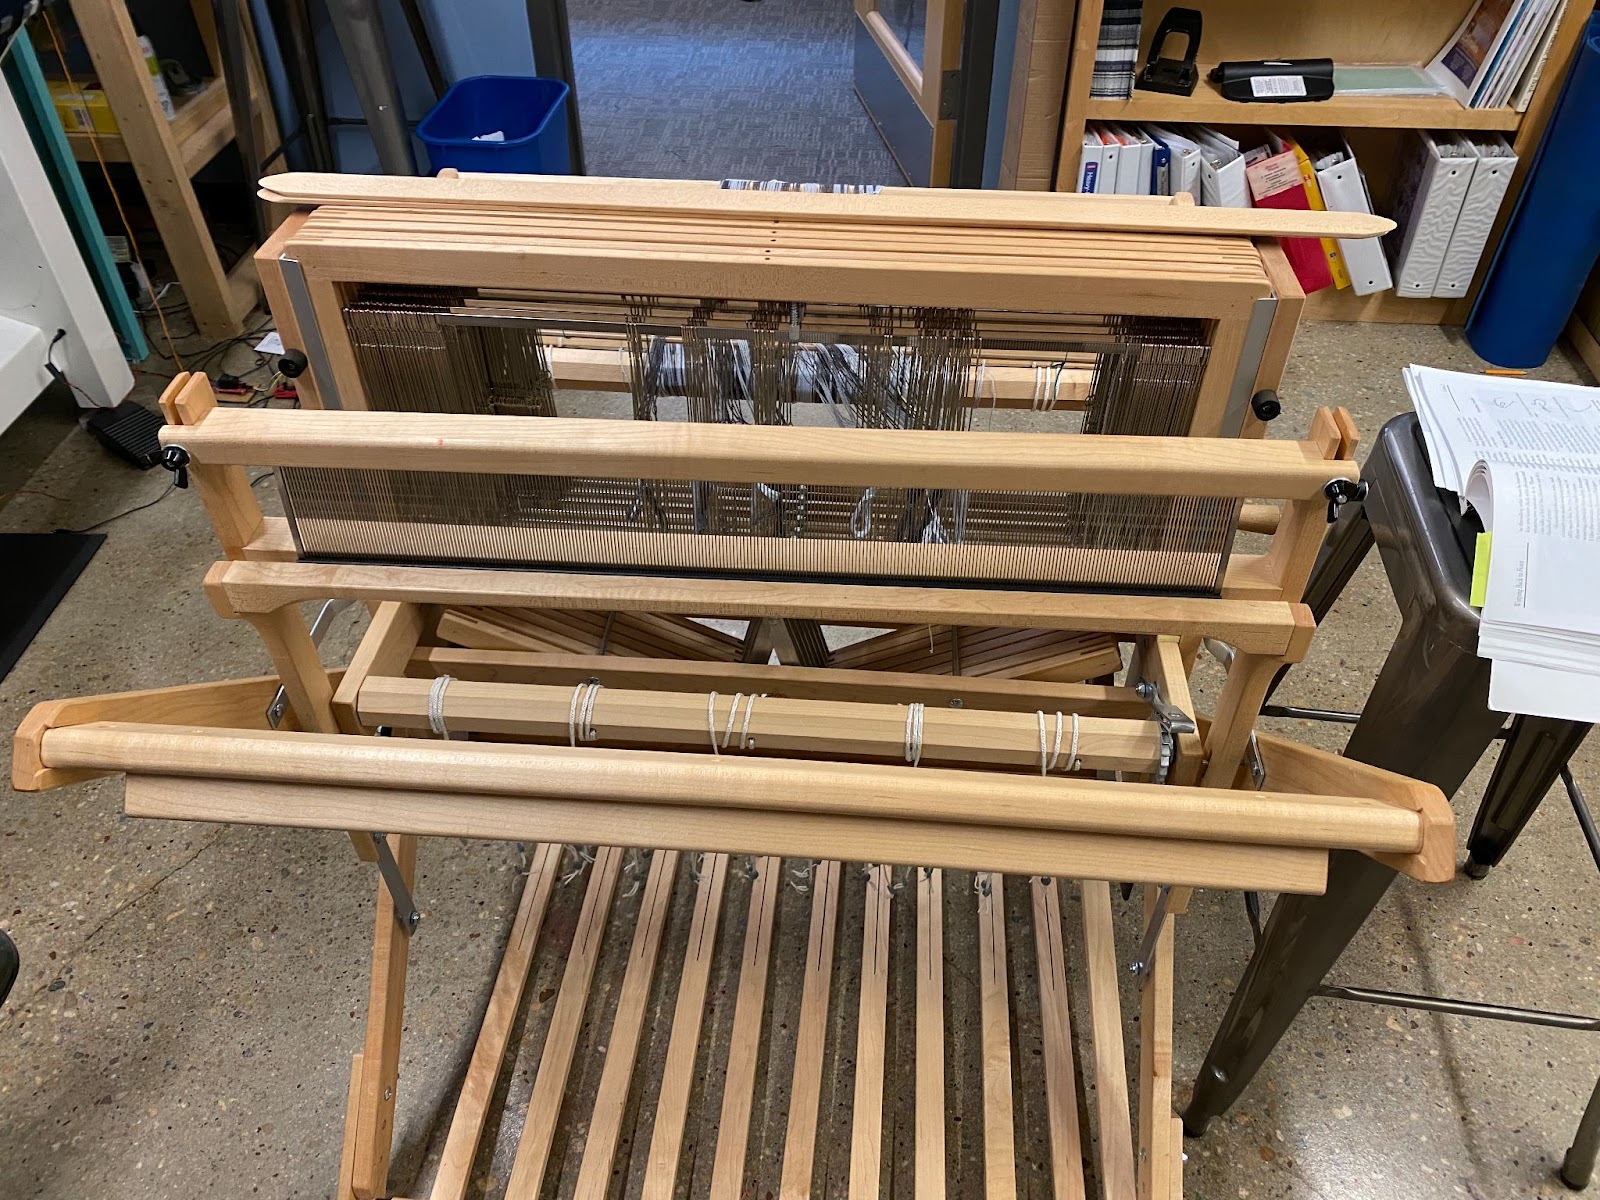
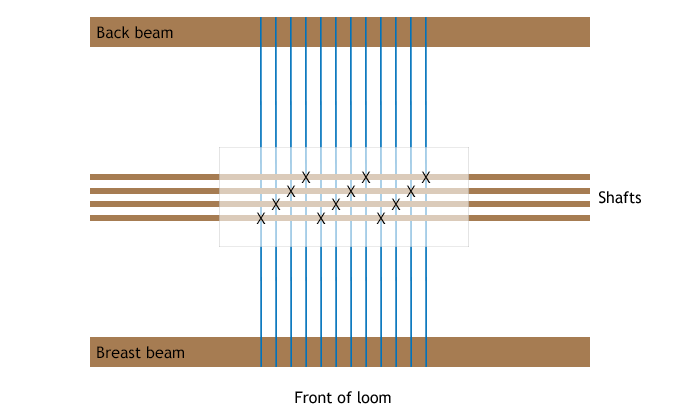
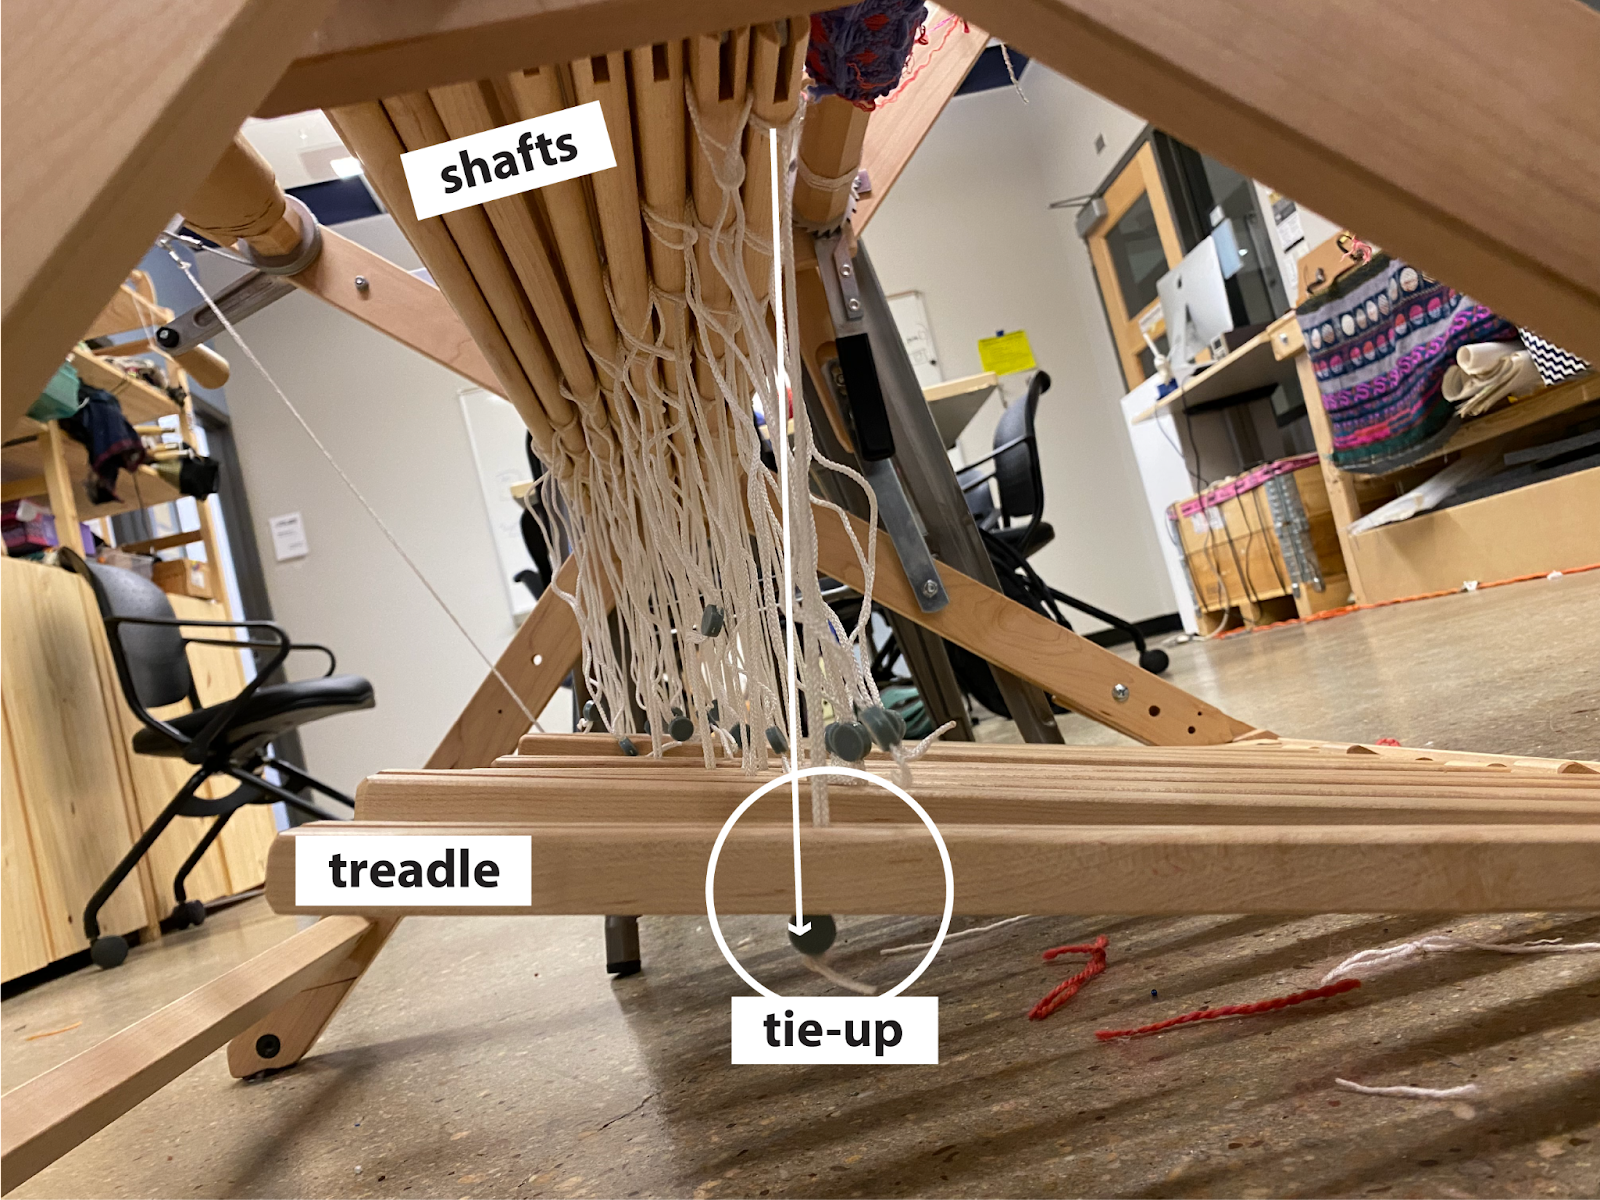
Below is the anatomy of a floor loom.
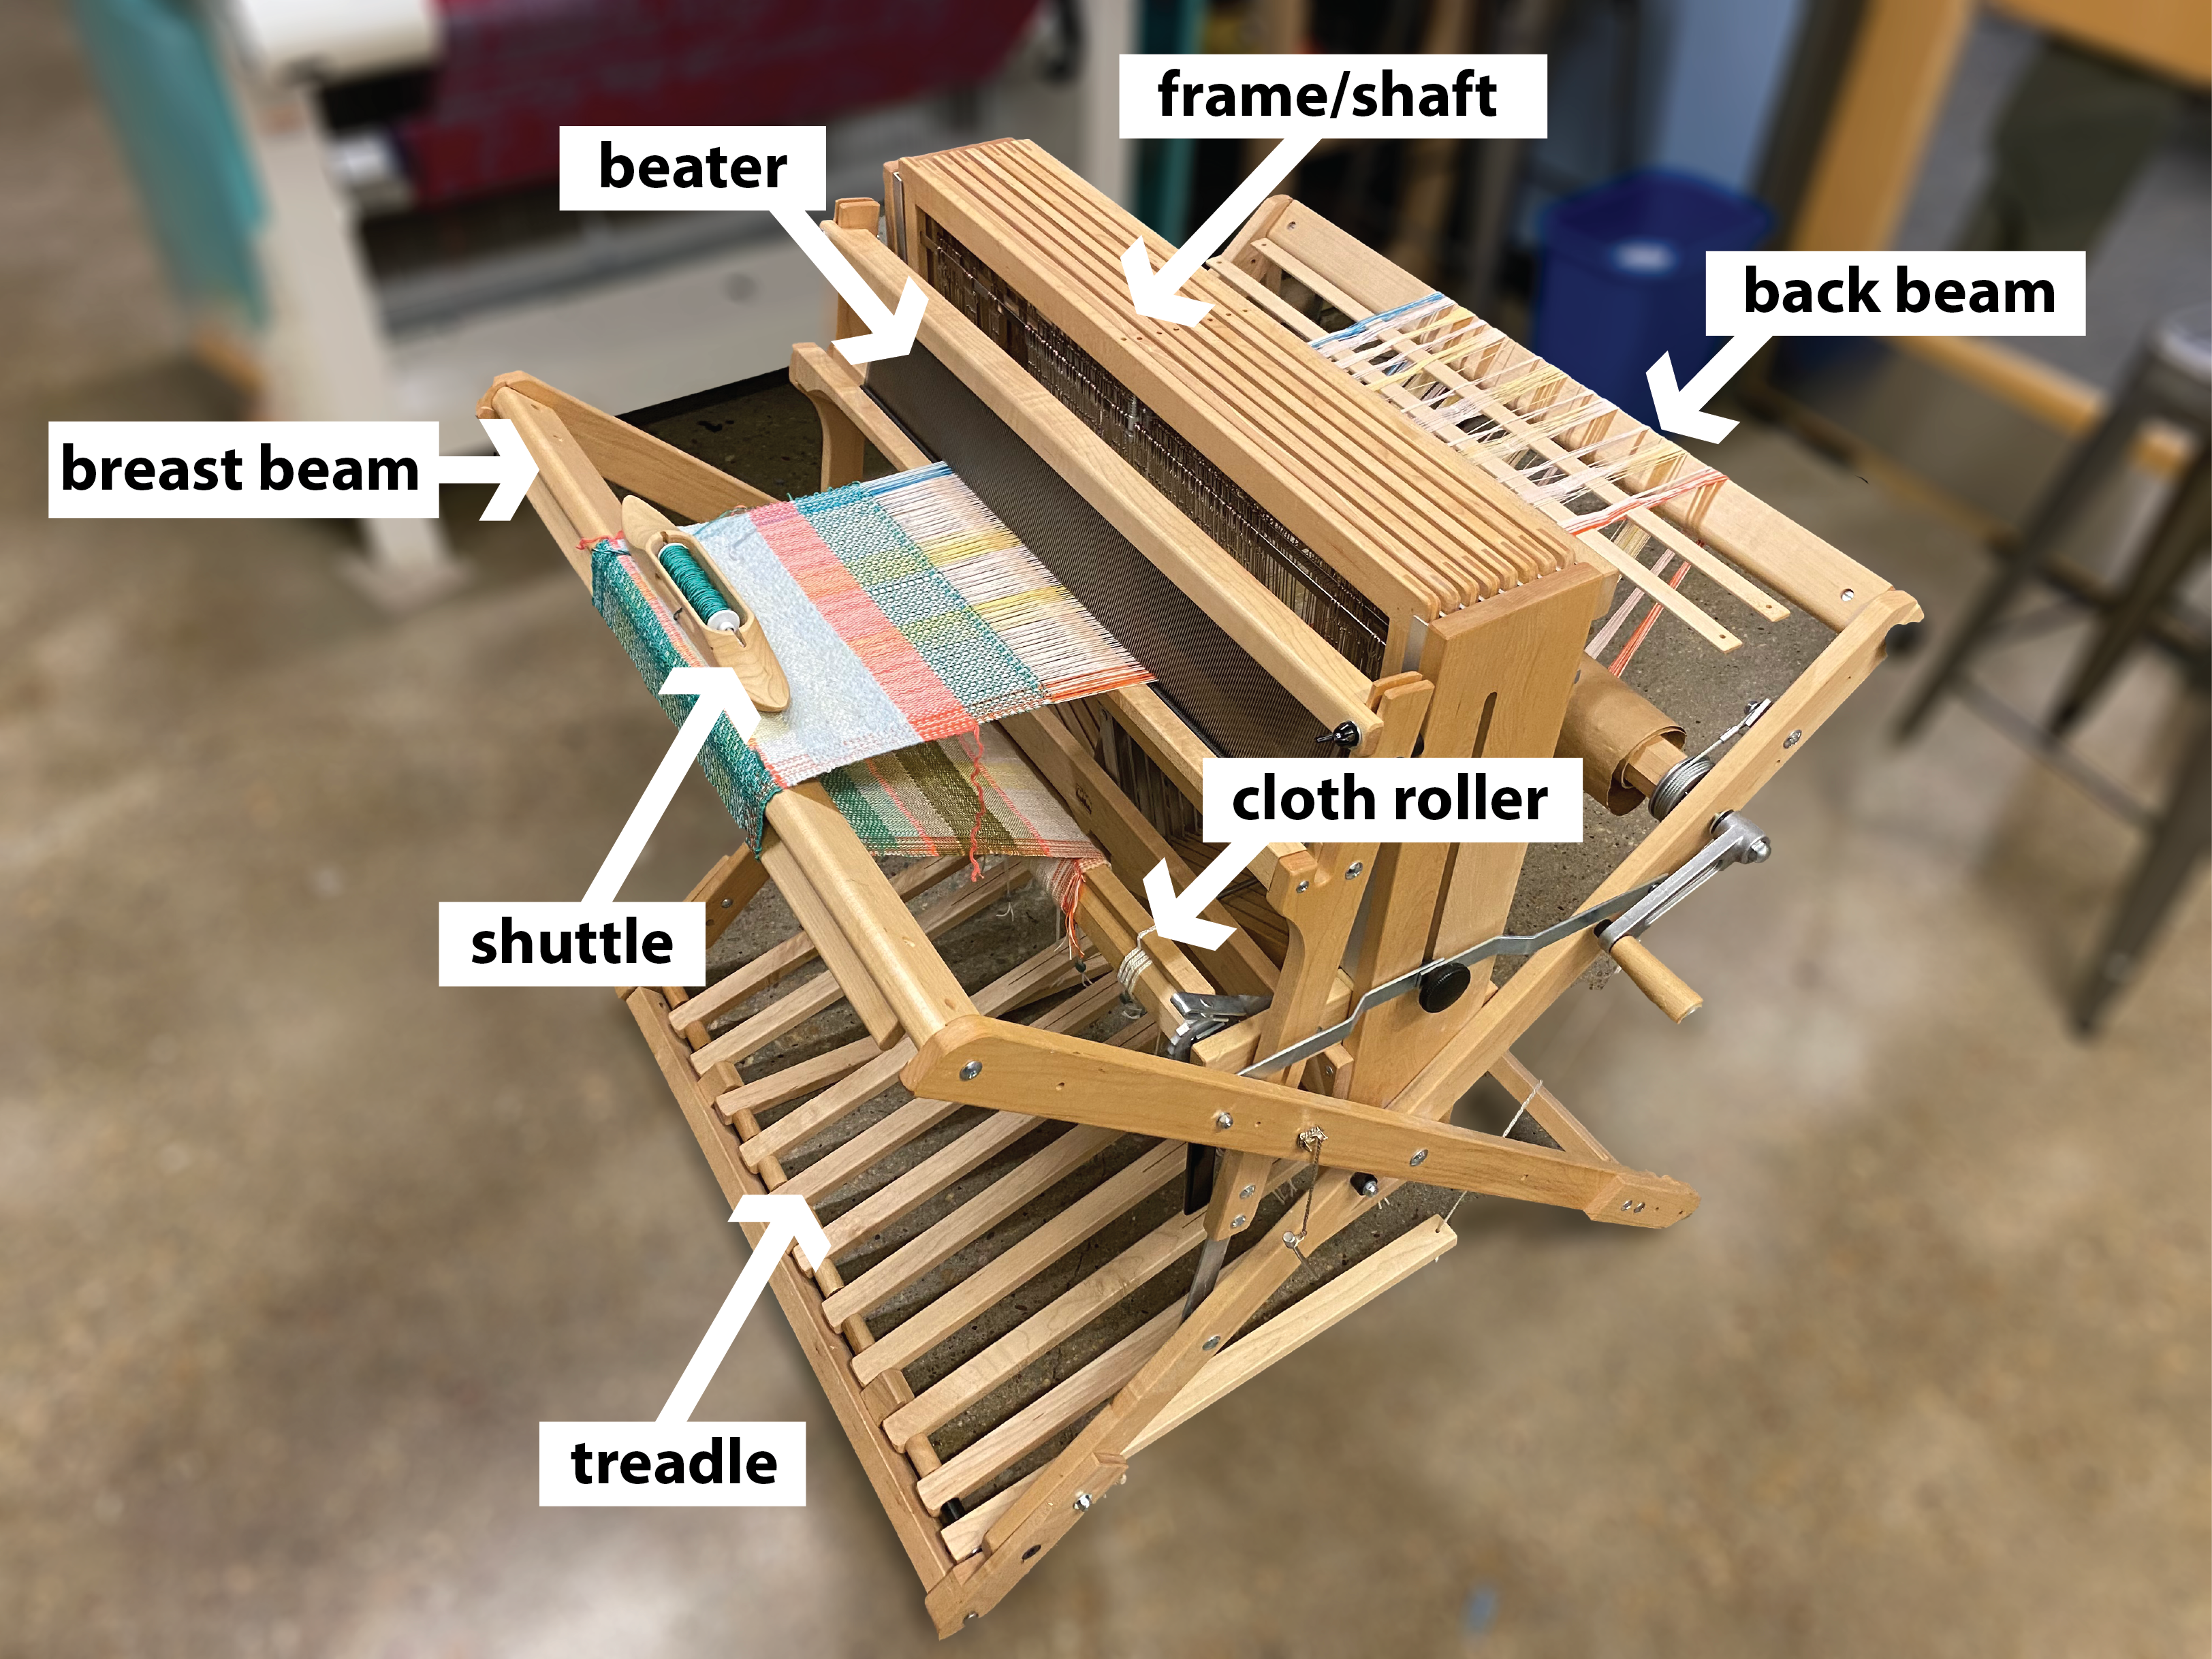

The loom consists of several parts. More details about each part can be found in the key terms section.
Basic Mechanics #
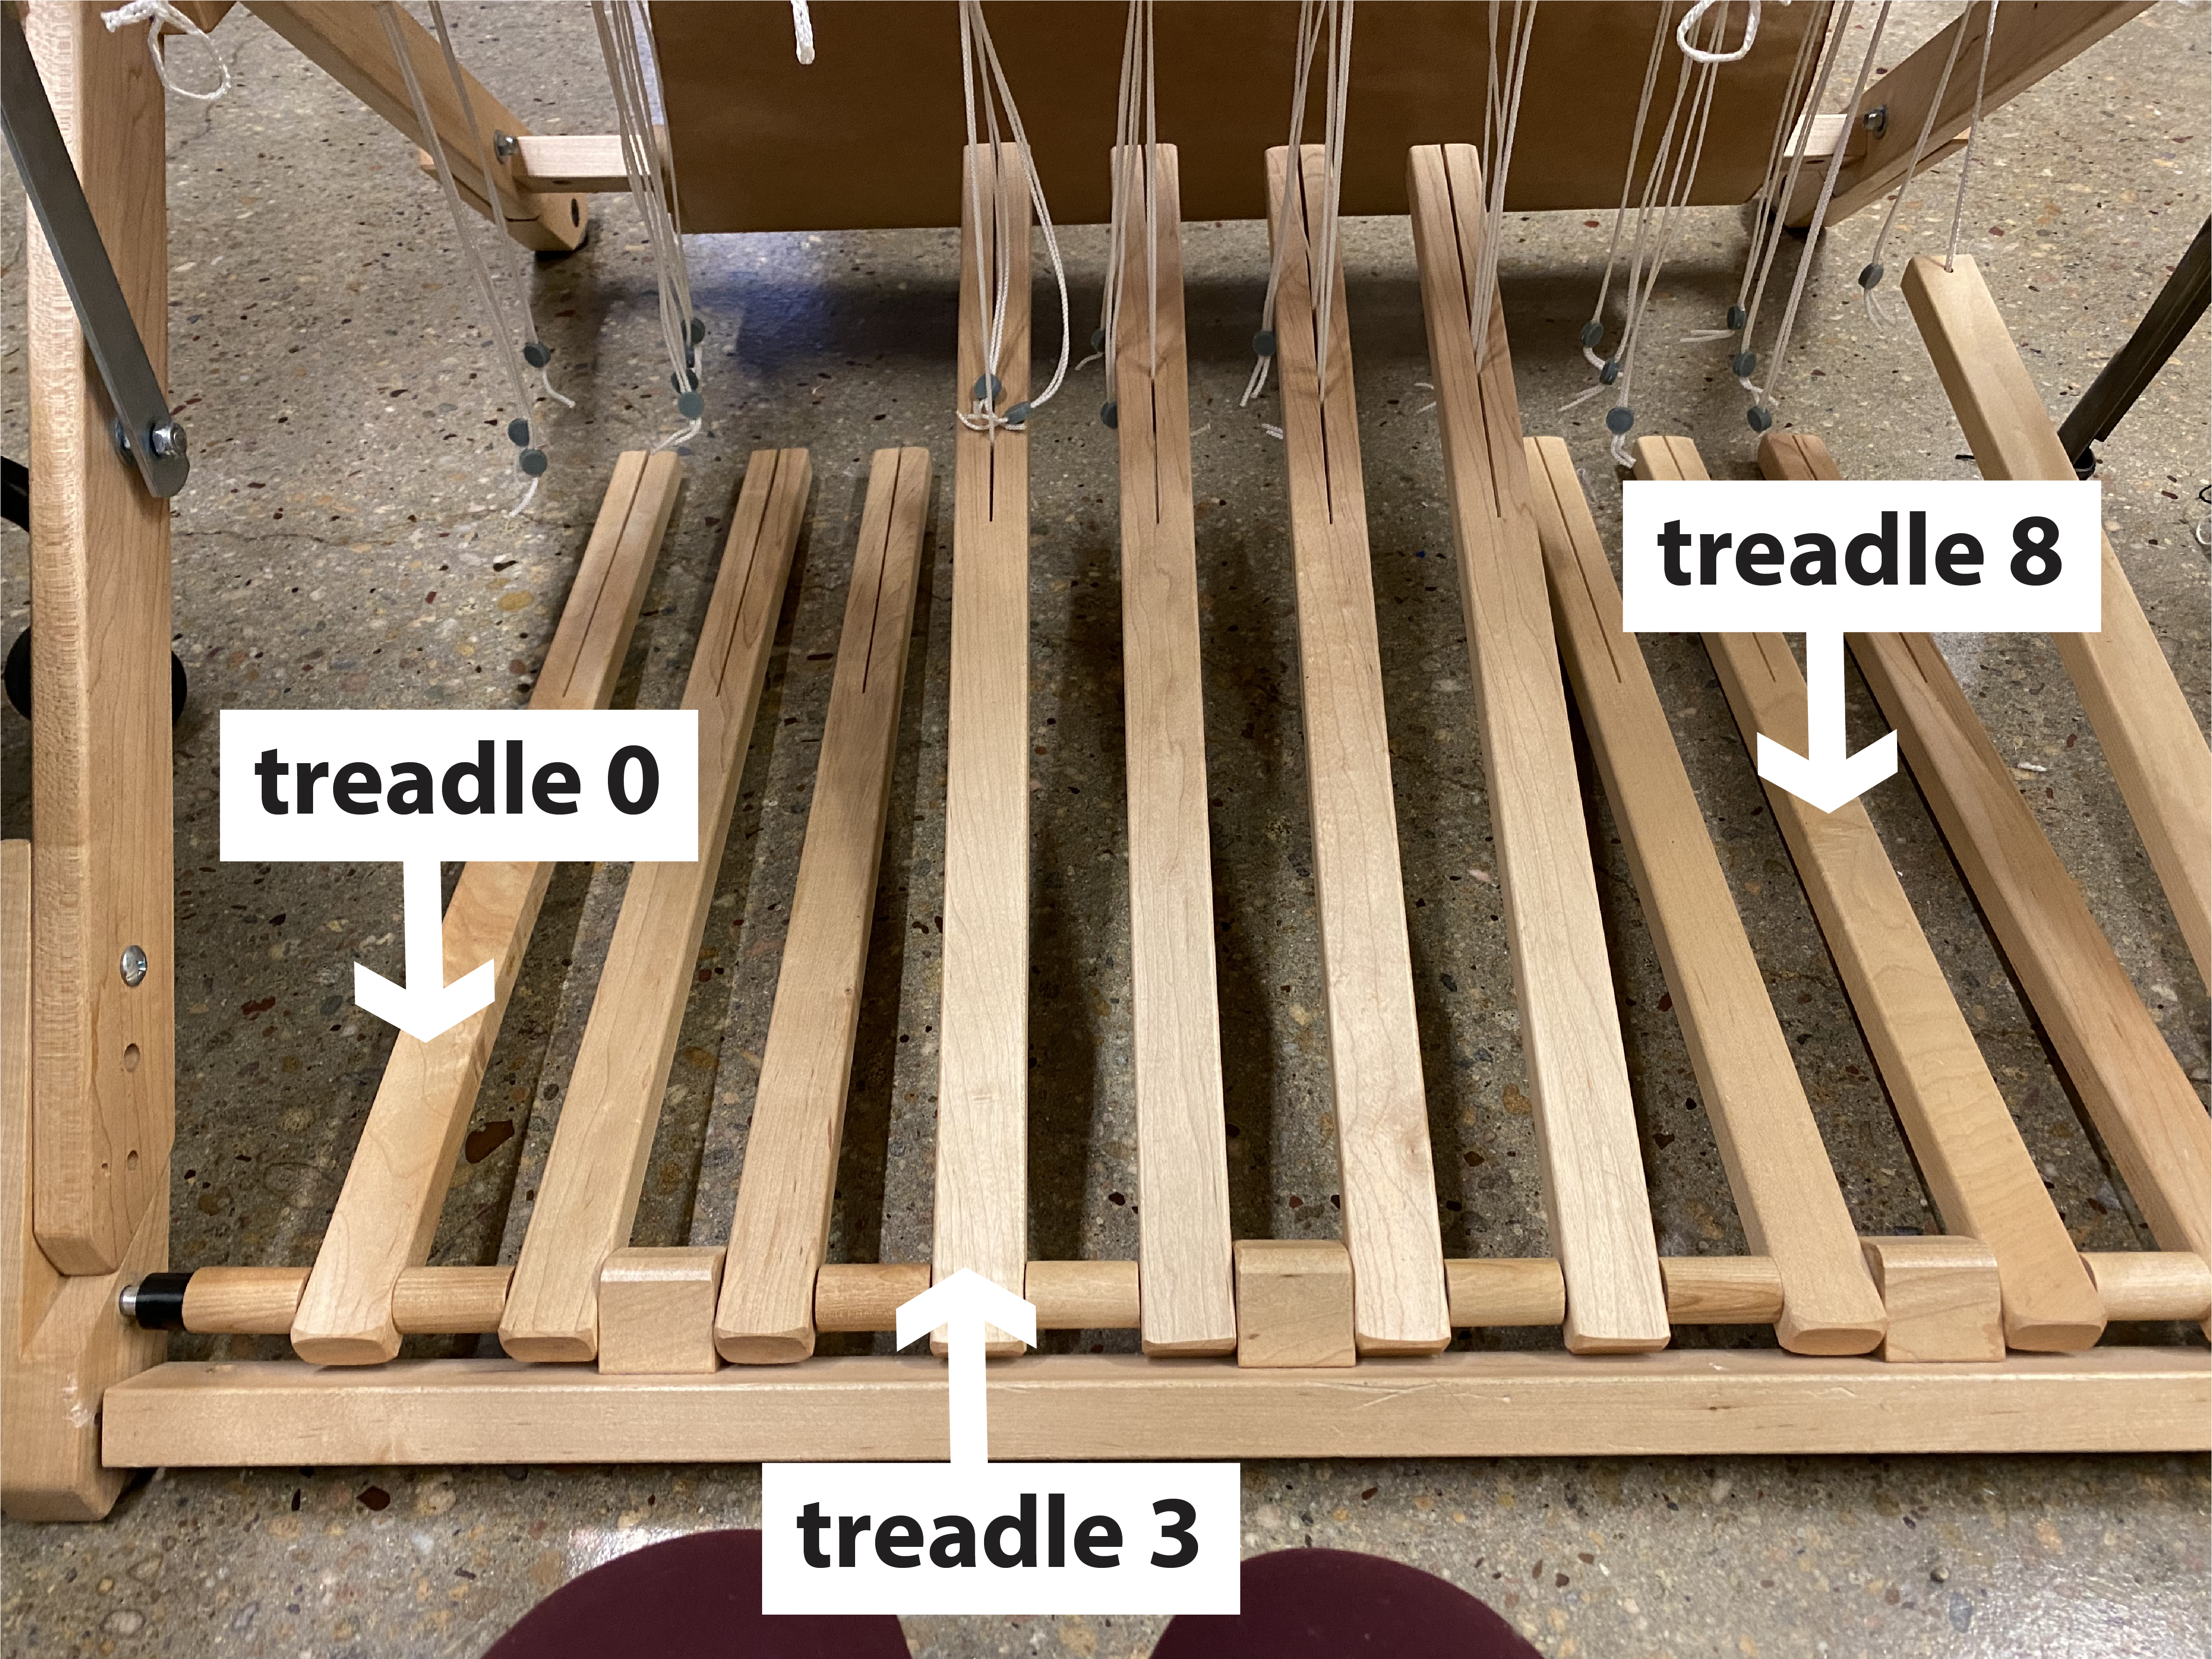
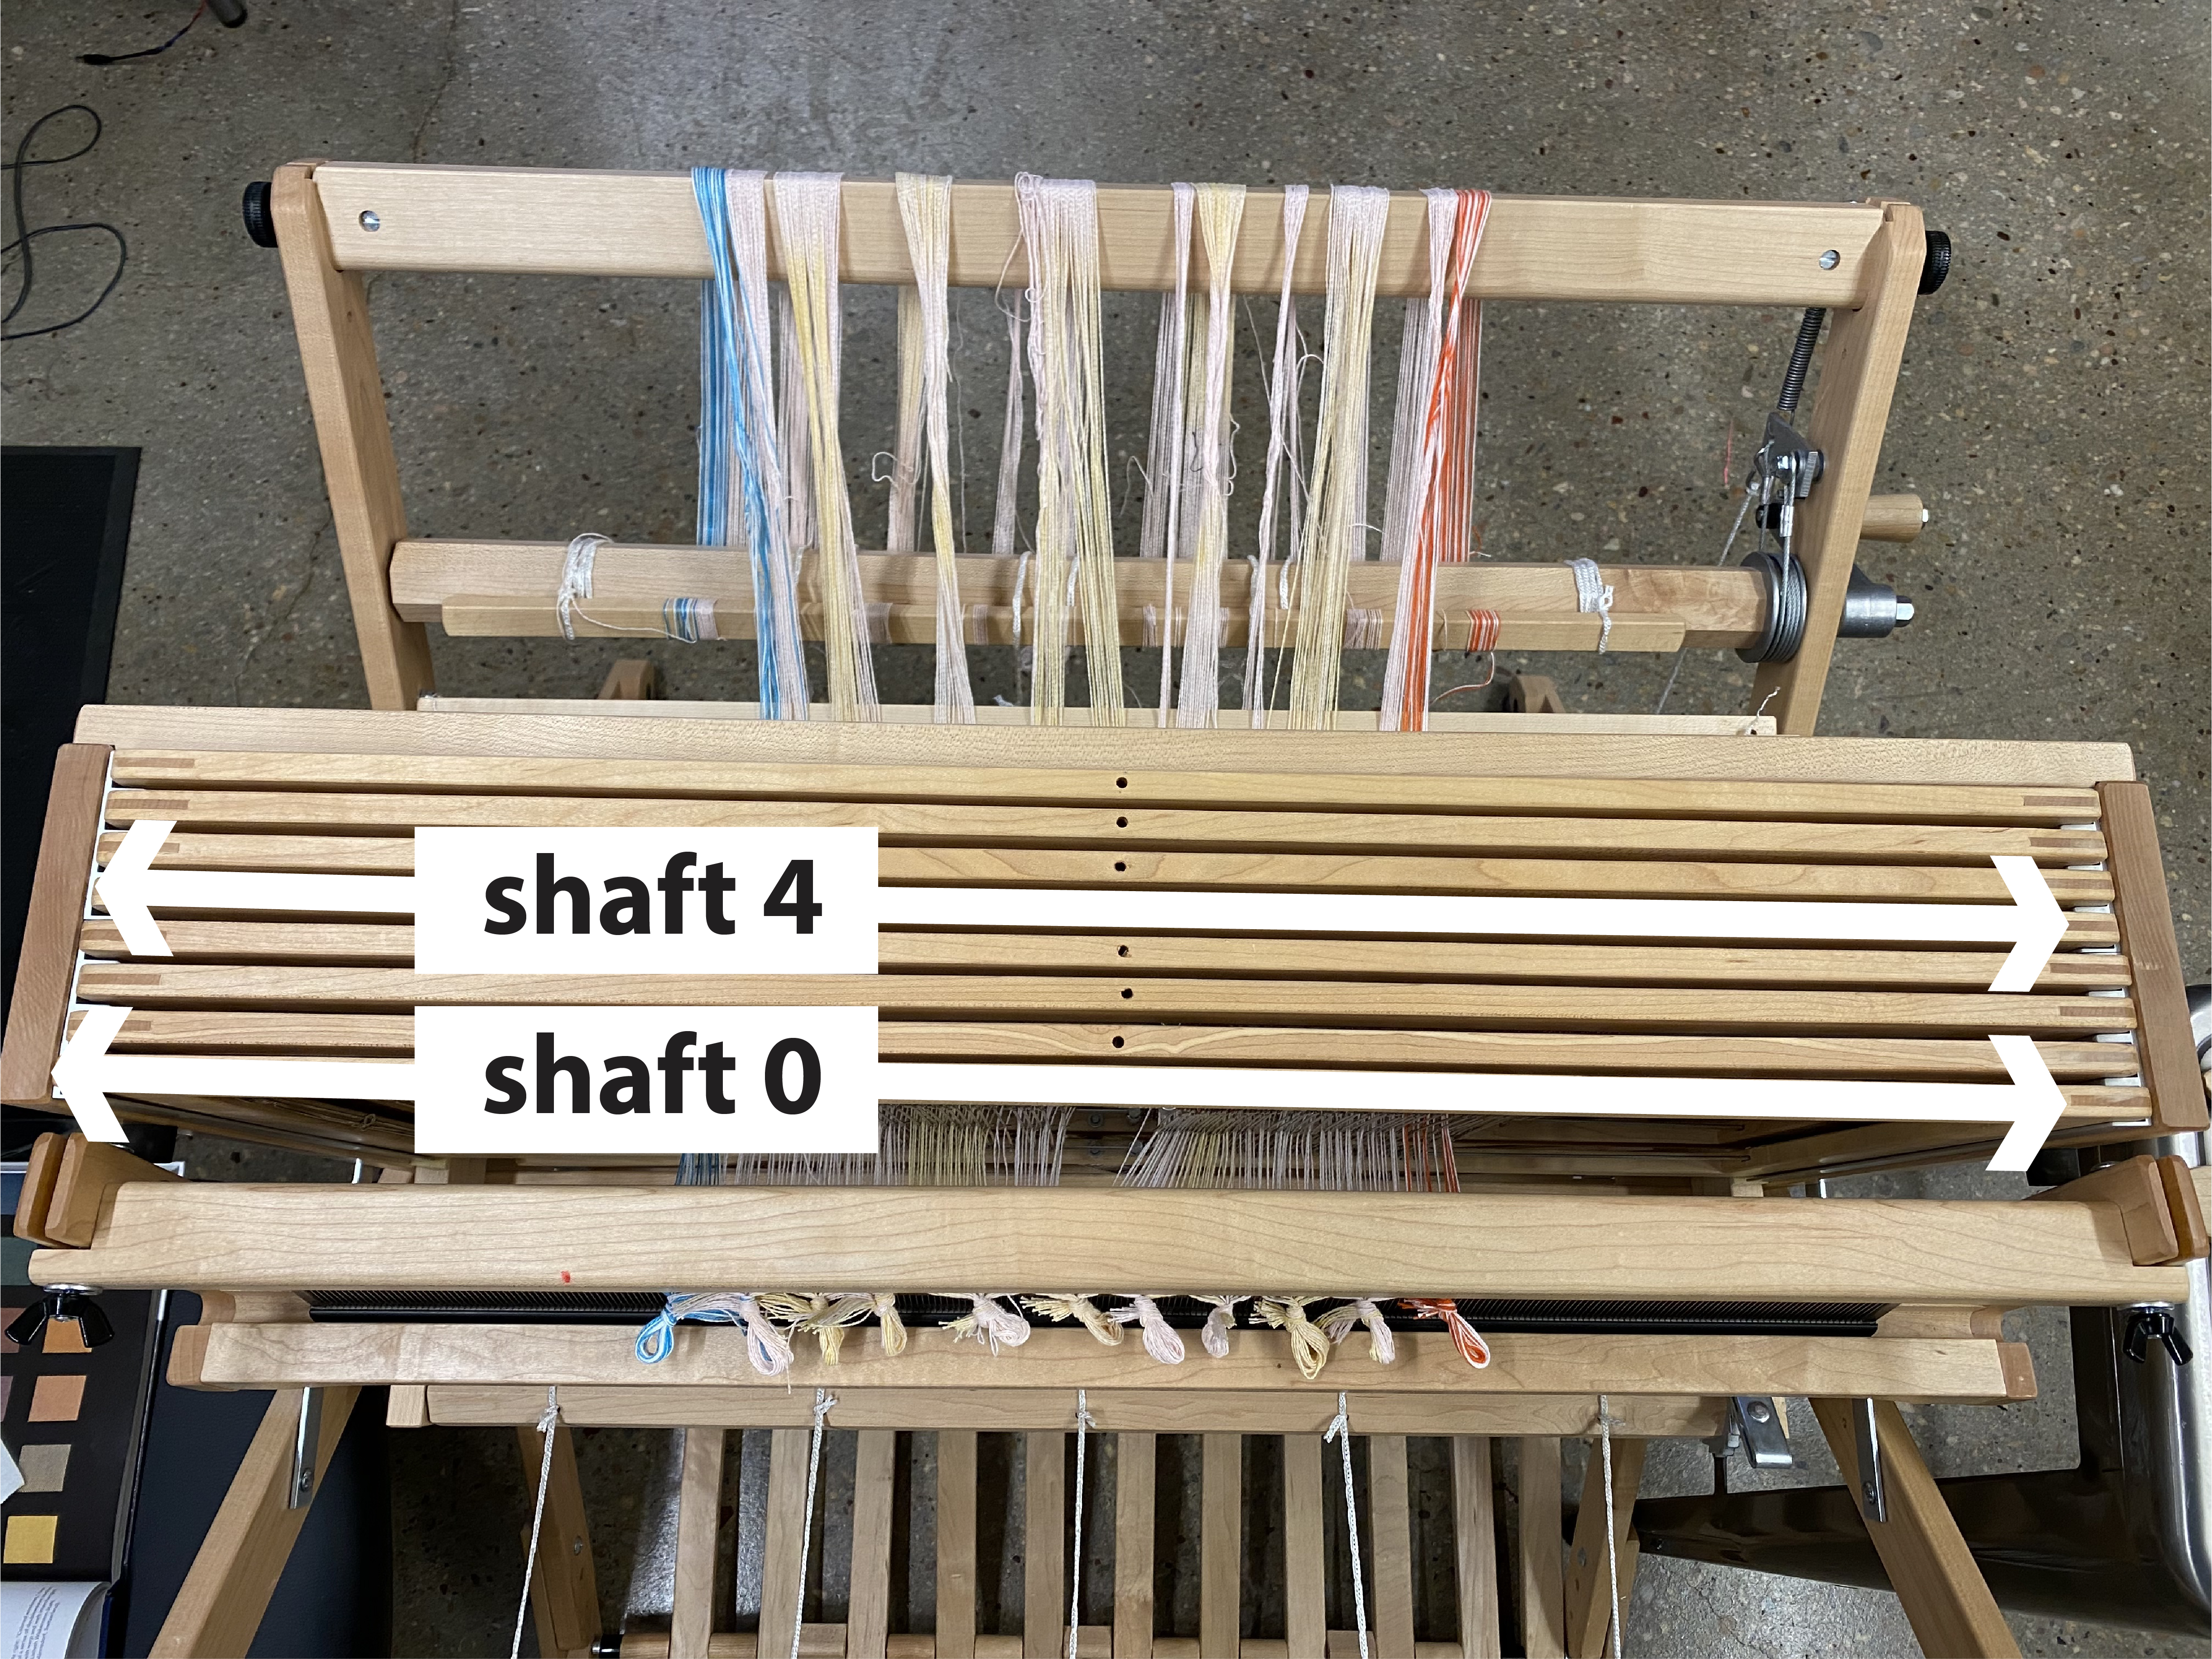
[1] There are multiple treadles on the loom. There are multiple shafts on the loom.
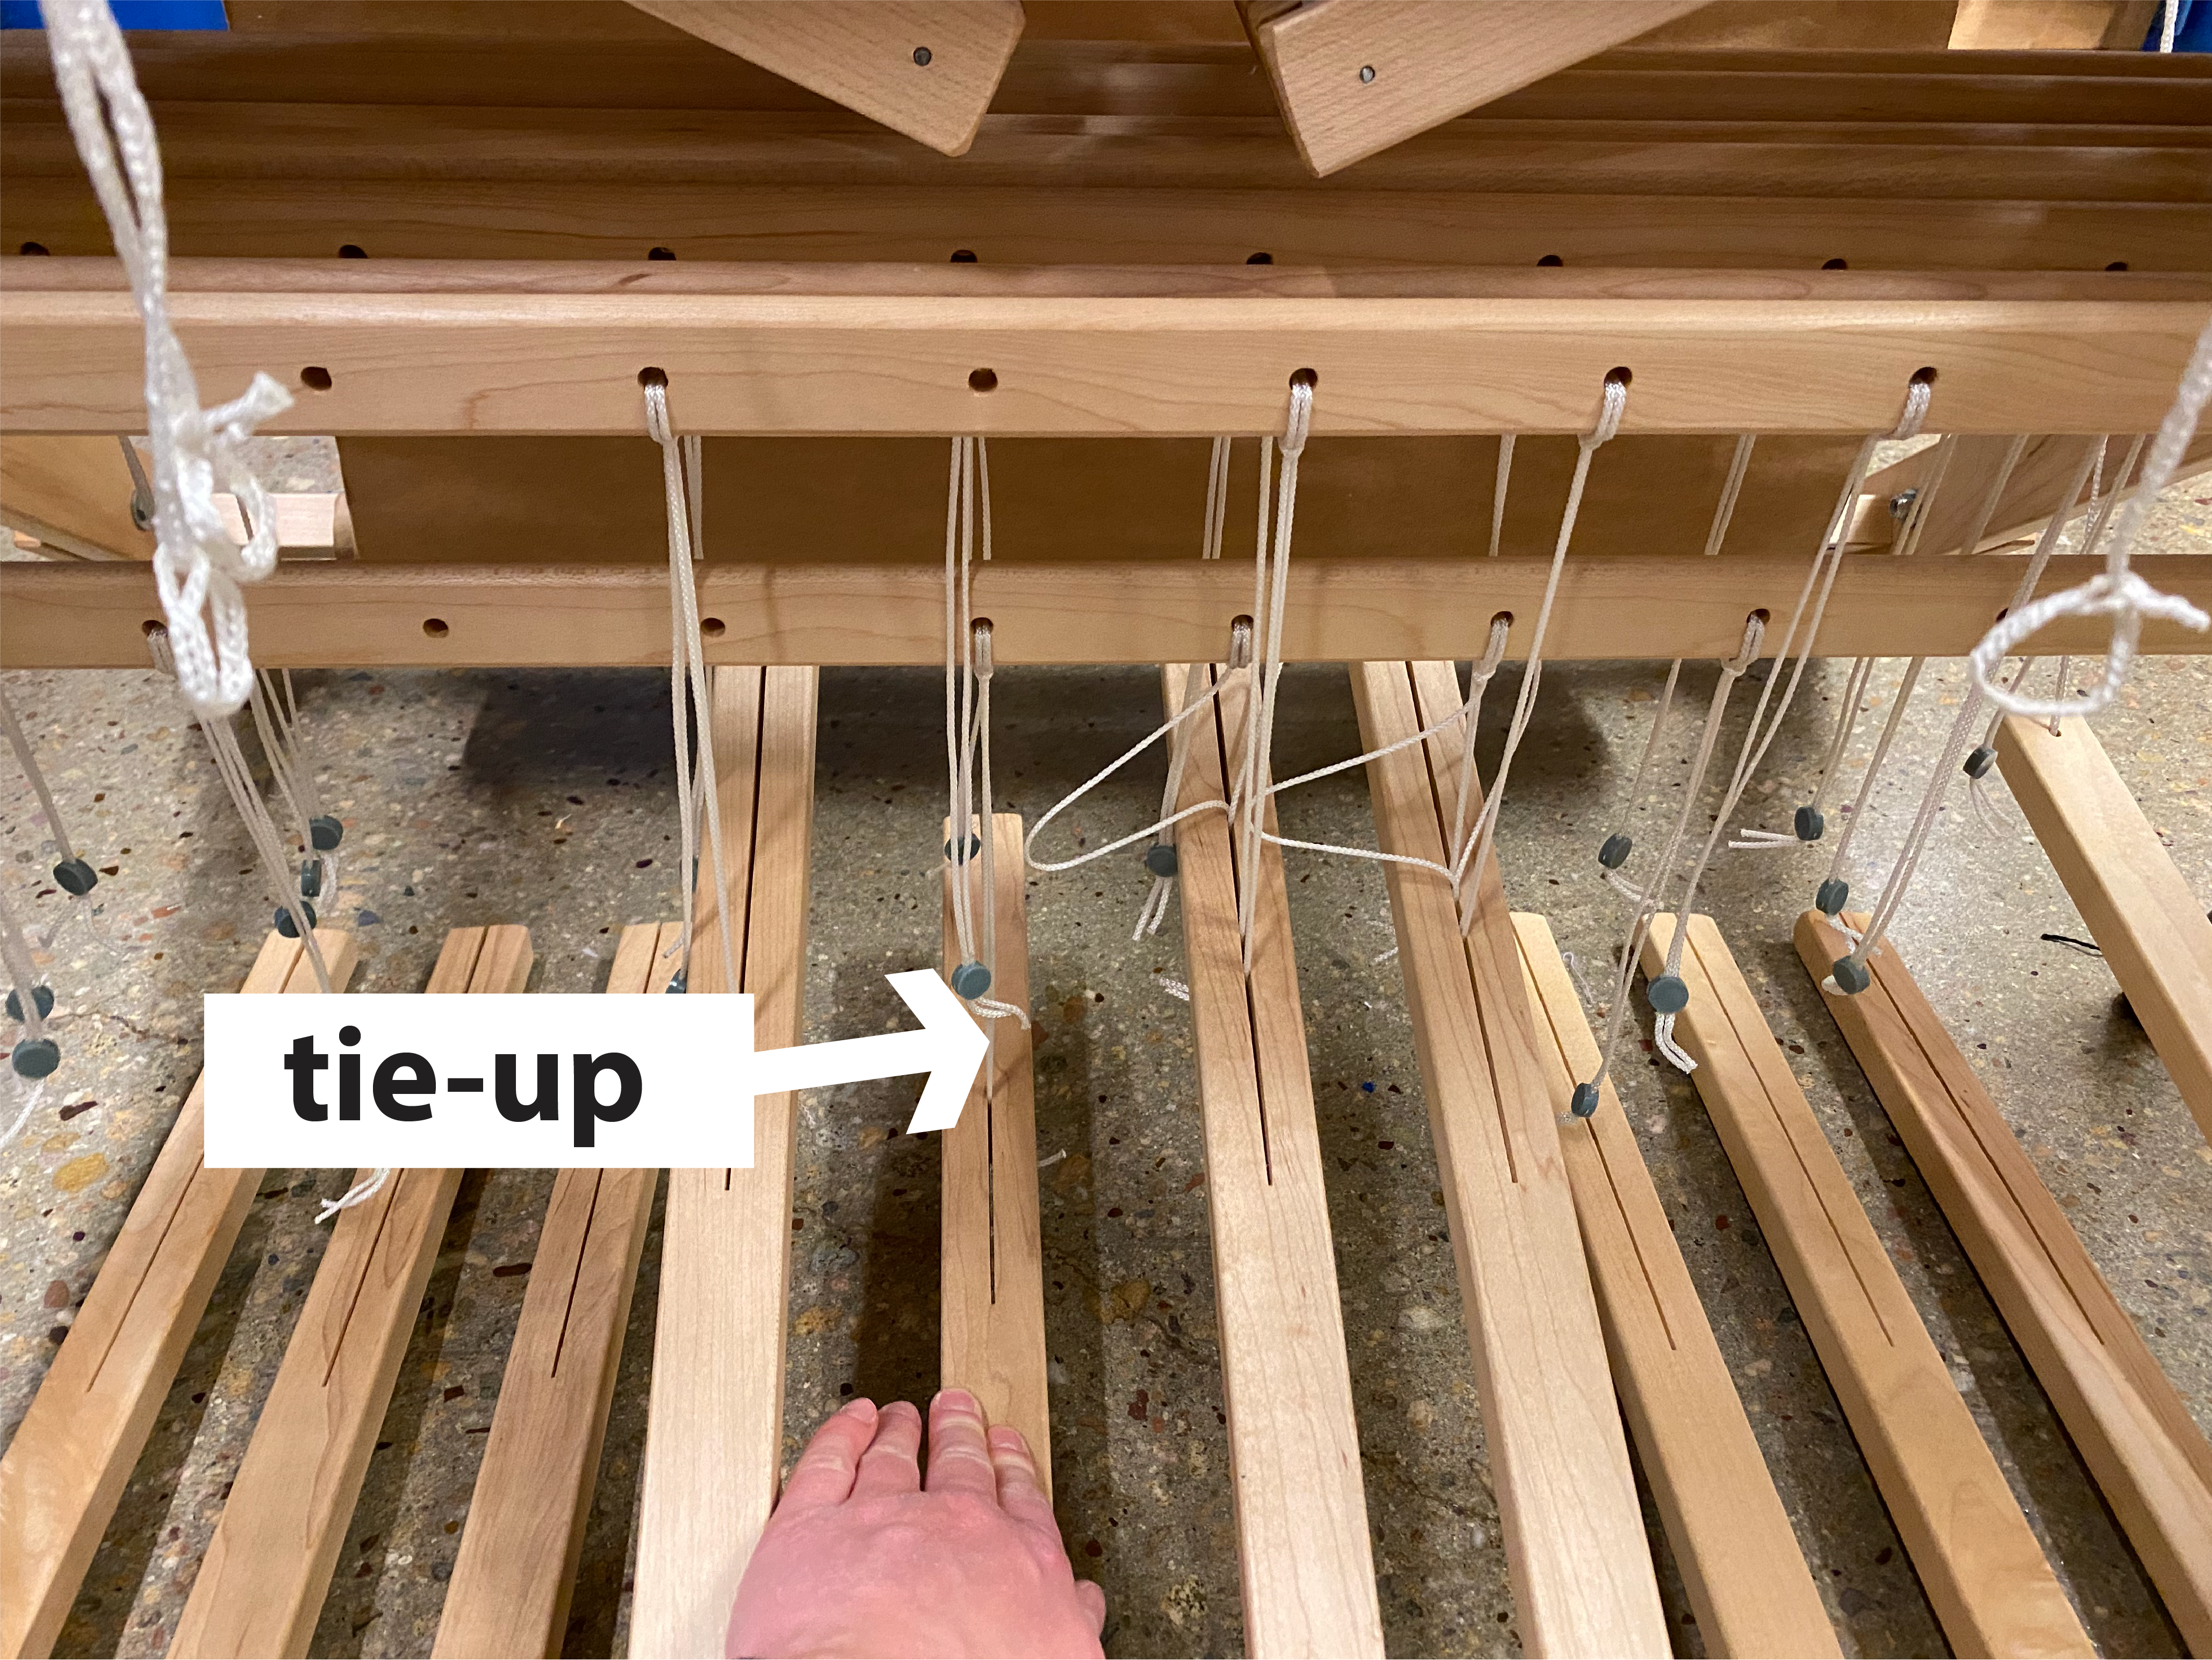
[2] The treadles can be tied up to as many shafts as the weaver desires. The tie up connects the shaft to the treadles so that the weaver can control which warp is raised and lowered
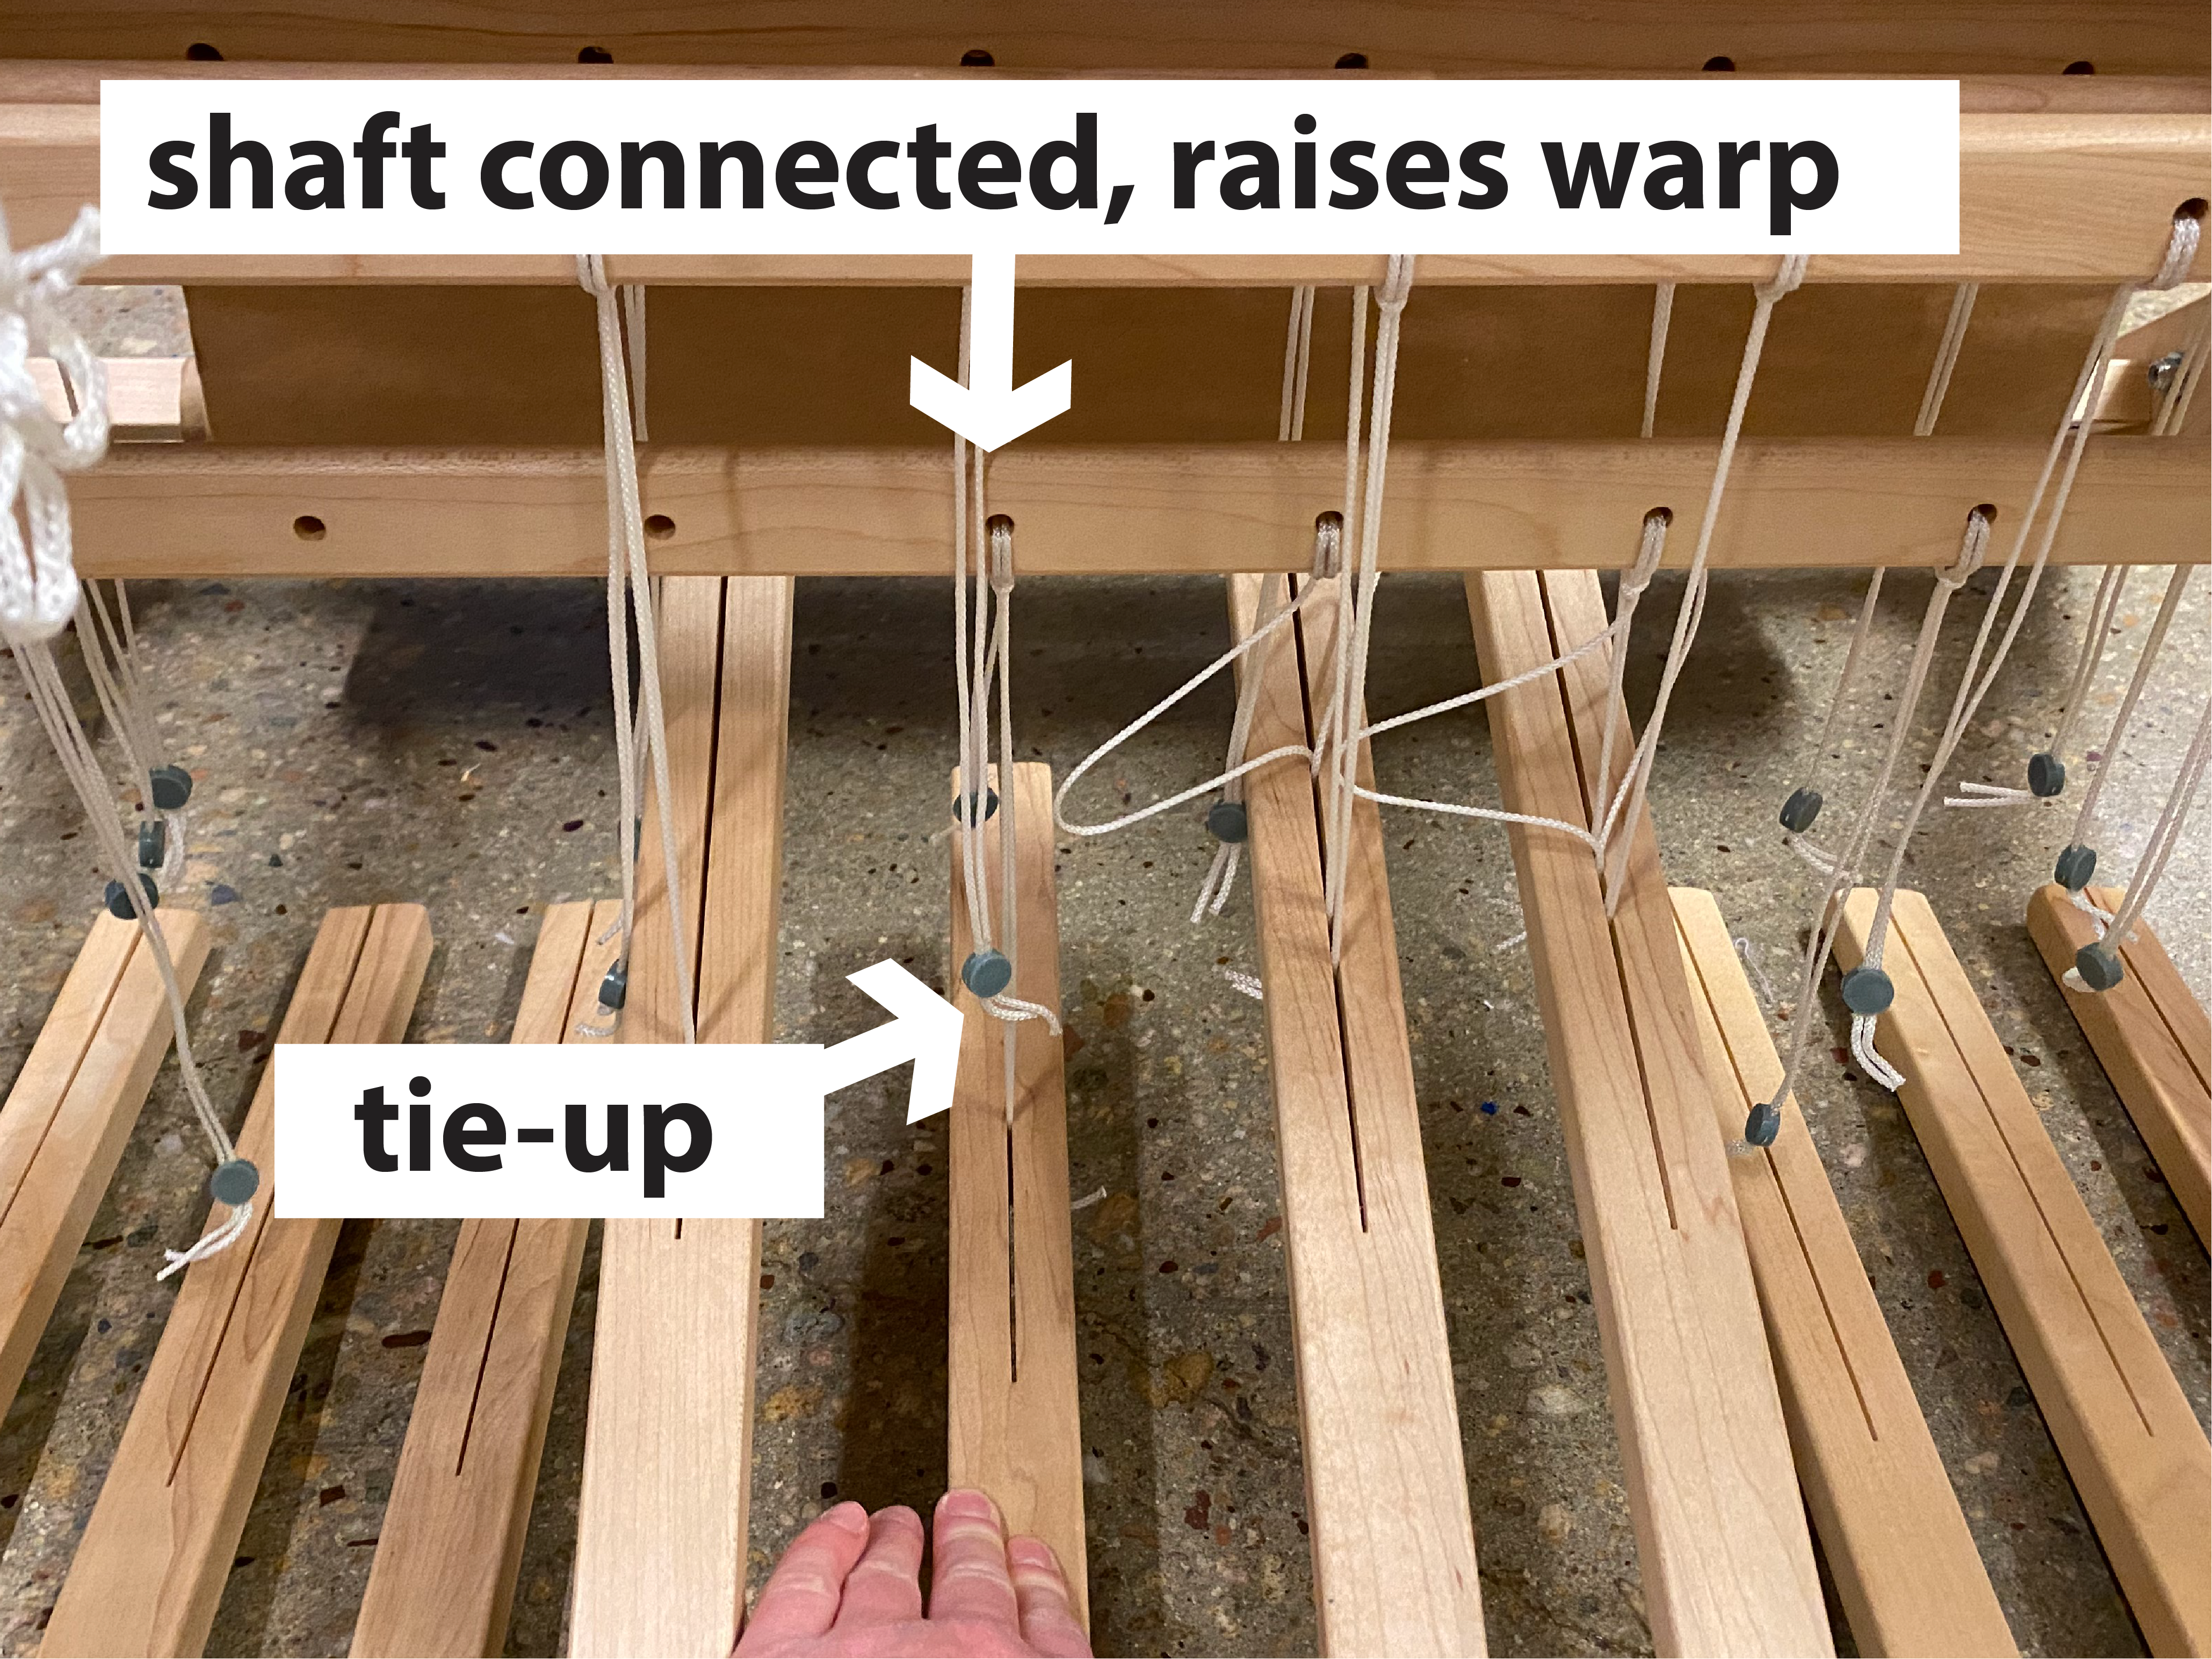
[3] Pressing on the treadles tied to the shafts raises the warp creating the shed
 [4] The treadles can be tied up to as many shafts as the weaver desires.
Floor Loom Process Overview #

Warping #
Synopsis of Warping Process:
- Measure the warp
- Tie the Cross
- Attach warp to the back apron rod
- Insert Lease Sticks
- Thread the heddles
- Sley the reed
- Tie the warp to the front apron rod
- Tie up treadles
Step 1: Measure the Warp
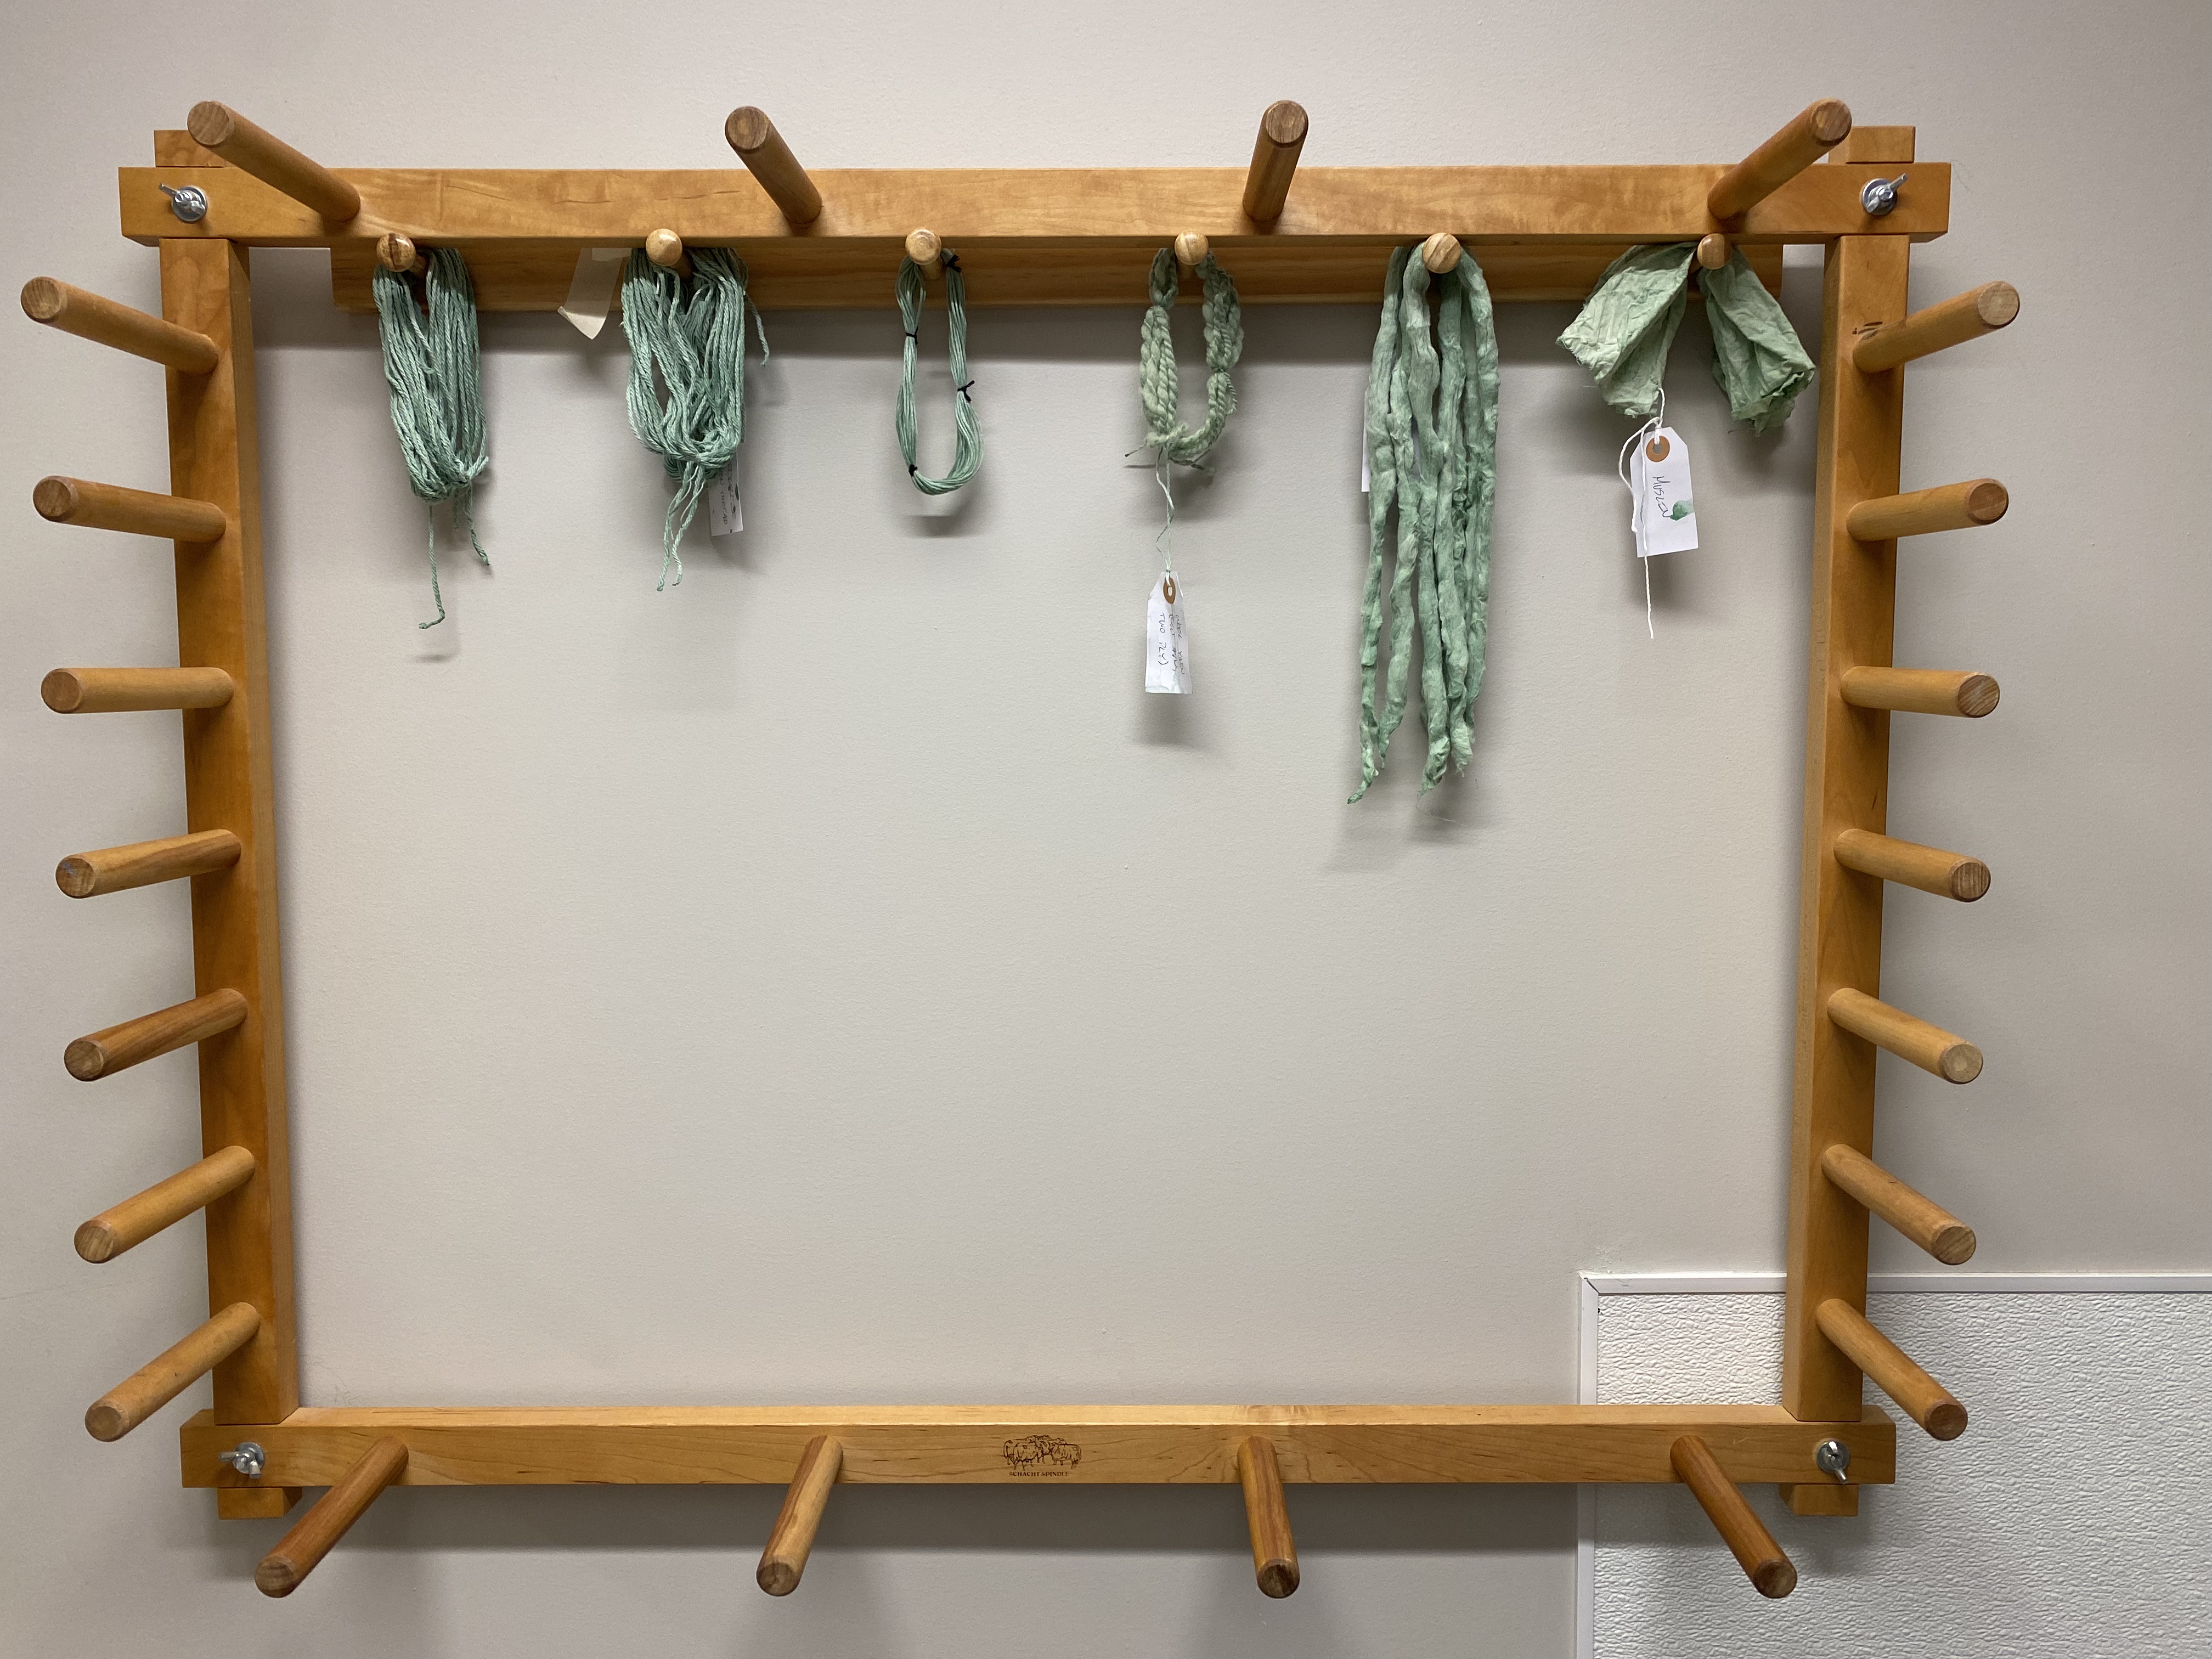
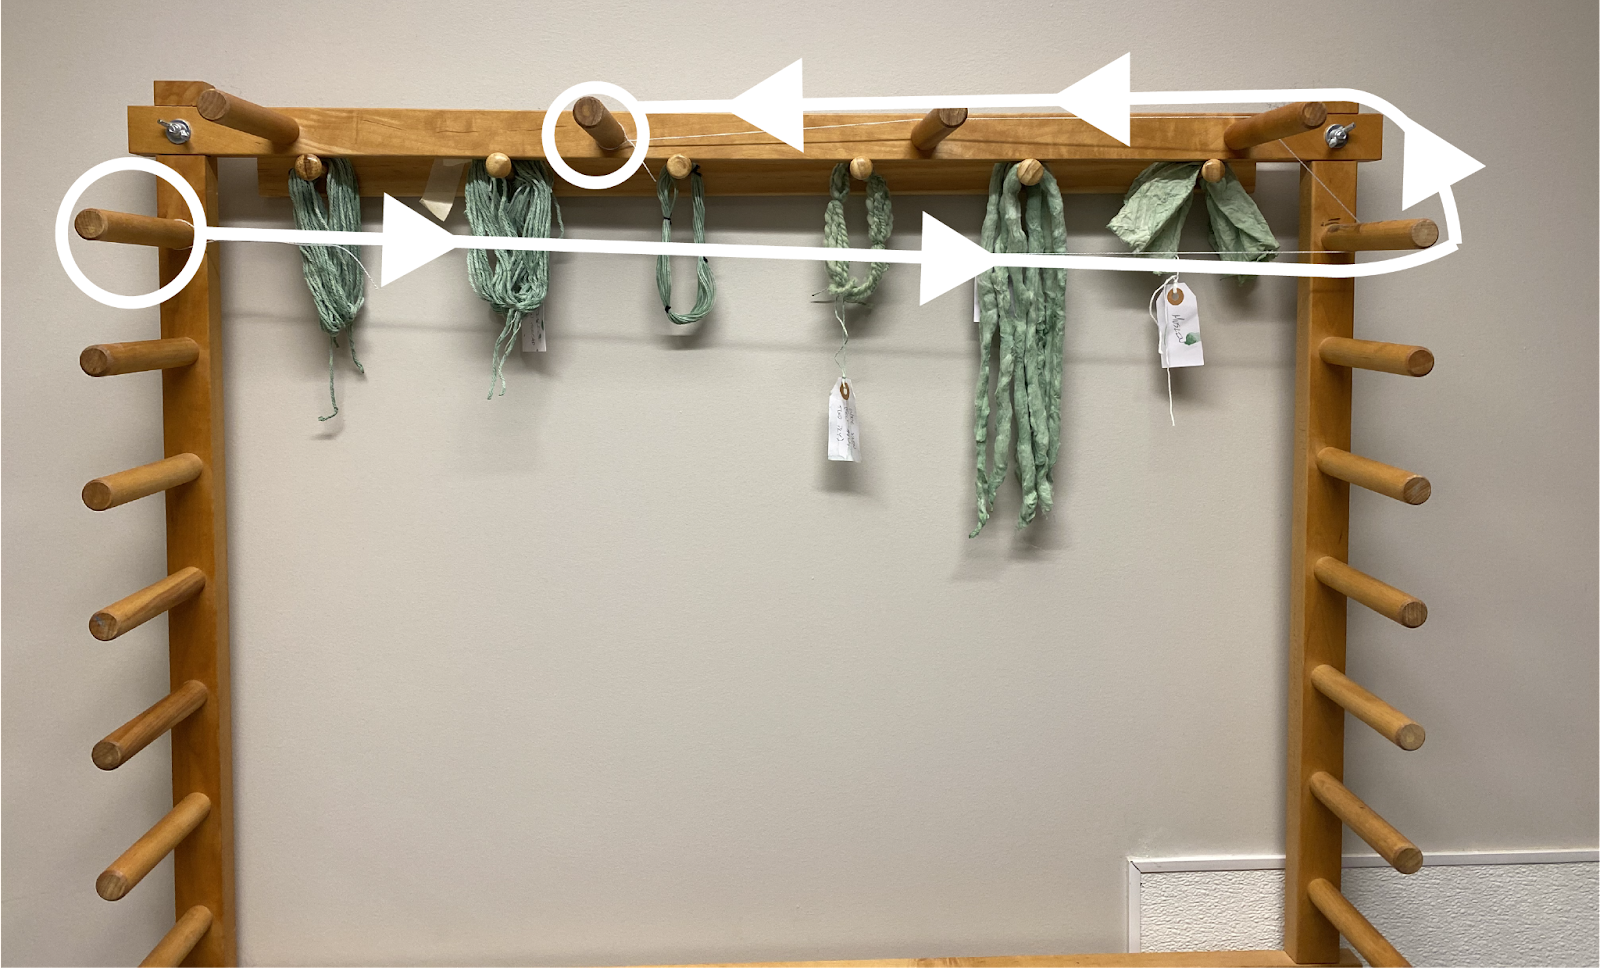
[1] Gather two bobbins of thread that are contrasting colors. Then, find a warping board and hang it such that you can access the pegs easily.
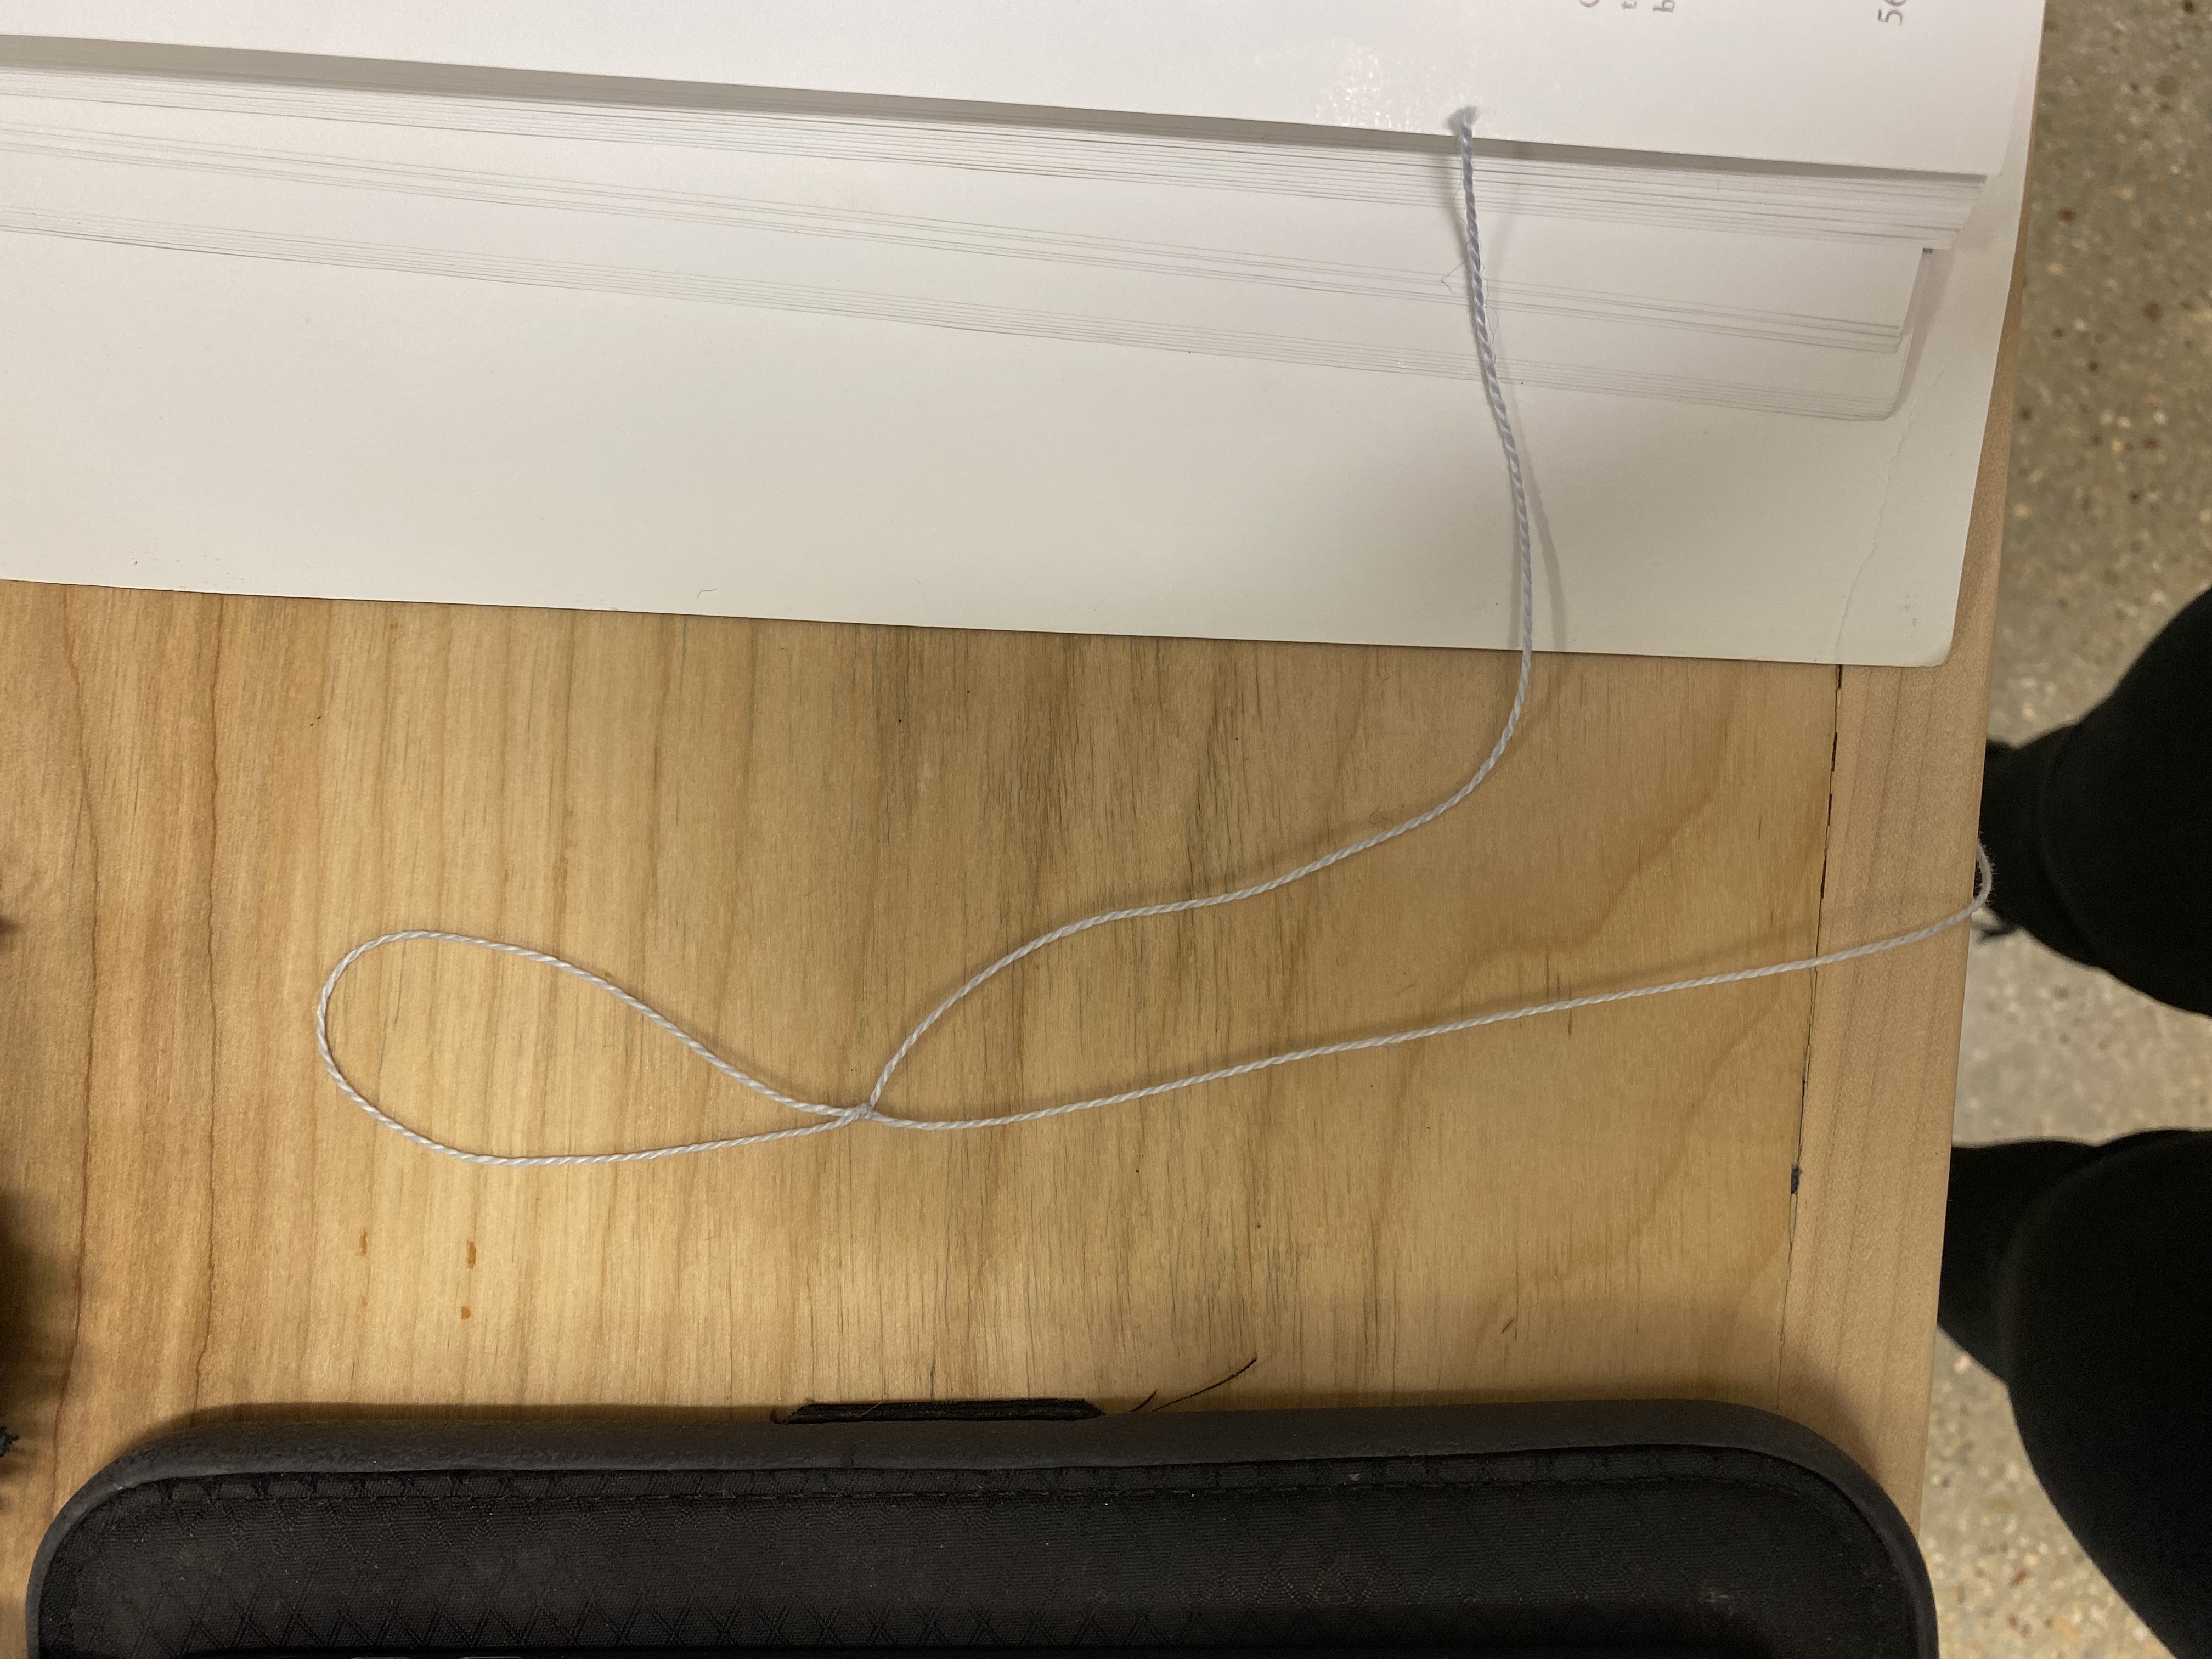
[2] Start with your first colored thread. Create a slip knot in one end of your thread and place it around the first peg. This will be the start of our guide thread.
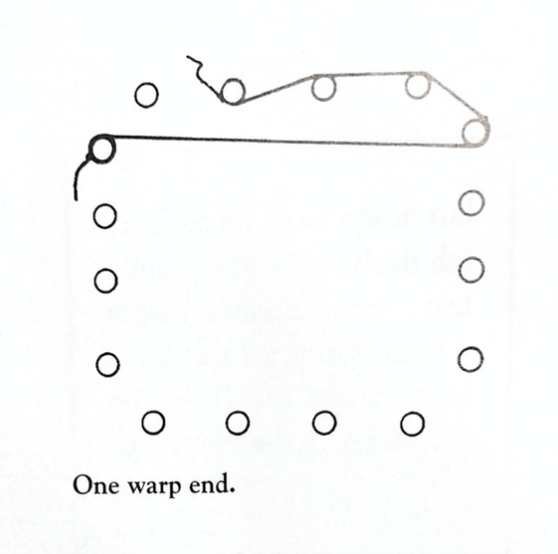
[3] Then, wrap the thread along the warping board by following the image above and secure it on the final peg with another slip knot. This thread will guide where you wrap your warp threads.
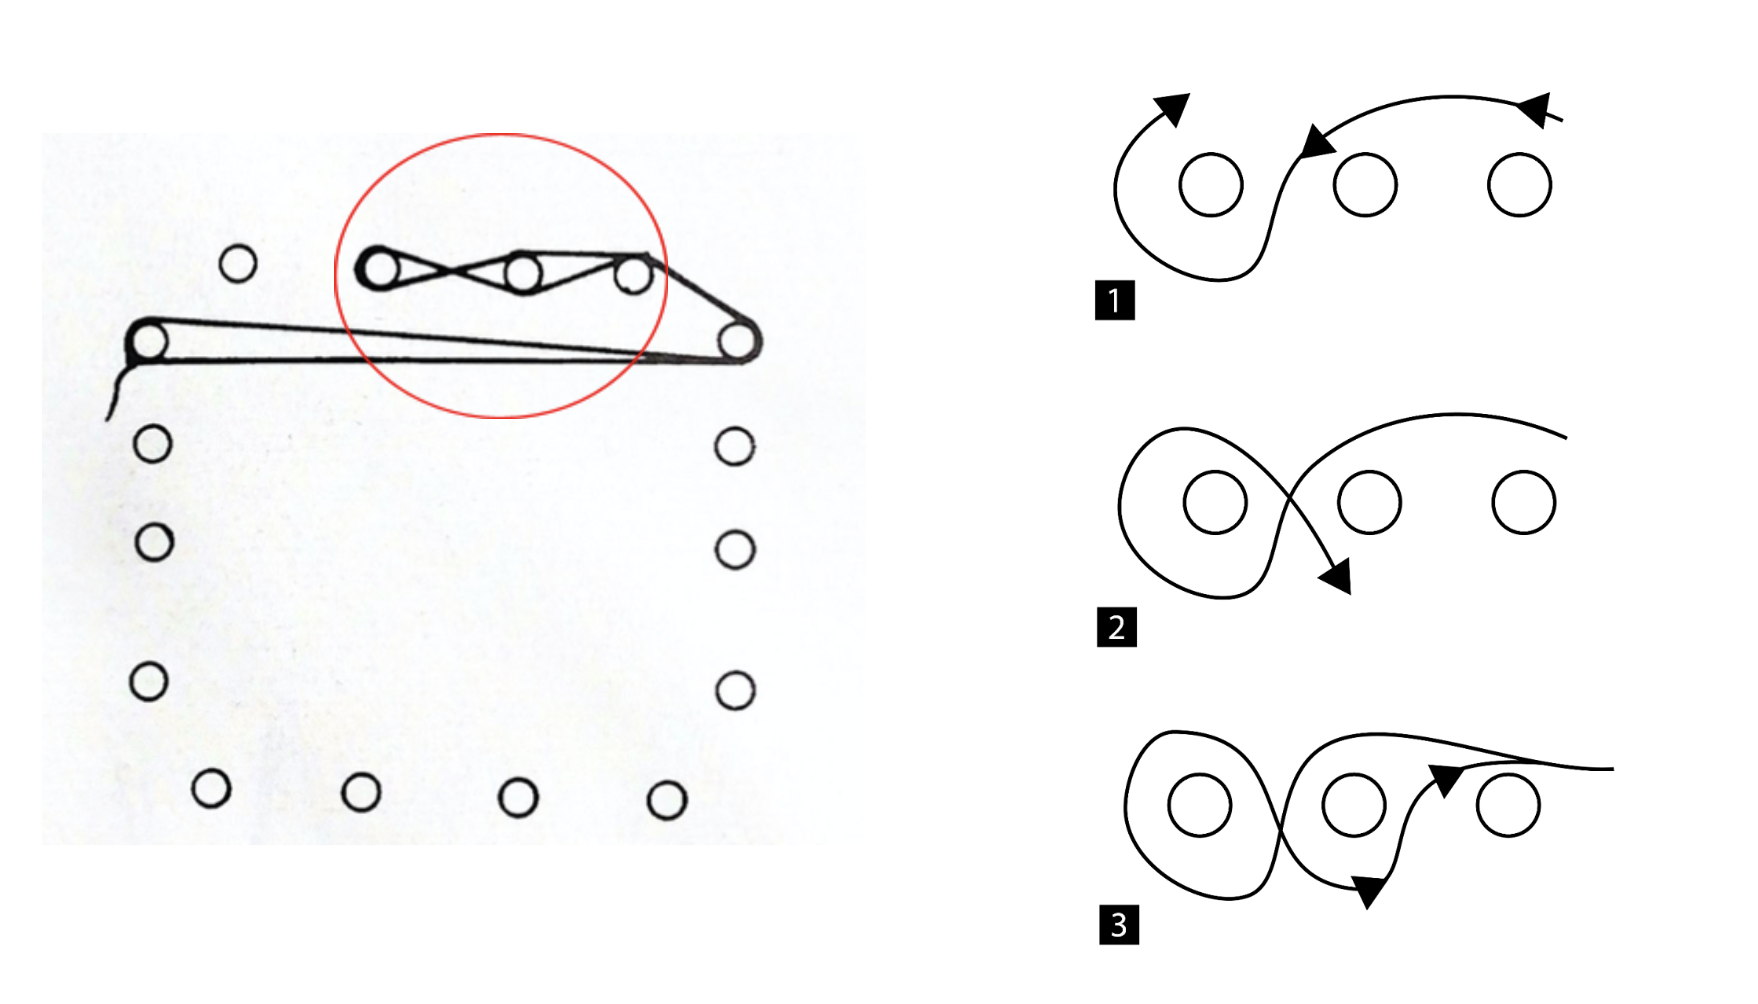
[4] Next, we are going to follow the guide string to add to the warp. This includes making a cross around the final two pegs. The cross is a figure-eight path around the final two pegs which will be helpful for string management later on. The left image shows the cross in context of the entire warping board.
[5] The right diagram shows how thread is taken around the final pegs to create the cross. When you reach the final two pegs, you will take the warp thread over the second to last peg, under and around the last peg (#1), and back under the second to last peg (#2) to meet the thread you brought again on top of the third to last peg (#3). )

[6] The video and illustration show adding a warp thread to the board with a cross
[7] When you reach the initial peg again (as shown by step 4 above), you will repeat this motion until you have measured 12 threads of this first color.
[8] To get 12 threads, you will travel from the first to last peg and back, counting a new thread each time you reach an ending peg. EXAMPLE: starting on the first peg, you travel along the board until you reach the end of the cross. That is 1 thread. Then, after making the cross you travel back to the first peg. That is the 2 threads. You can check your progress by counting the number of threads on top of the second to last peg and multiplying it by two (half of the threads will be over the cross and half under).

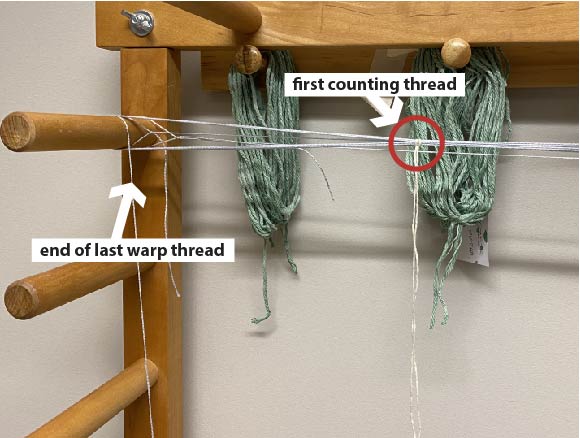
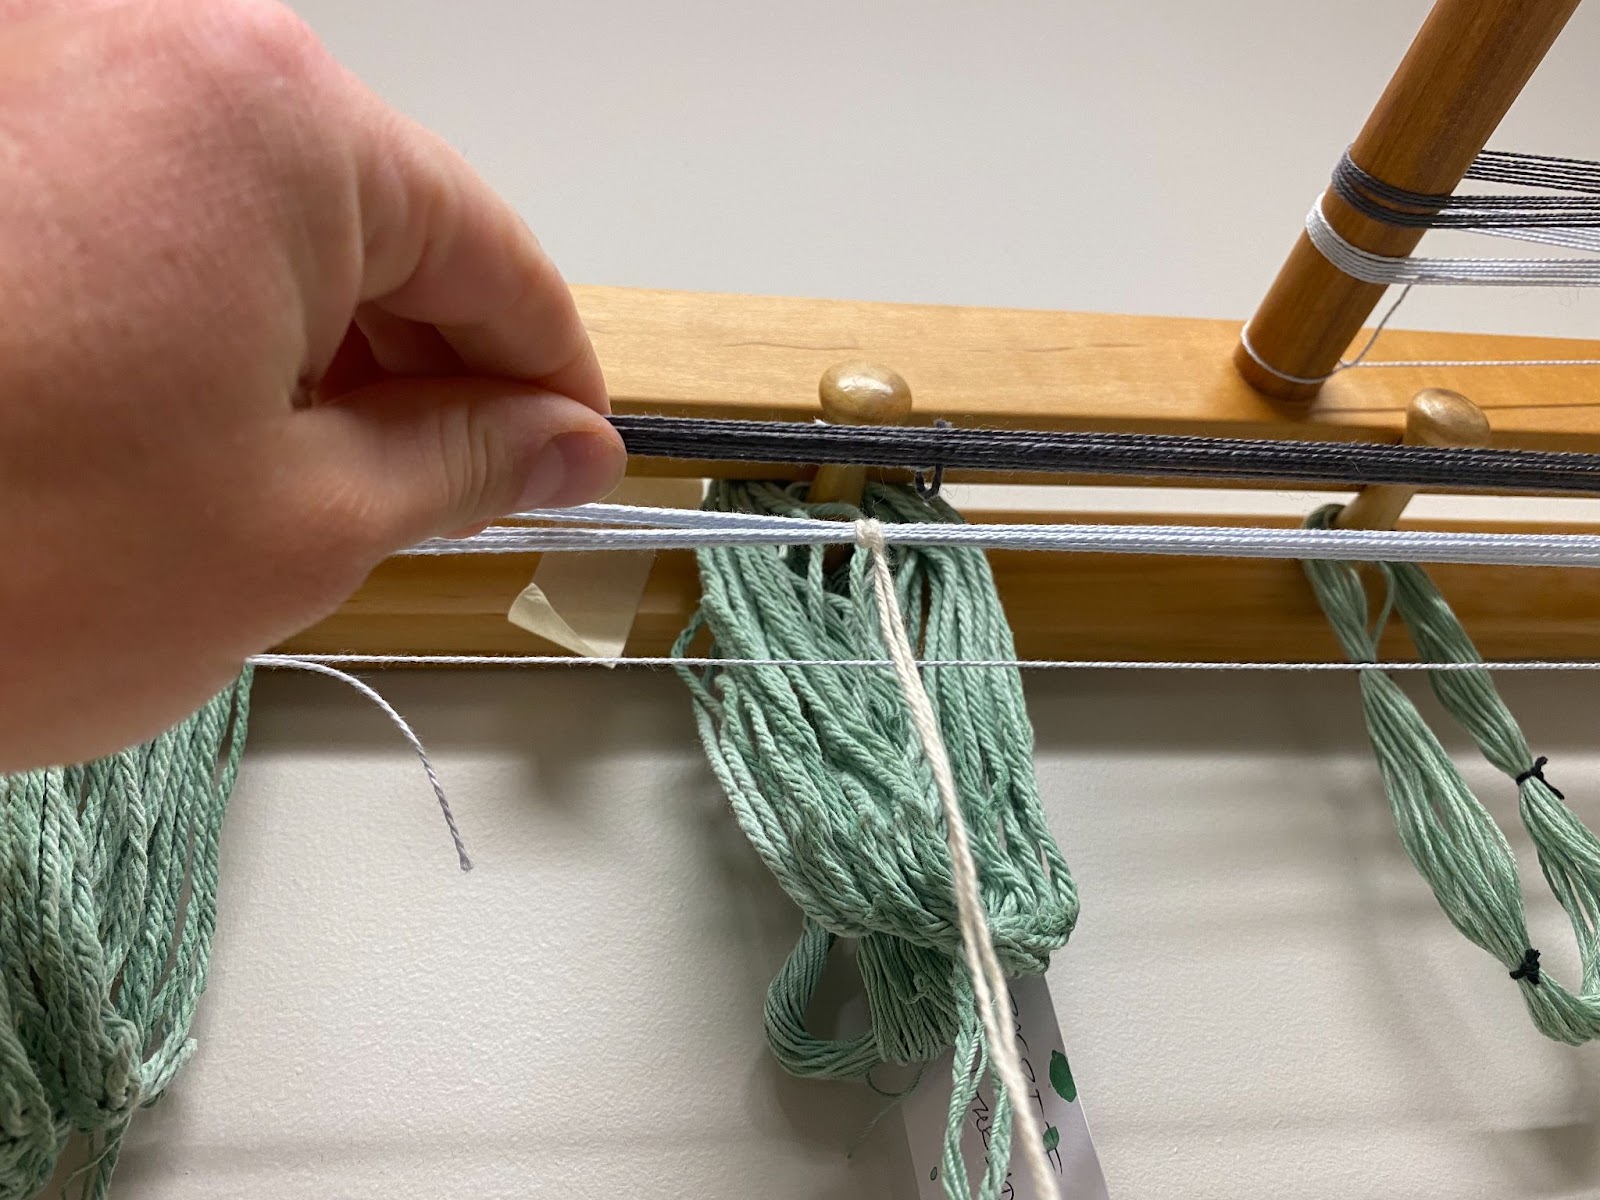
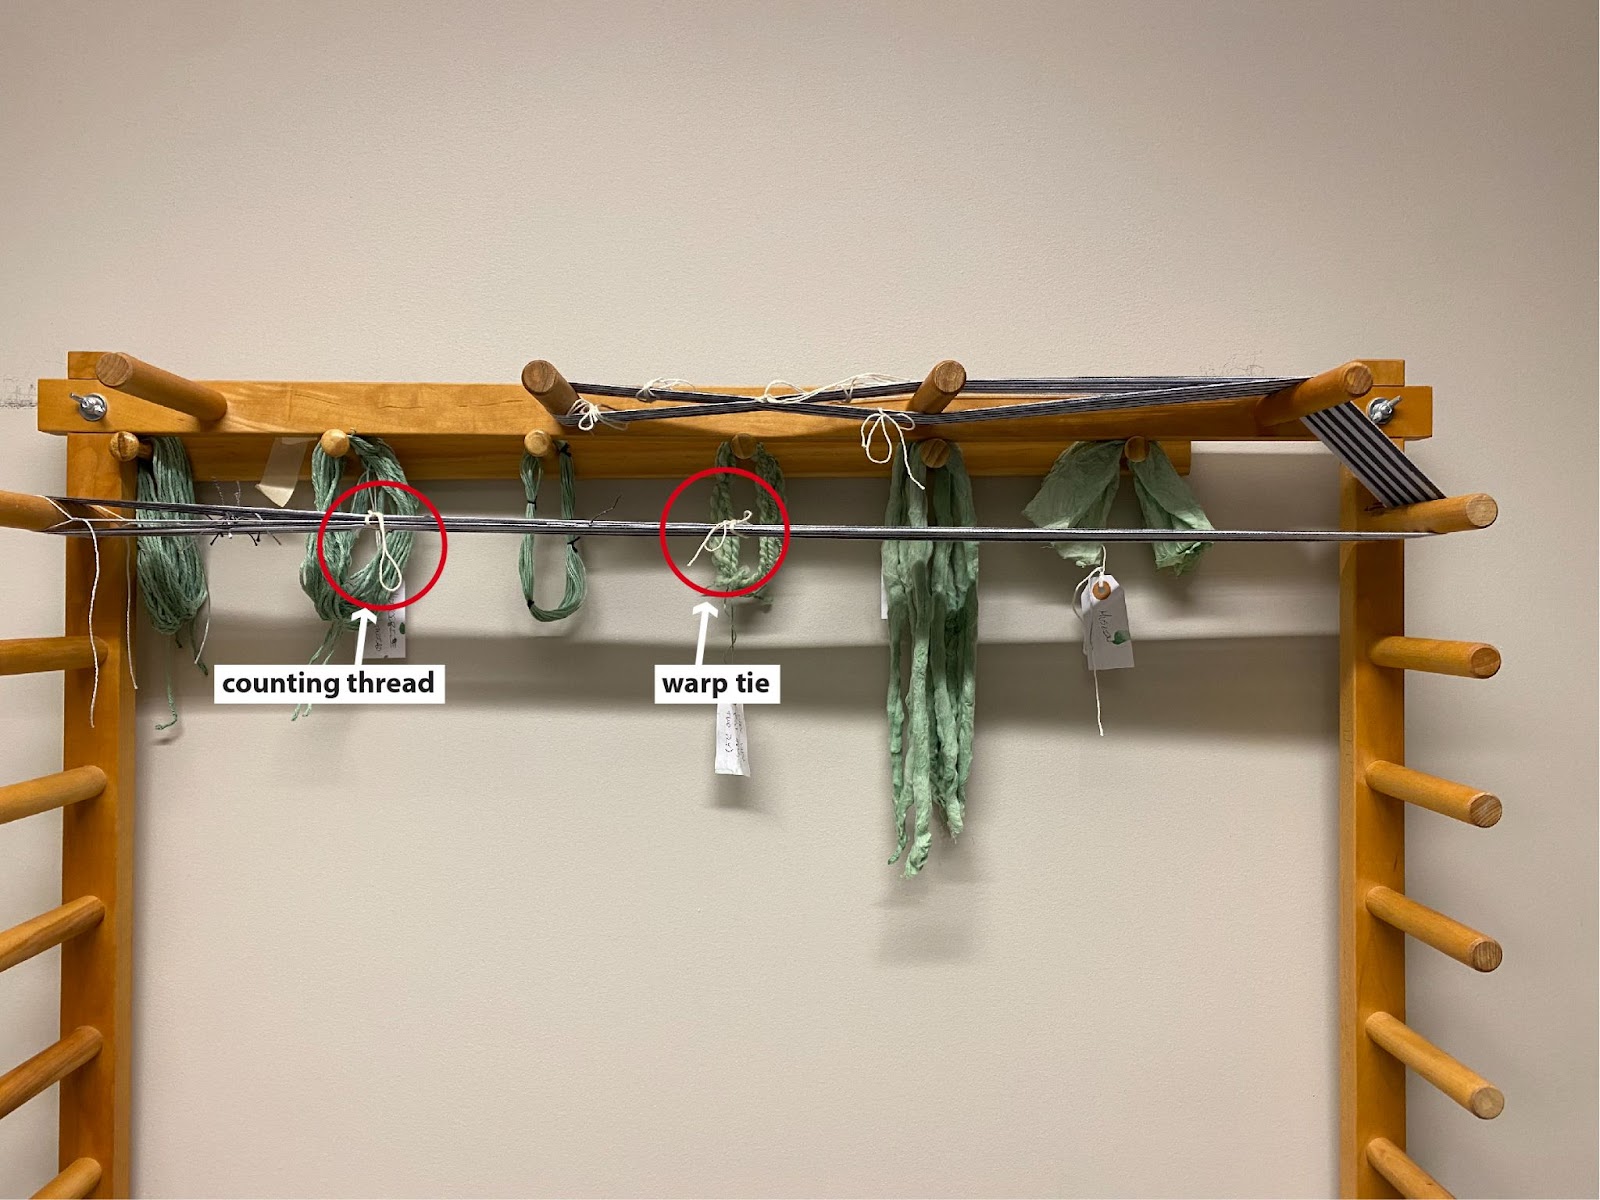
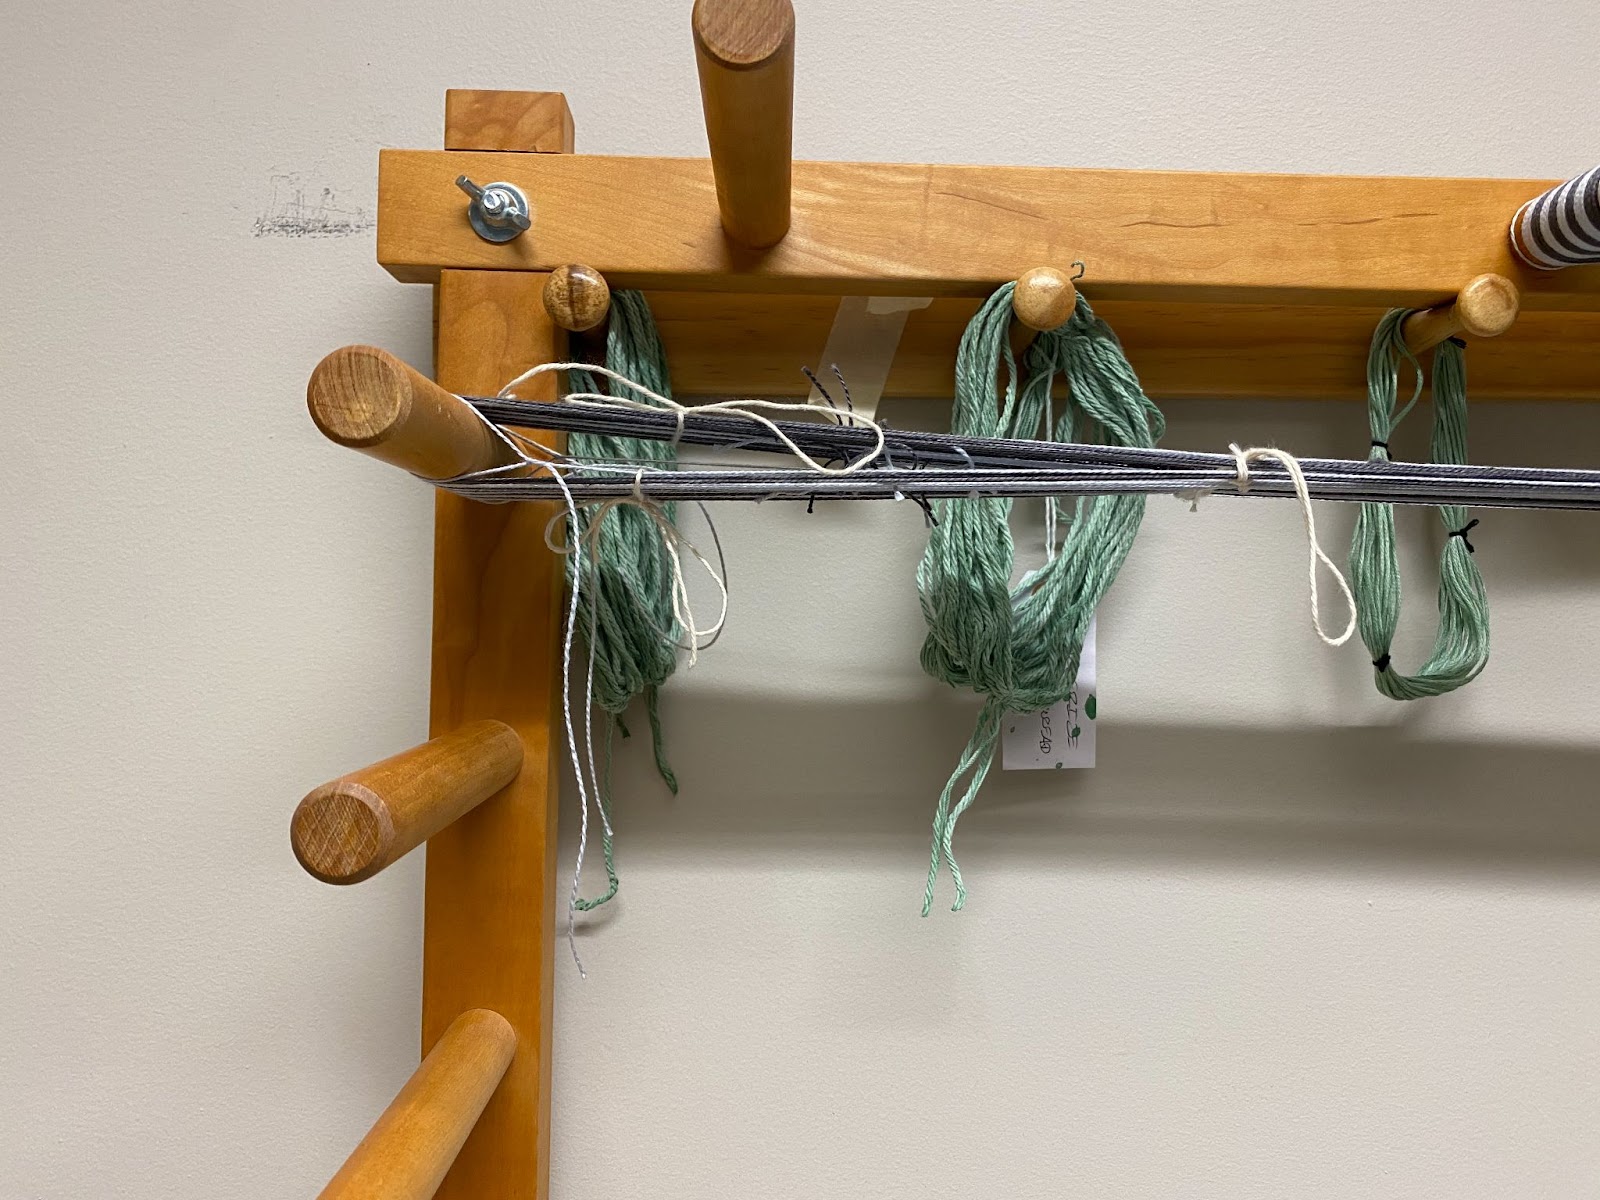
[9] Once this first section is complete, you will tie a counting thread on the warp which is used to lay threads in the correct order on the loom later on.
[10] Tie the counting thread on this bunch of thread so that it will secure that bunch together but you can also take it out later on. A half knot will suffice. See on the right image how that same counting thread will be secured to the next bunch as well, so make sure to cut enough to span the width of your warp.
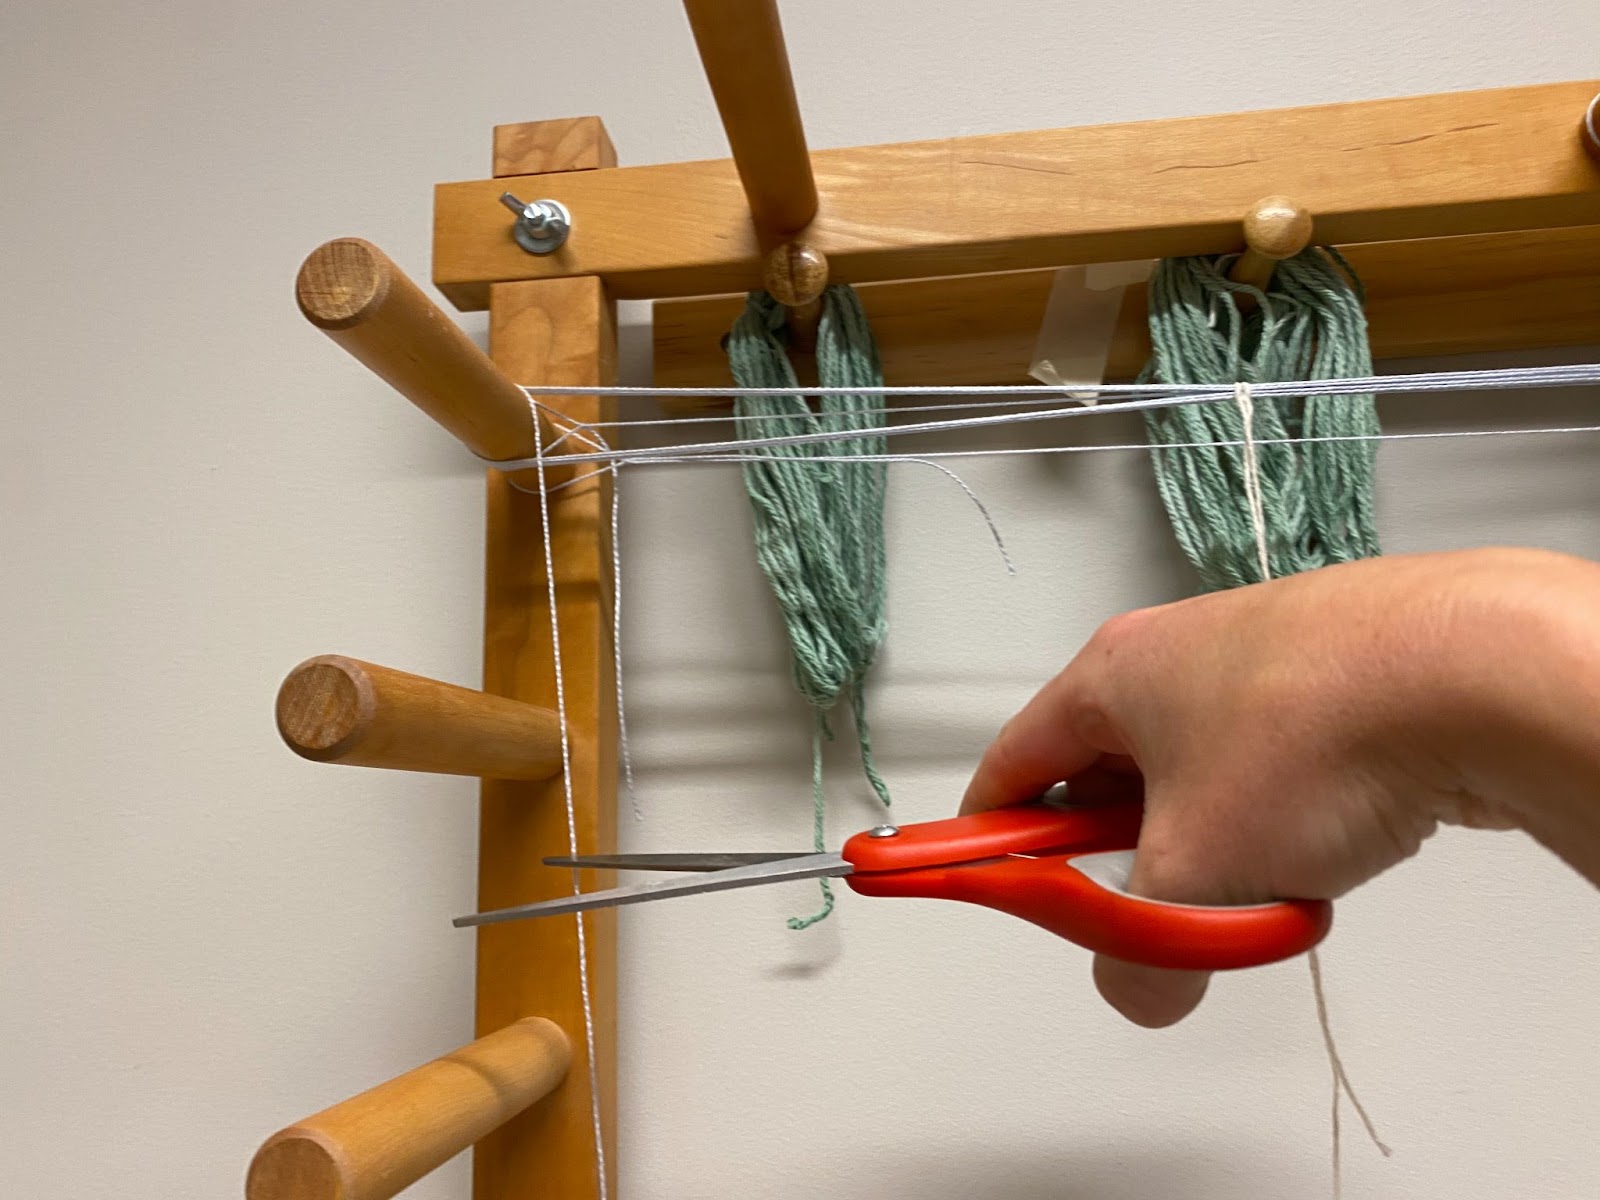

[11] Next, you will need to grab the second color you picked so that you can use if for your next stripe. [12] Begin by cutting the end of the first color about an inch or two past the end of the peg and tie the second color to it.
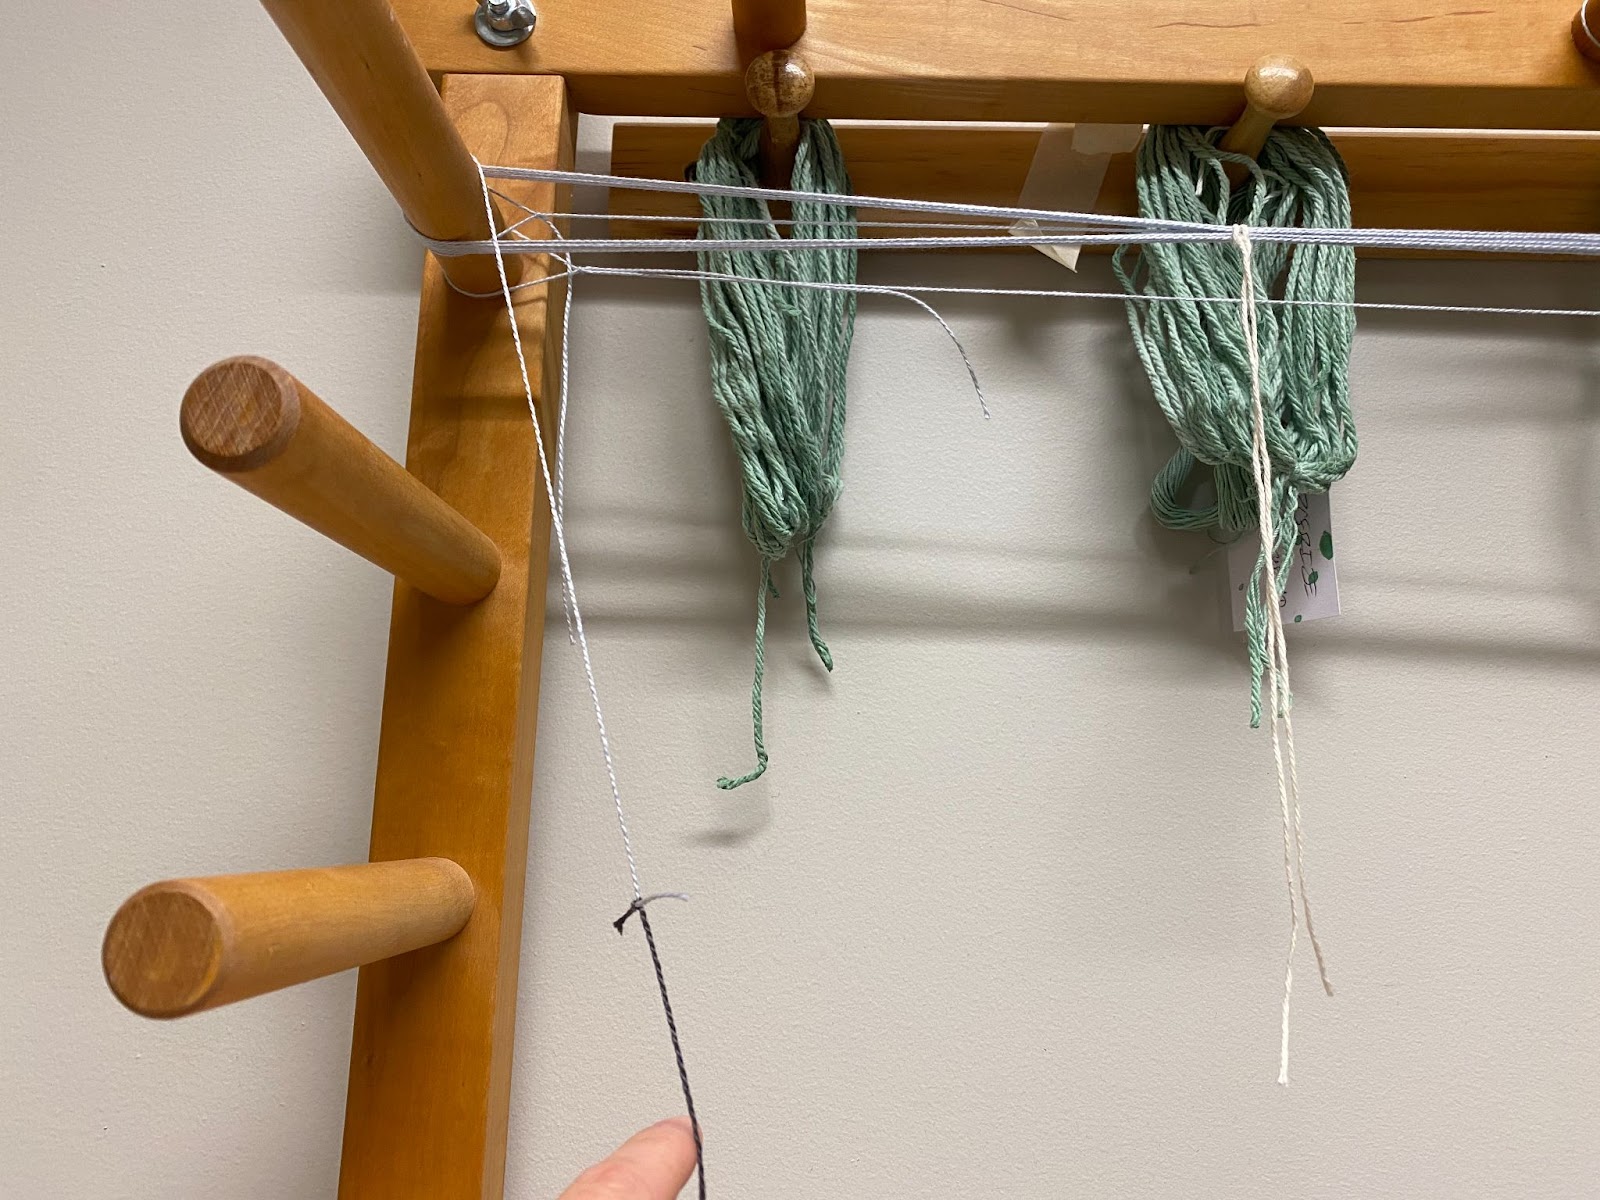
[13] With this second color attached, measure 12 threads again just as before. [14] When finished, tie the tails of the counting thread from the first stripe around that inch of warp you just made with the second color
[15] Then, cut the end of that second stripe, and re-attach the first color to the end just as before. Measure 12 threads with that color.
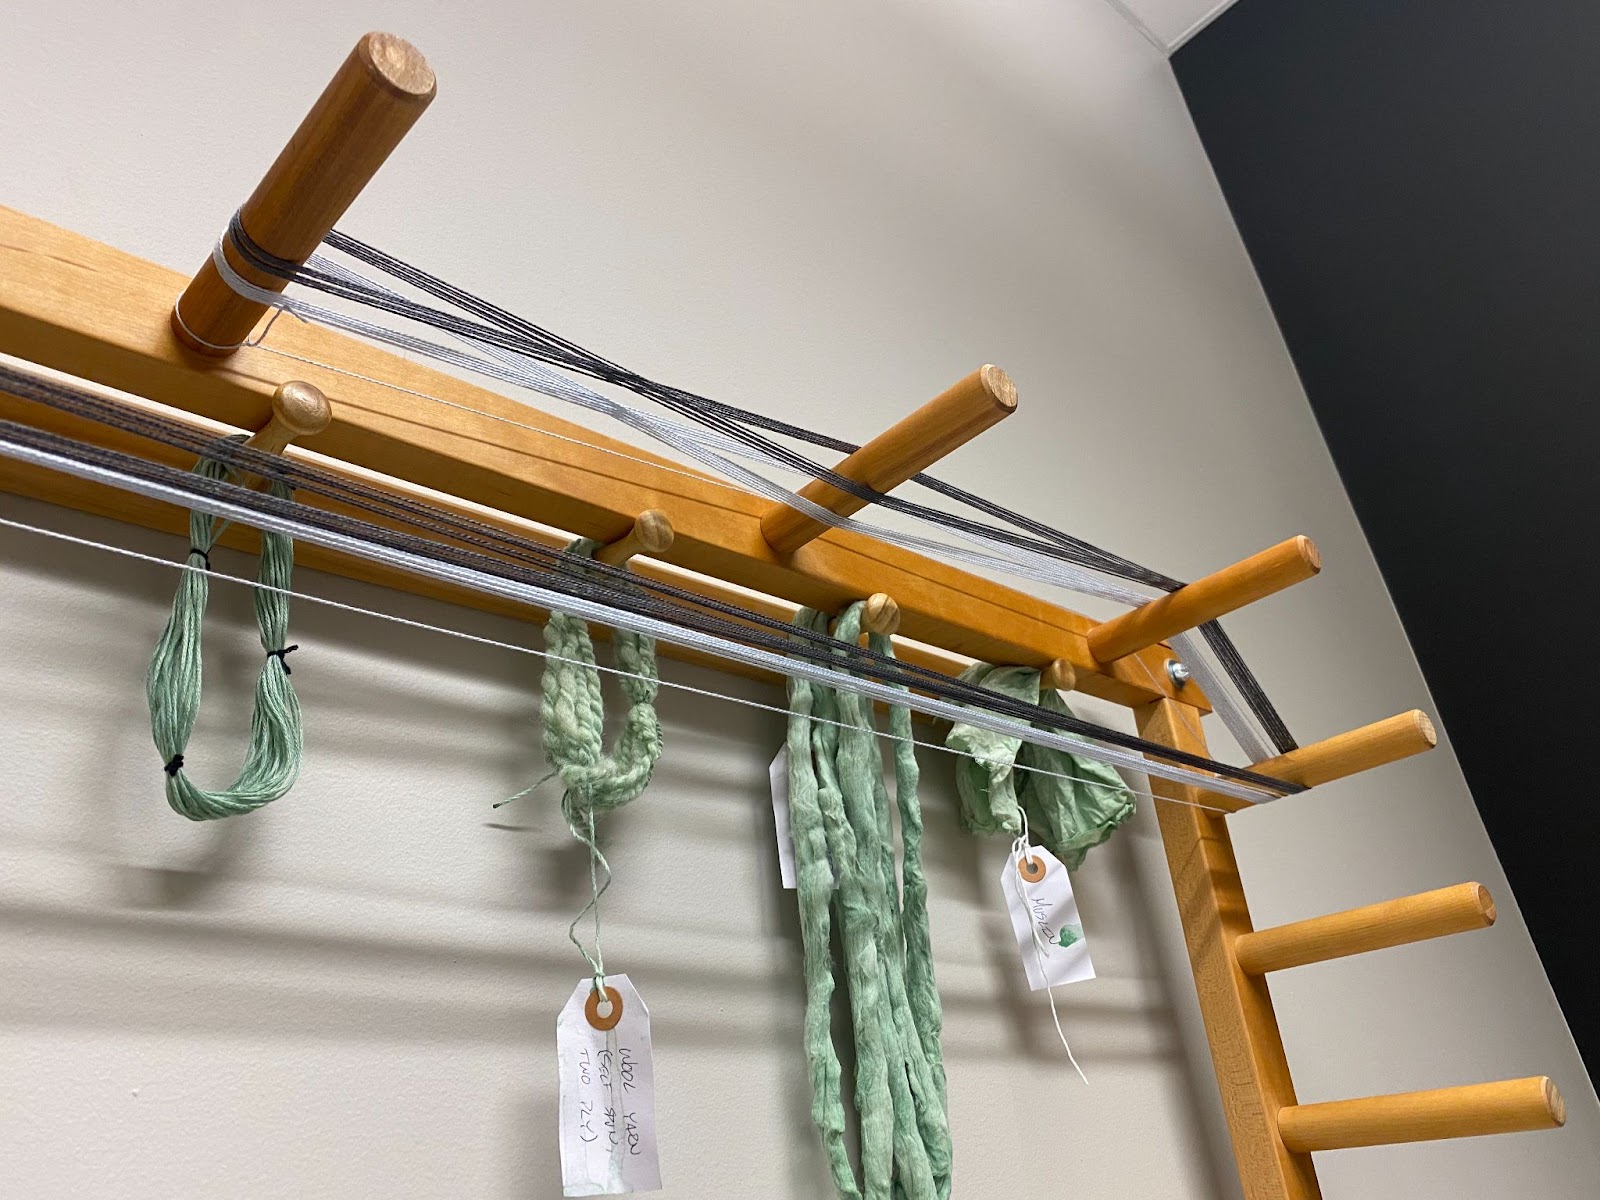
[16] Continue this process until you have 10 total stripes, 5 of one color and five of the other color
Step 2: Tie the Cross
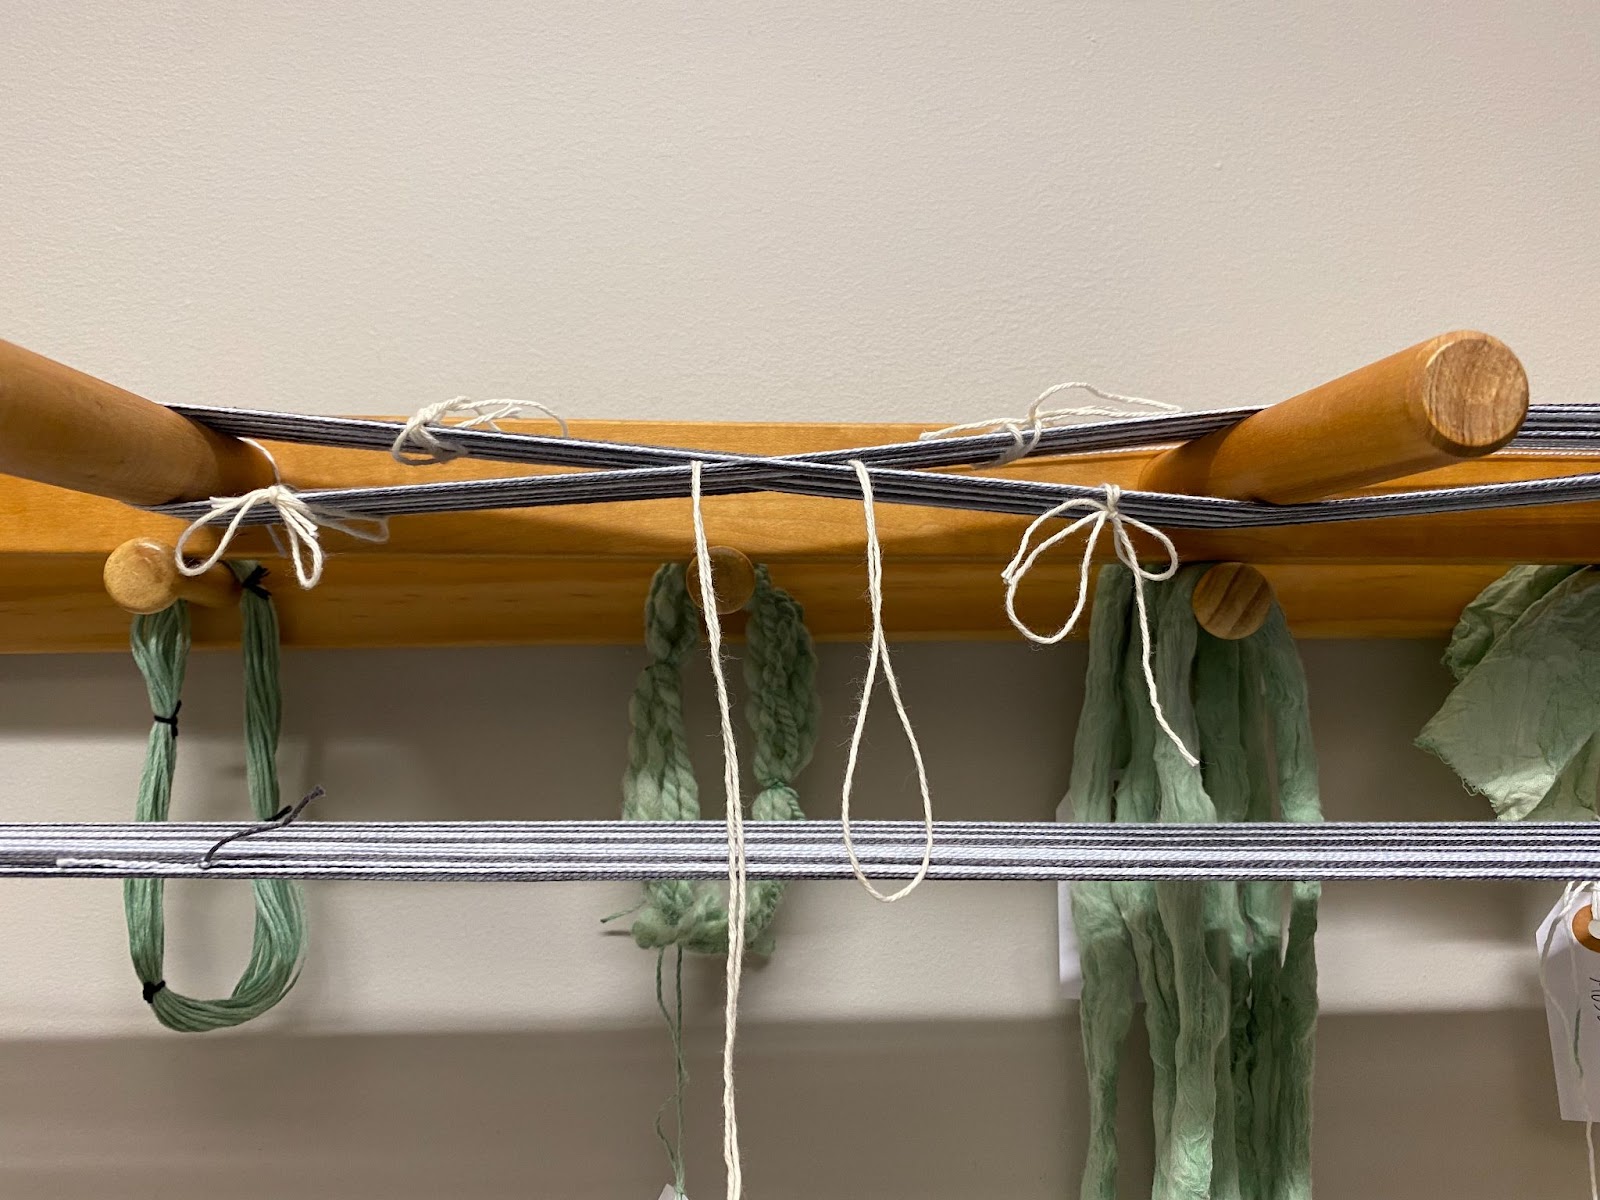
[1] Now that you have all your warp, you want to secure it before moving it over to the loom to ensure that the threads stay in order
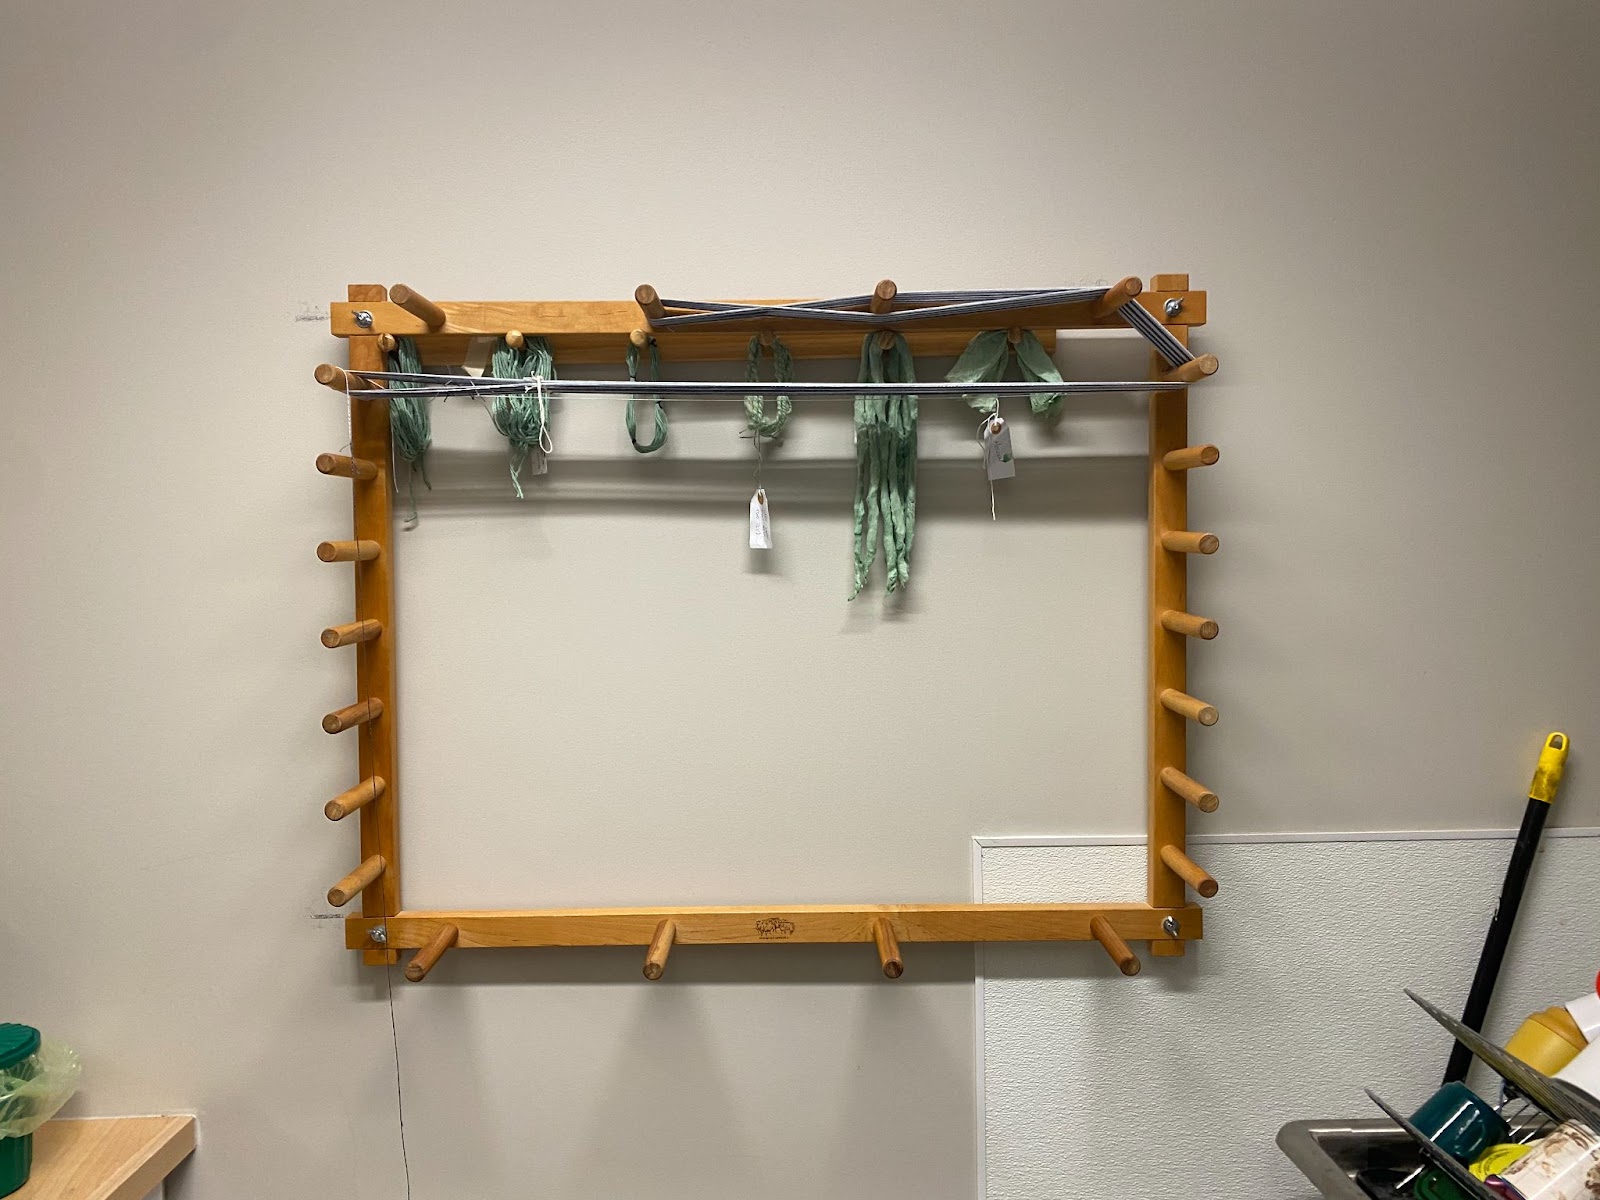
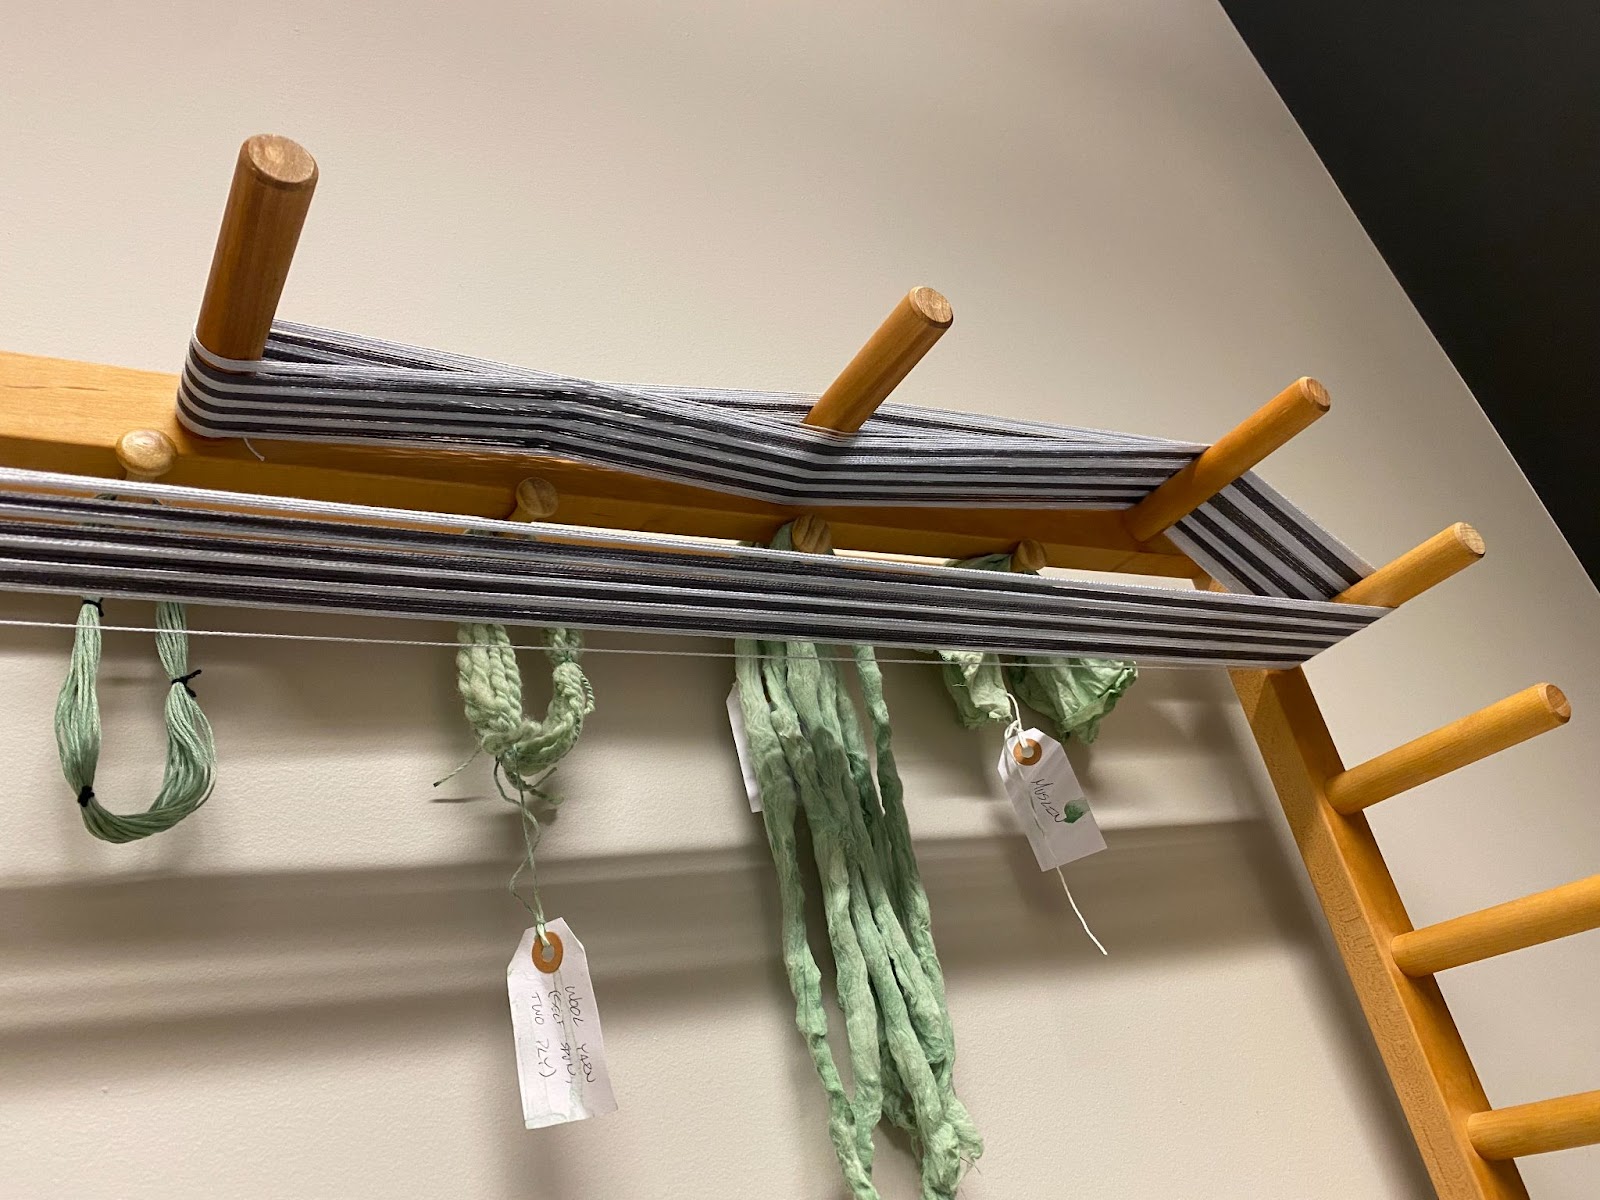
[2] To do so, we will tie a string around 5 areas: the top and bottom of the loops on either side of the cross and around the intersection of threads themselves. Begin by tying string around the loops as seen above. Again, you will eventually untie these, so make sure they are secure enough to hold the threads, but loose enough to get undone
 |
 |
 |
 |
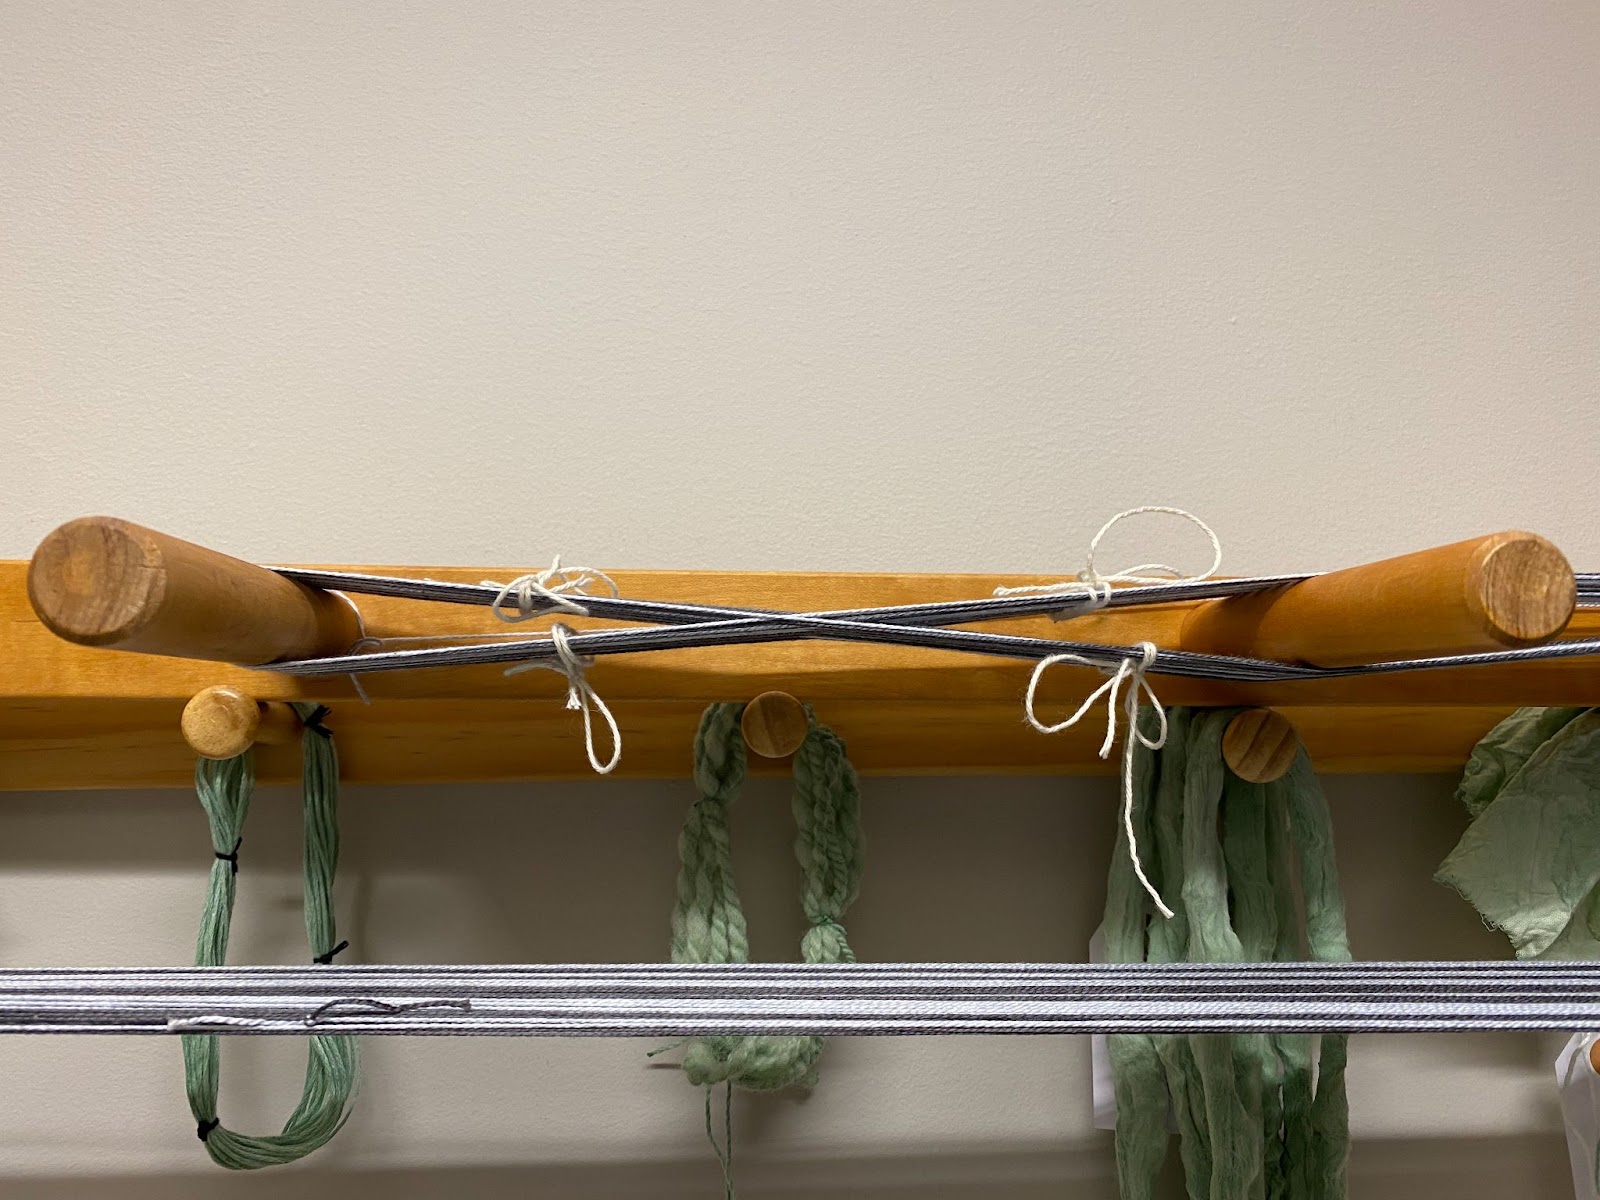
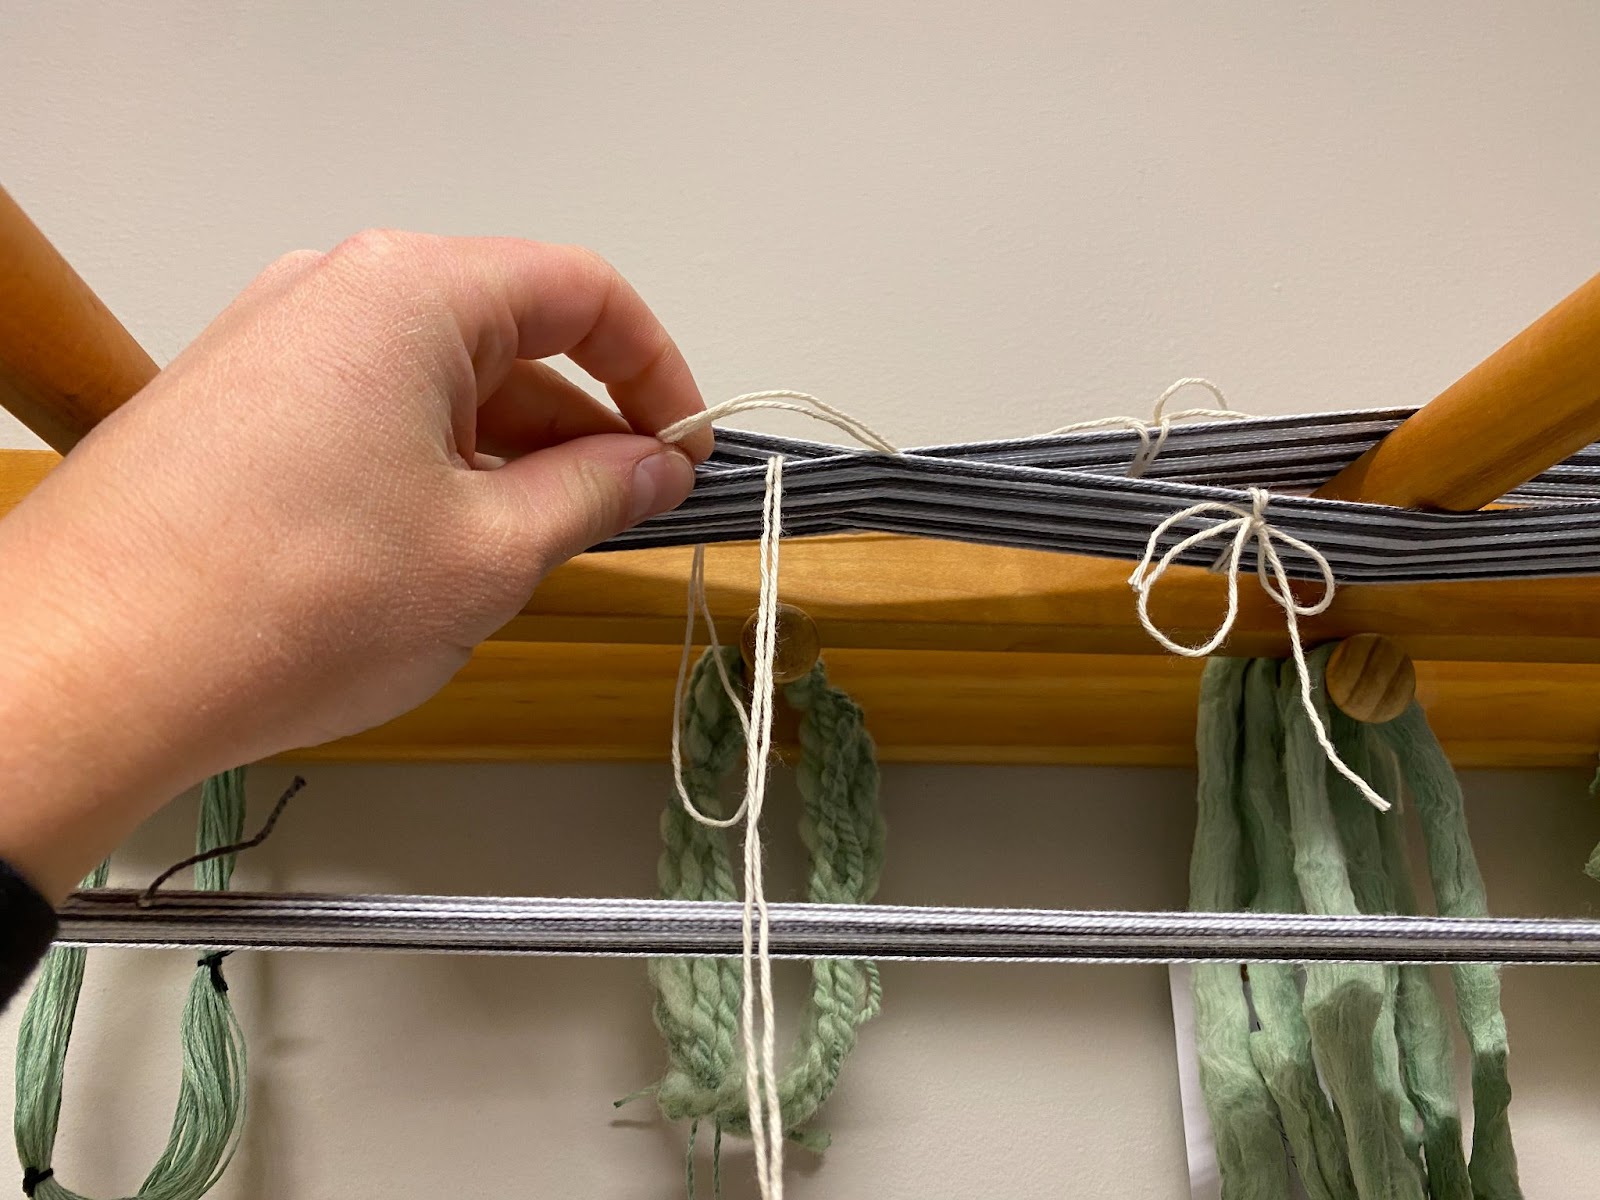
[3] Next, you will tie the middle of the cross. Begin by taking a string around the back of the cross so both ends are facing you
[4] Then, wrap one end of the string back through the loop and around to the front on the other side.
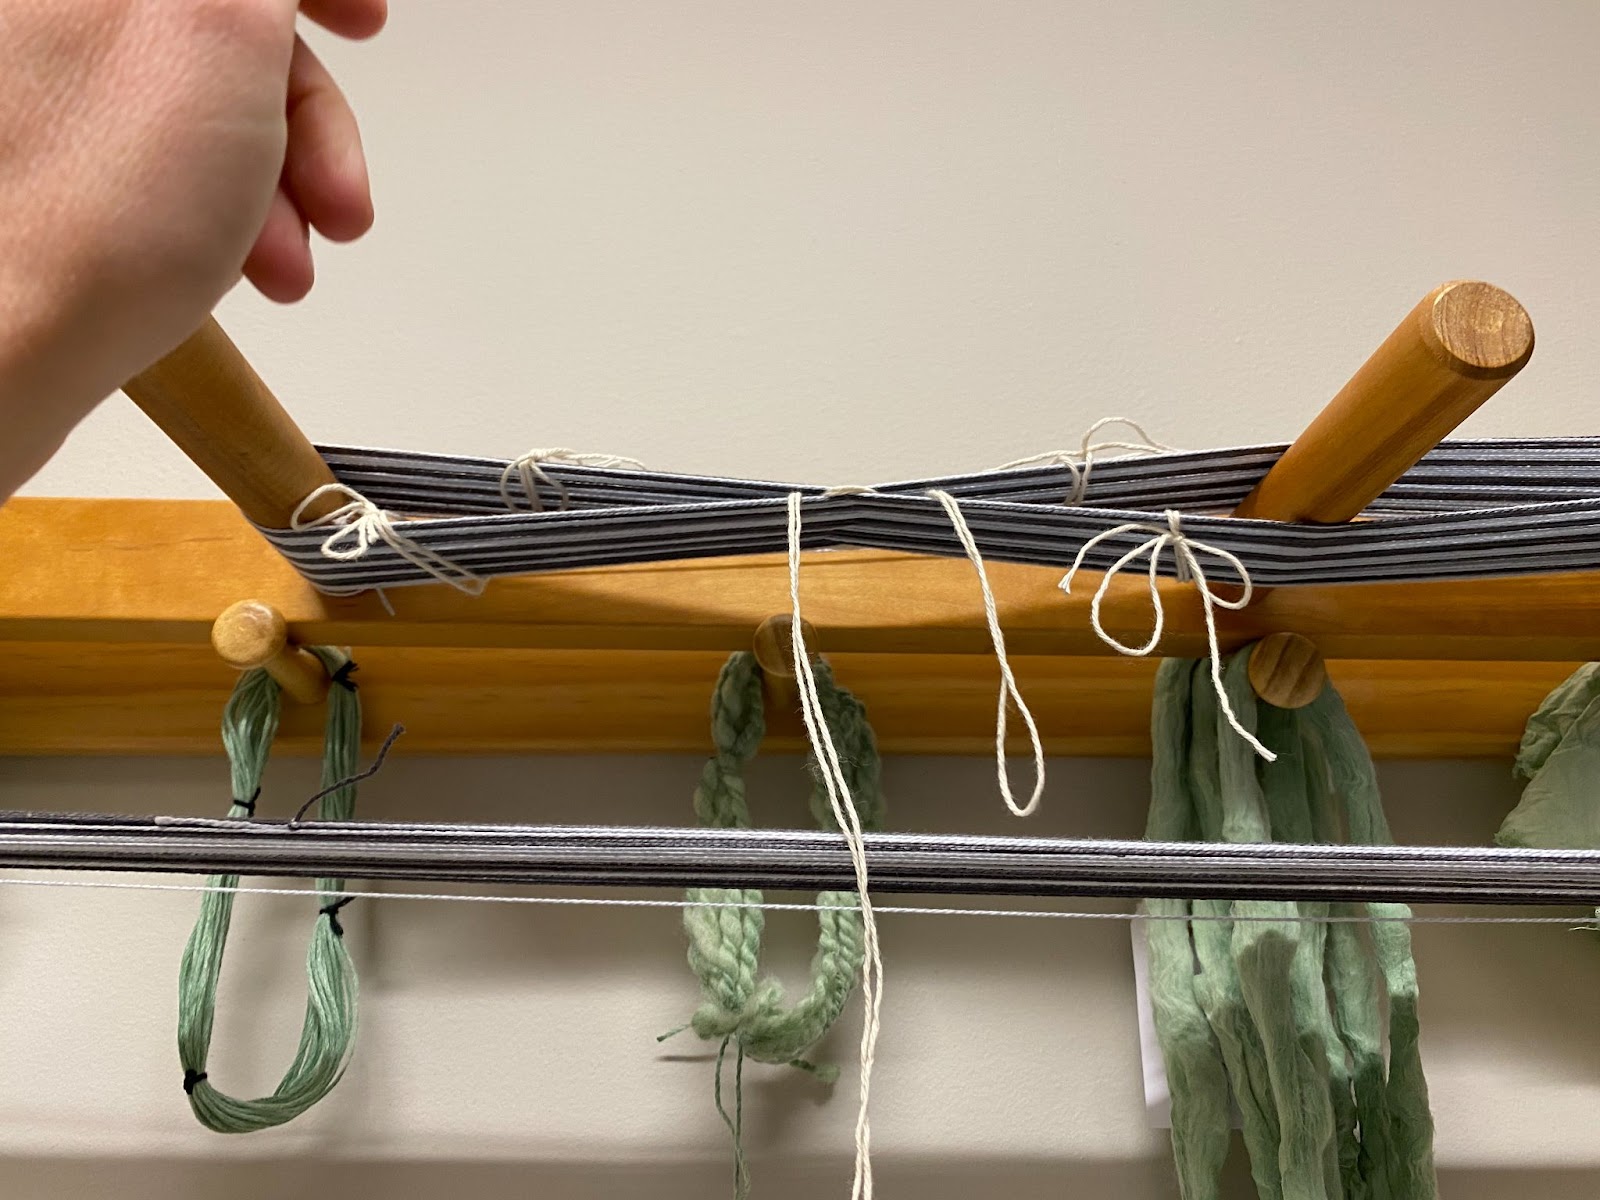
[5] Tie the two ends together to make a half knot
[6] Now, double check that your counting threads are all tied properly and tie one more piece of thread around the middle of the warp
[7] Finally, tie the top and bottom of the starting loop just as you did the loops of the cross.
Step 3: Attach Warp to Back Apron Rod
[1] Begin by lifting the beater out of the loom by taking off the rail and reed so that you can easily access the shafts.

[2] Slide all heddles on the shafts to the sides so there is a clear space between them
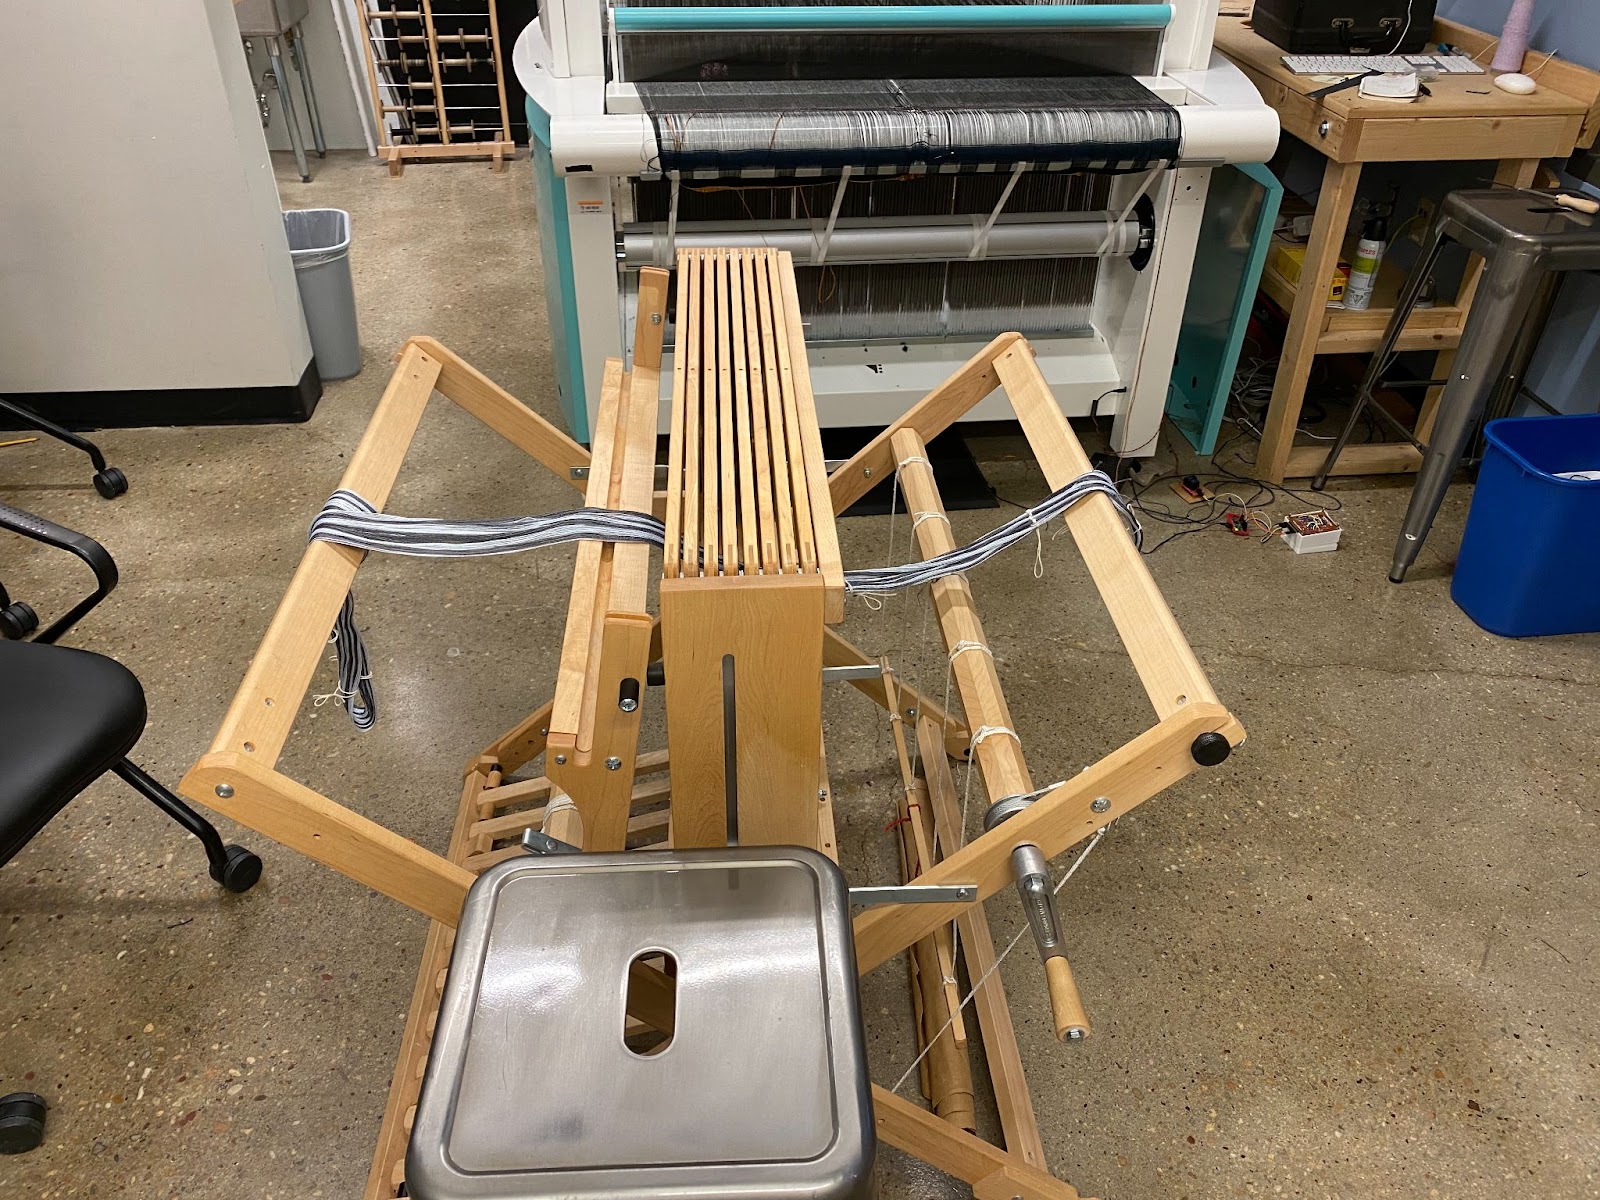

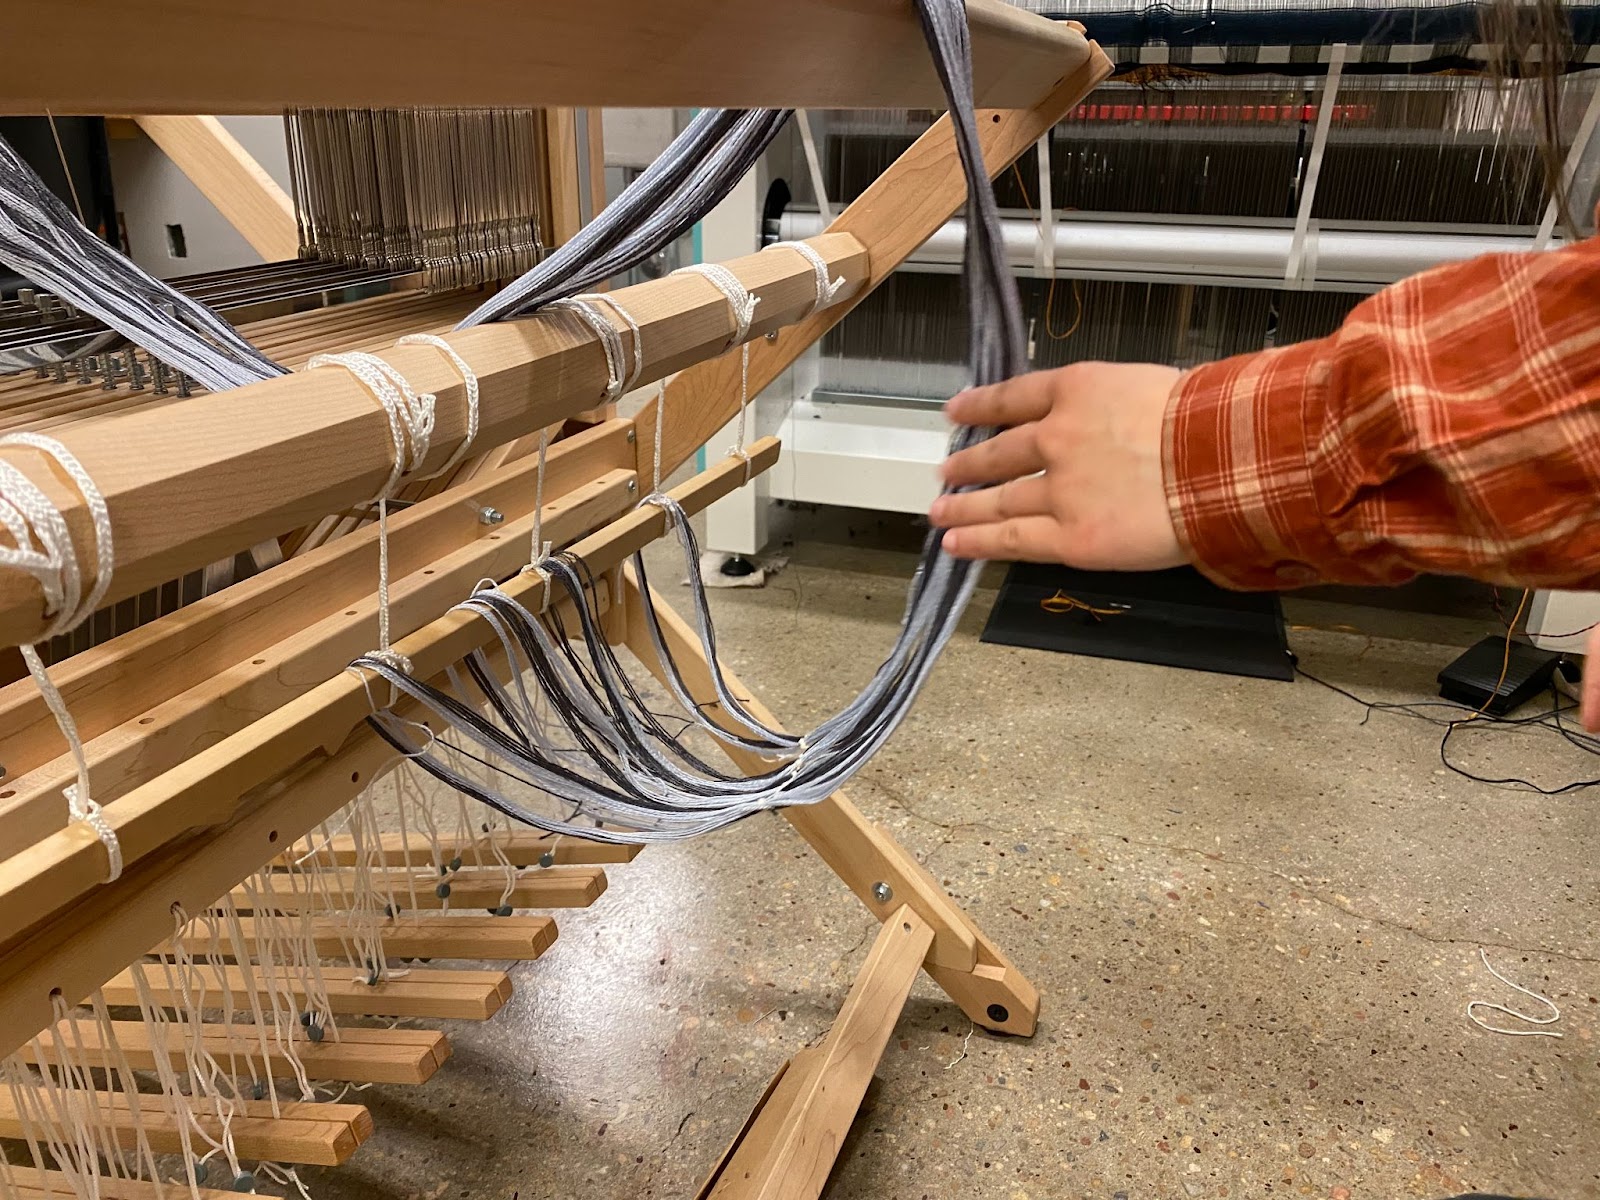
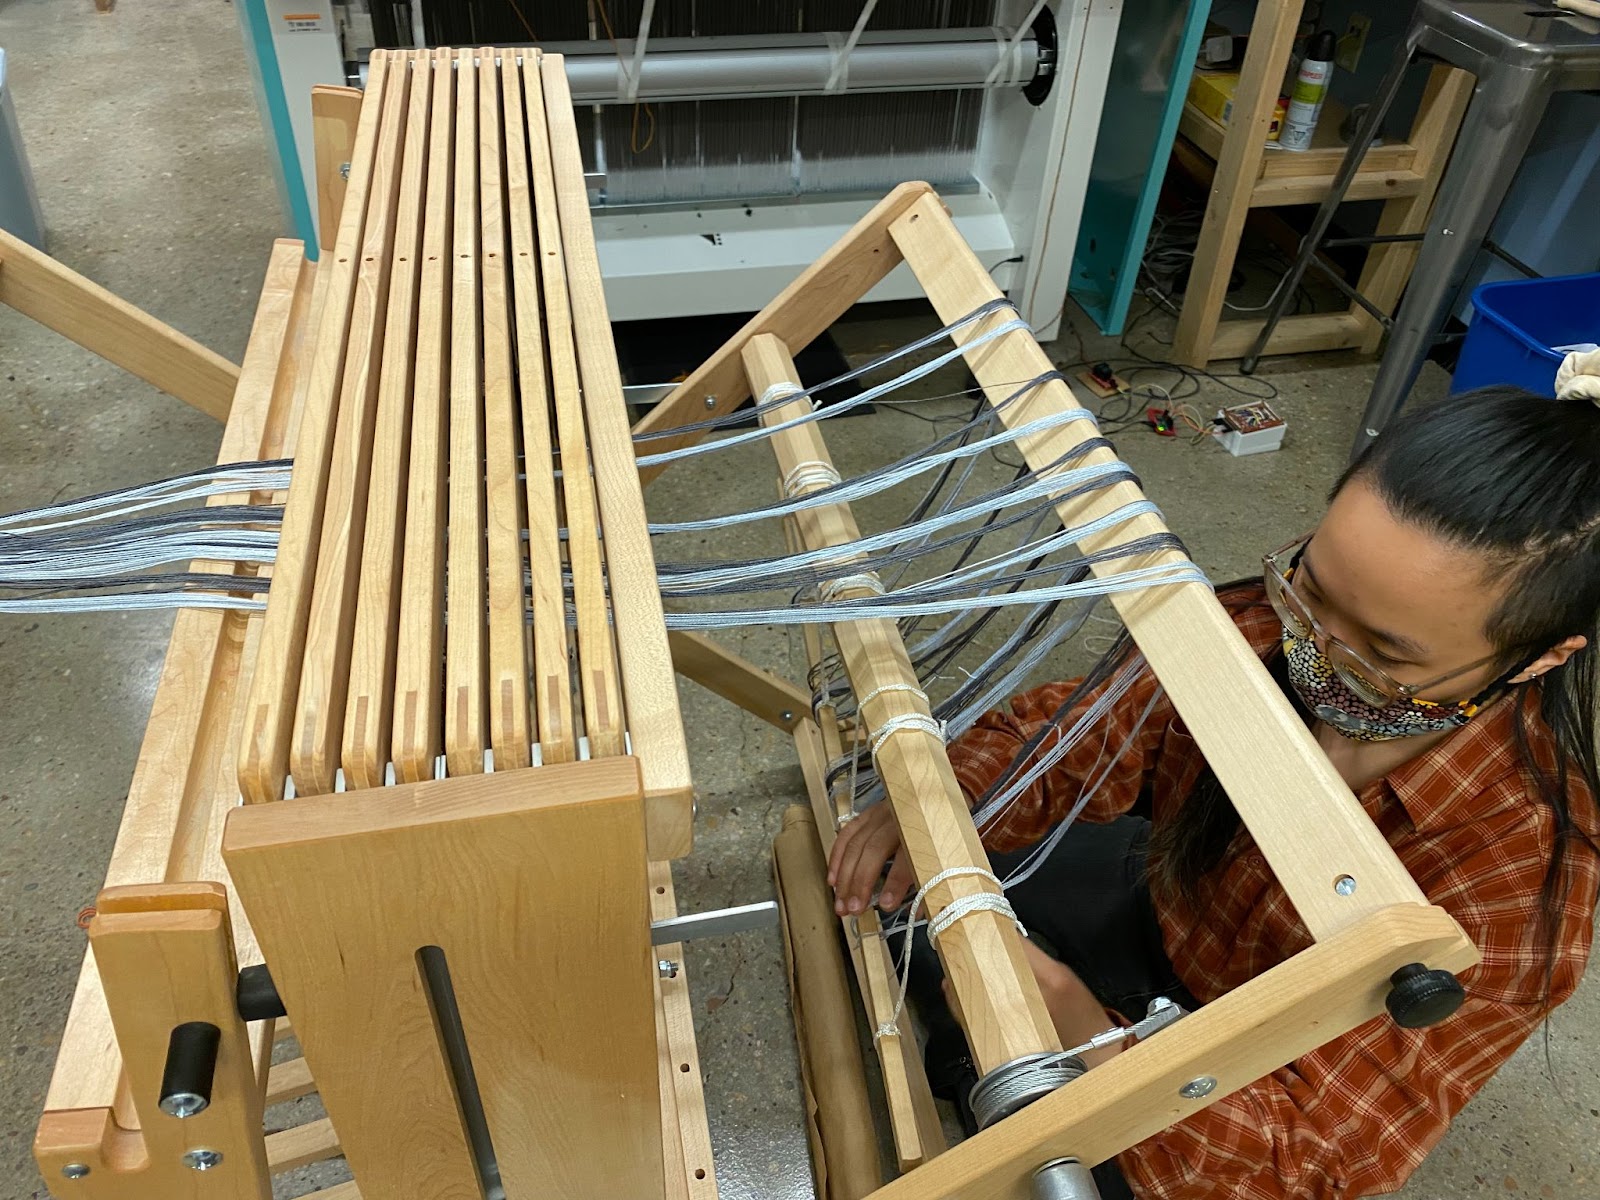
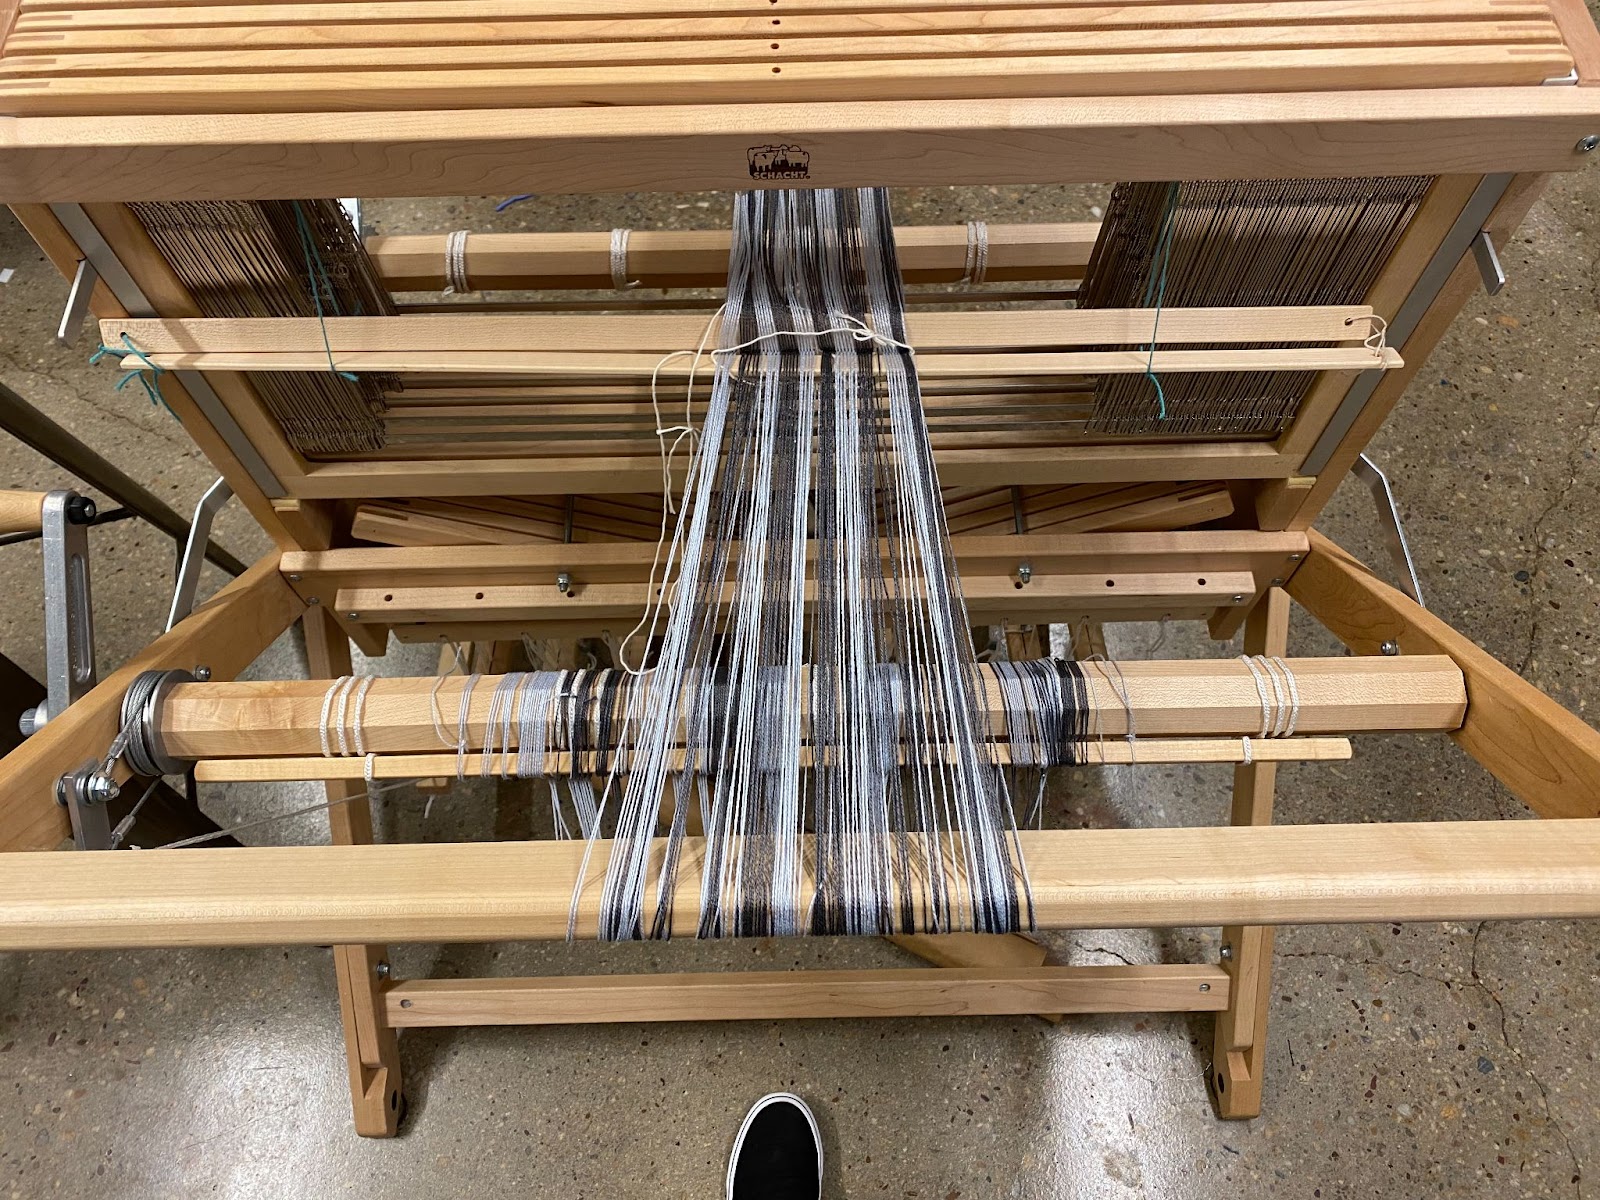
[3] Place the warp along the loom by wrapping the cross end around the front beam and guiding the rest of the warp to rest on the back beam
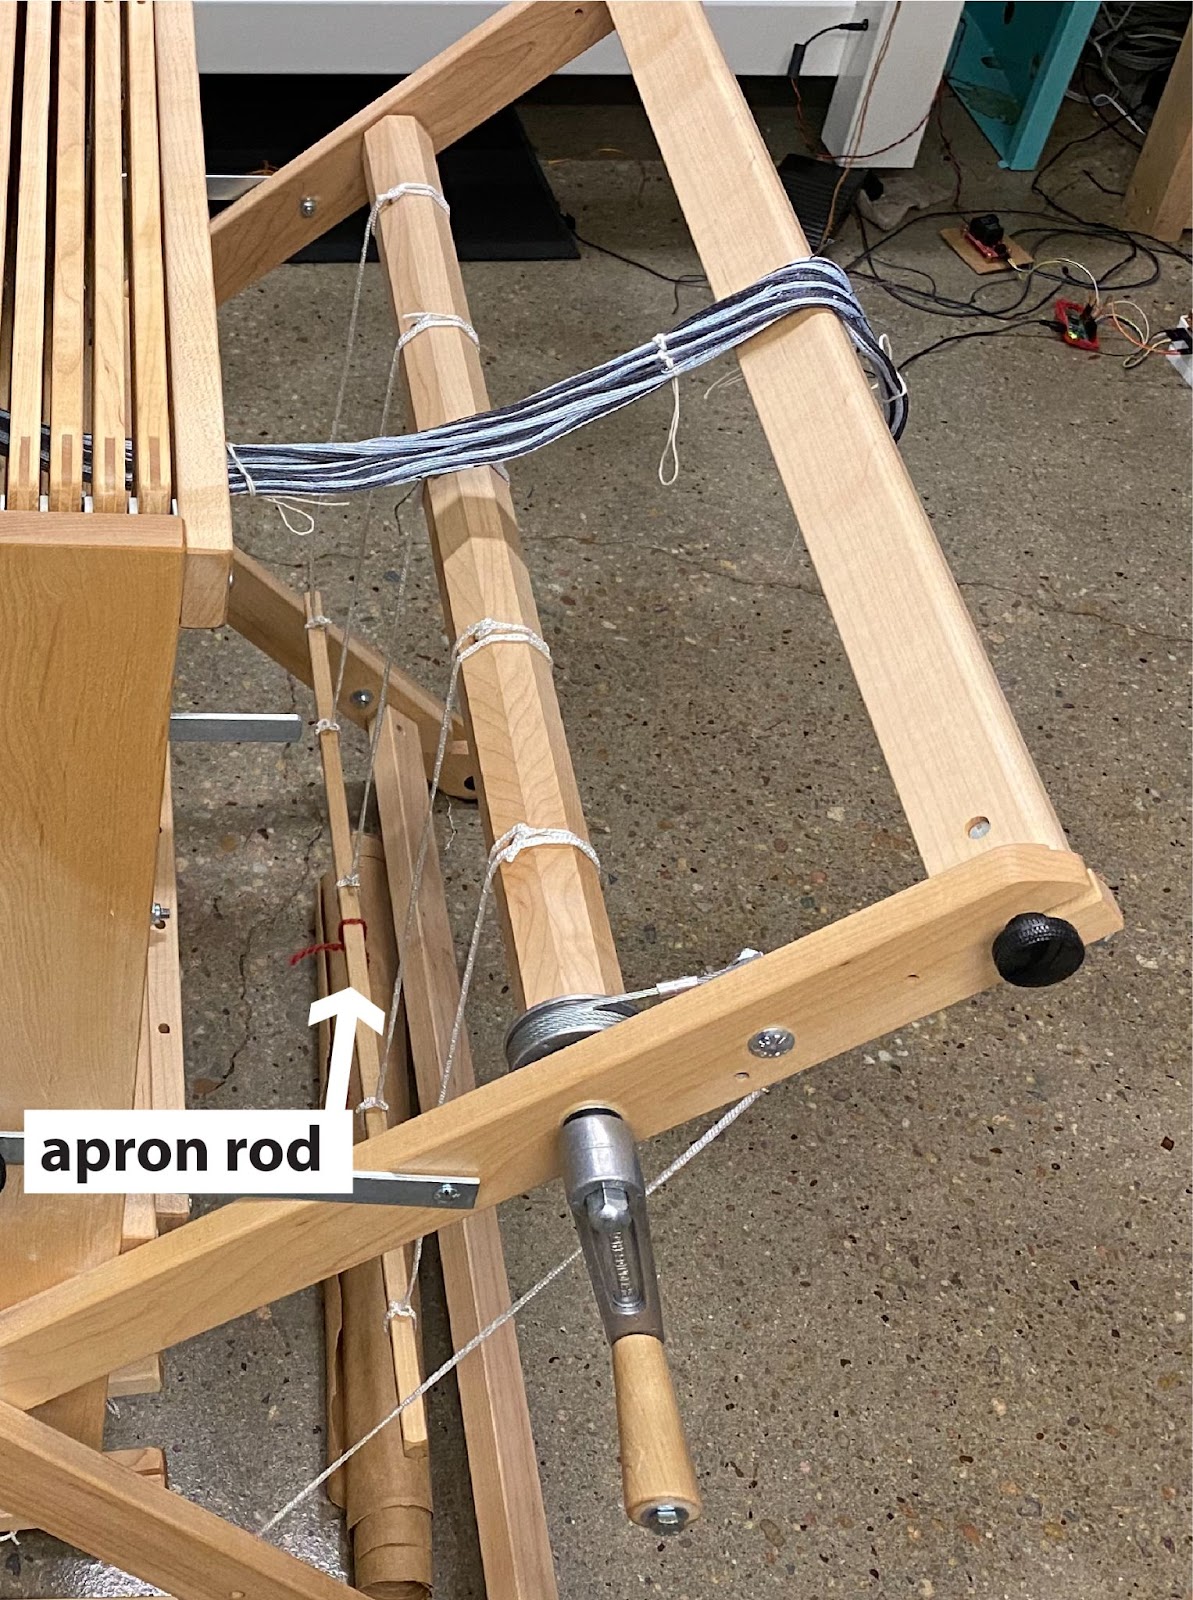
[4] Pull the apron rod up to the end of the warp on the back beam, slide the warp over it, then tighten the apron rod slightly with the crank on the left of the loom. We will spread the warp out next, so make sure to leave a little slack
[5] Spread the warp out on the apron rod into even bunches. We have 120 total threads and want to spread the strings out in 4 equal sections. So, we spread 30 strings into each section (designated by the white ties holding the apron rod to the warp beam). Therefore, in each section there are 2.5 of each color block.
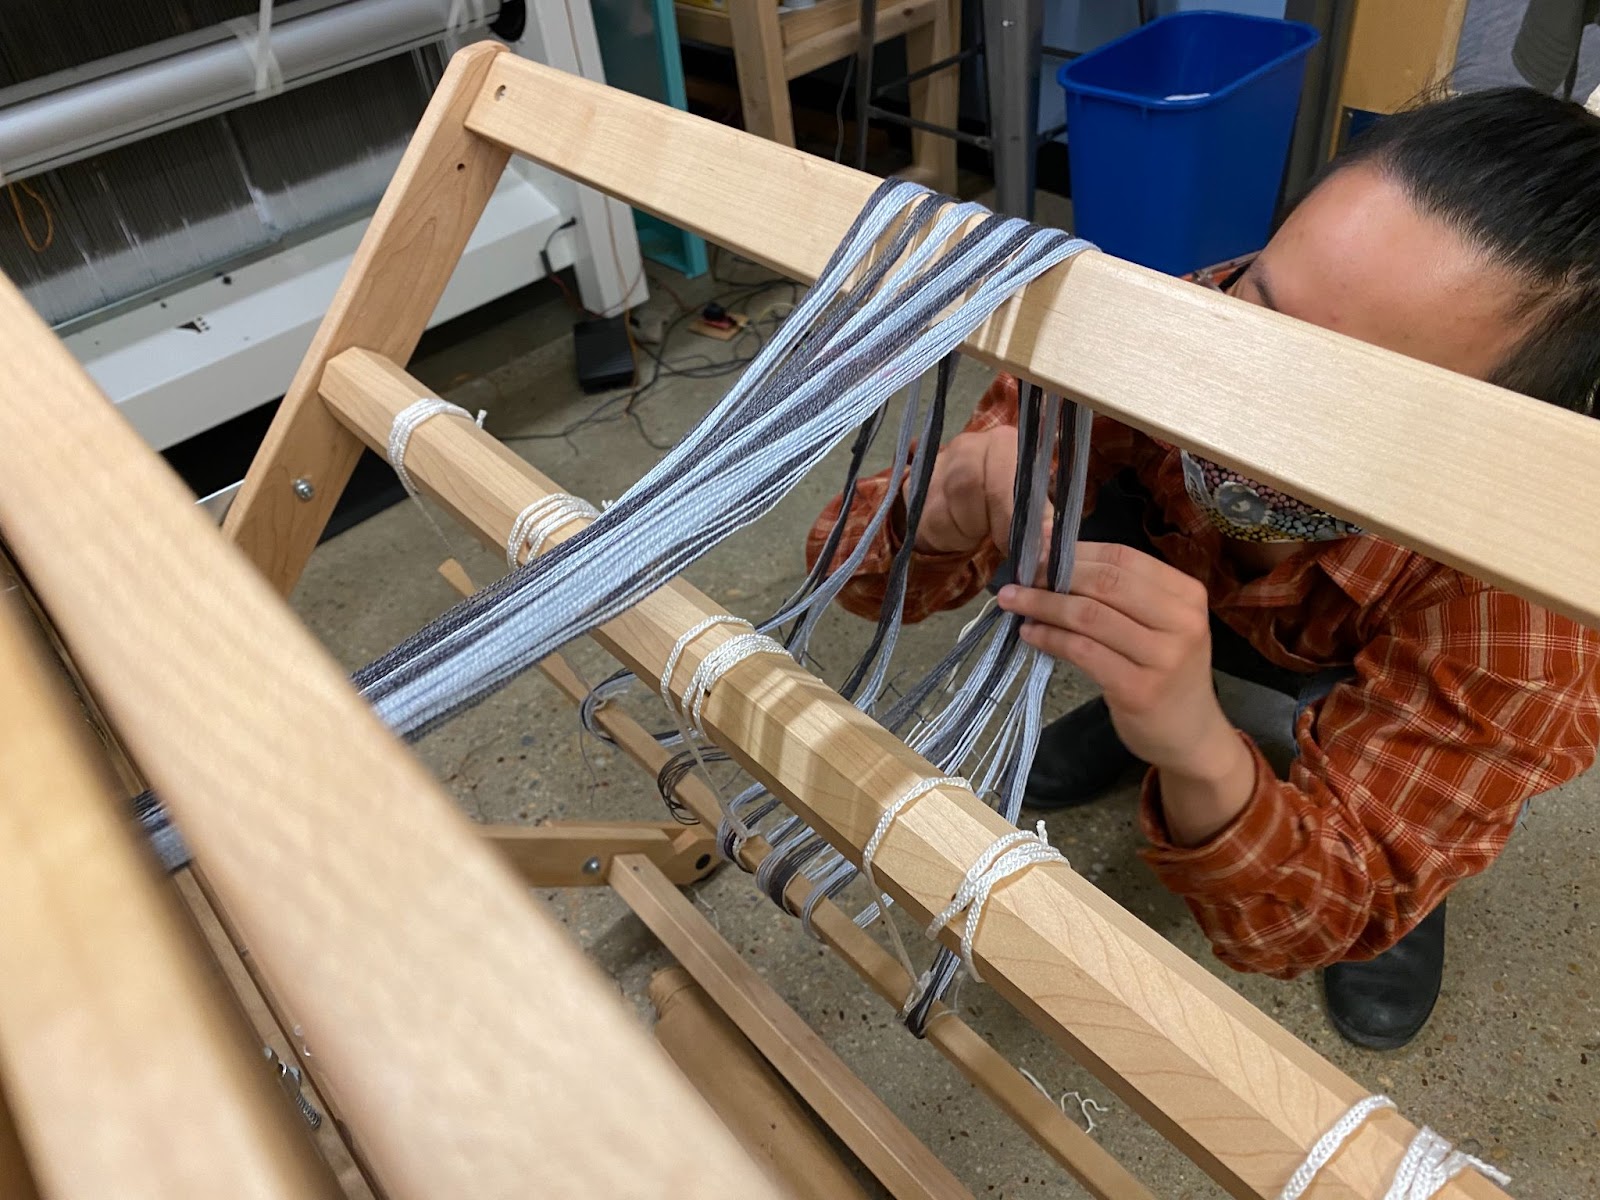
[6] Remove the counting tie, then continue spreading the warp into these equal sections along the apron rod.
[7] Make sure to be meticulous in this process, we want to make sure all strands are laying in the right order and flat on the apron rod
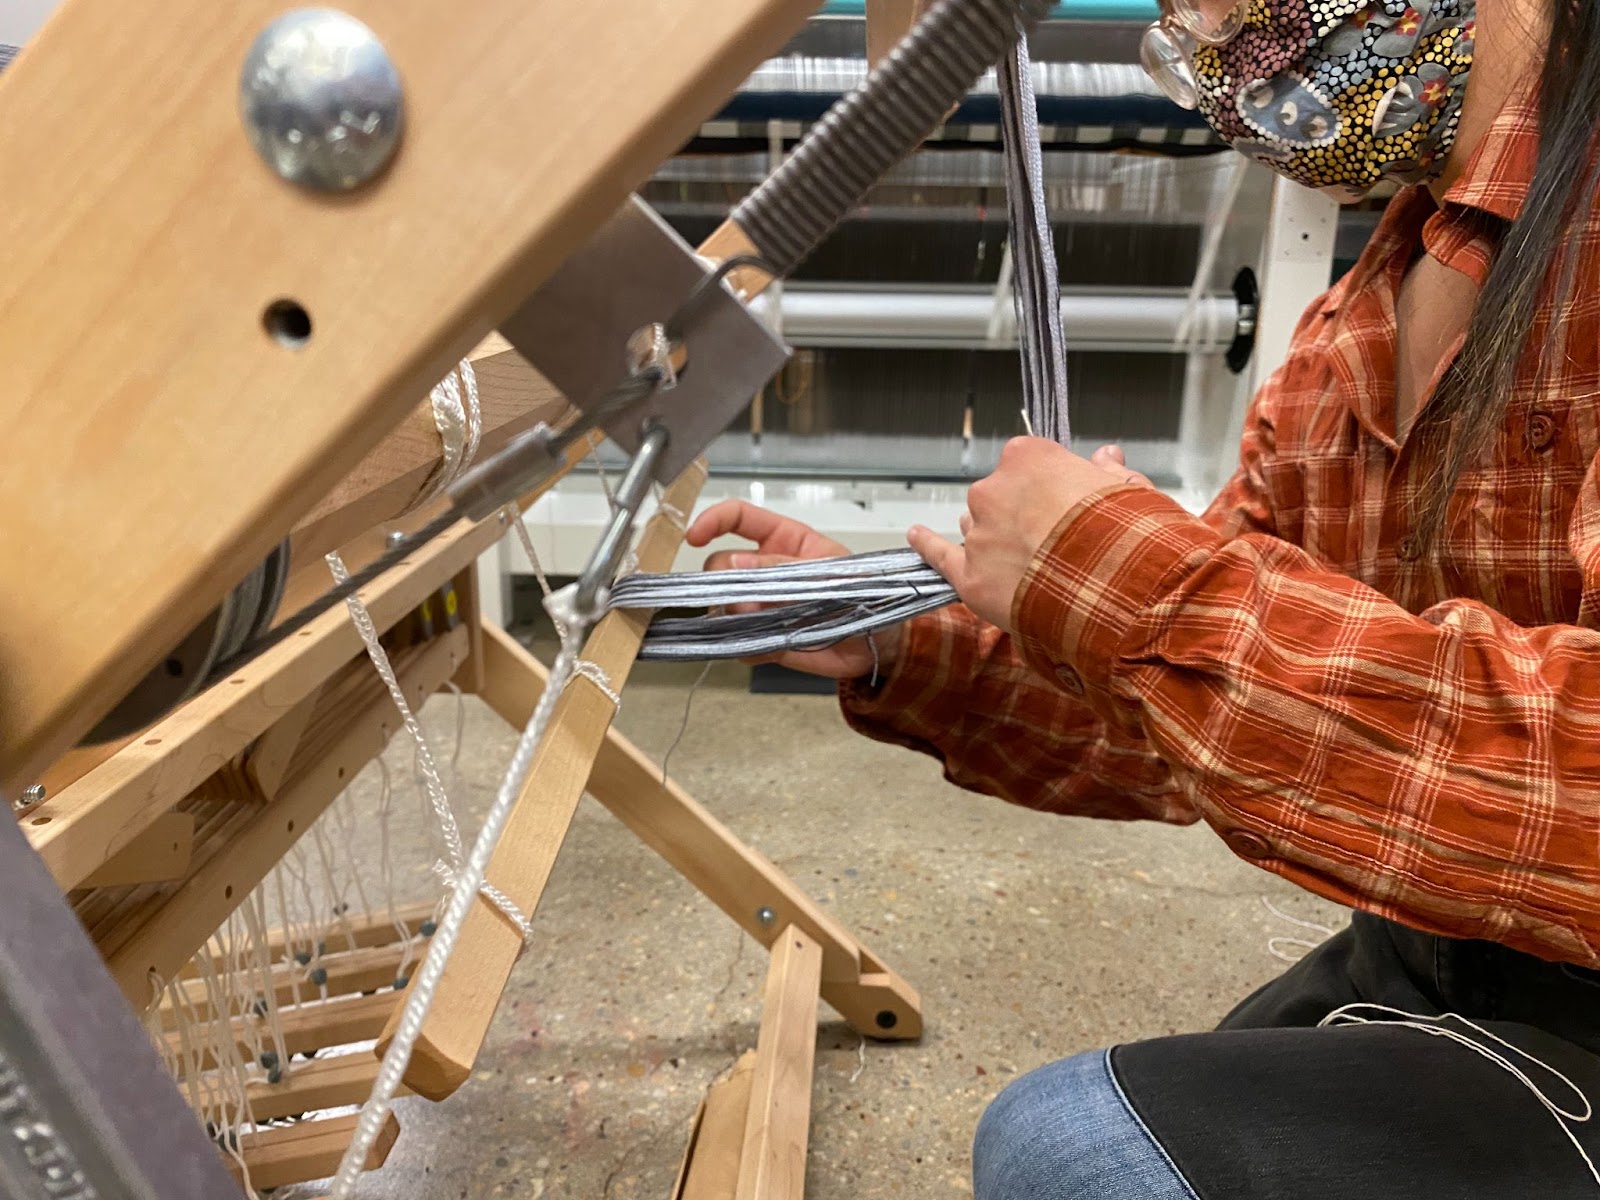
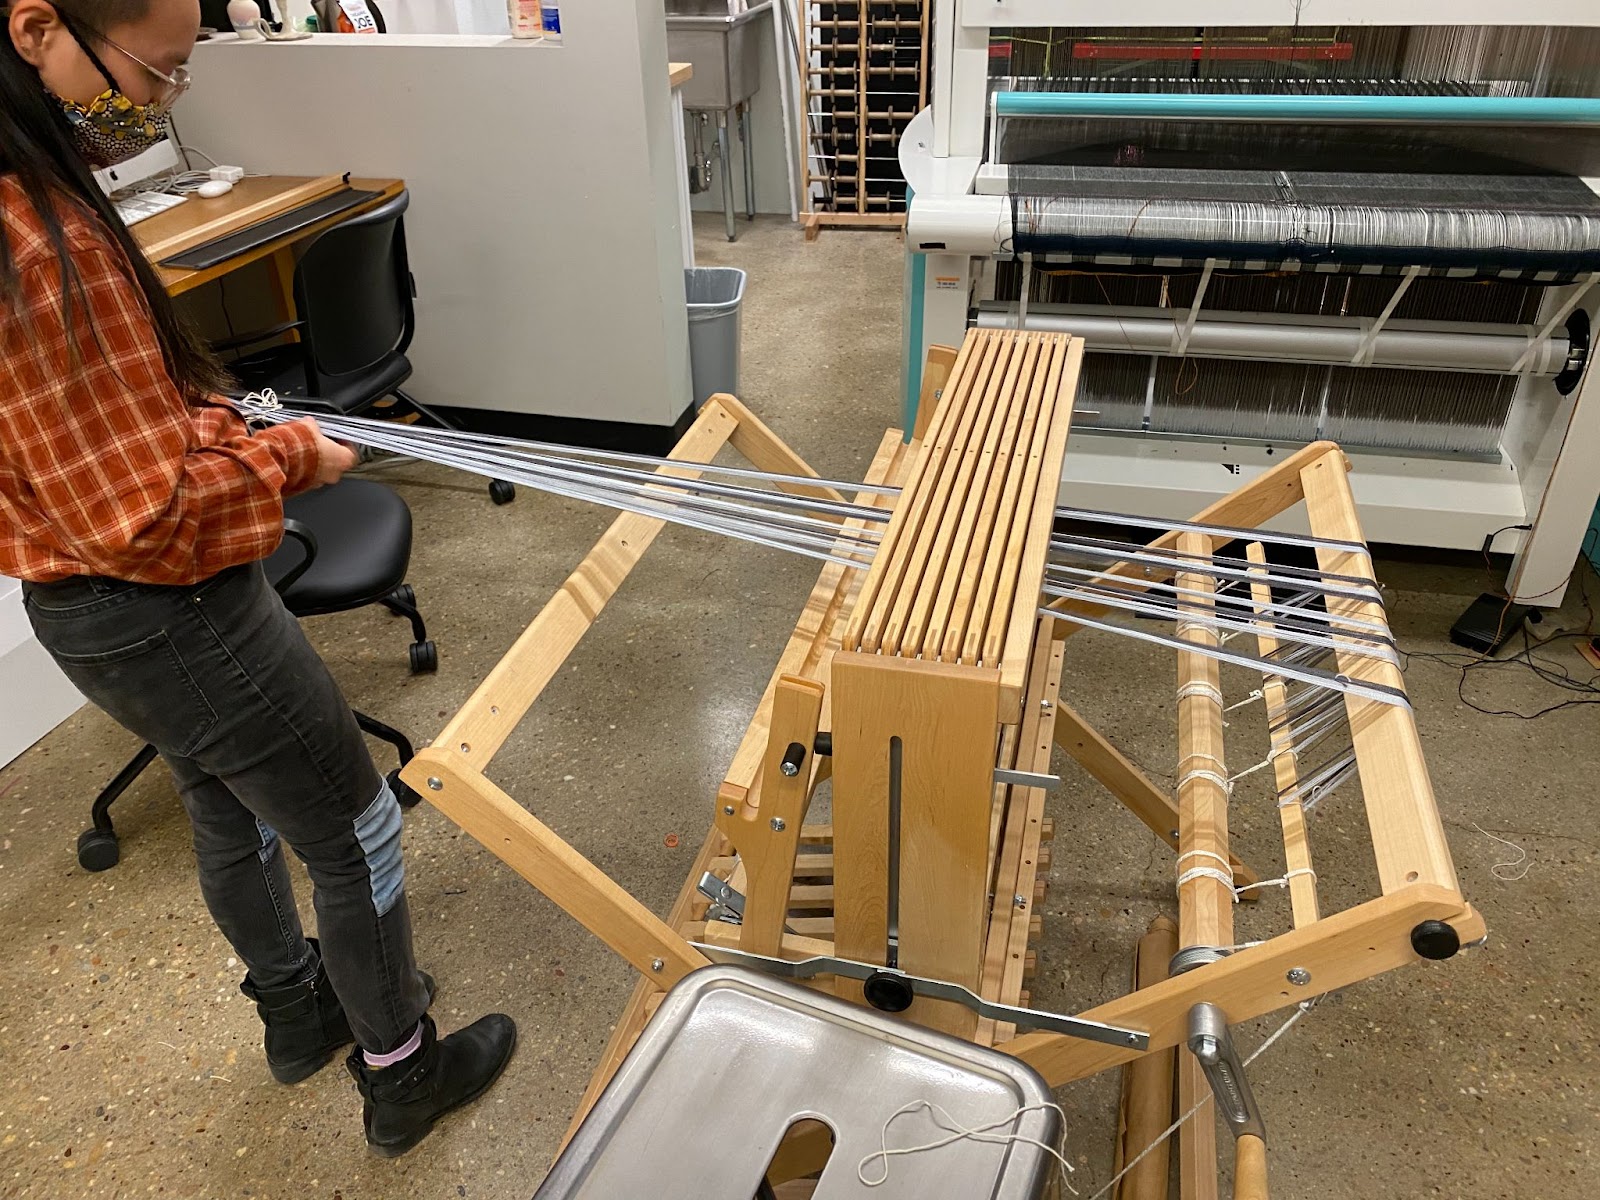 [8] With the apron rod set, move to the front of the loom and tug on the warp at the cross end to create tension across the warp.
[9] Work from front to back to ensure that all the threads are in order and laying flat
 [10] Once you feel like the threads are nicely lain, you can crank the back beam to tighten the warp across the loom
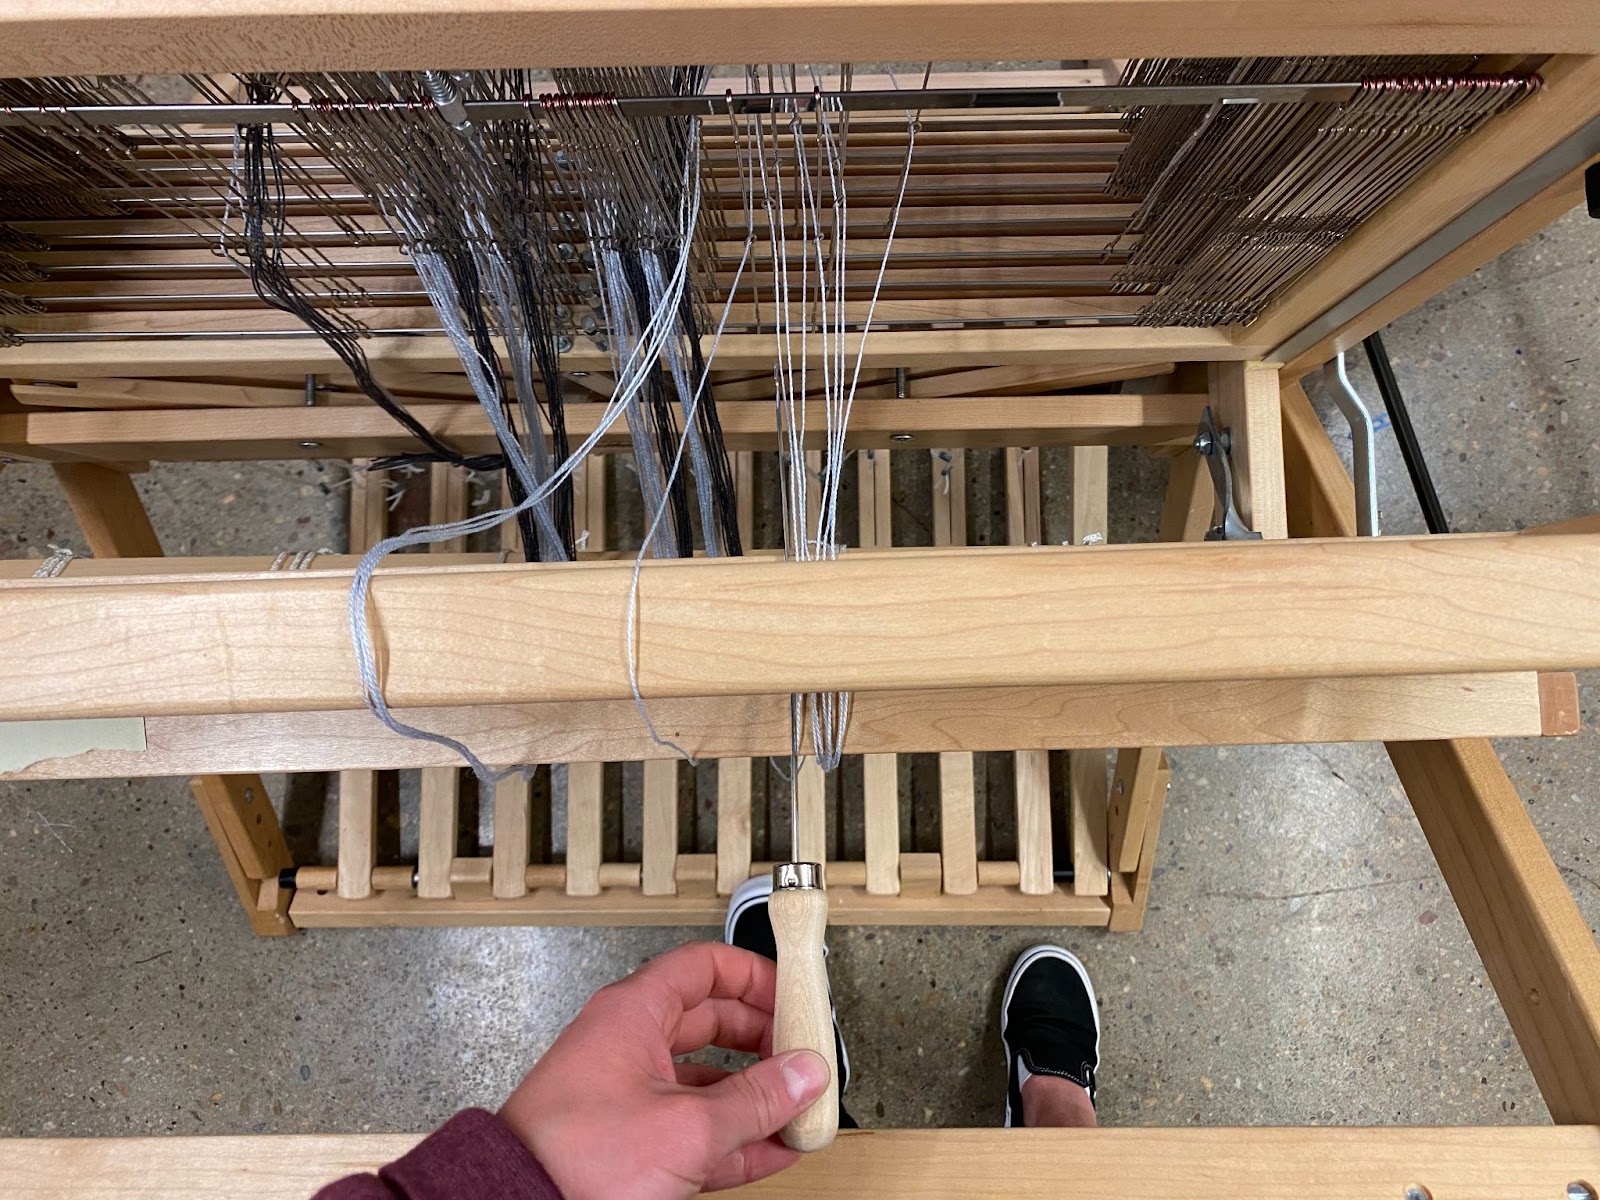
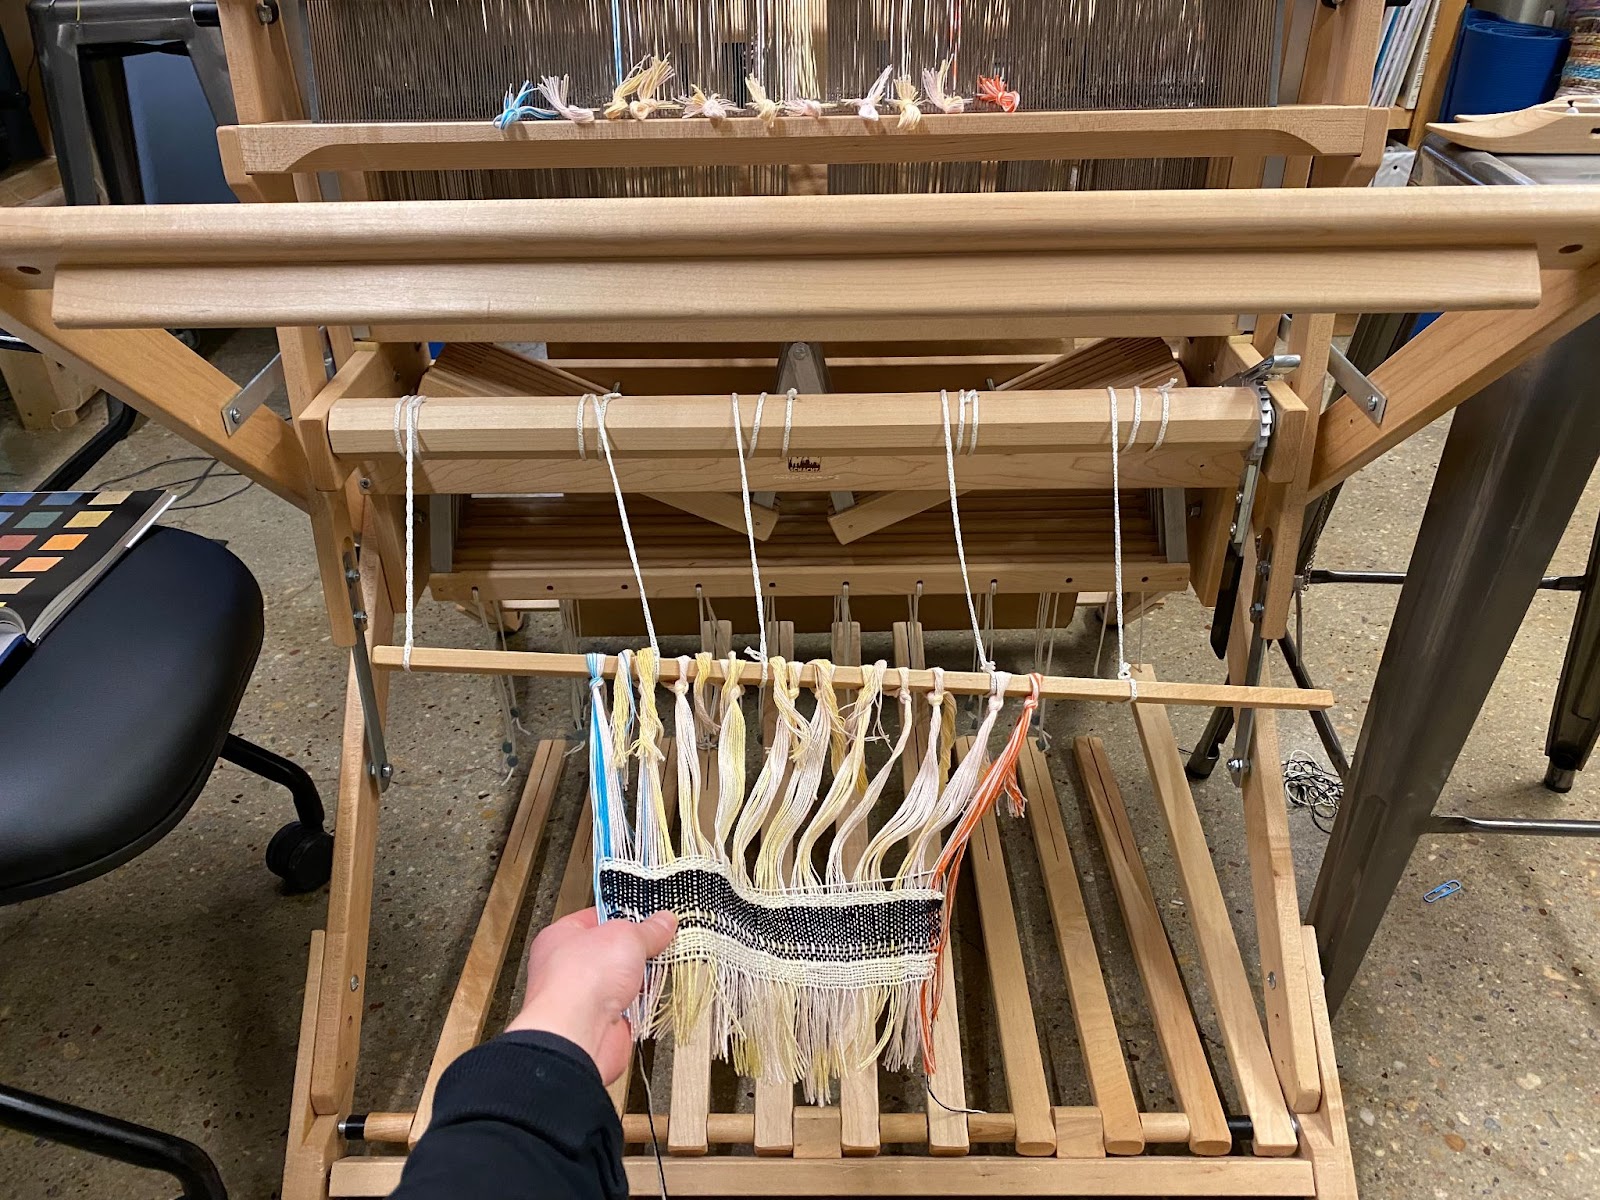
Step 4: Inserting Lease Sticks
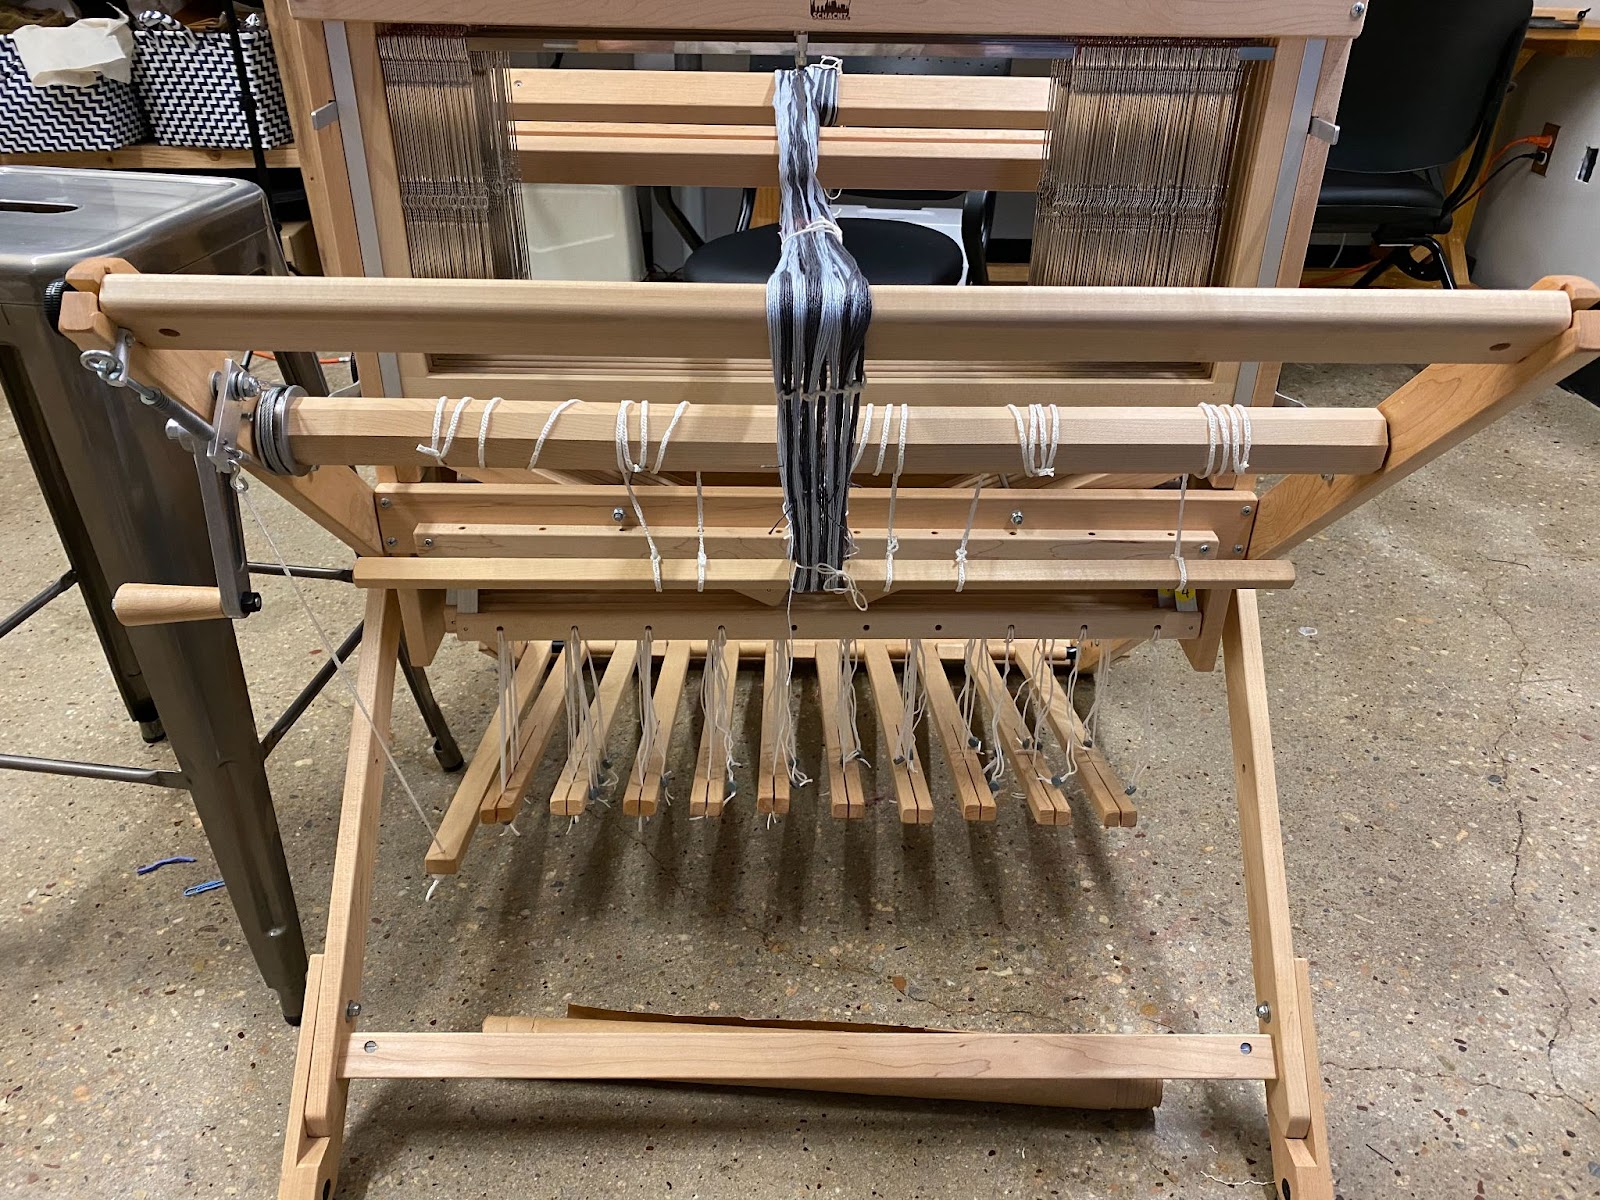
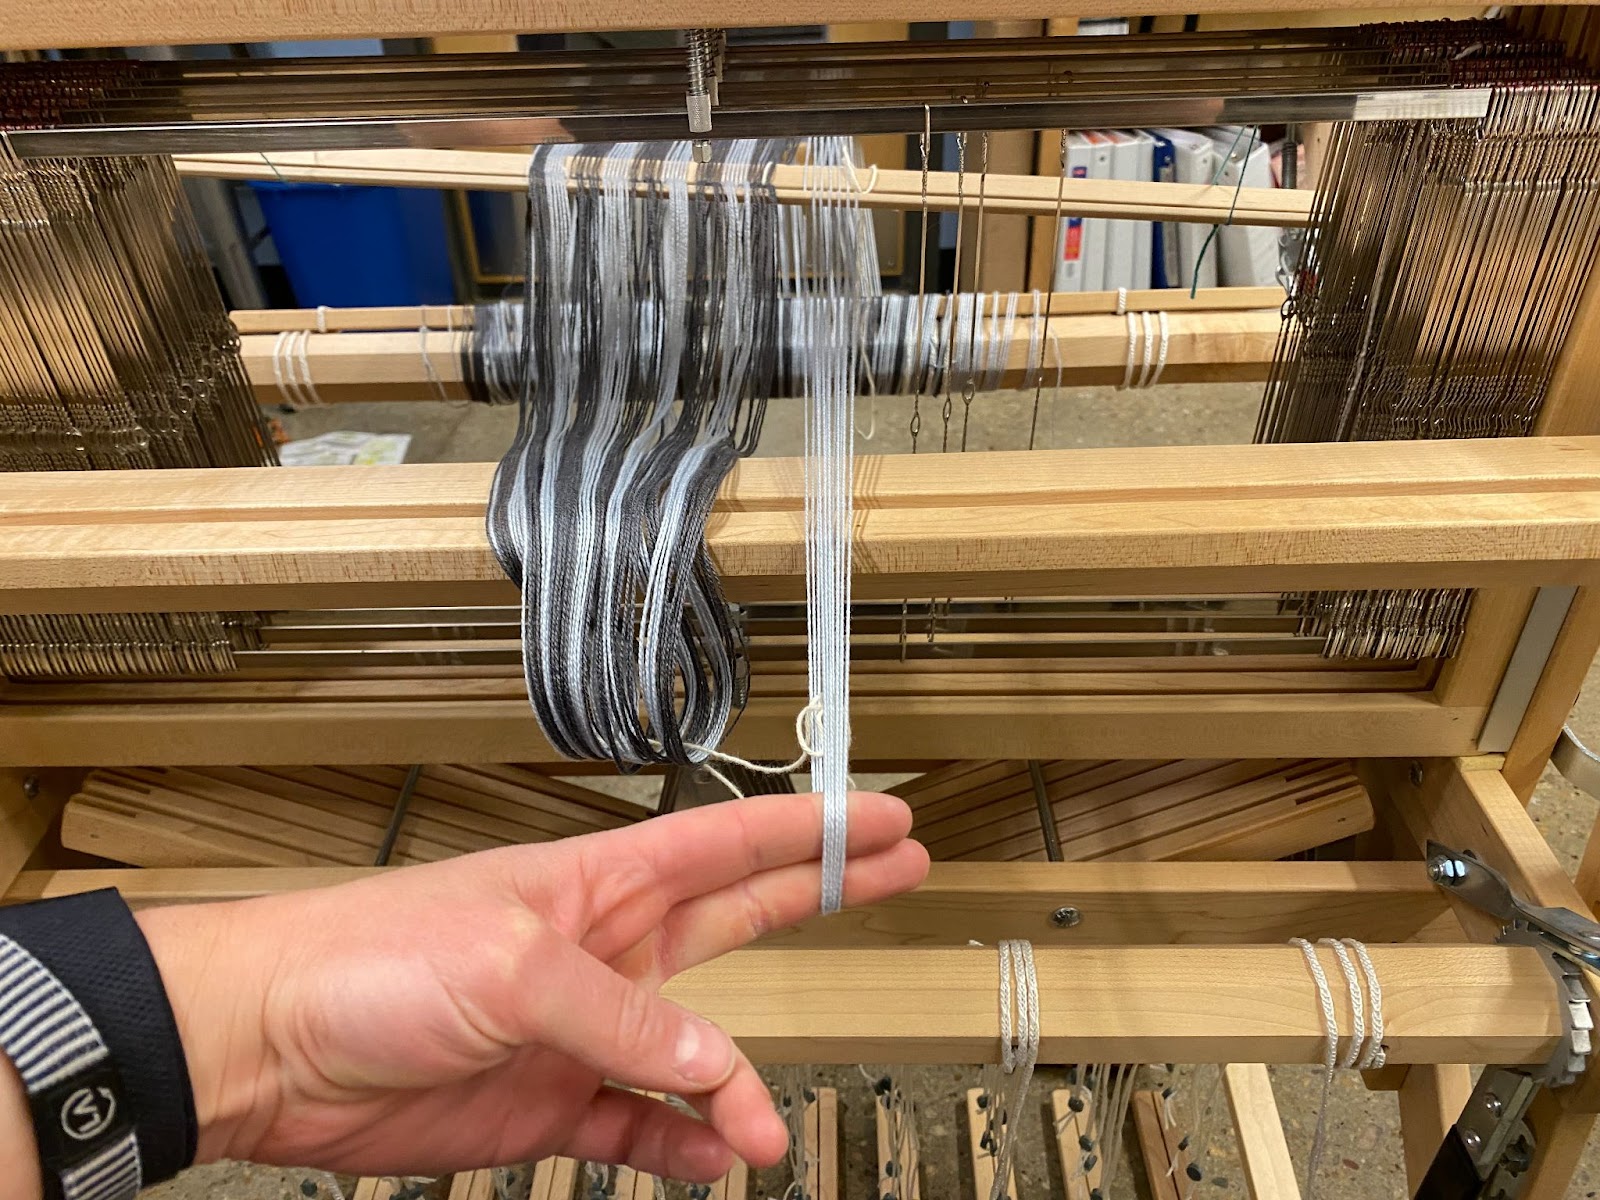
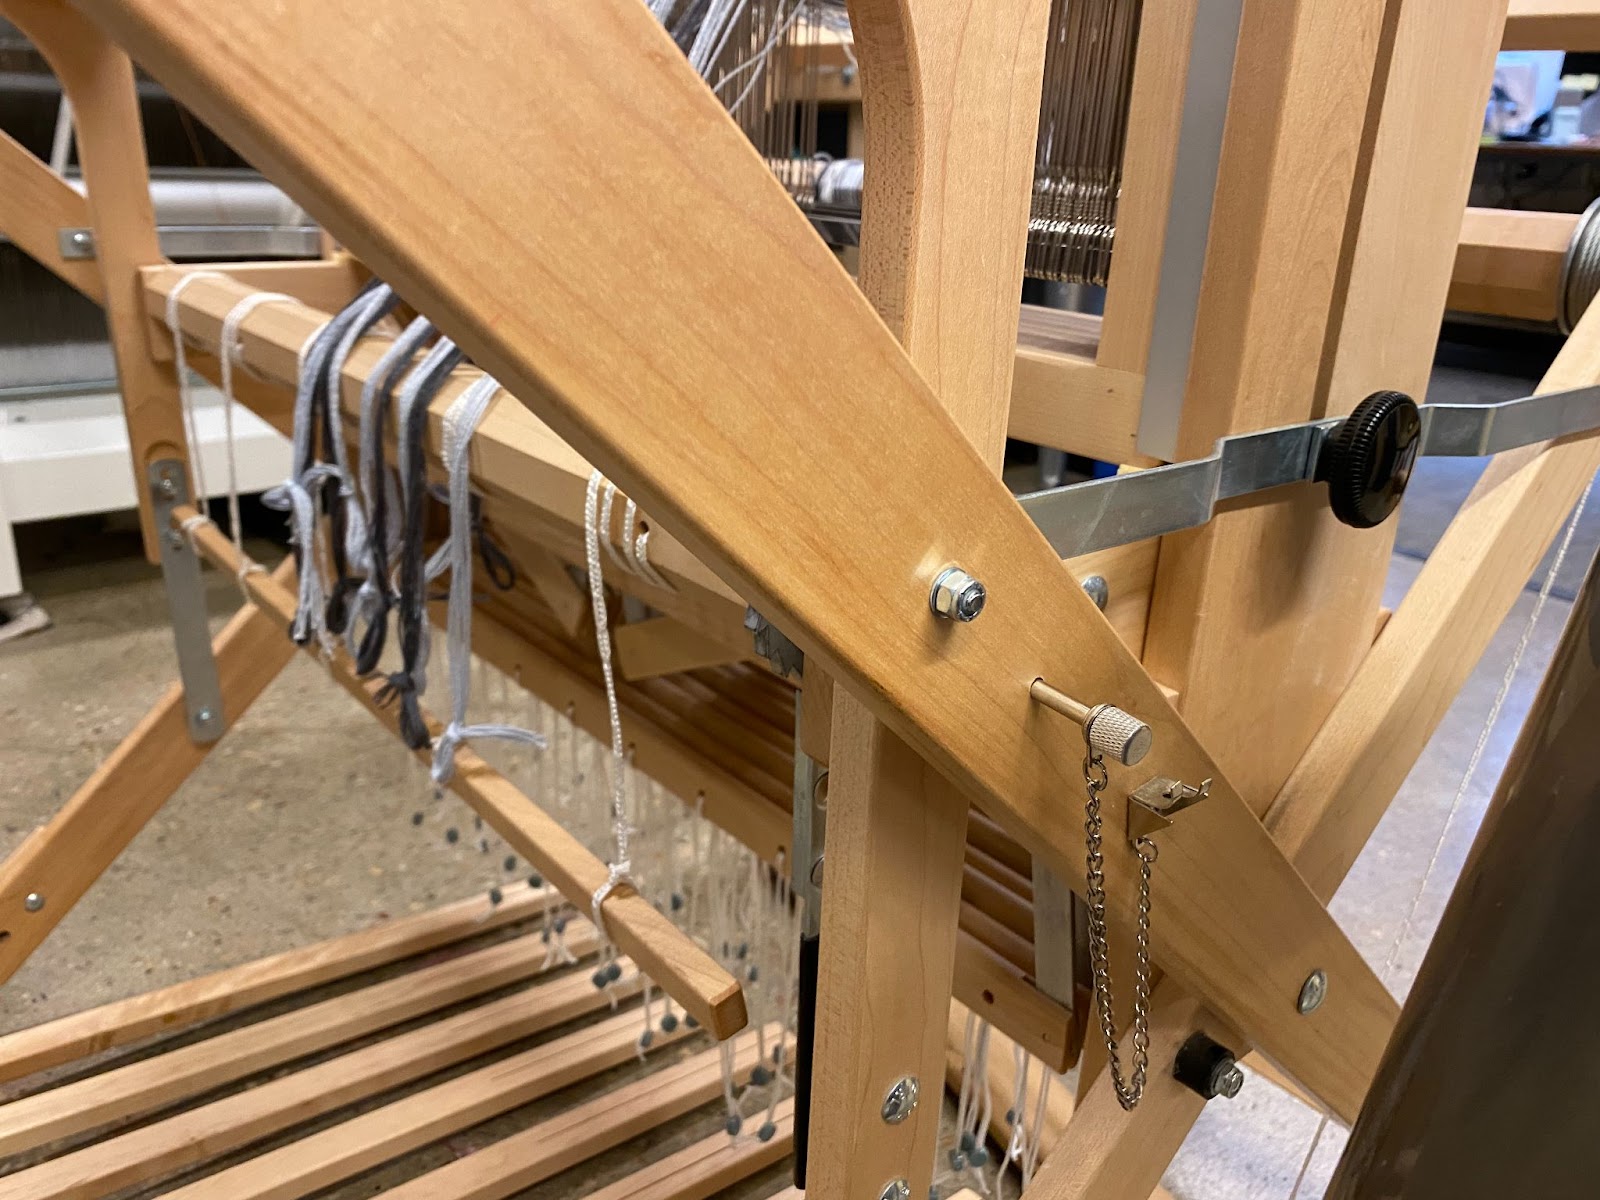
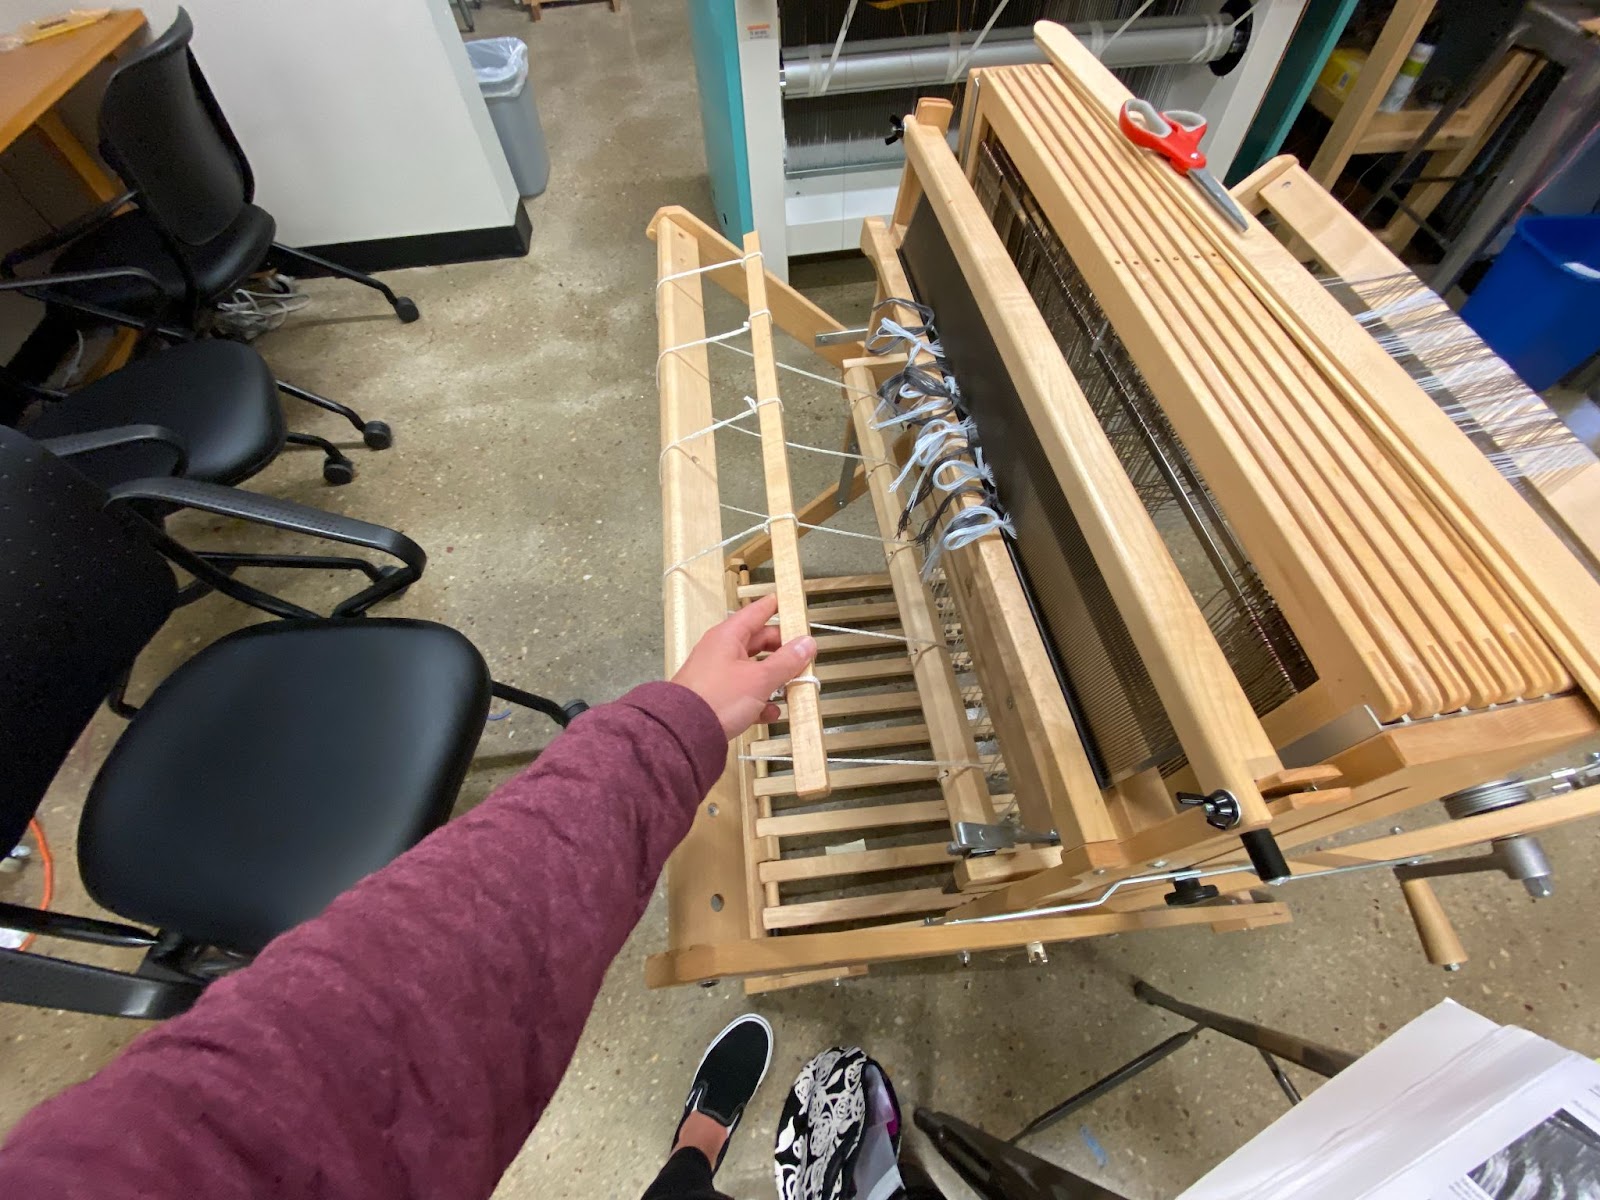
[1] Gather some thread and tie two loops around the top rail of the last shaft, closest to the back beam. Spread them out to about the length of the lease sticks. This is where your lease sticks will be held. See on the left side how this thread will hold the lease sticks when they have been set.

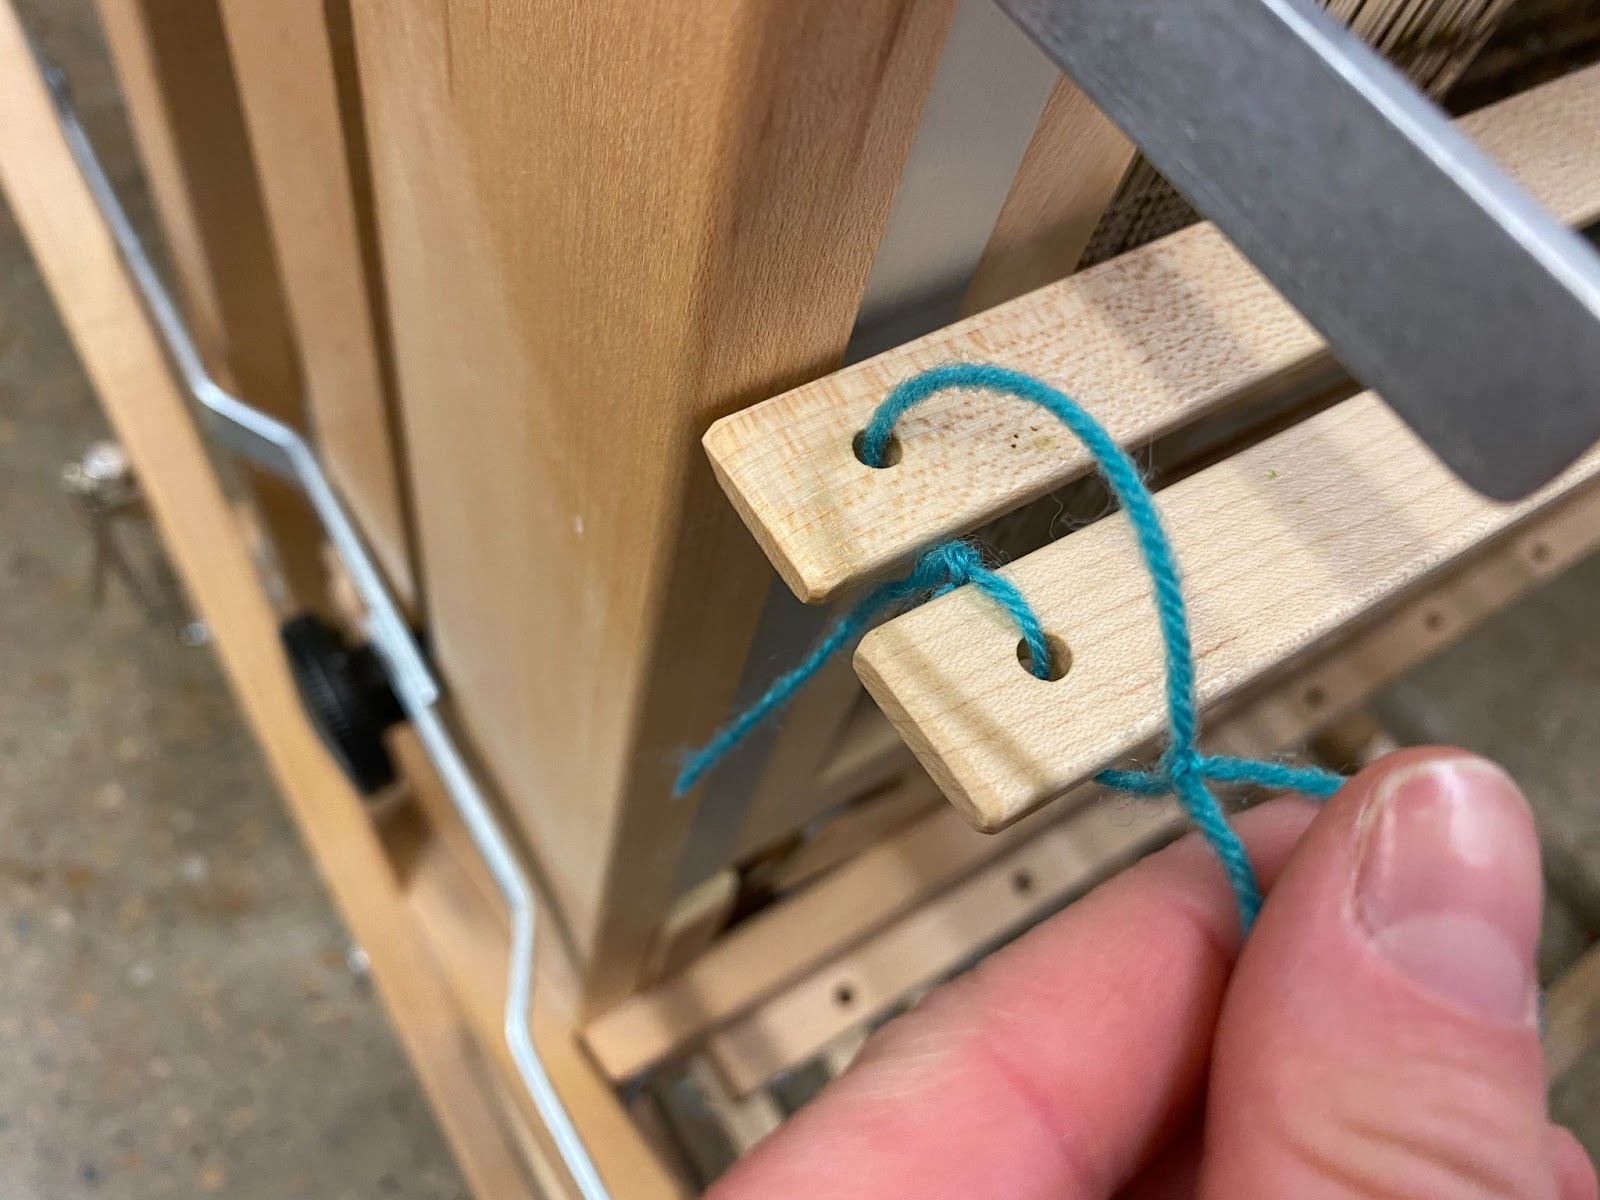
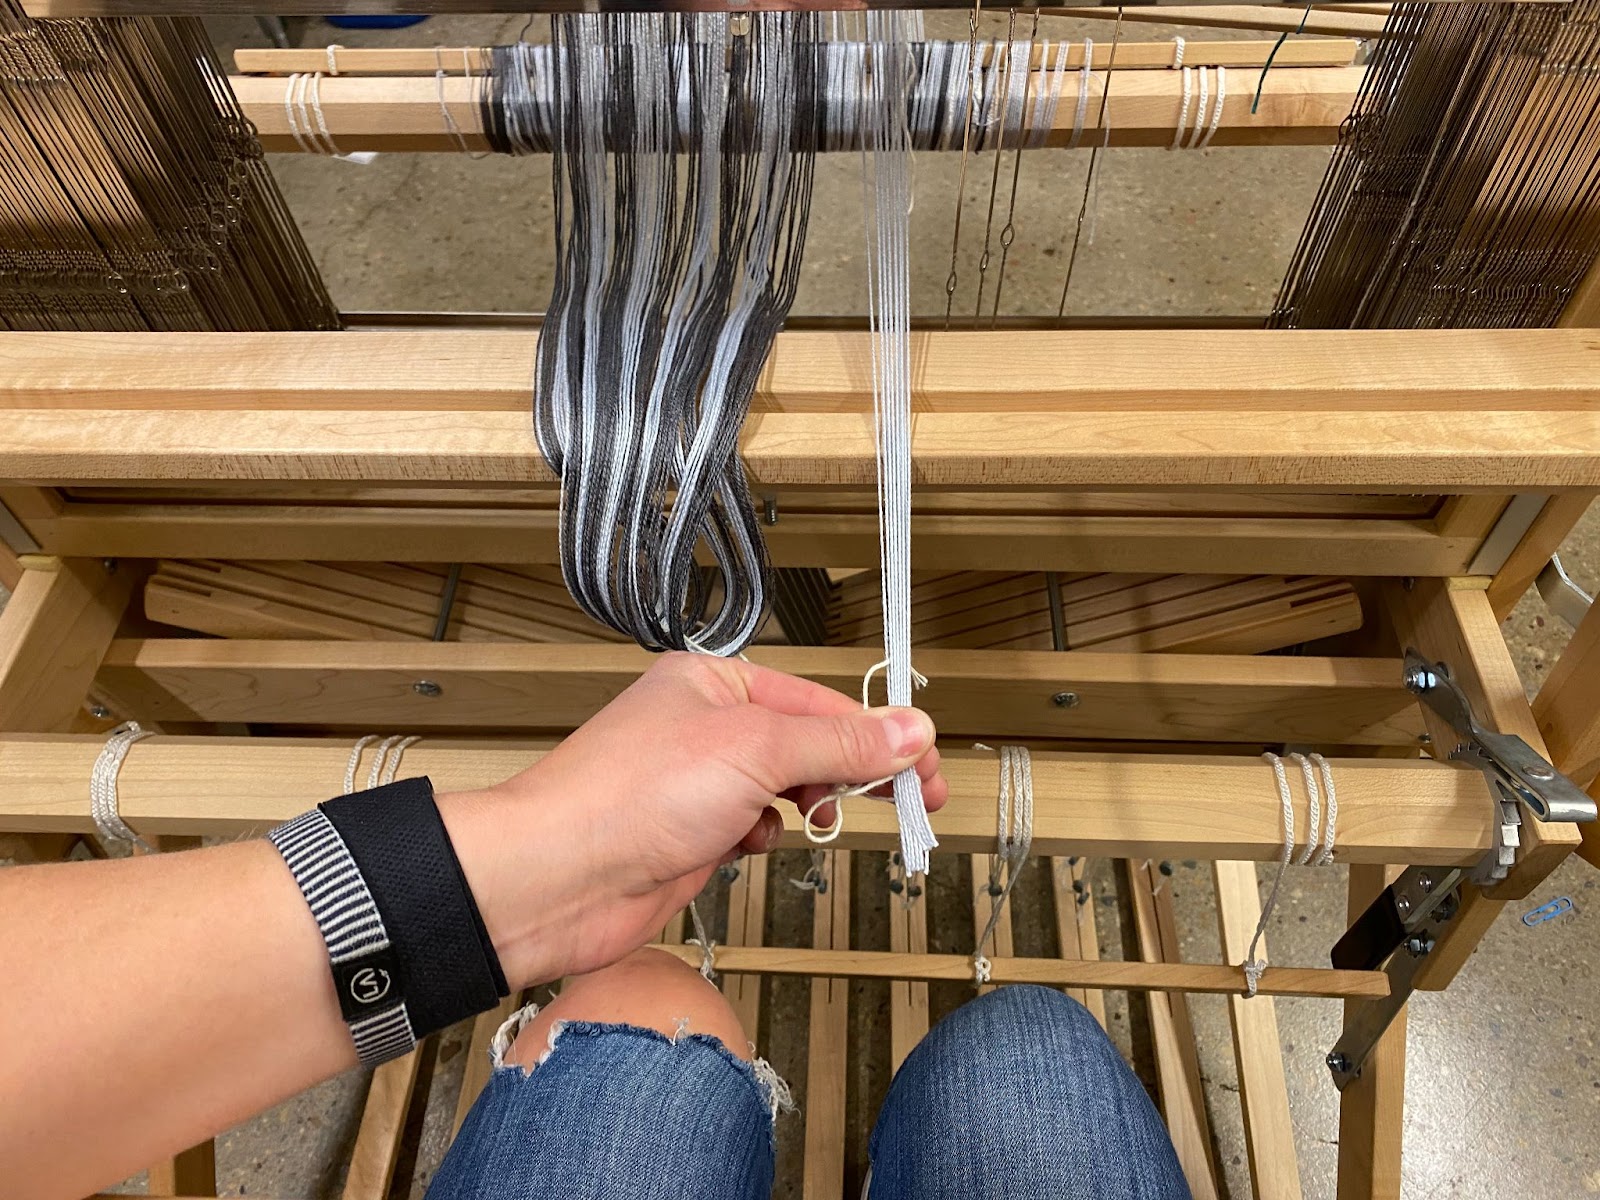
[2] Gather the lease sticks and place one on either side of the cross. Tie the ends of the lease sticks together so that they cannot fall apart off of the warp.
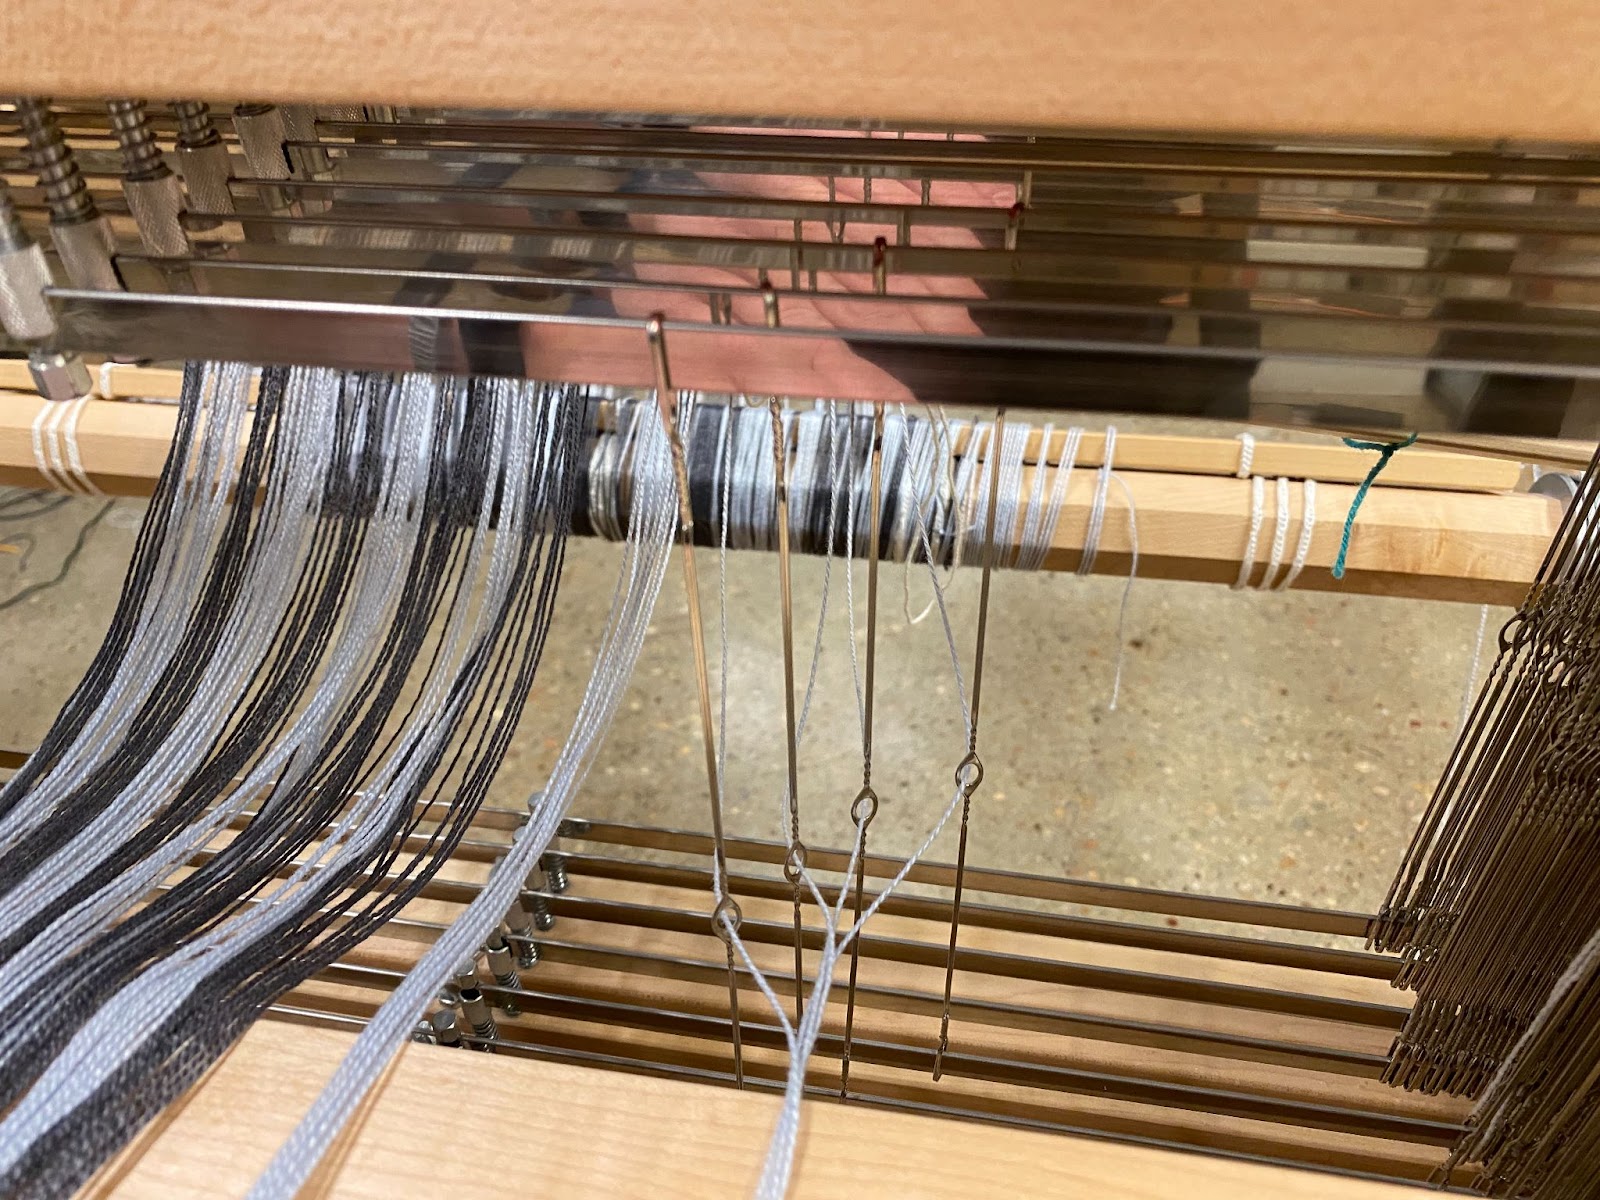
[3] Slowly shimmy the lease sticks back, pulling the cross closer to the back beam. When you pass through the final shaft, loop the ends of the sticks in the hanging thread to secure. At this point, you can cut the ties around the cross as it is secure now.
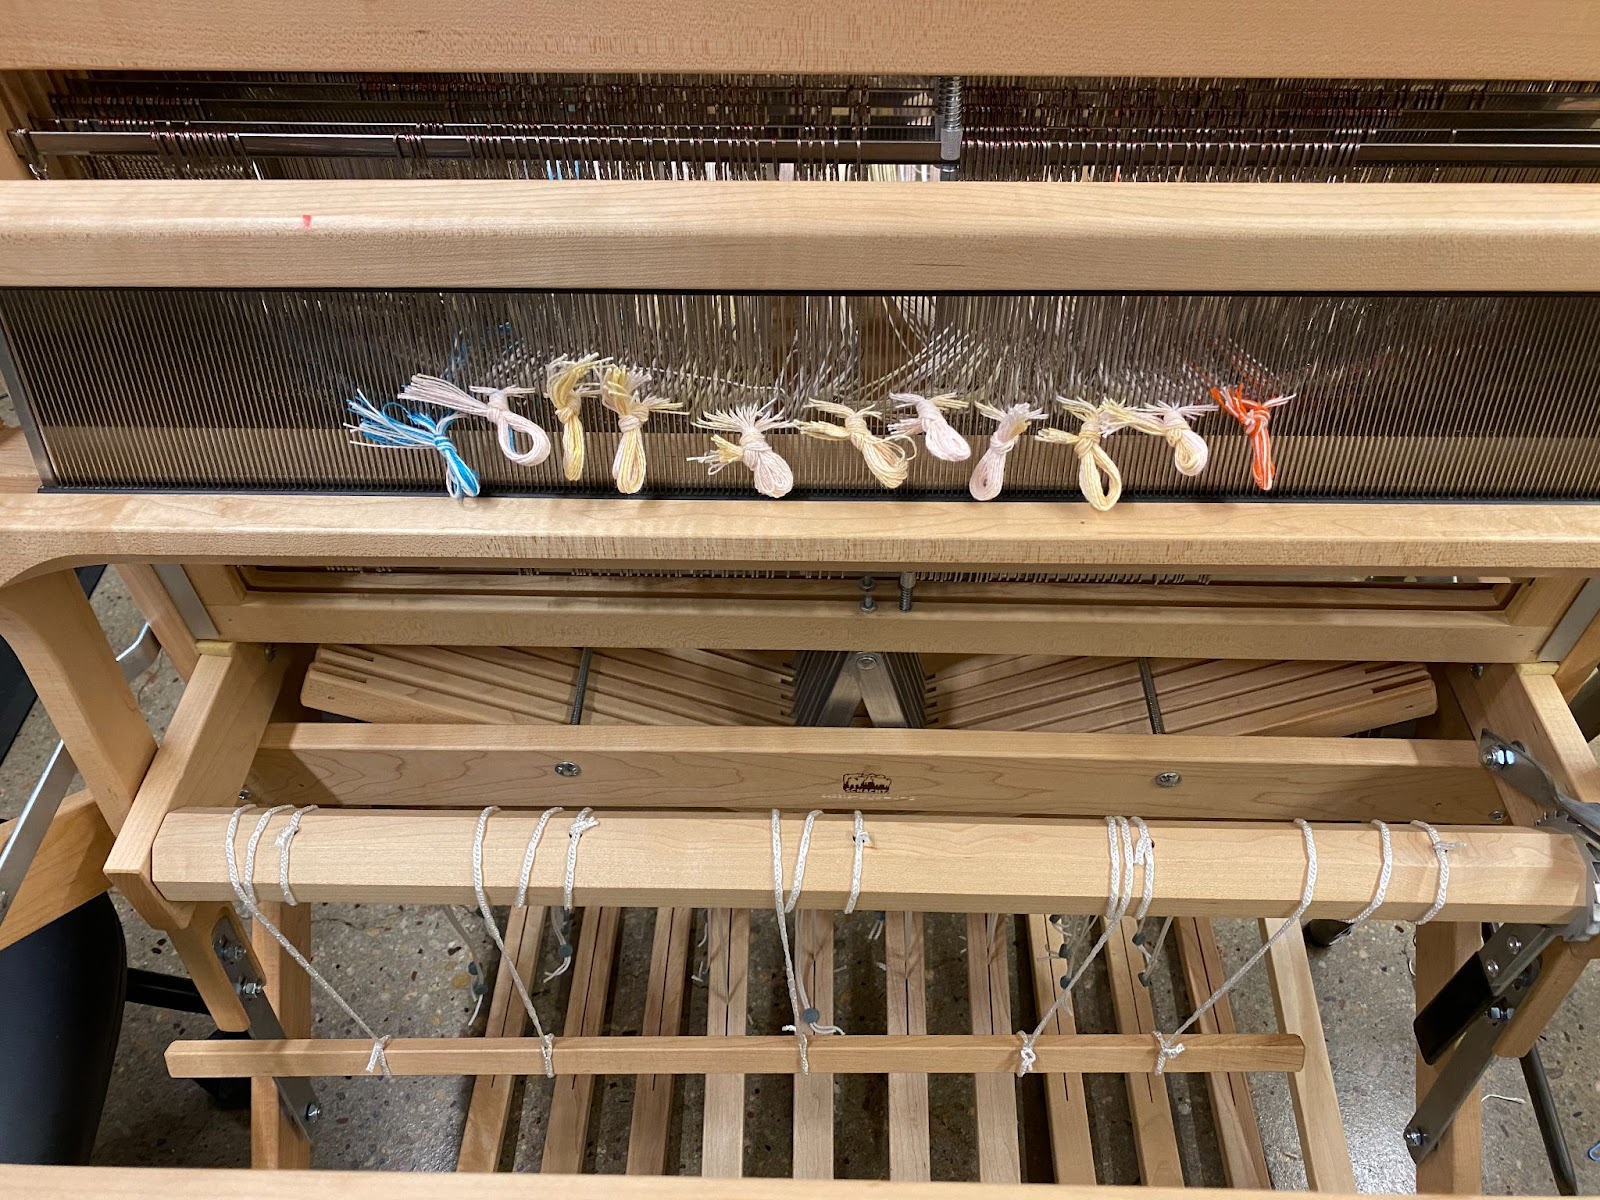
Step 5: Threading the Heddles
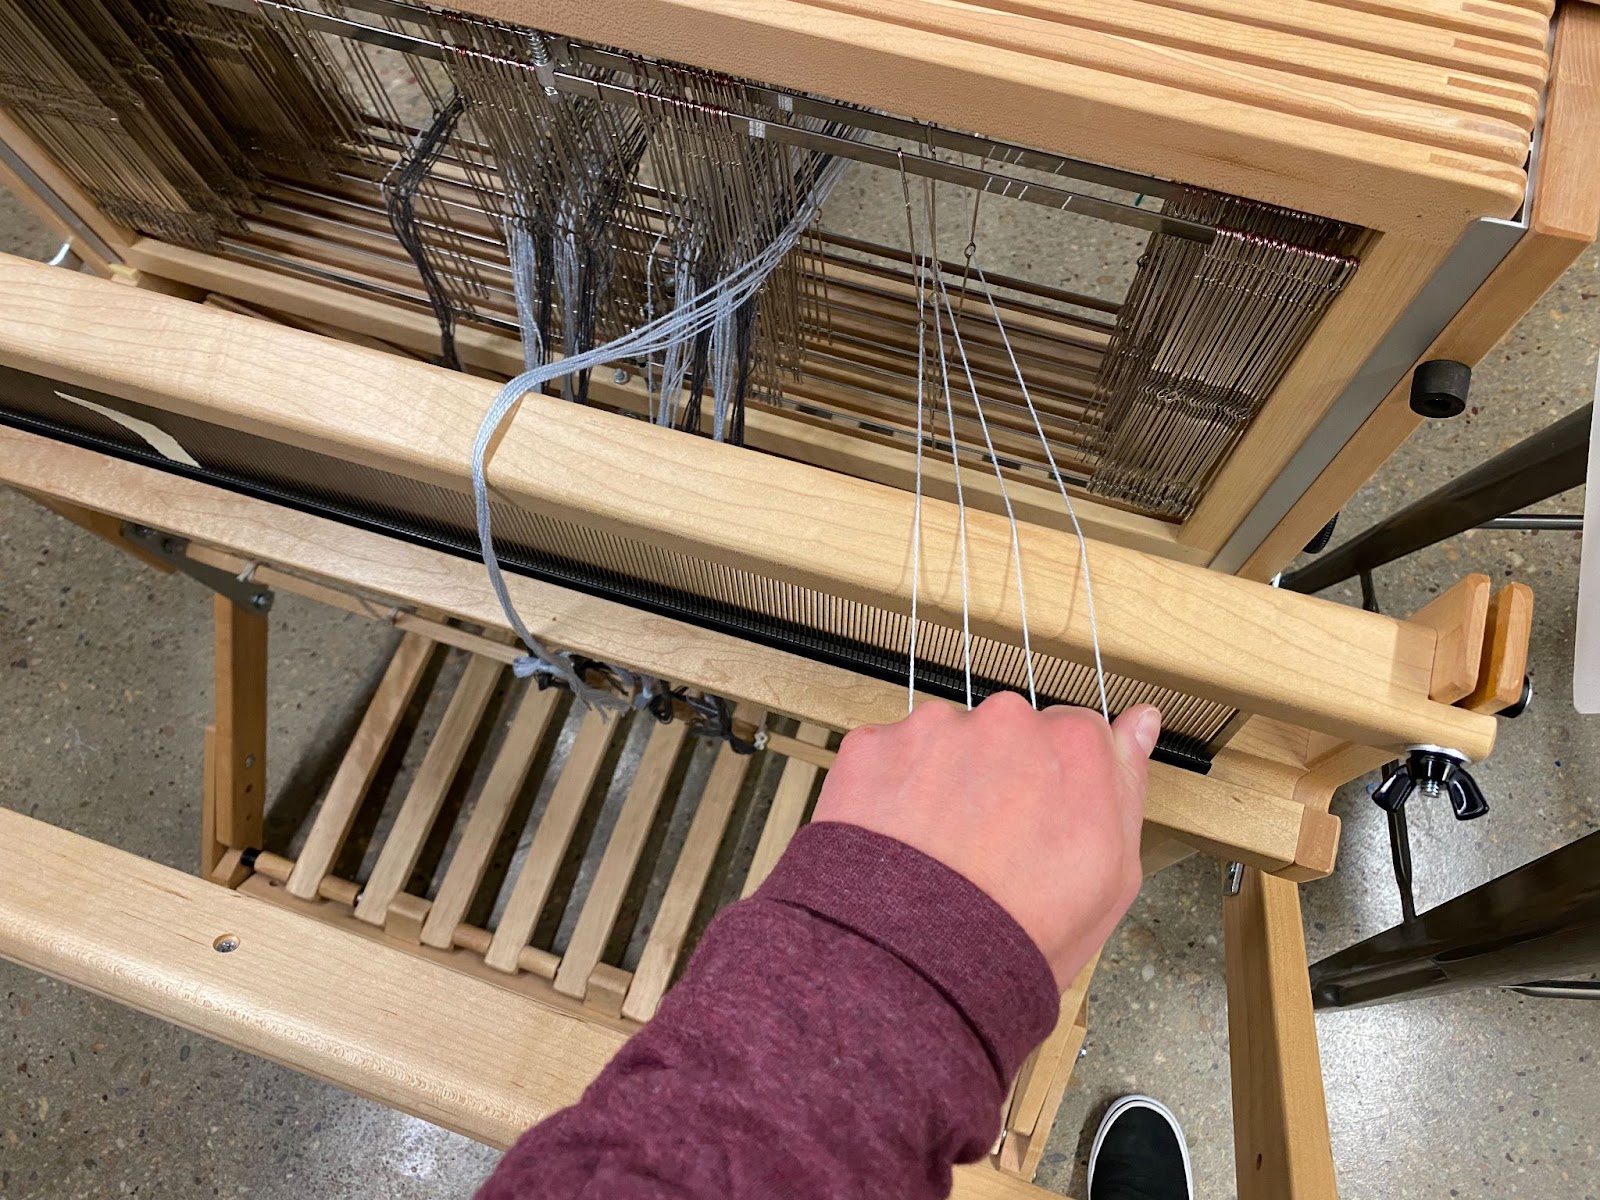
[1] To thread the heddles, begin by winding the warp in so that there is only 8-10 inches reaching out past the first shaft.
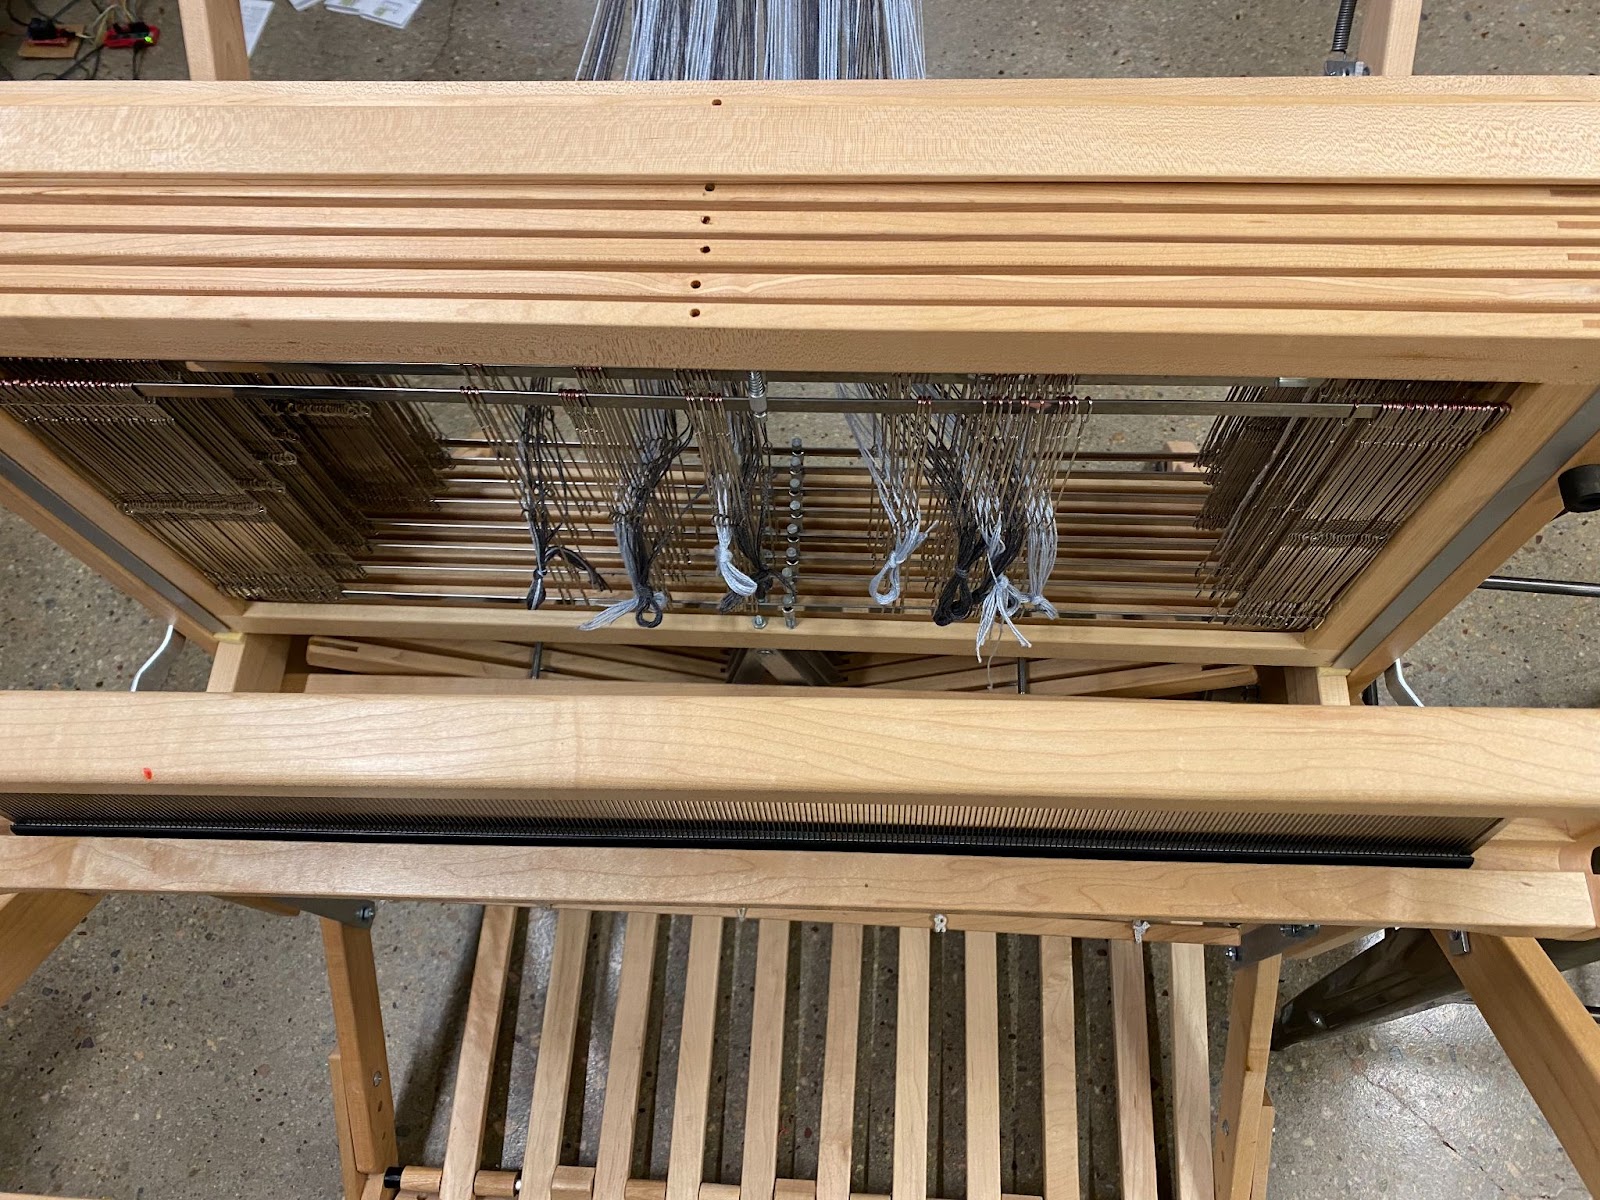
[2] Slide 30 heddles from each shaft (total of 120 heddles) over to the right side of your warp. These will be the heddles you thread.
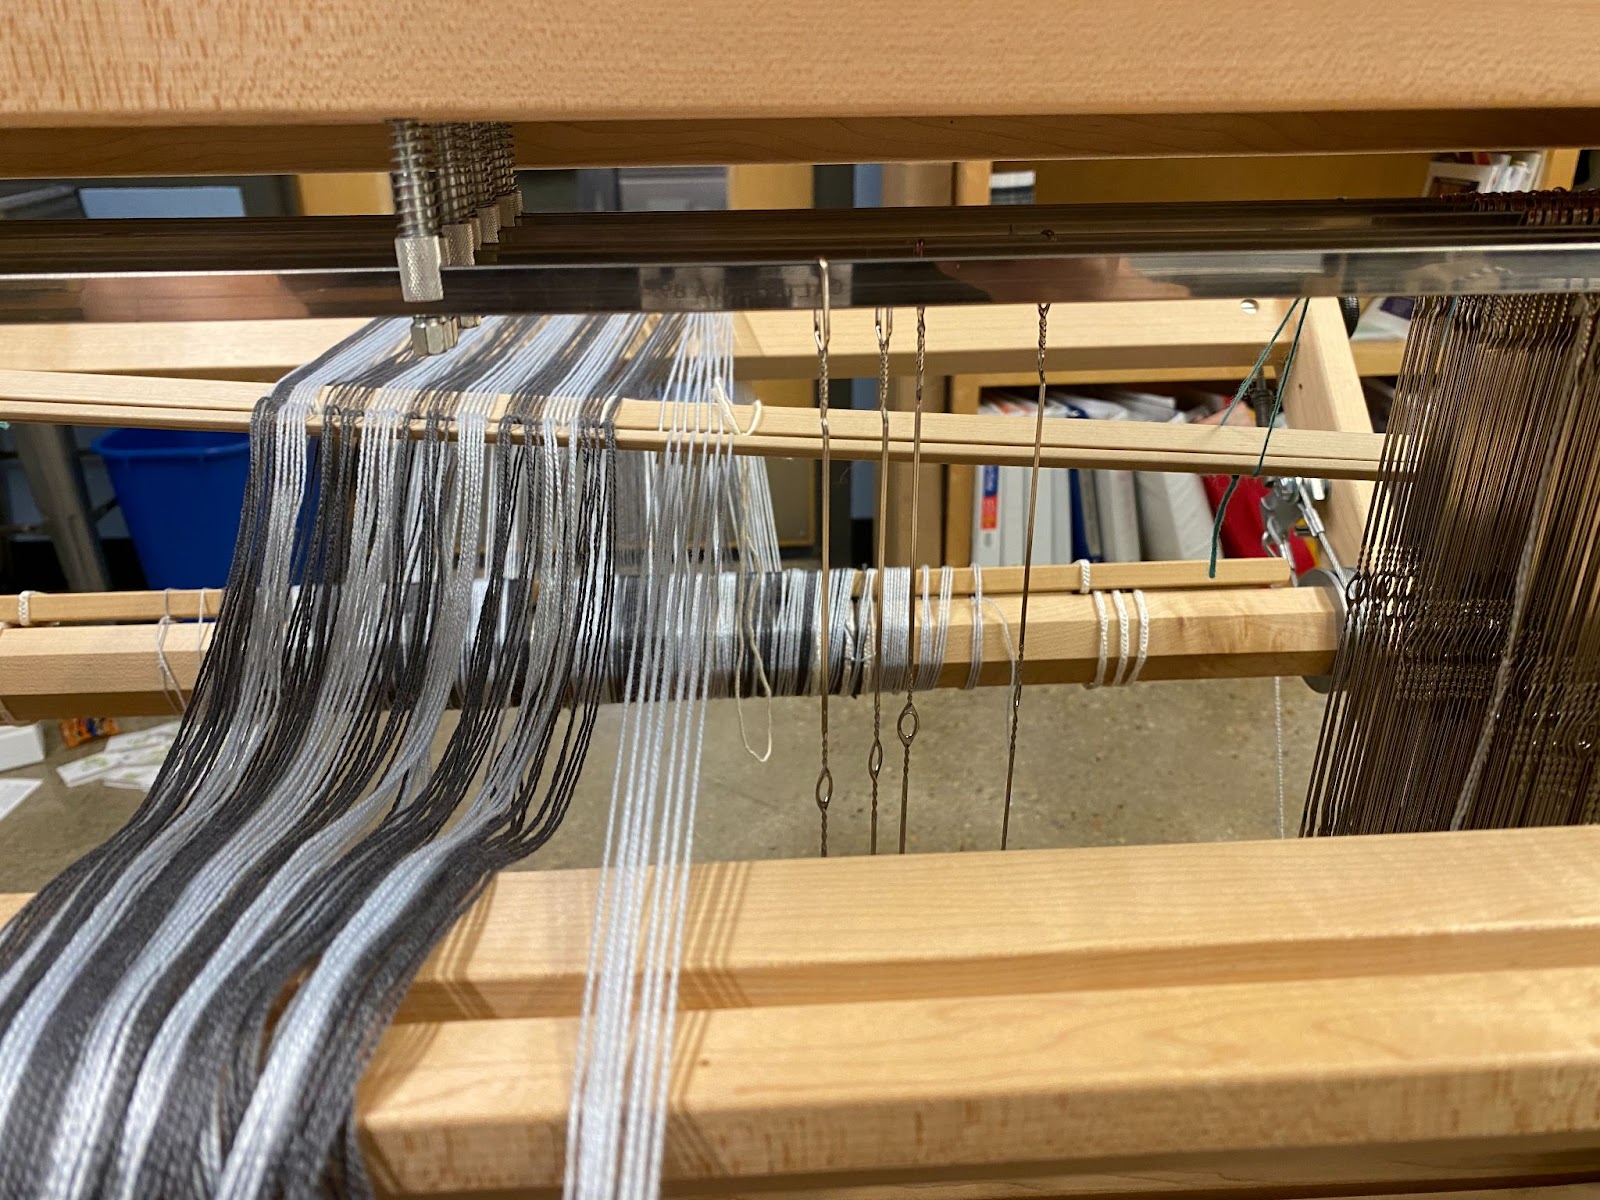
[3] We are going to thread a straight draw. Starting on the very far right most warp thread, we are going to take the first thread through the 4th shaft, the second thread through the 3rd shaft, the third thread through the 2nd shaft, and the fourth thread through the 1st shaft. Then, we repeat this process for the rest of the warp so that the threads are threaded in the pattern 4,3,2,1 all the way through.
[4] Begin by pulling the first four heddles out to the right of the warp. They should be in the order 4,3,2,1 as shown above
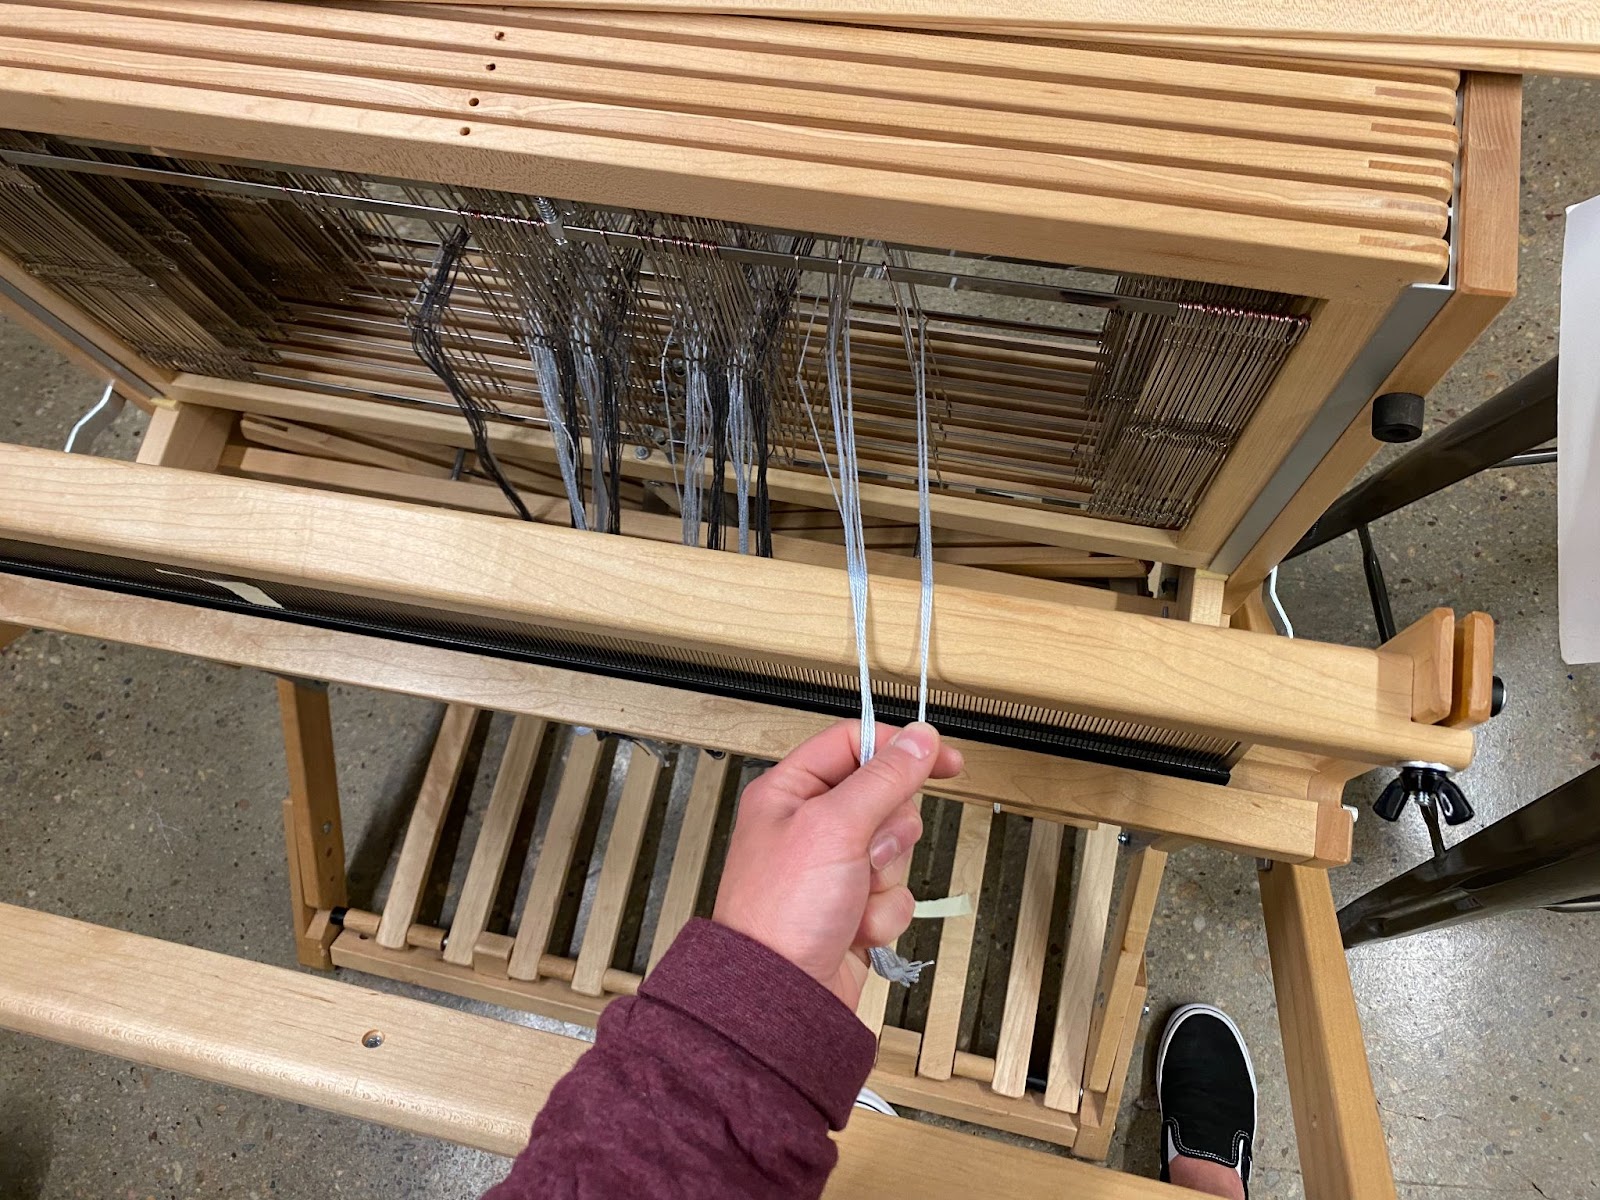
[5] Now grab the first color of warp and cut the loop at the end so all the threads are even
[6] Thread the newly cut warp through the heddles as described in step 3 above. To reiterate, the furthest right thread will go through the 4th shaft heddle, the second to last warp through the 3rd, and so on through the 1st shaft heddle. After each color block is threaded, tie all the warp threads together in a slip knot to keep them threaded and out of the way.
Note: heddles have directions, so make sure that the warp thread travels straight through from the back beam to the front. You can figure out which way is correct by threading multiple ways.
Step 6: Sleying the Reed
[1] Next we will sley the reed, meaning that we will bring the heddle threads through the reed. Begin by replacing the reed on the beater (remember we had removed this back when laying the warp down).
[2] On the right hand side of the beater arm, there is a pin used to secure the beater in place. Make sure to secure this pin before starting to sley.

[3] Once the beater is set, release the warp so that there is 8-10 inches of warp that can come out past the beater. Now we are ready to sley.
[4] Grab one section of color, untie the slip knot, and separate out the last four threads on the right hand side of the warp.
[5] Spread the four threads out in your hand and bring forward over the beater
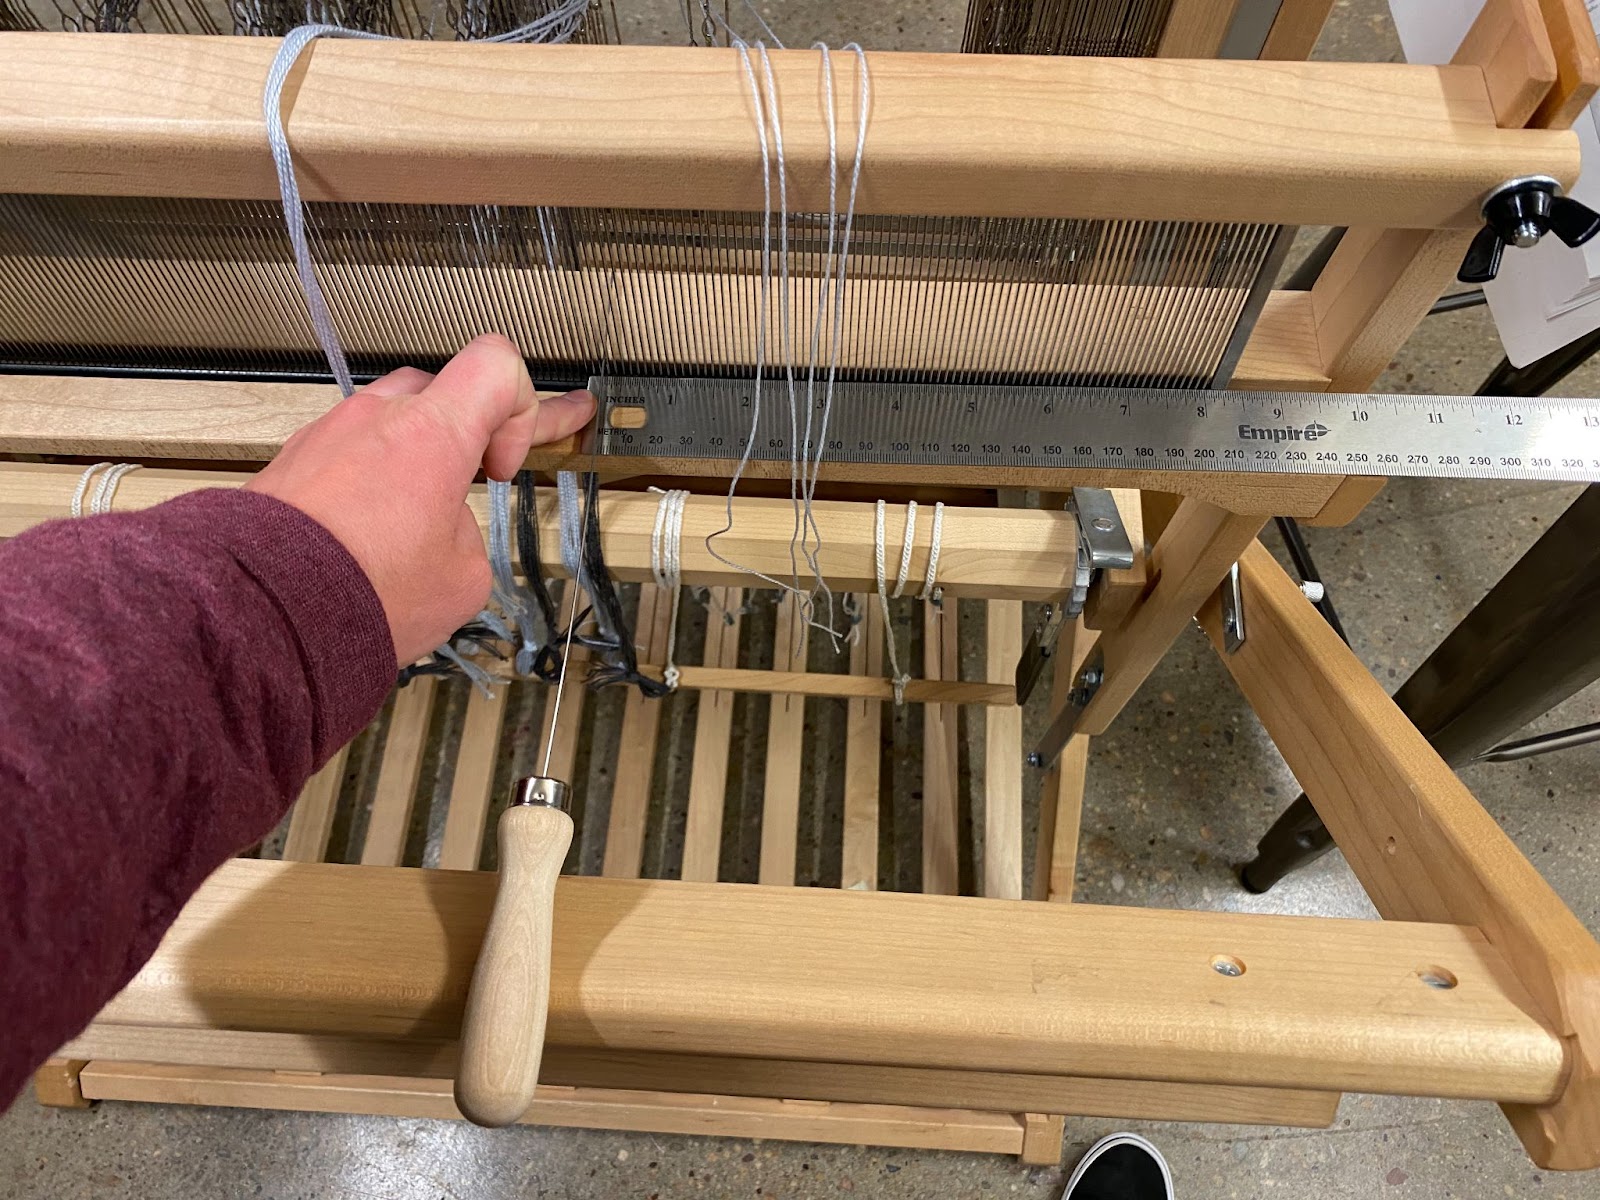
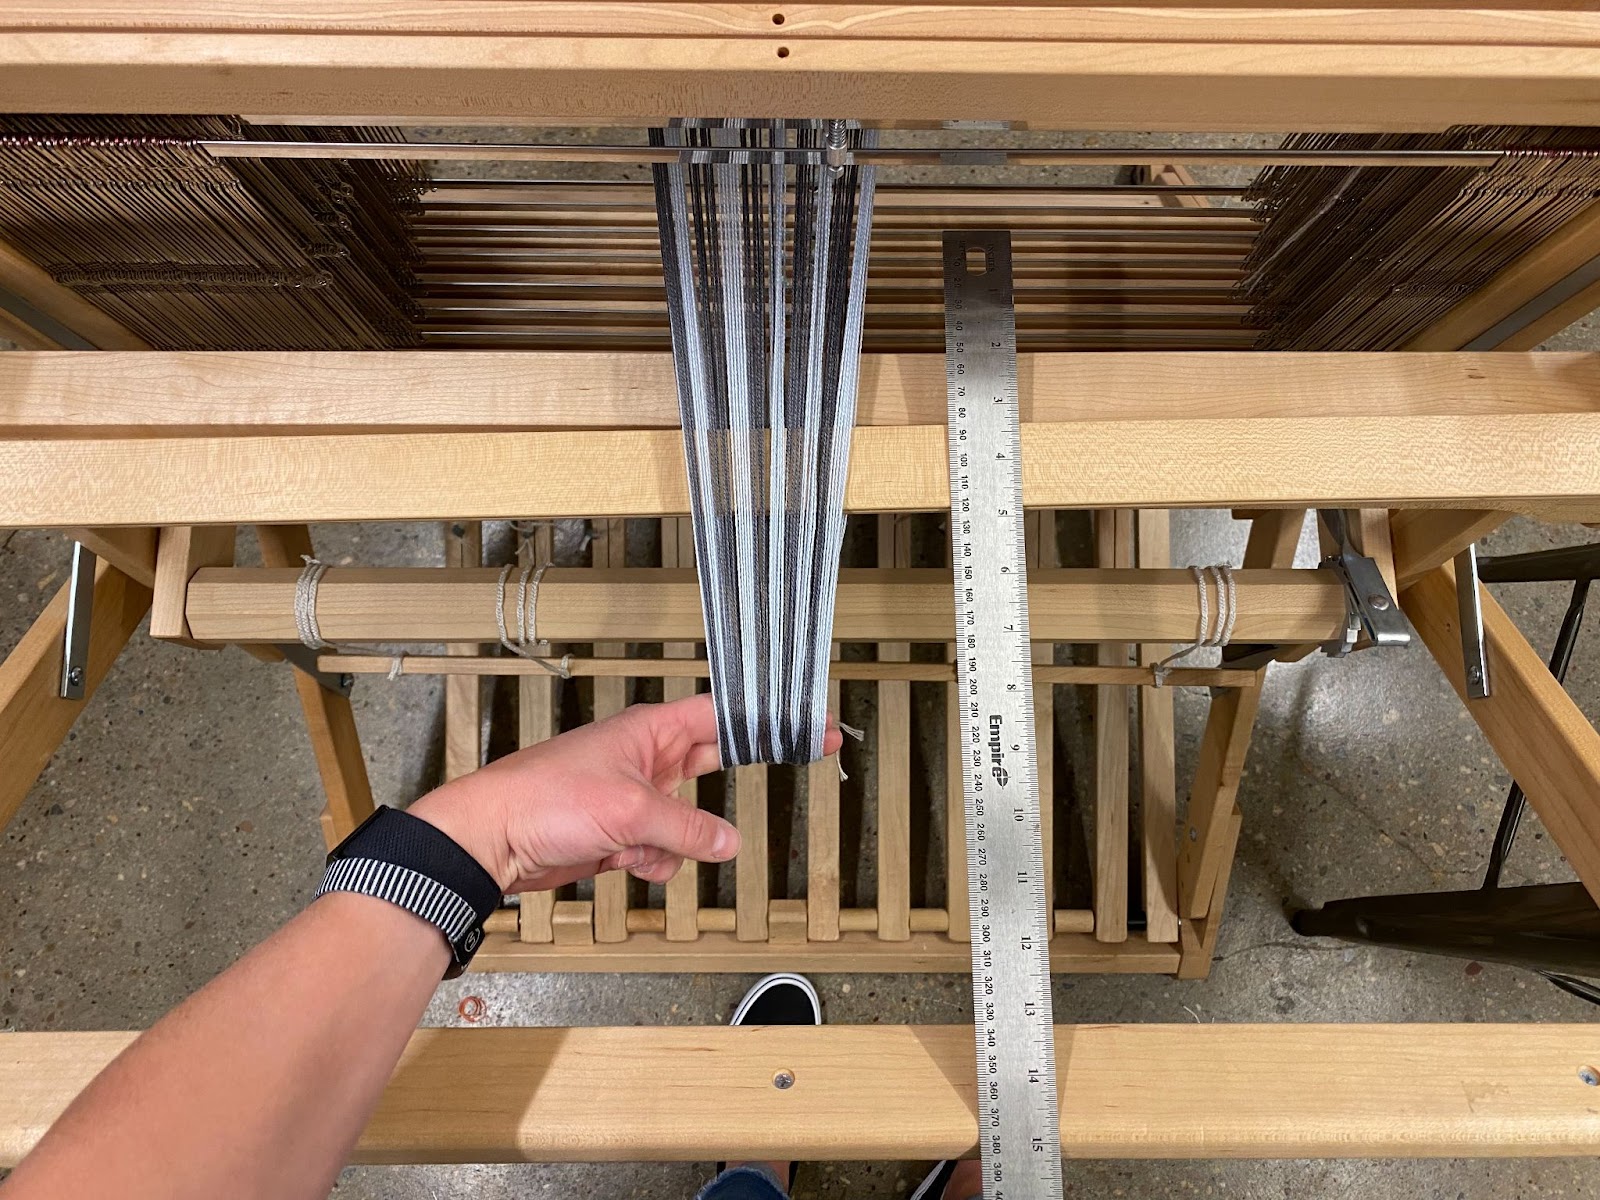
[6] Now, measure the length of the reed. The floor loom reed is 26” long and we have 10” of warp. So, we will have 16” of warp leftover when finished sleying. That means we want to start the warp 8” from the right hand side of the reed so that our warp is centered on the reed.
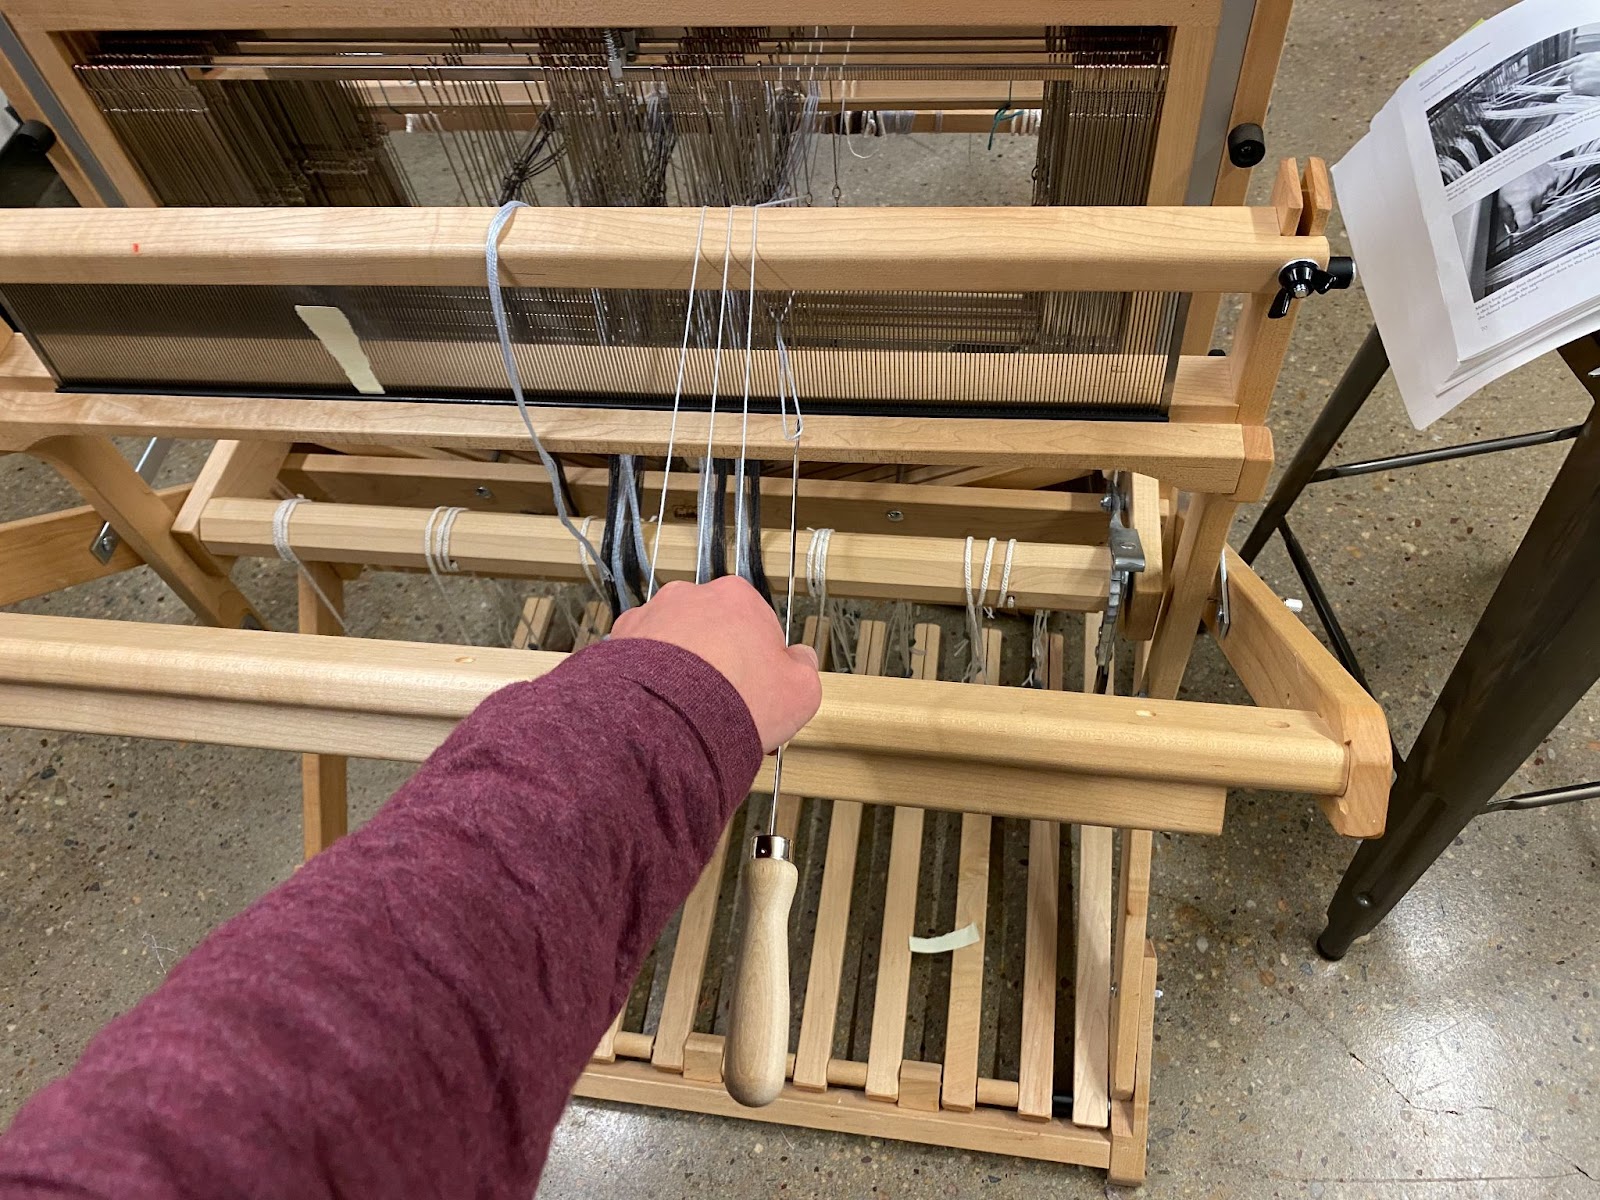
[7] With the first slot in mind, pull those first four threads out and use the sley hook to grab the furthest right thread and pull it through the dent you identified to be 8” into the reed
[8] Repeat this process with the rest of the threads in your hand, placing each new thread in the next dent over from the first. It is easy to skip a dent or place two threads in one dent, so double check you are placing only one thread in each along the way.
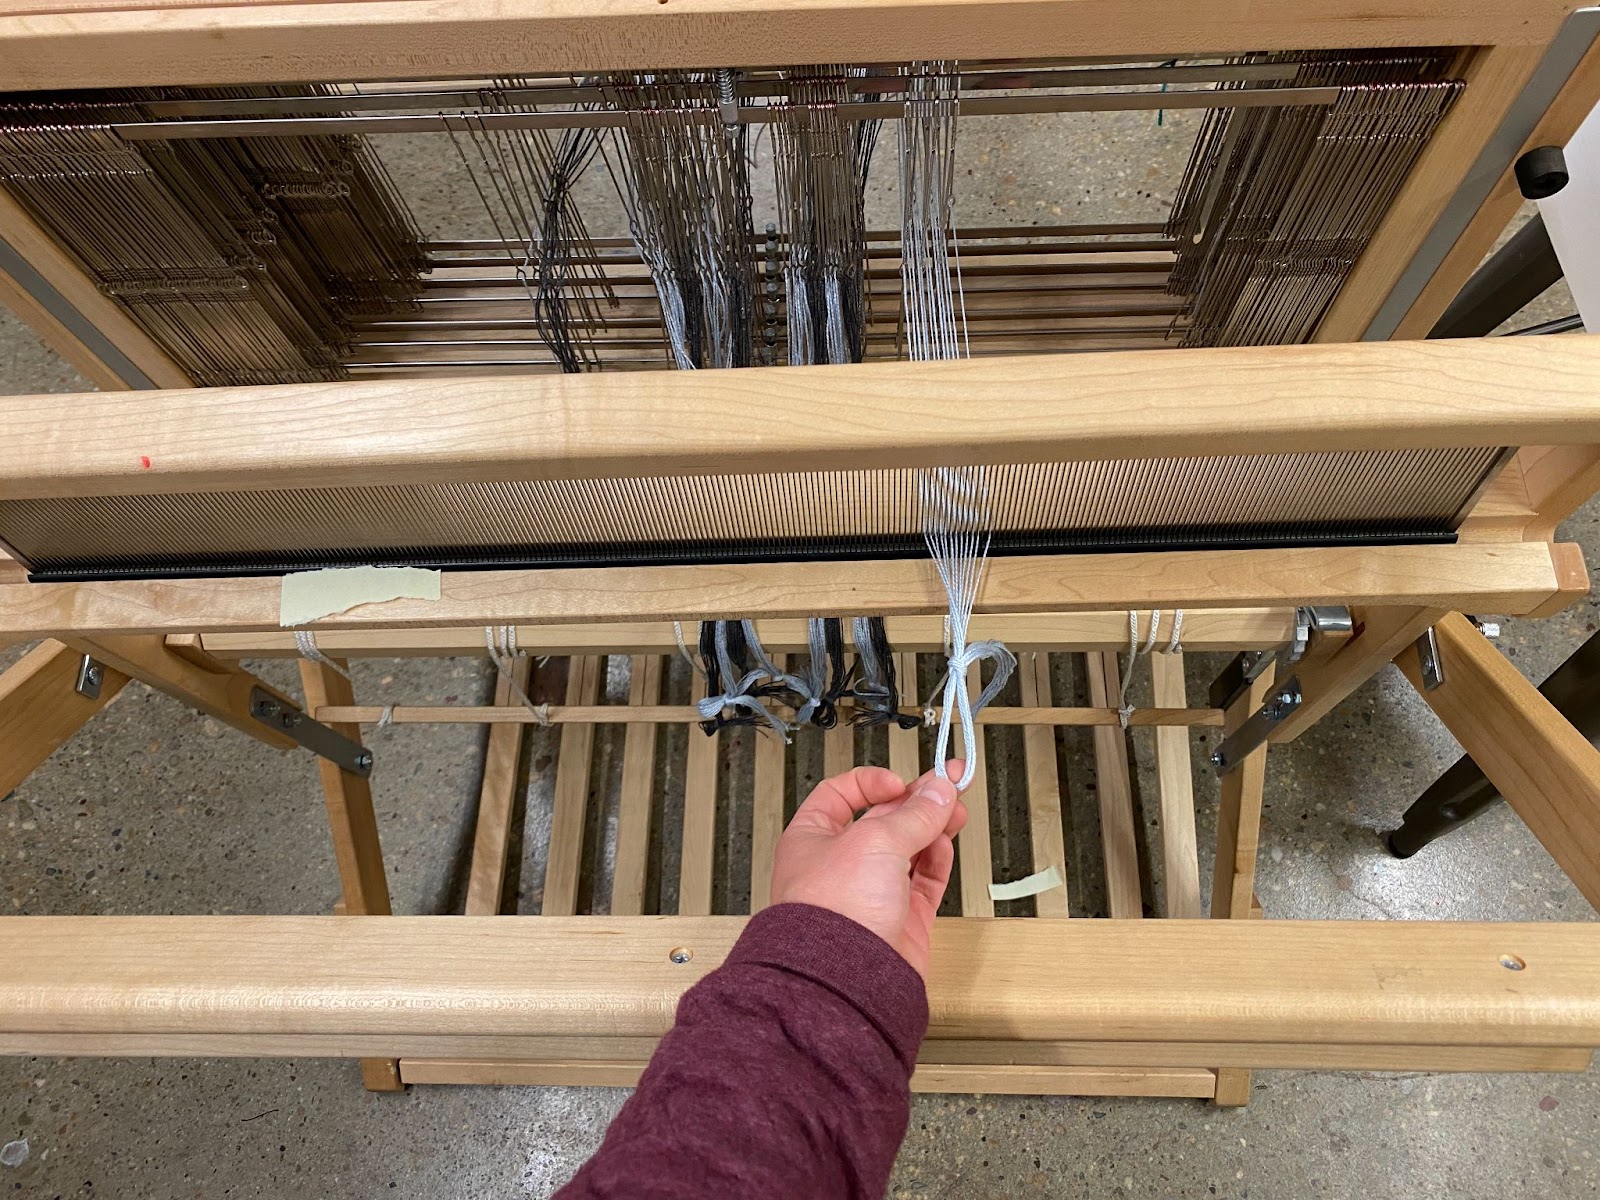
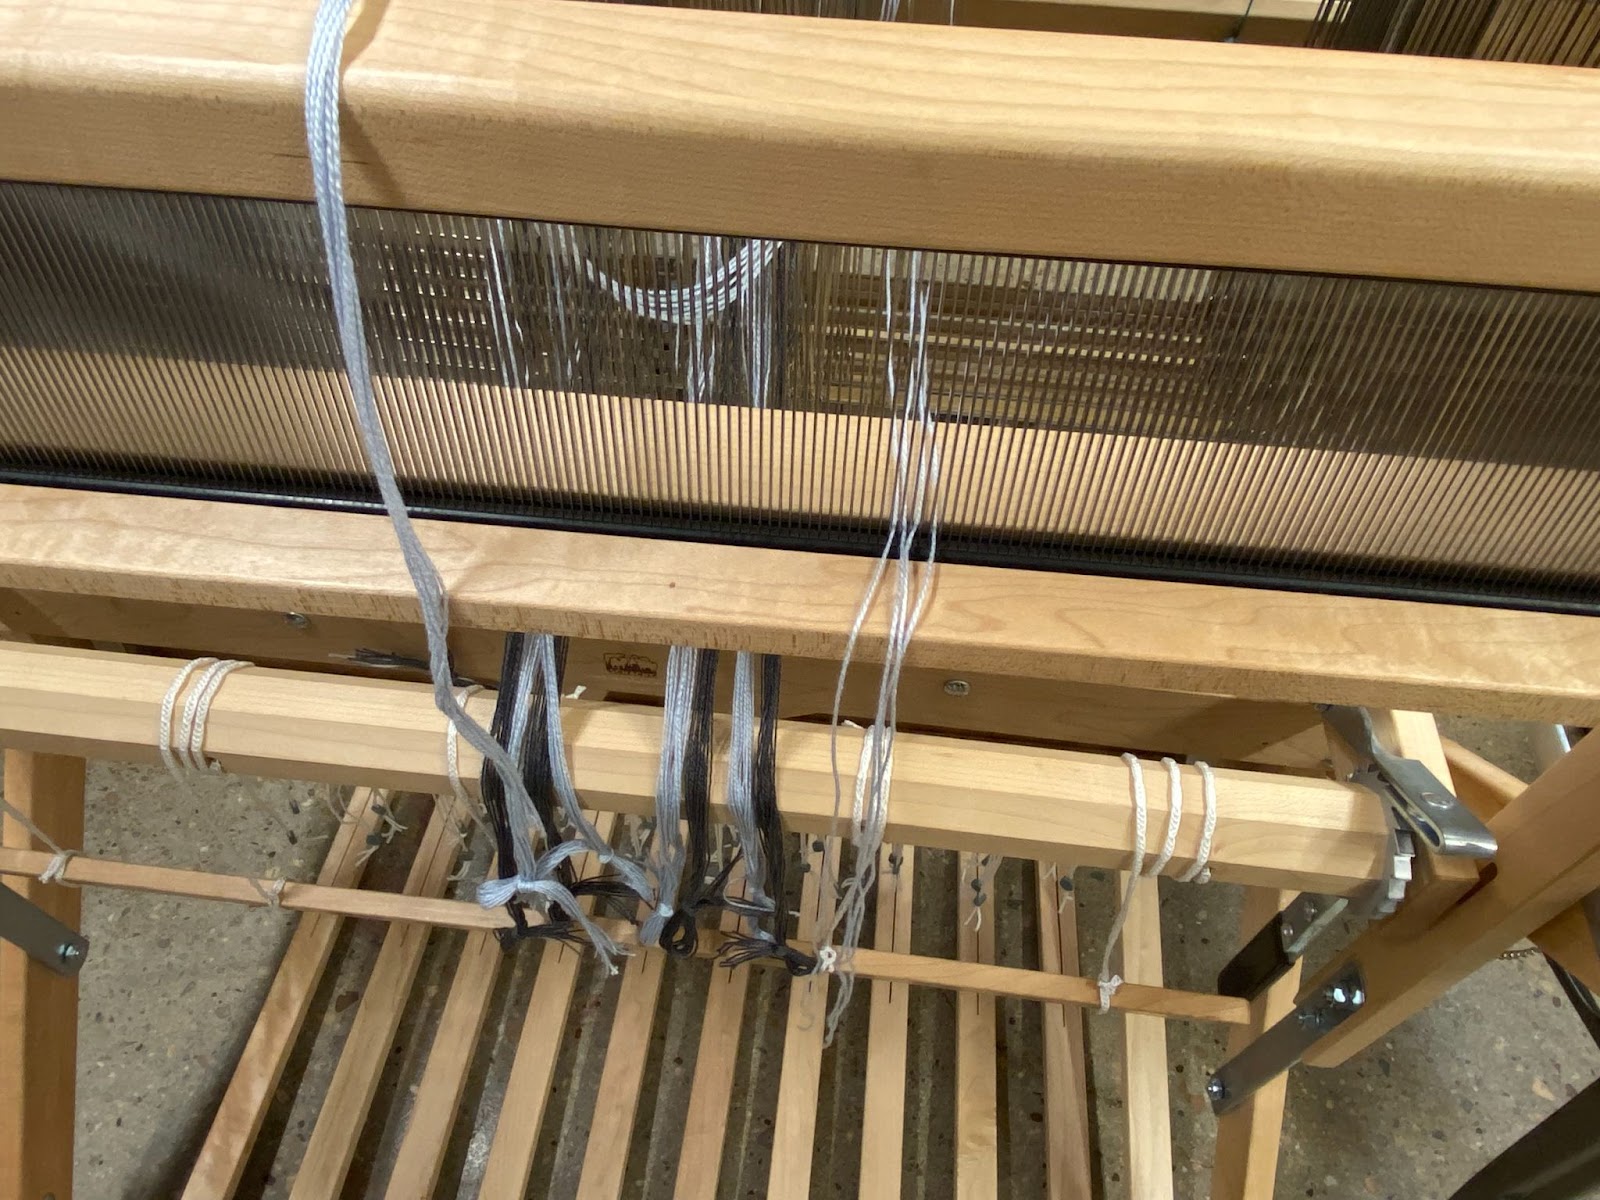
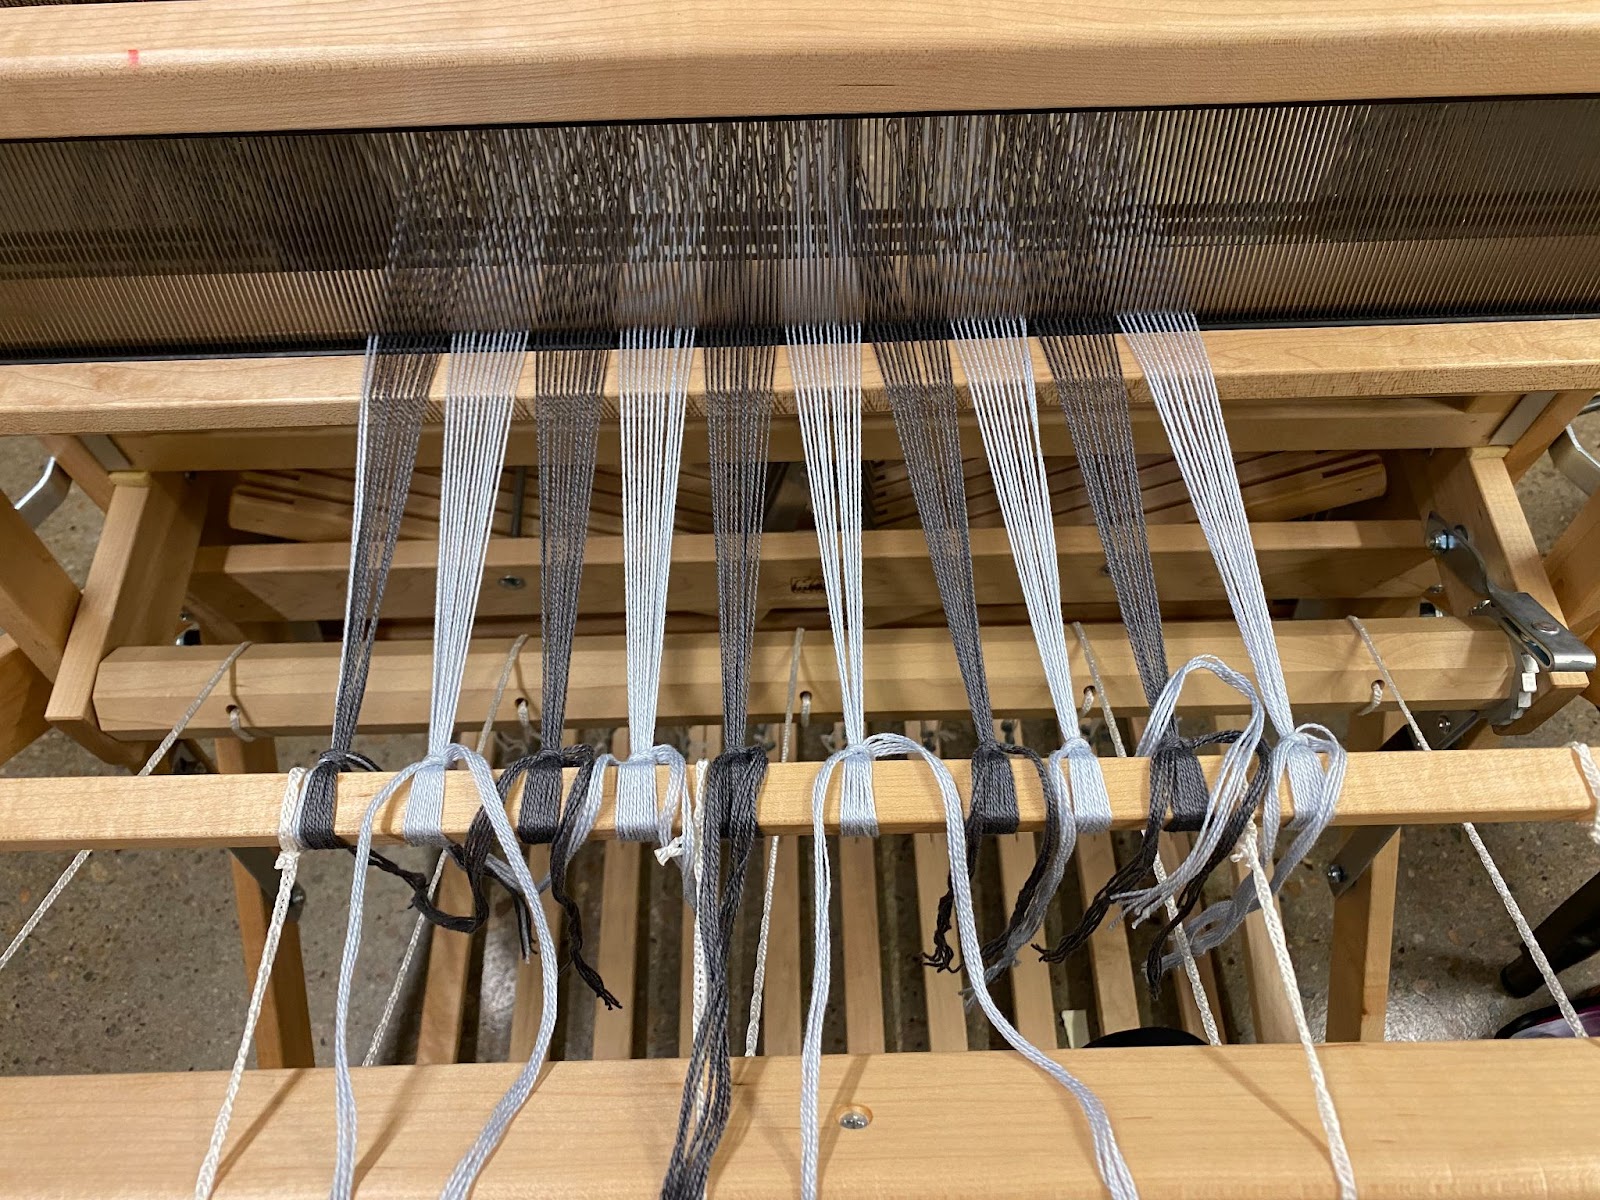
[9] Continue sleying the rest of the color block that you are on. When finished with a block of color, tie another slip knot to keep all the colors together.
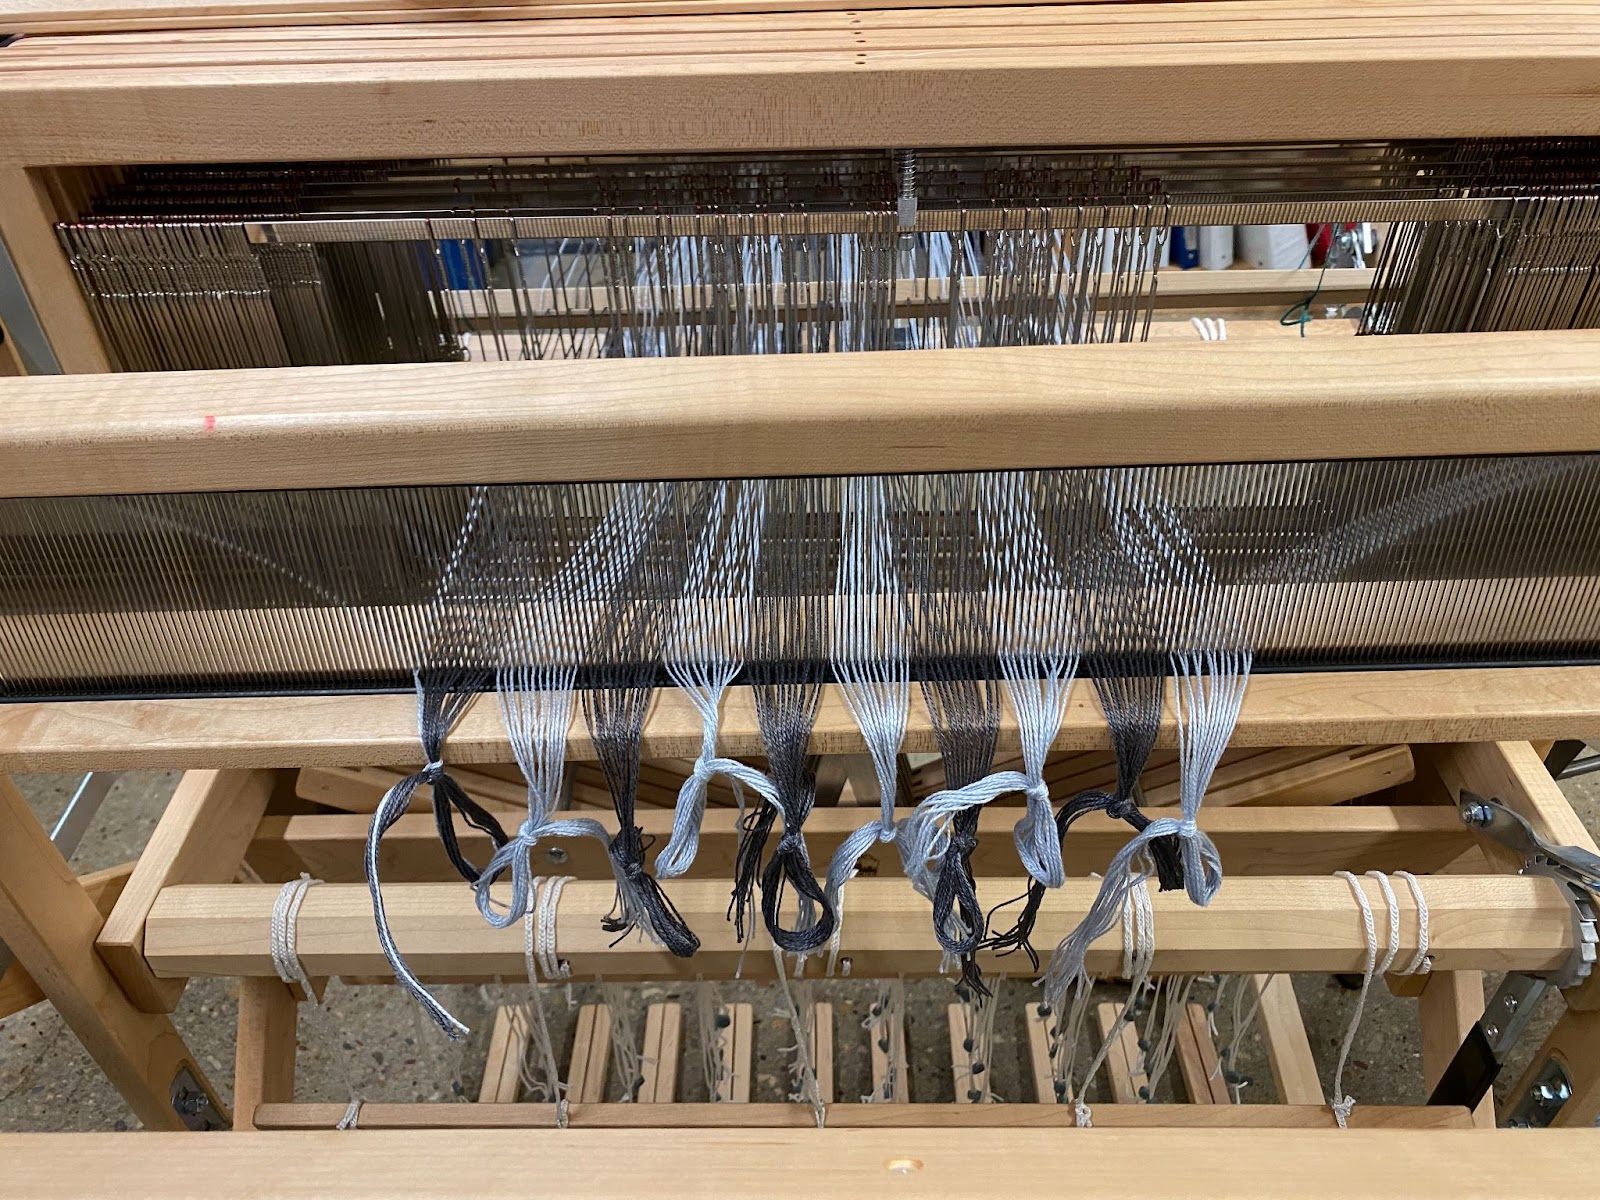
[10] Repeat this process until all the warp is sleyed. On the left, you can see what the threads look like as they are placed through the dents and tied with a slip knot. On the right you can see how to grab the thread with the sley hook from your hand and pull it through.
Note: it is helpful to have a small loop in the thread being slayed for the sley hook to grab on to
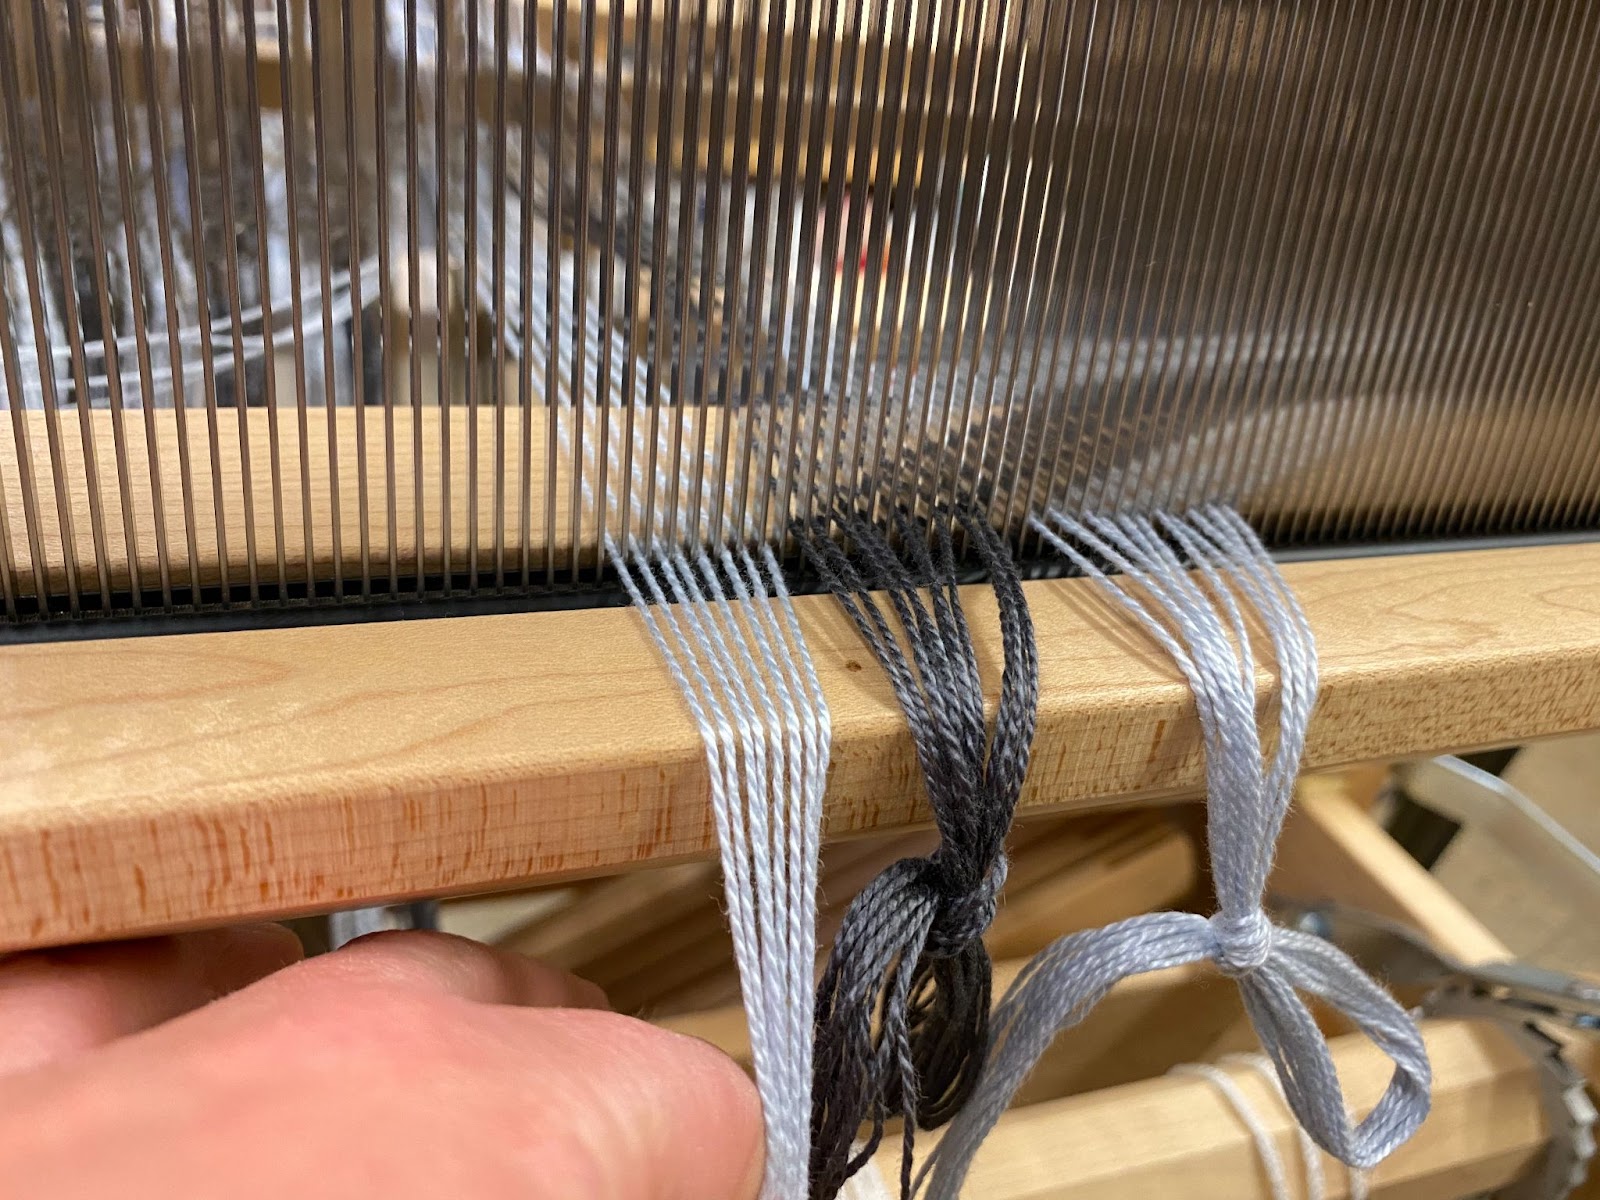
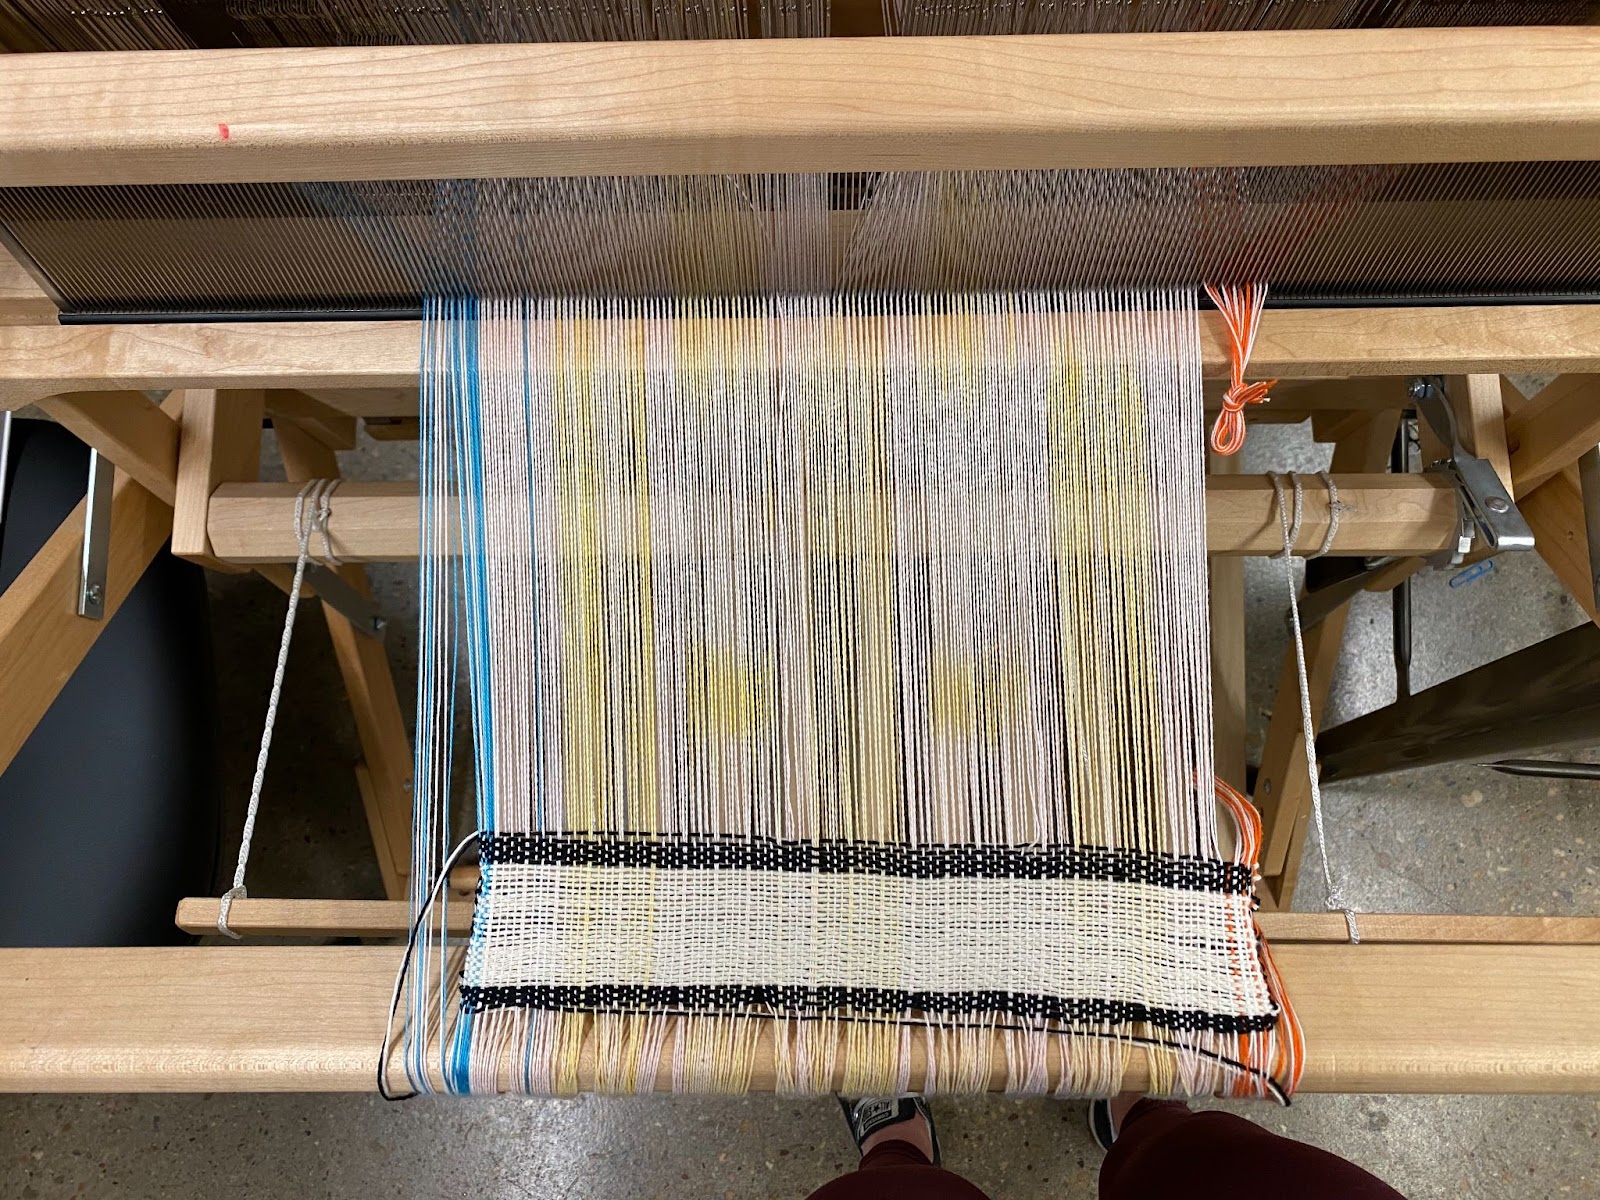
Step 7: Tie the Warp to the Front Apron Rod
[1] At this point, the reed is completely sleyed.
[2] Release the front beam from the lock and lay it back against the loom
 [3] Next, pull the front apron rod up and over the front beam.
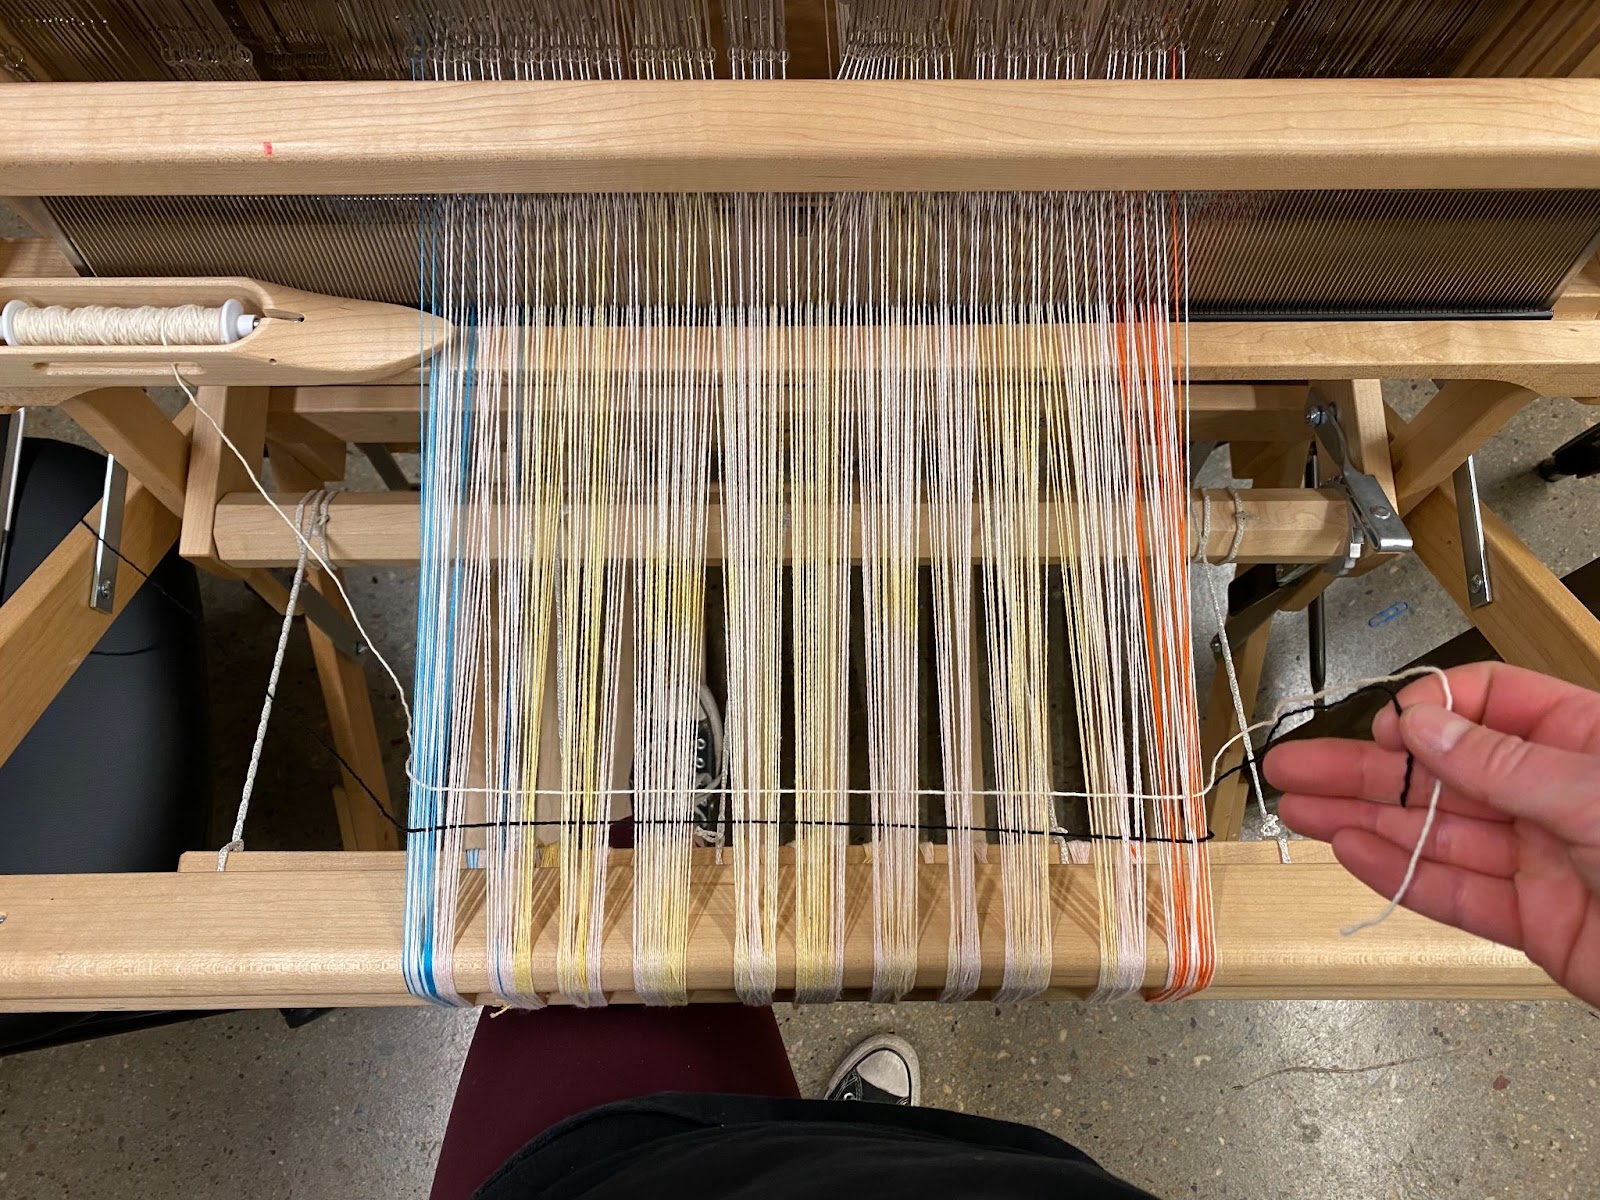
[4] Begin tying the warp onto the apron rod. To do so, split the section of warp into two pieces and wrap around the apron rod by first taking the warp thread over the rod towards yourself and then back under the rod toward the loom. Then, tie the two ends together loosely. This will allow you to easily adjust the tension
[5] Repeat this process for all warp sections until all of them have been tied on the apron rod.
 [6] Adjust and re-adjust the knots until there is even tension across all of the sections of warp. Once even tension is achieved, double knot each section to secure.
Step 9: Tie Up Treadles
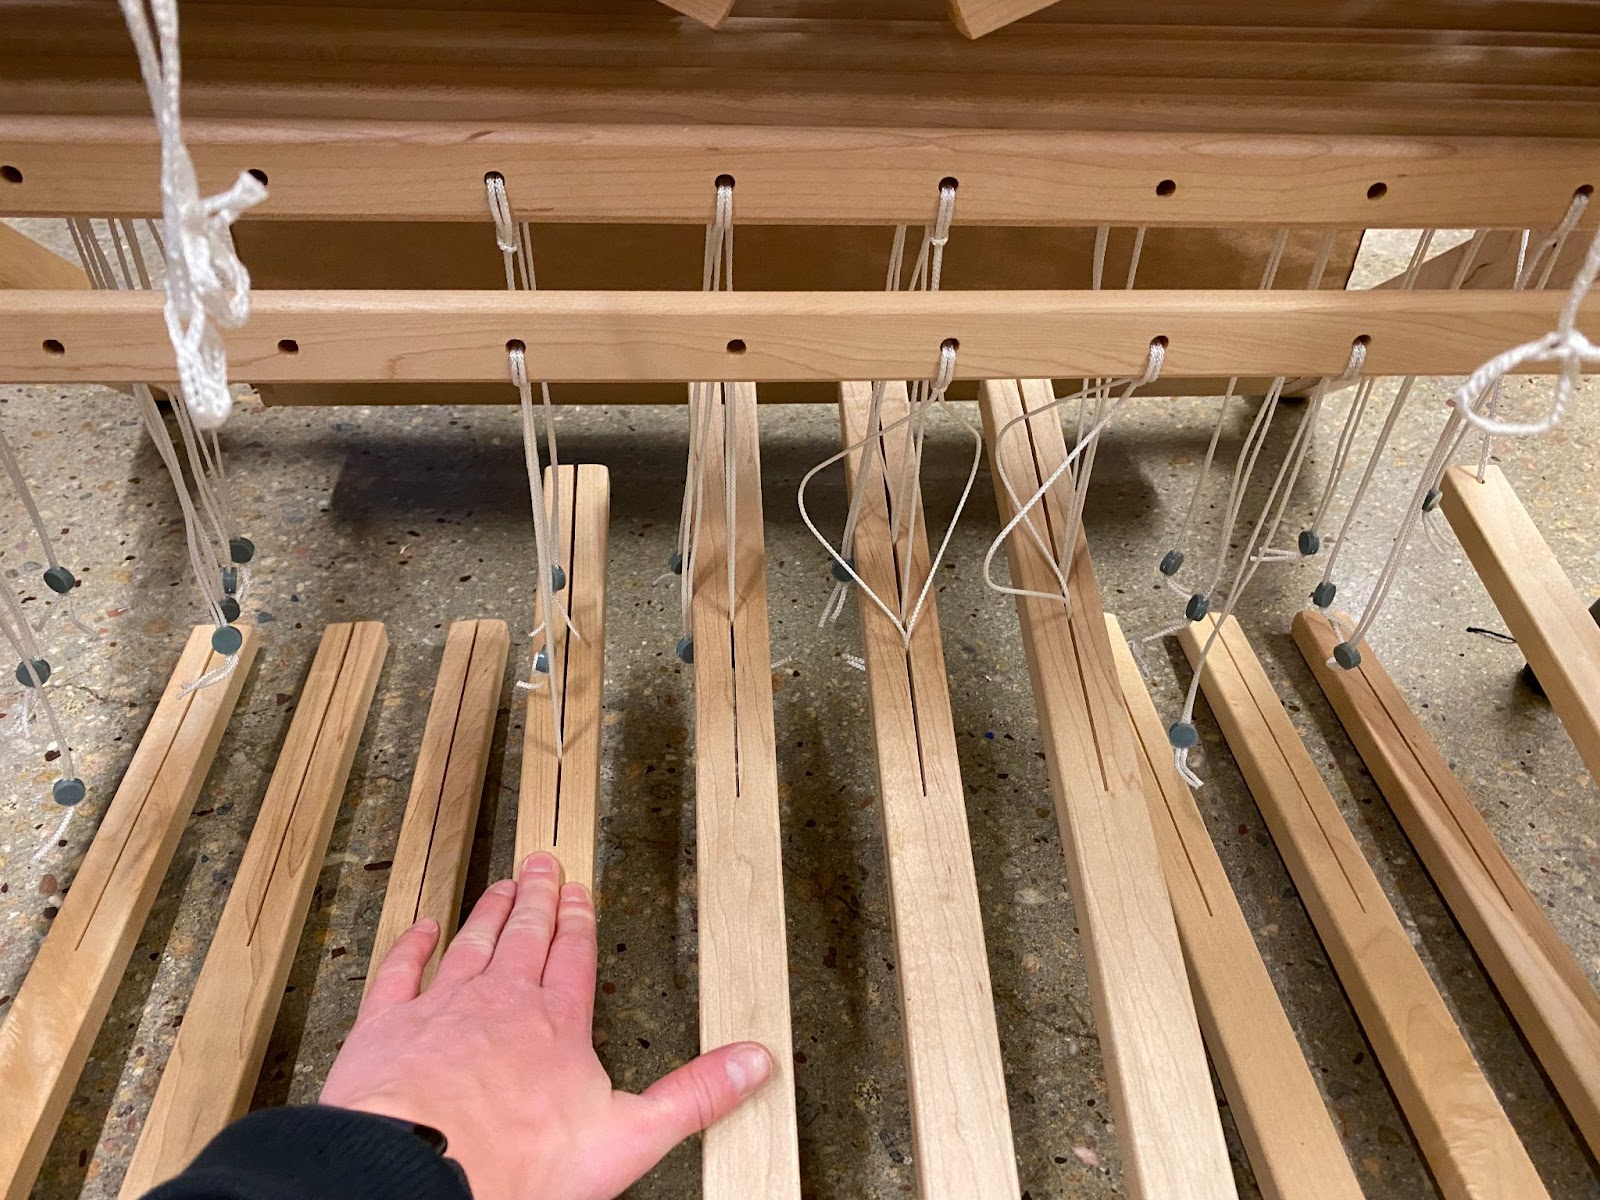 [7] The last step to set up the loom before getting to weaving is tying up the treadles. You can vary your woven piece quite a bit by changing the treadle tie up. Make sure to look at your draft to determine the treadle tie up for your desired piece. If you are unfamiliar with a draft, see the next section to learn more about each component.
Threading #
Variation in threading patterns provides opportunity for different weaving patterns. Threading variations are unlimited, but families of weave structures or patterns are produced from particular threading. (Chandler 113)
In this tutorial, we threaded a straight draw. This means that the threads are placed in the following order: shaft 1, shaft 2, shaft 3, shaft 4, repeat.
There are many other ways to thread, see resources here: Learning to Weave
Full Draft #
What is a draft? #
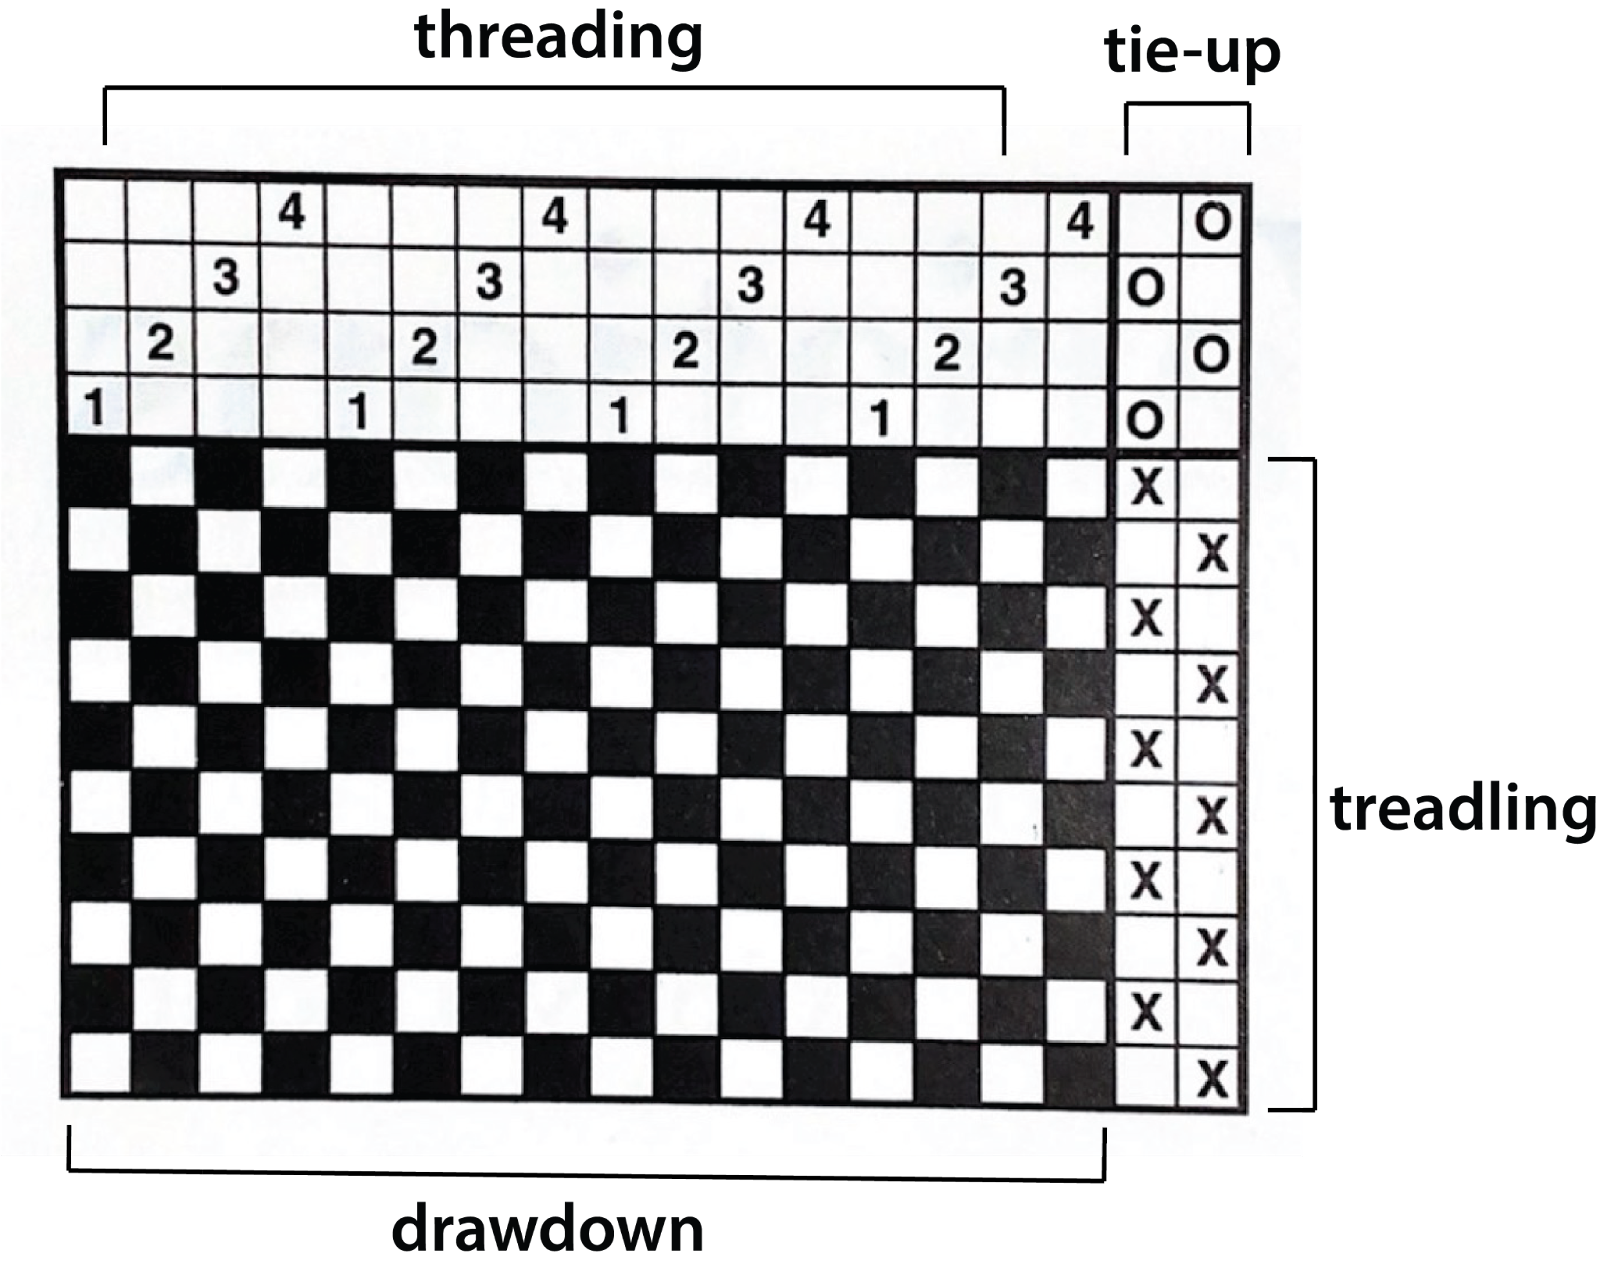
Drafts are the weaver’s blueprints. The blueprint tells the weaver which combinations of frames/shafts to raise together (tie-up), which order to raise the shafts (treadling), which yarn to throw at each pick (treadling), and what the fabric will look like overall (drawdown).
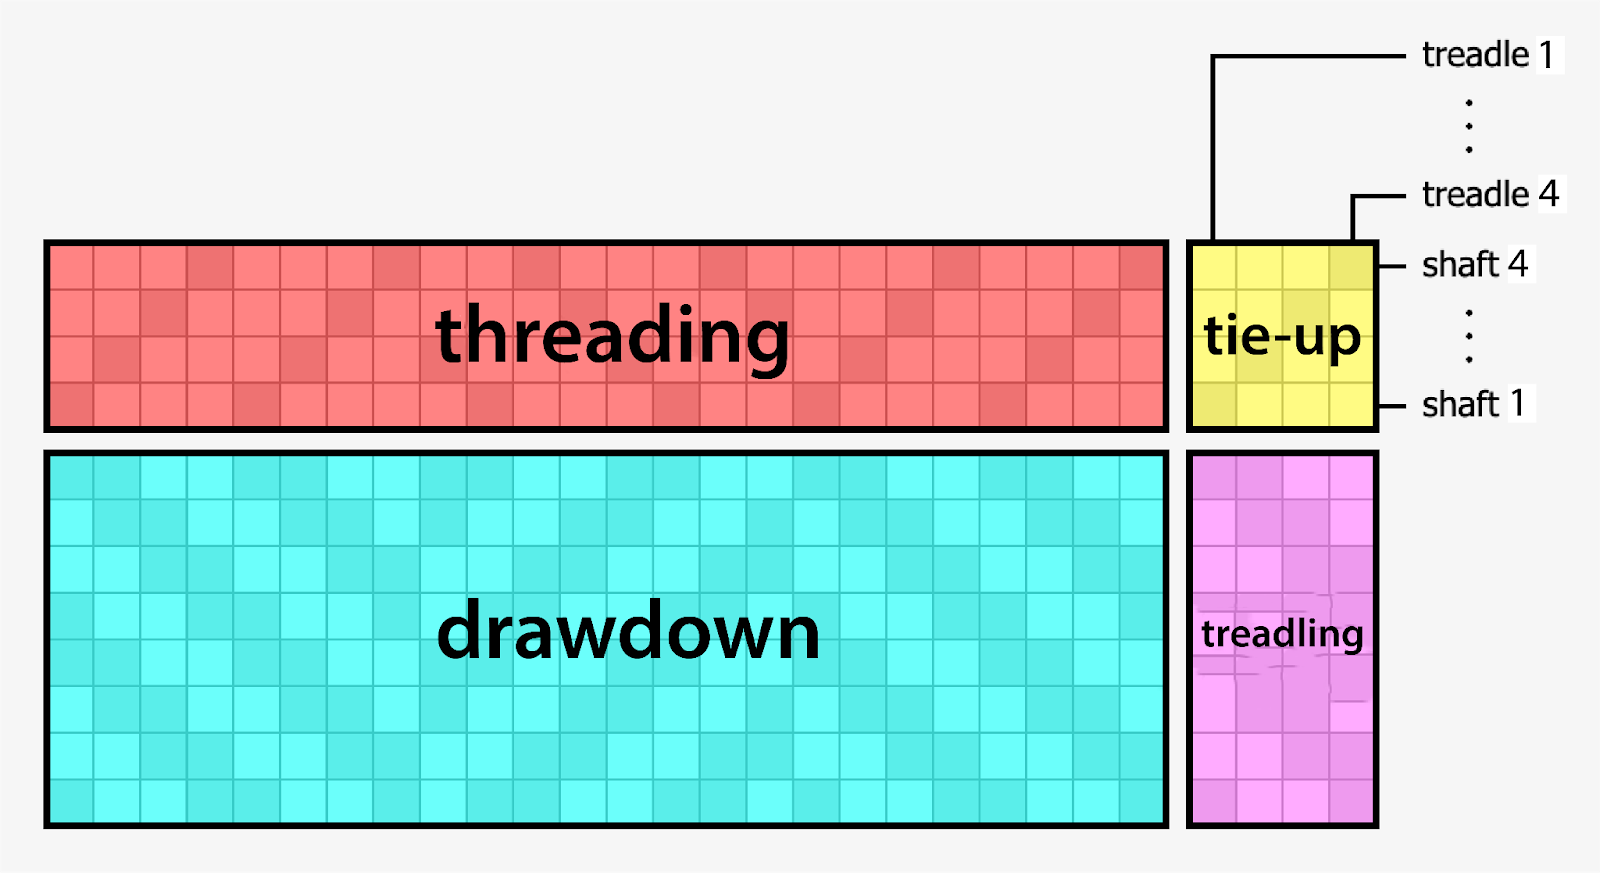
Parts of a draft #
Threading - as described above in the warping section, threading tells you what shafts and in which order to thread the warp through the heddles.
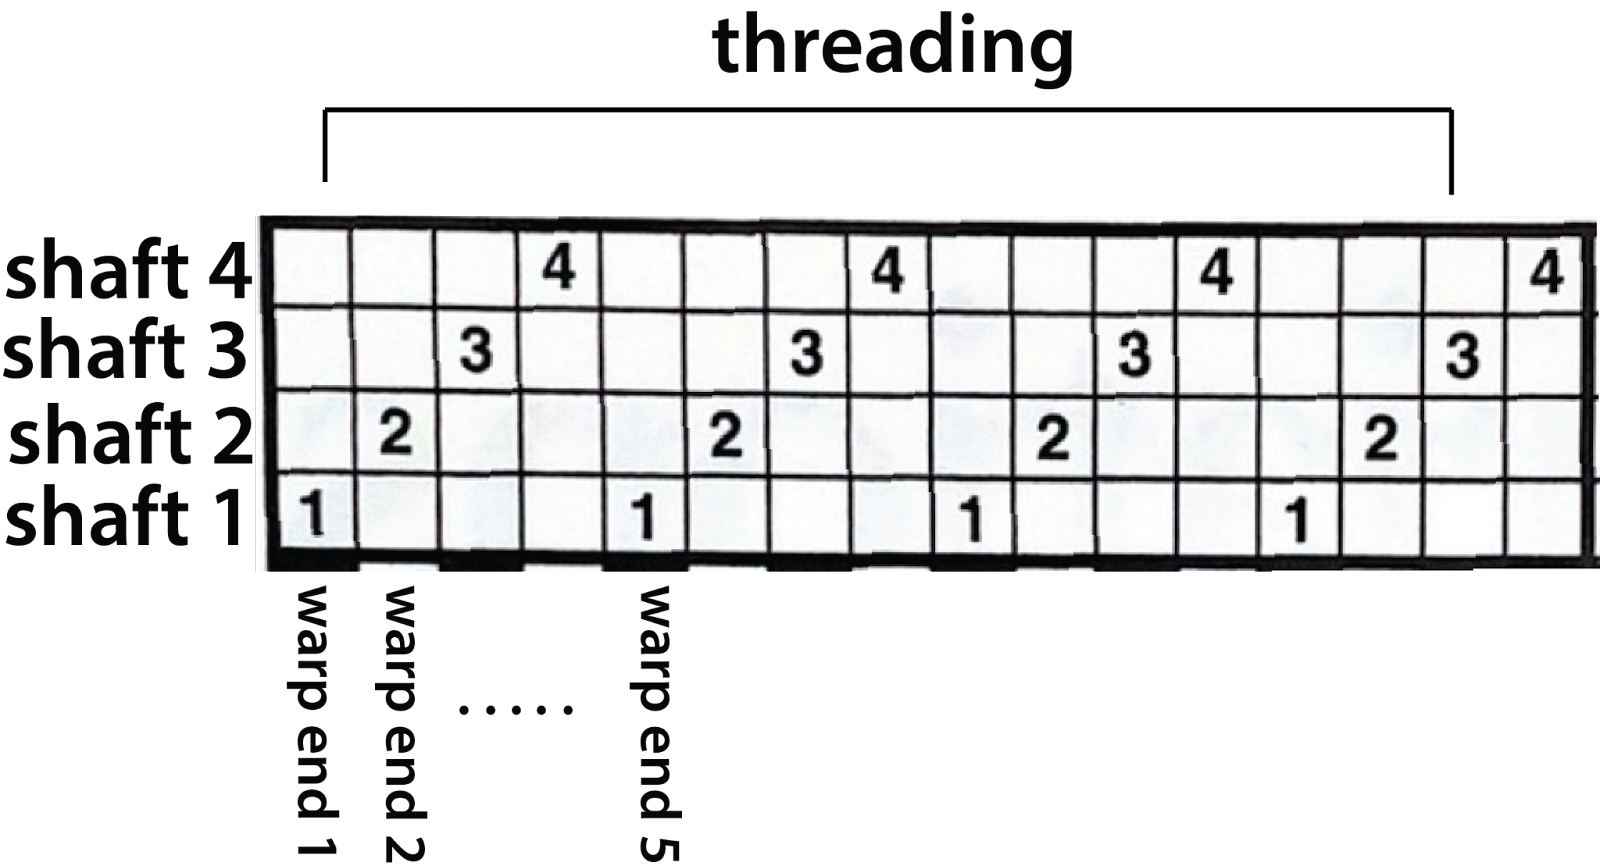
[1] Every row in the draft represents one shaft and every column represents one warp end. The number indicates which shaft each warp end should be threaded on. The numbers in the boxes refer to the shaft number. These can be replaced by symbols or colors.
[2] “Xs” are also a common way to mark threading. The threading diagram on the right lines up to the shaft and warp ends to display what this threading looks like on the loom.
Tie-Up - the tie-up tells you how to connect shafts and treadles. On a floor loom, the shafts are connected to the treadles via a string.
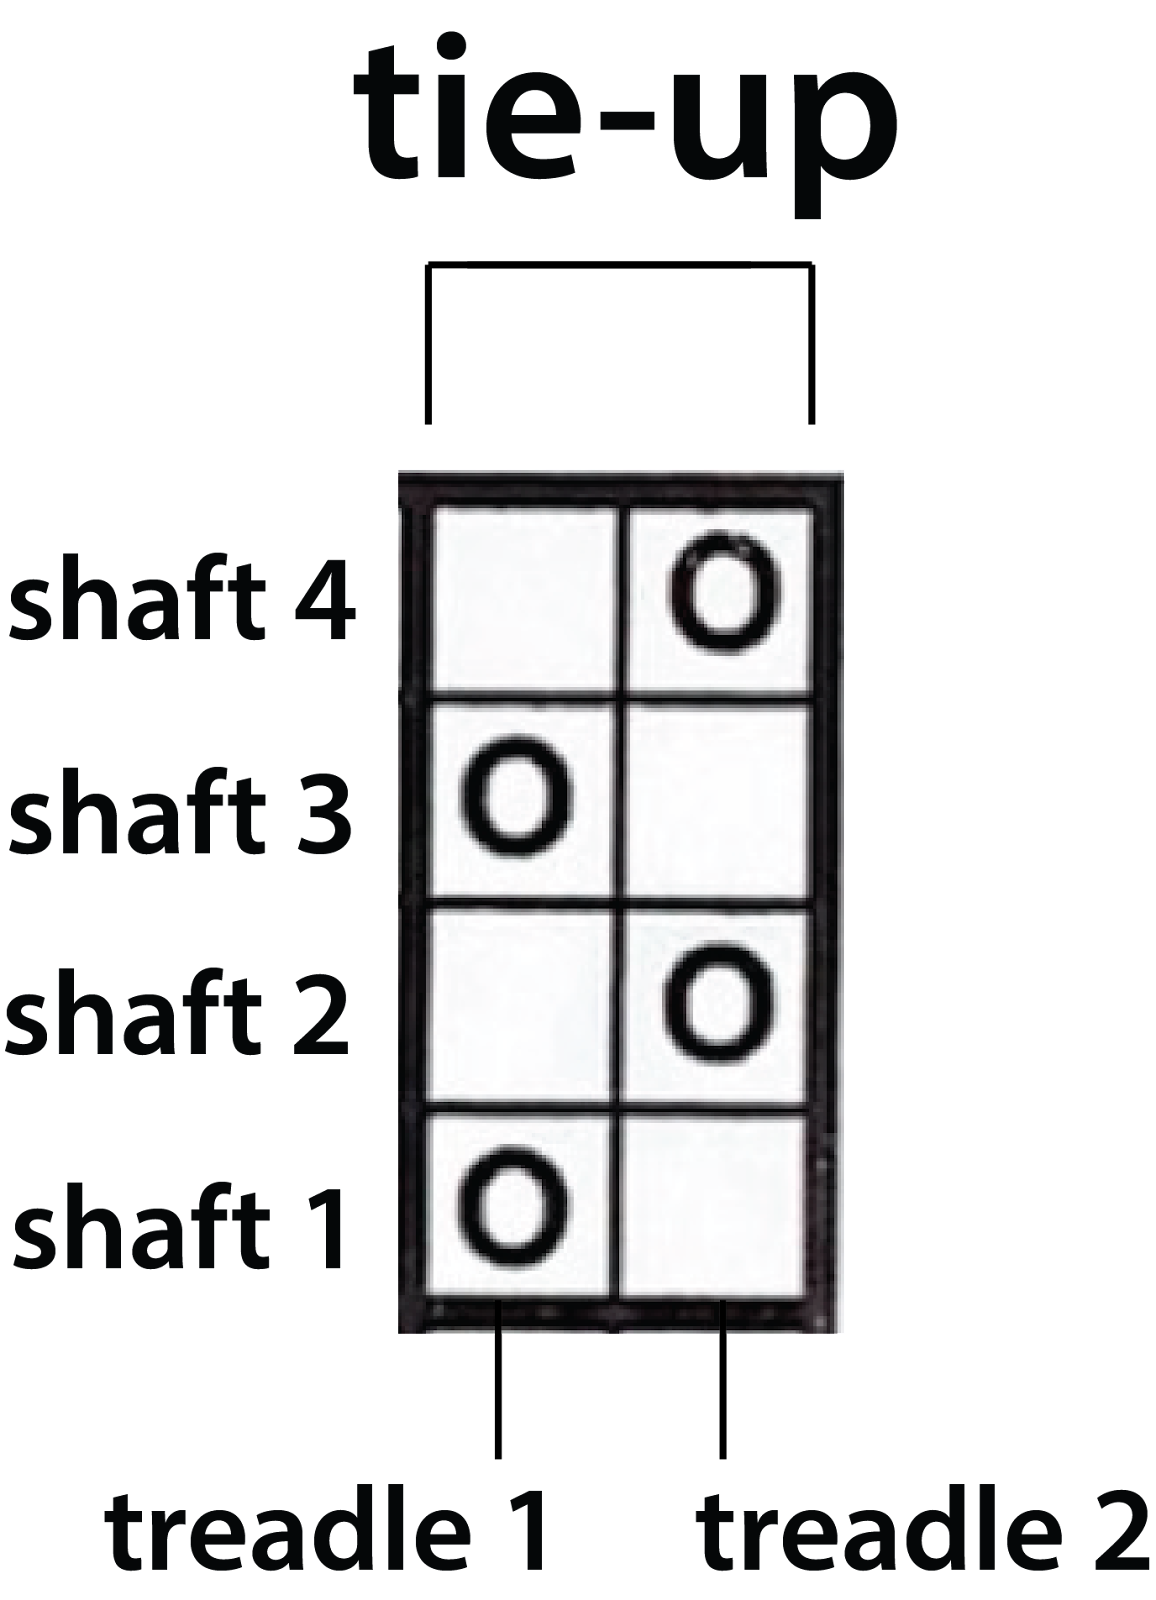
[1] Treadles are tied to shafts via strings. Each vertical column represents a treadle and each horizontal column represents a shaft. Here, you can see that treadle 1 lifts shafts 1 and 3.
Treadling - the treadling is the order in which you press the treadles and which yarns to throw at each press of the treadles. TODO
Drawdown - the drawdown is a visual representation of what your fabric will look like. TODO
Draft Examples #
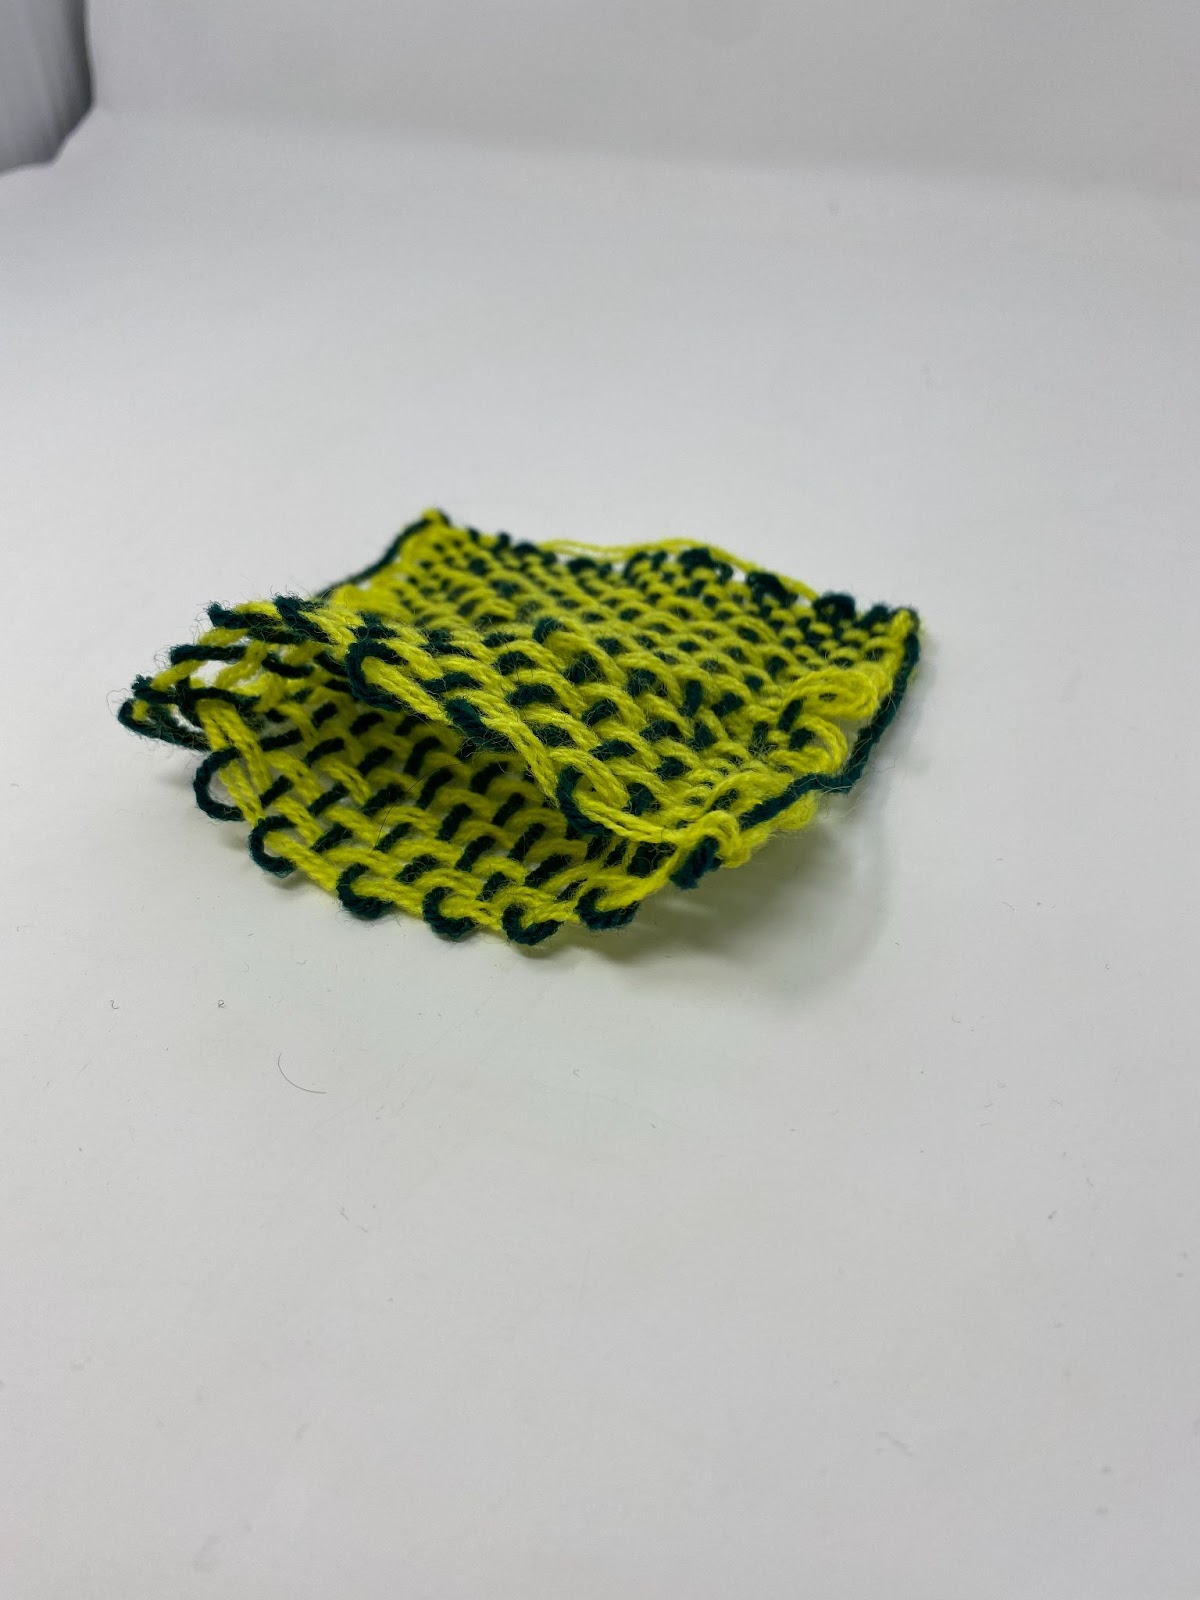
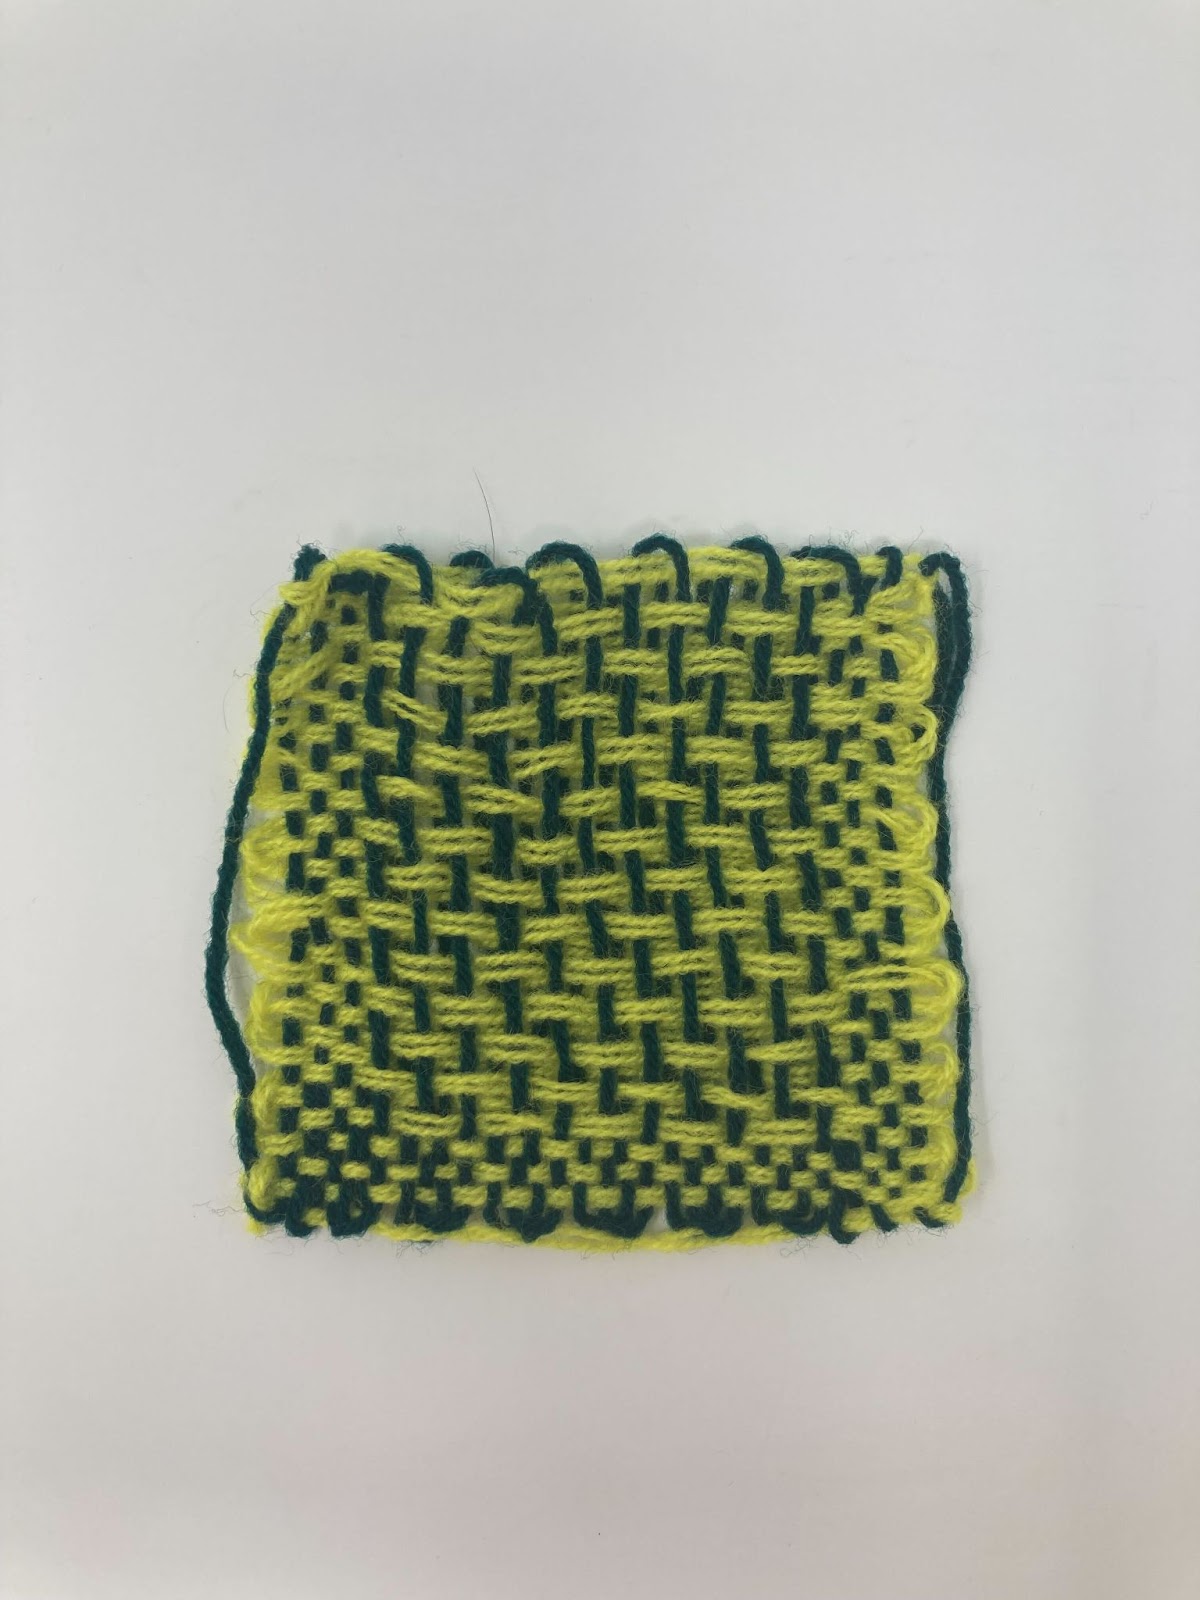
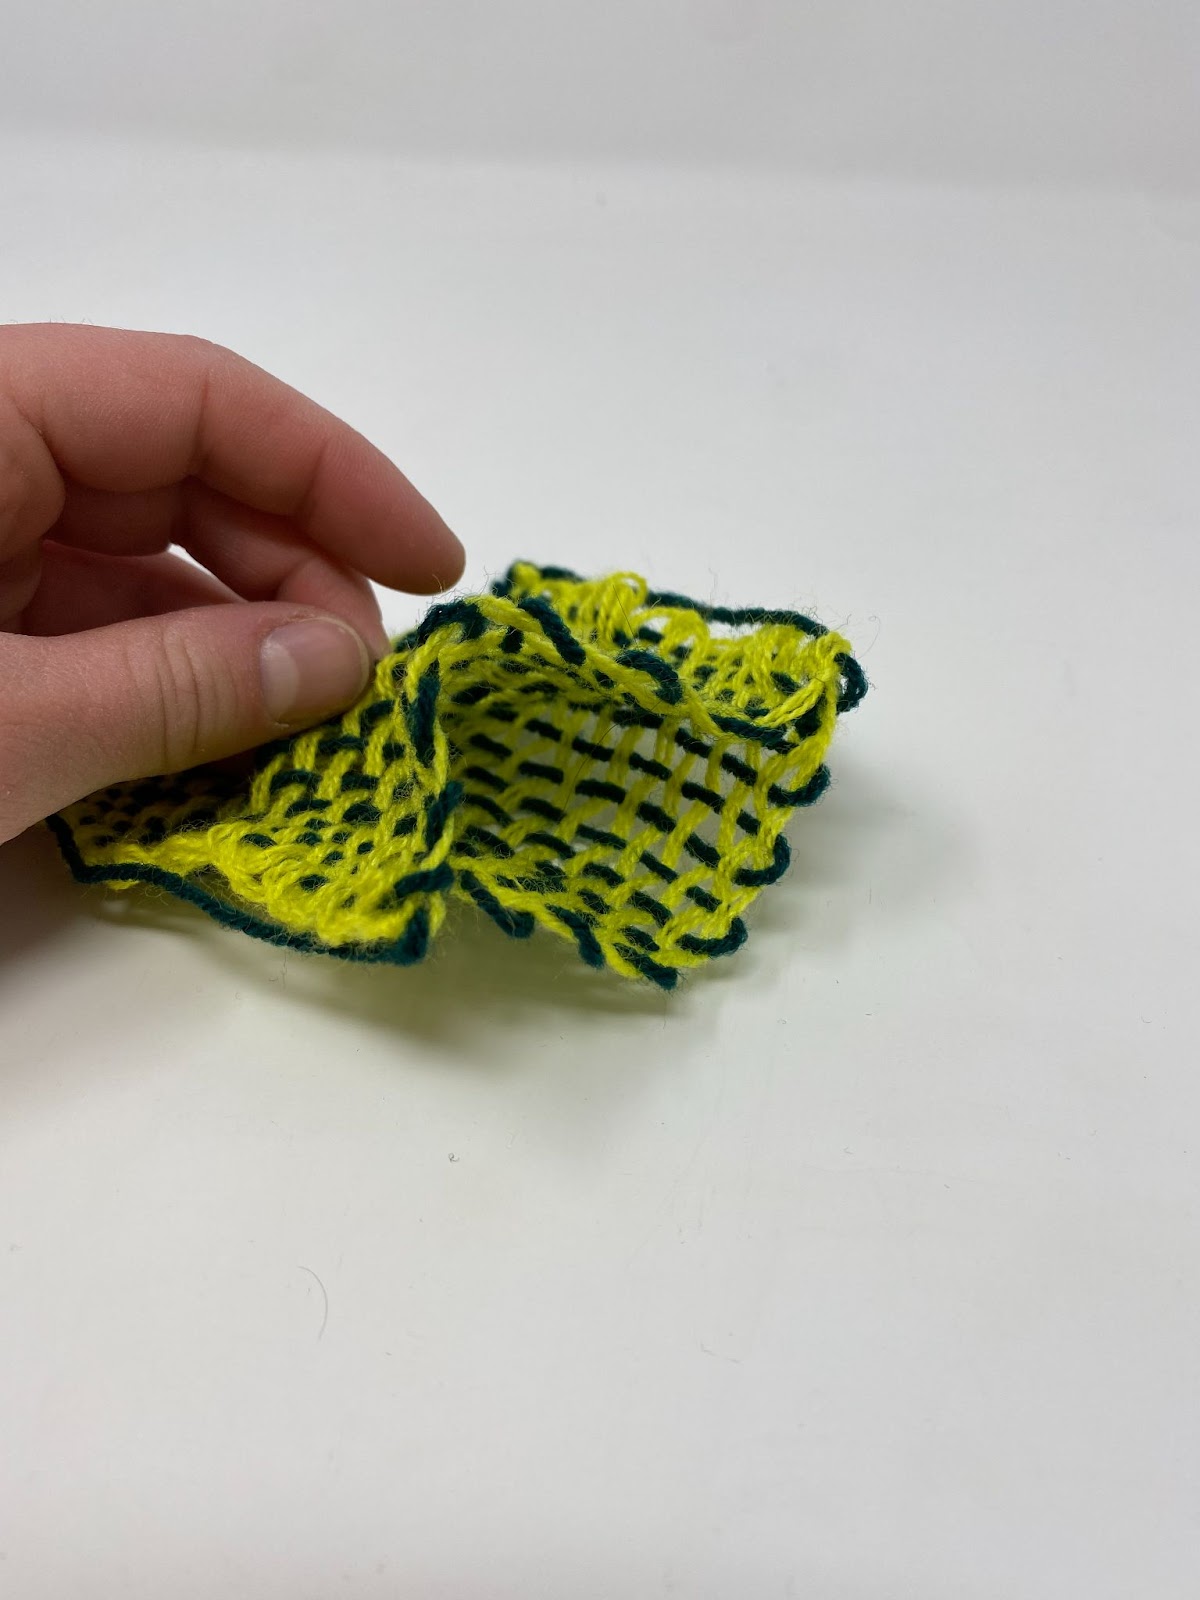
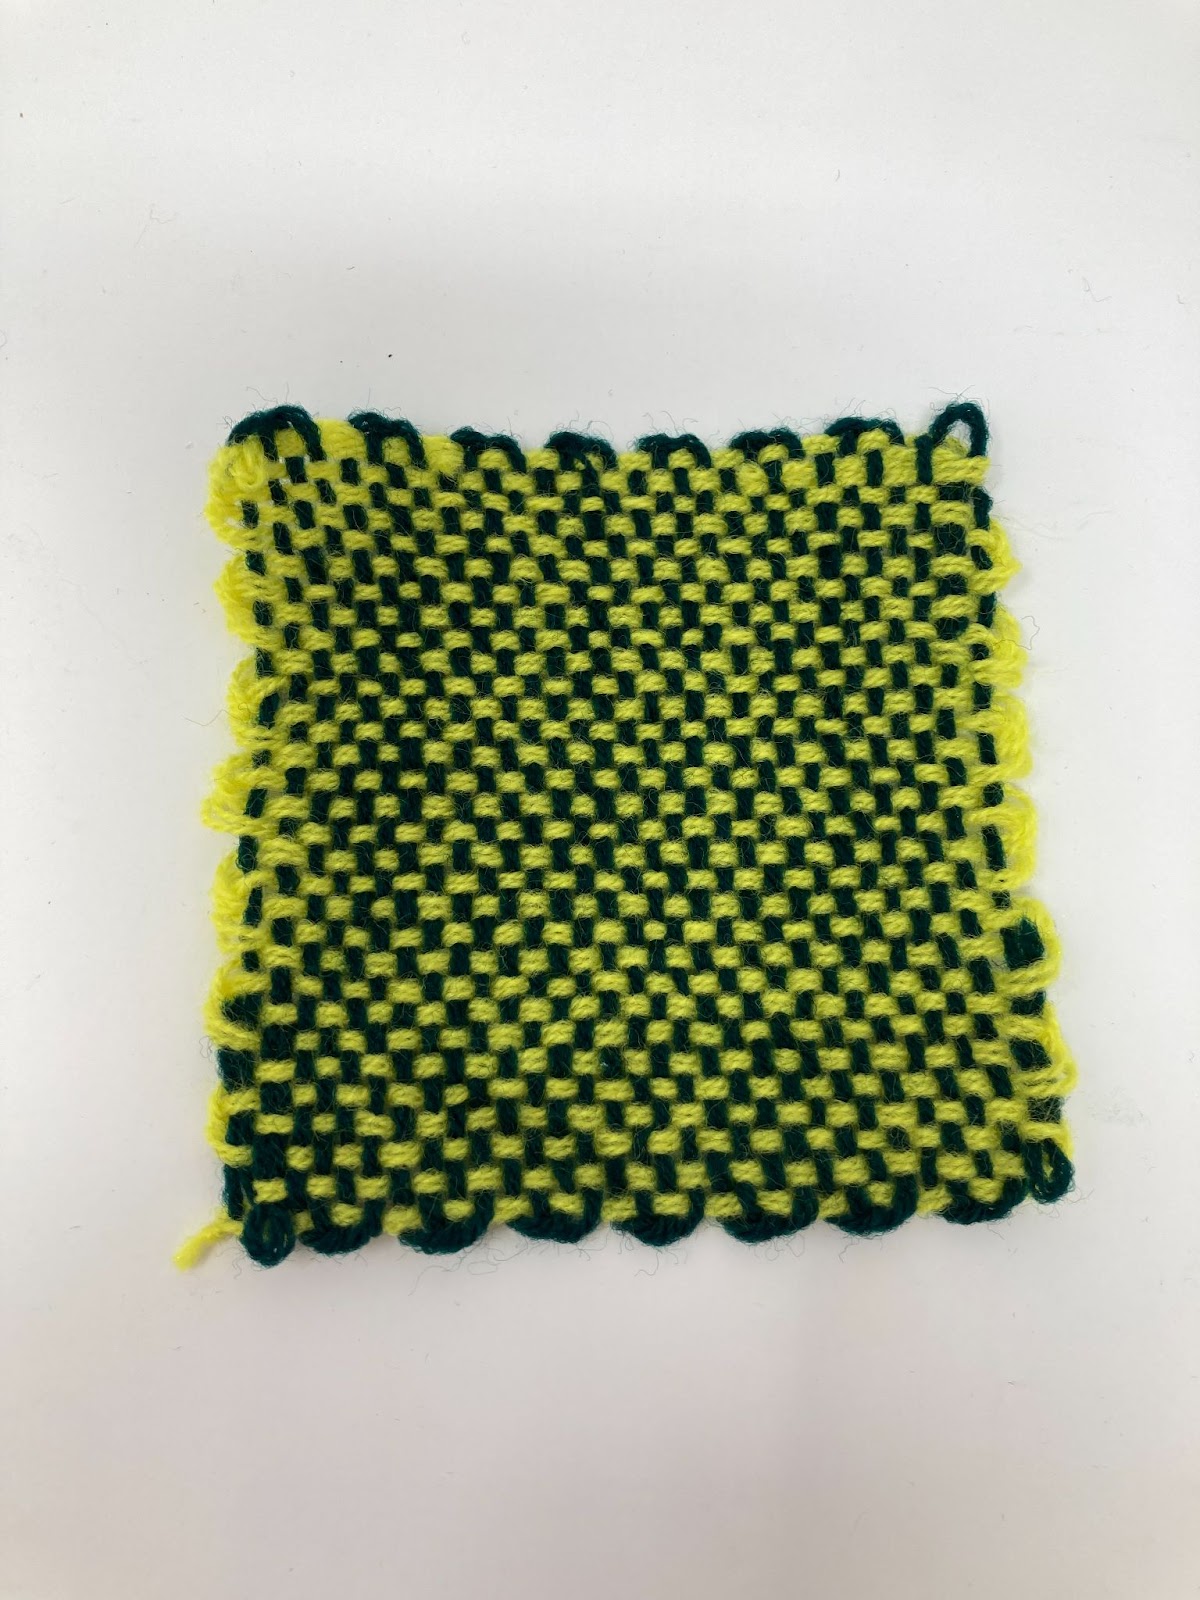
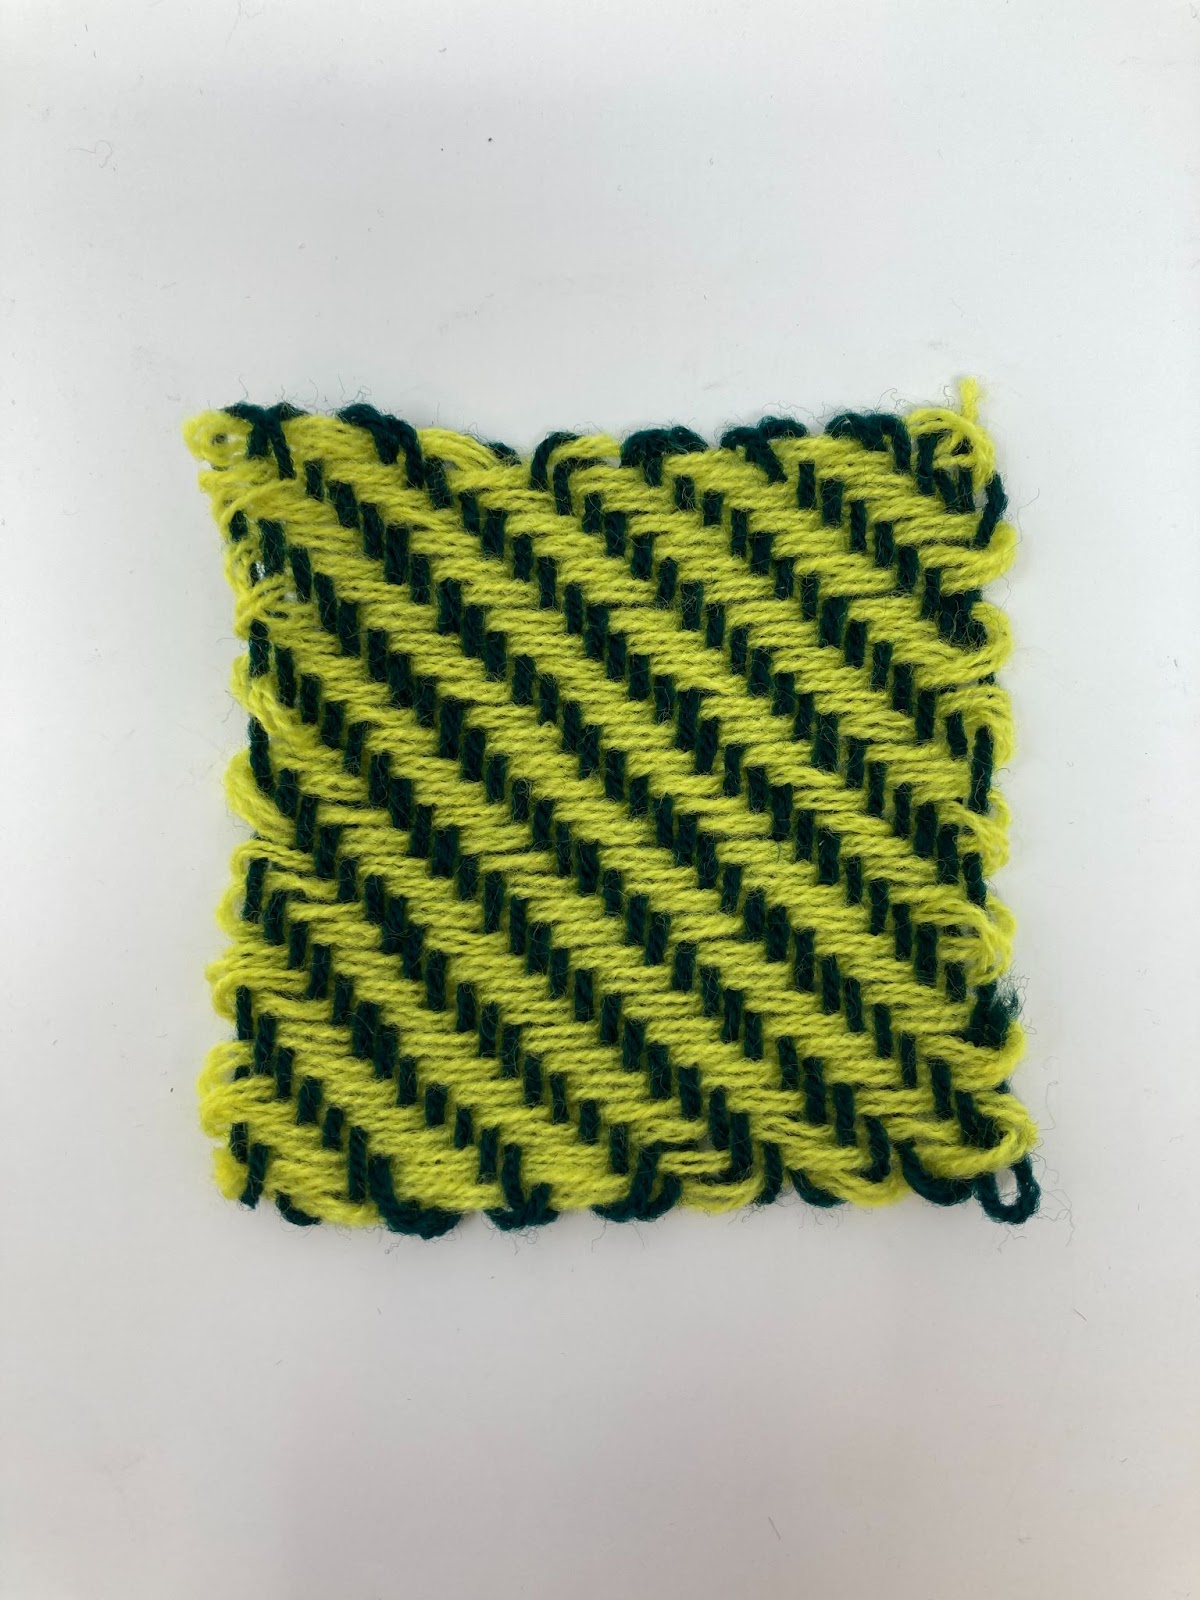
See below several examples of drafts and their woven result.
Double Weave
 Top
Top
 Bottom
 Both Layers
Plaid Weave


Tabby Weave

Twill Weave

Weave #

To begin weaving, gather all necessary shuttles and fill the bobbins with yarn. See process for spinning bobbins below.
Note You will need to reference your draft for the number of yarns you will need.
Spinning Bobbins
 |
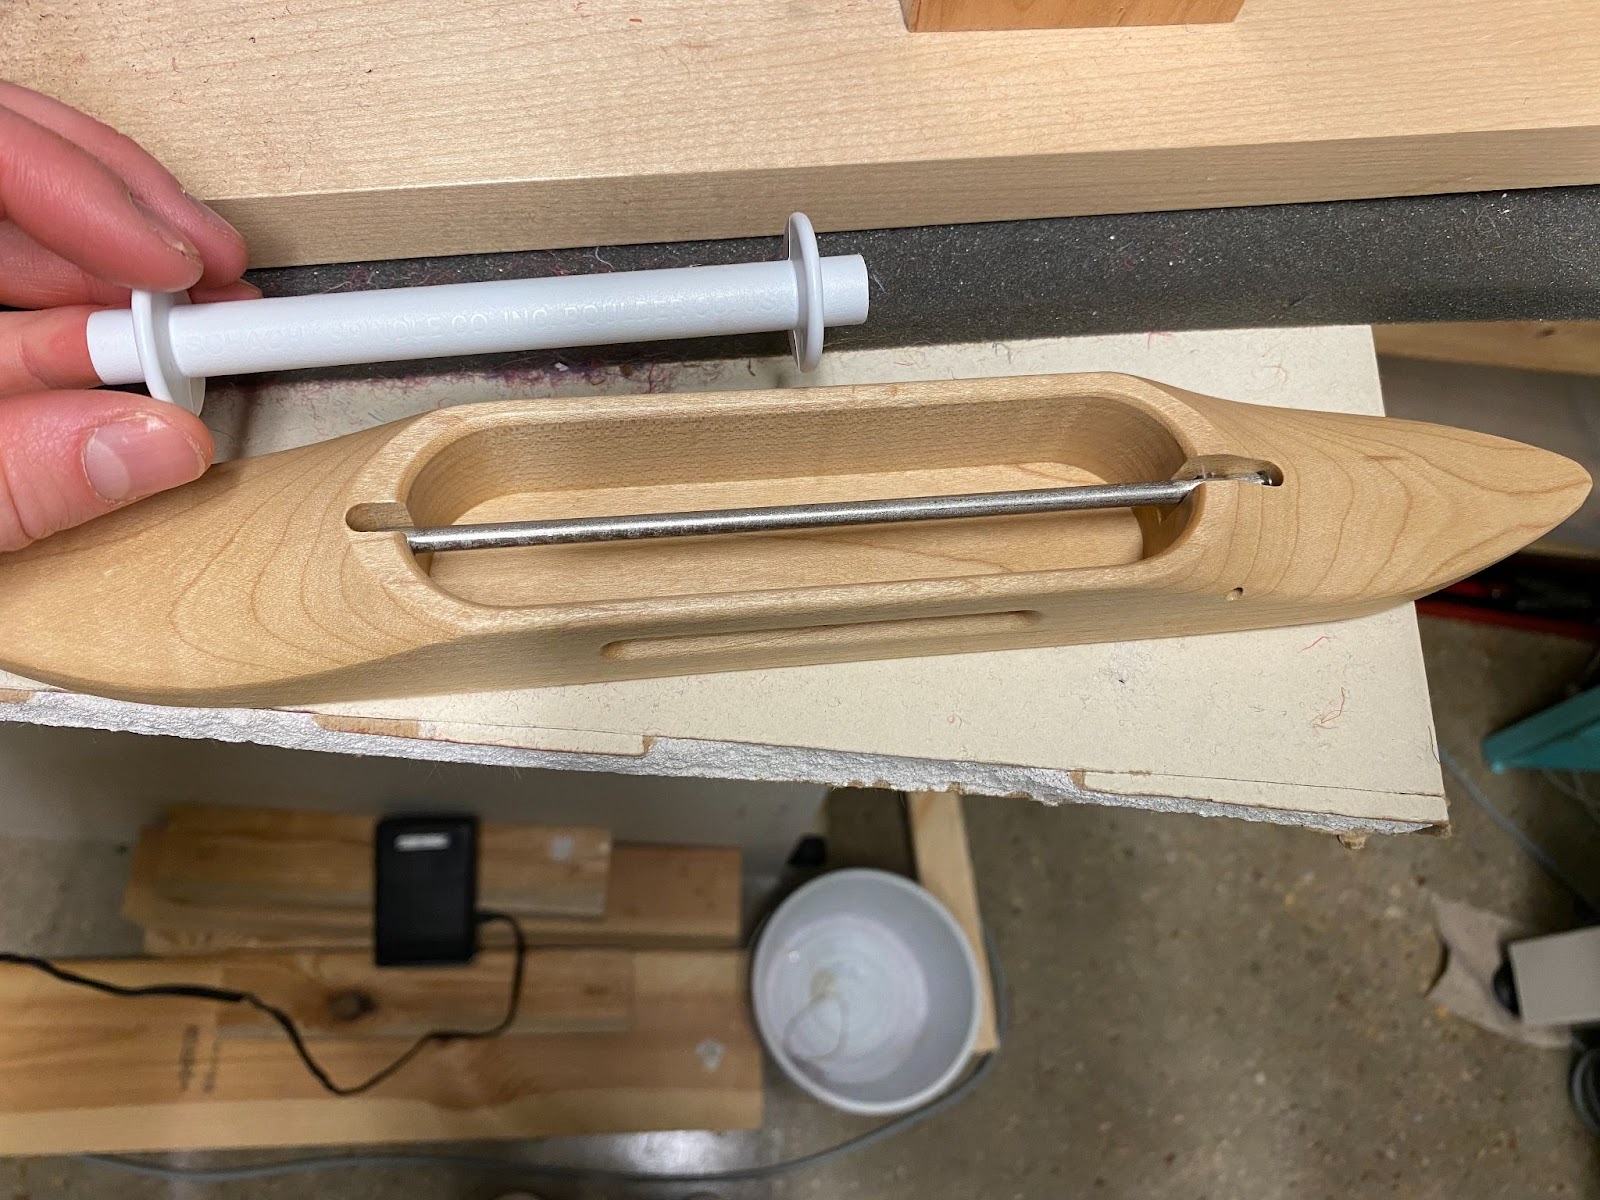 |
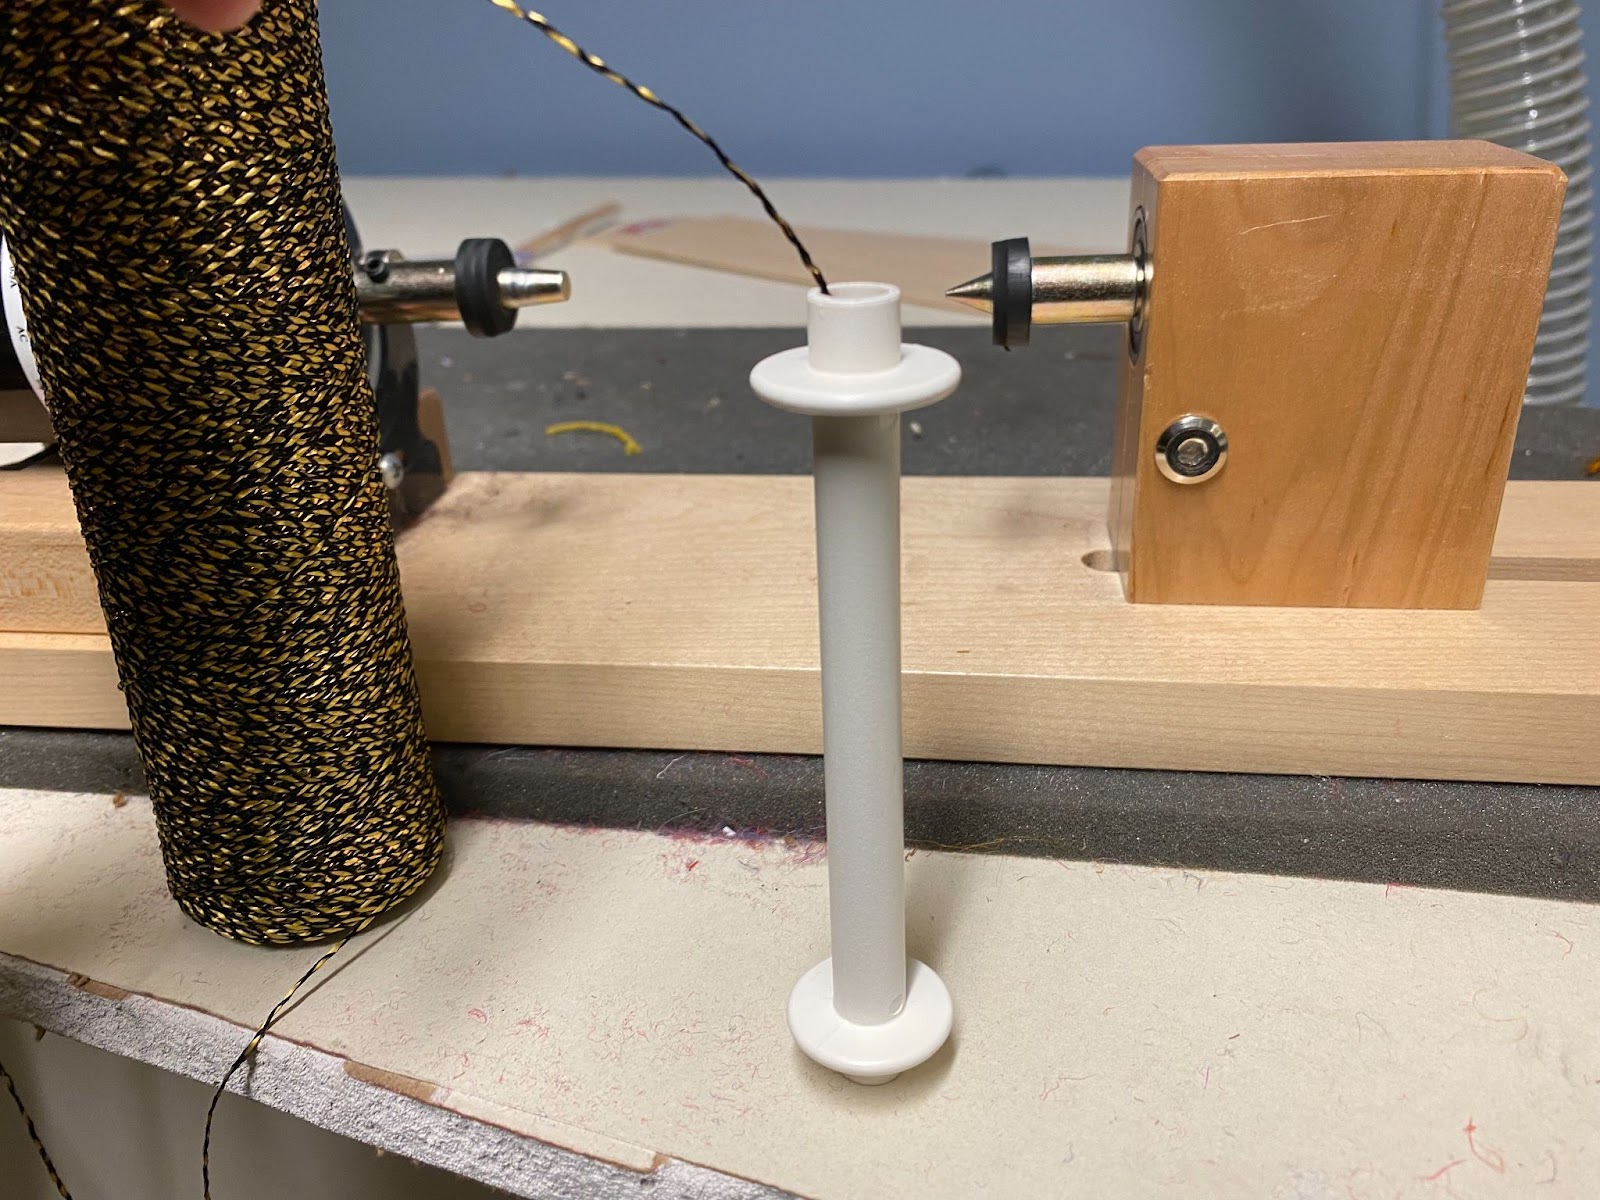
[1] take bobbin out of shuttle by pulling up on the open end and sliding plastic bobbin off of shuttle’s metal rod
 |
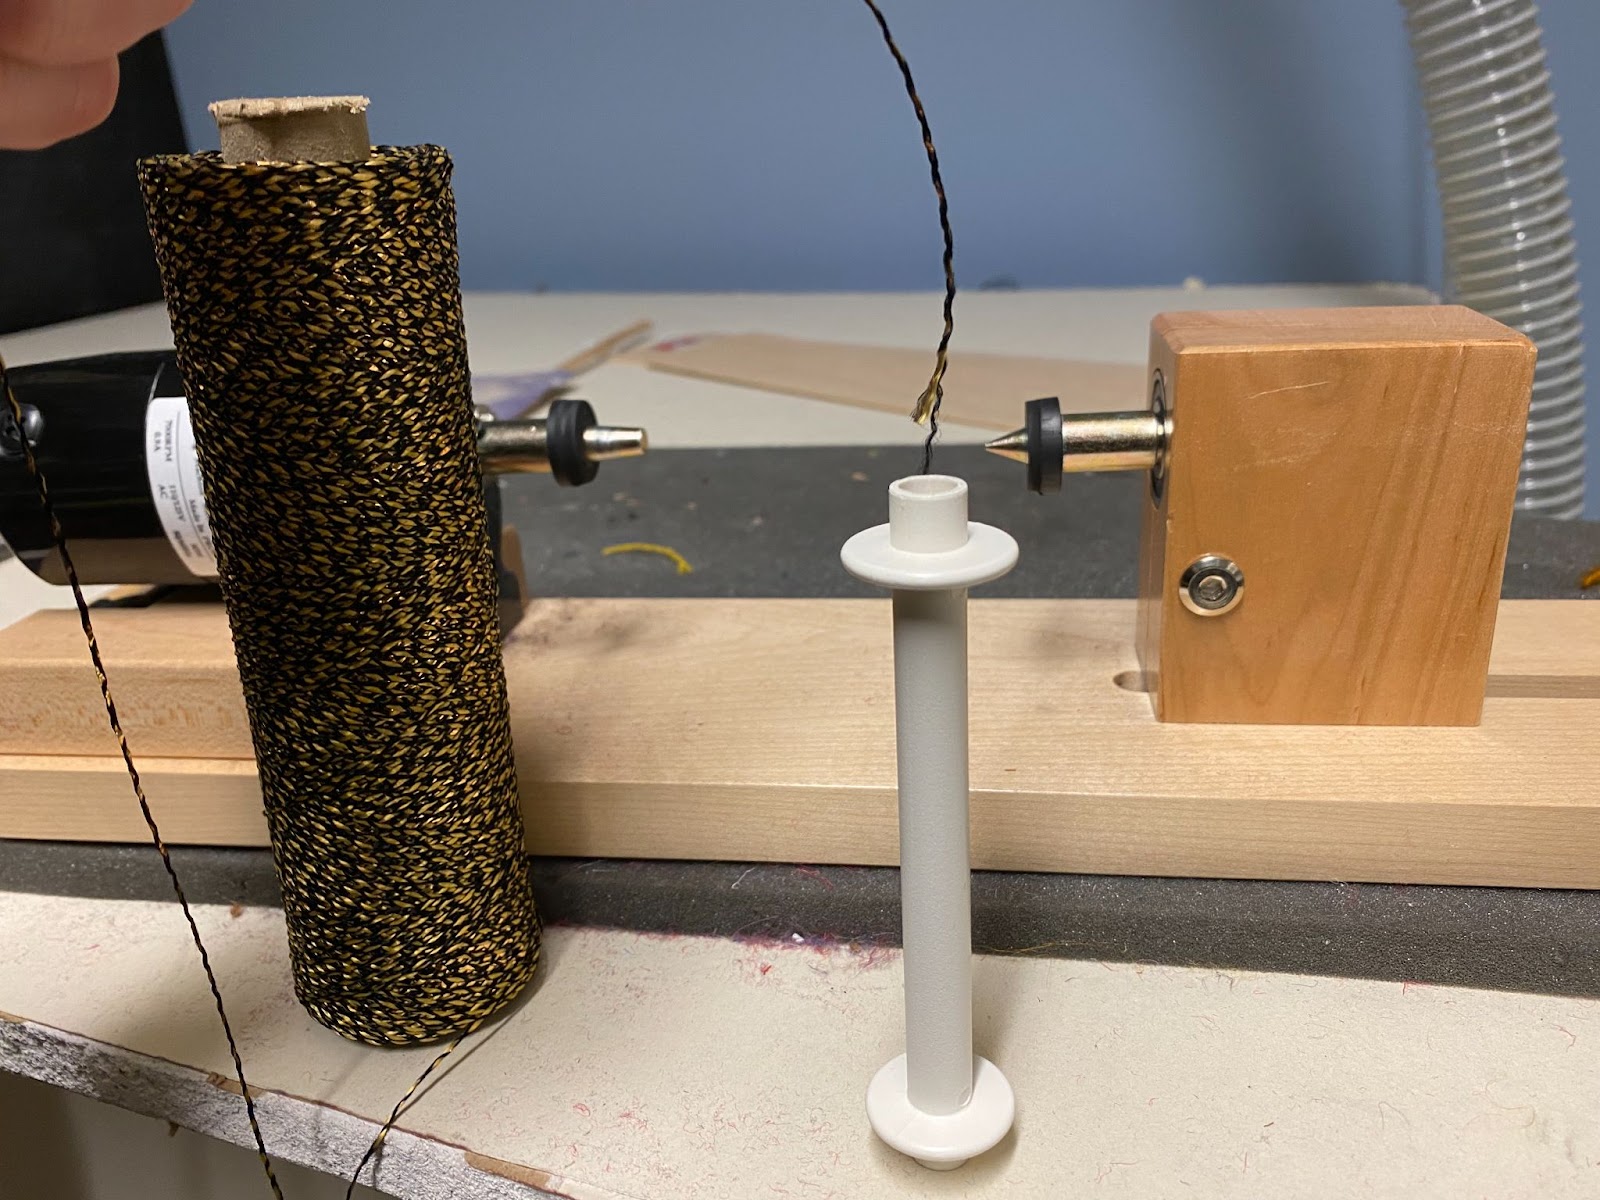 |
[2] Gather yarn and place about an inch of the end into the hole of the bobbin. This will help keep the yarn attached to the bobbin when we start spinning it.
 |
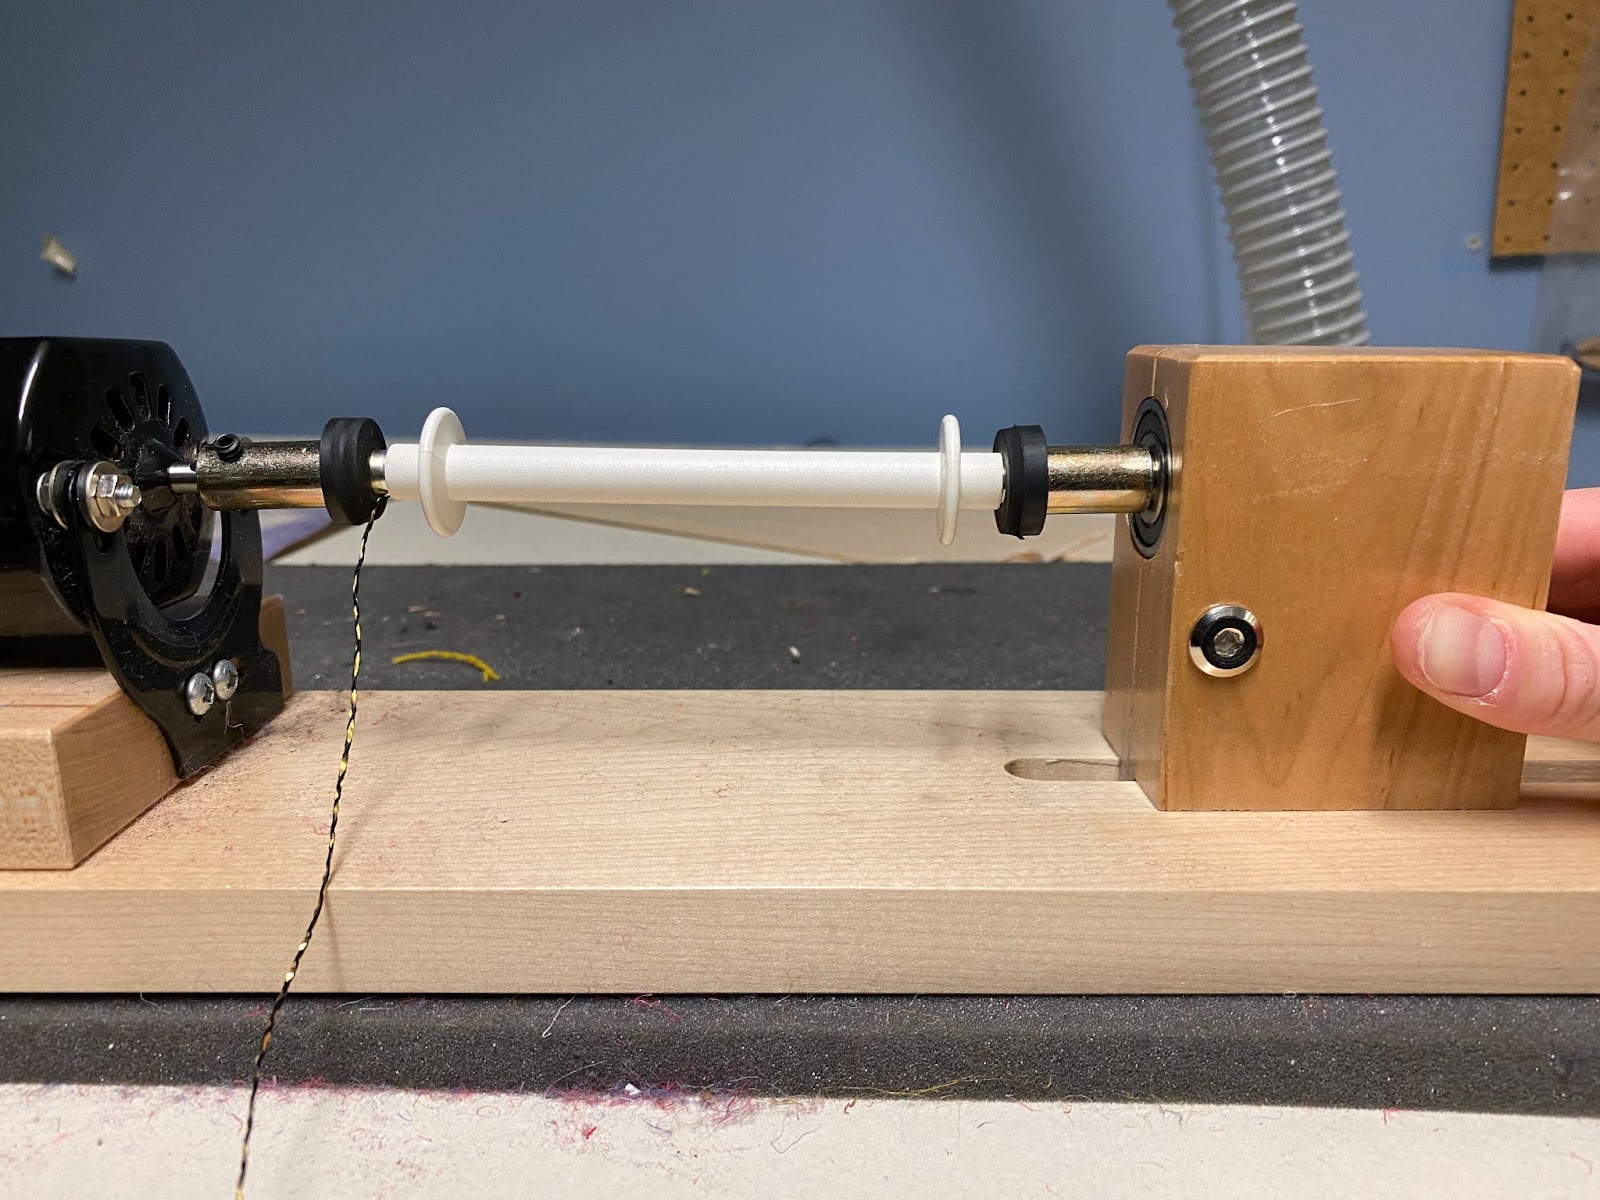 |
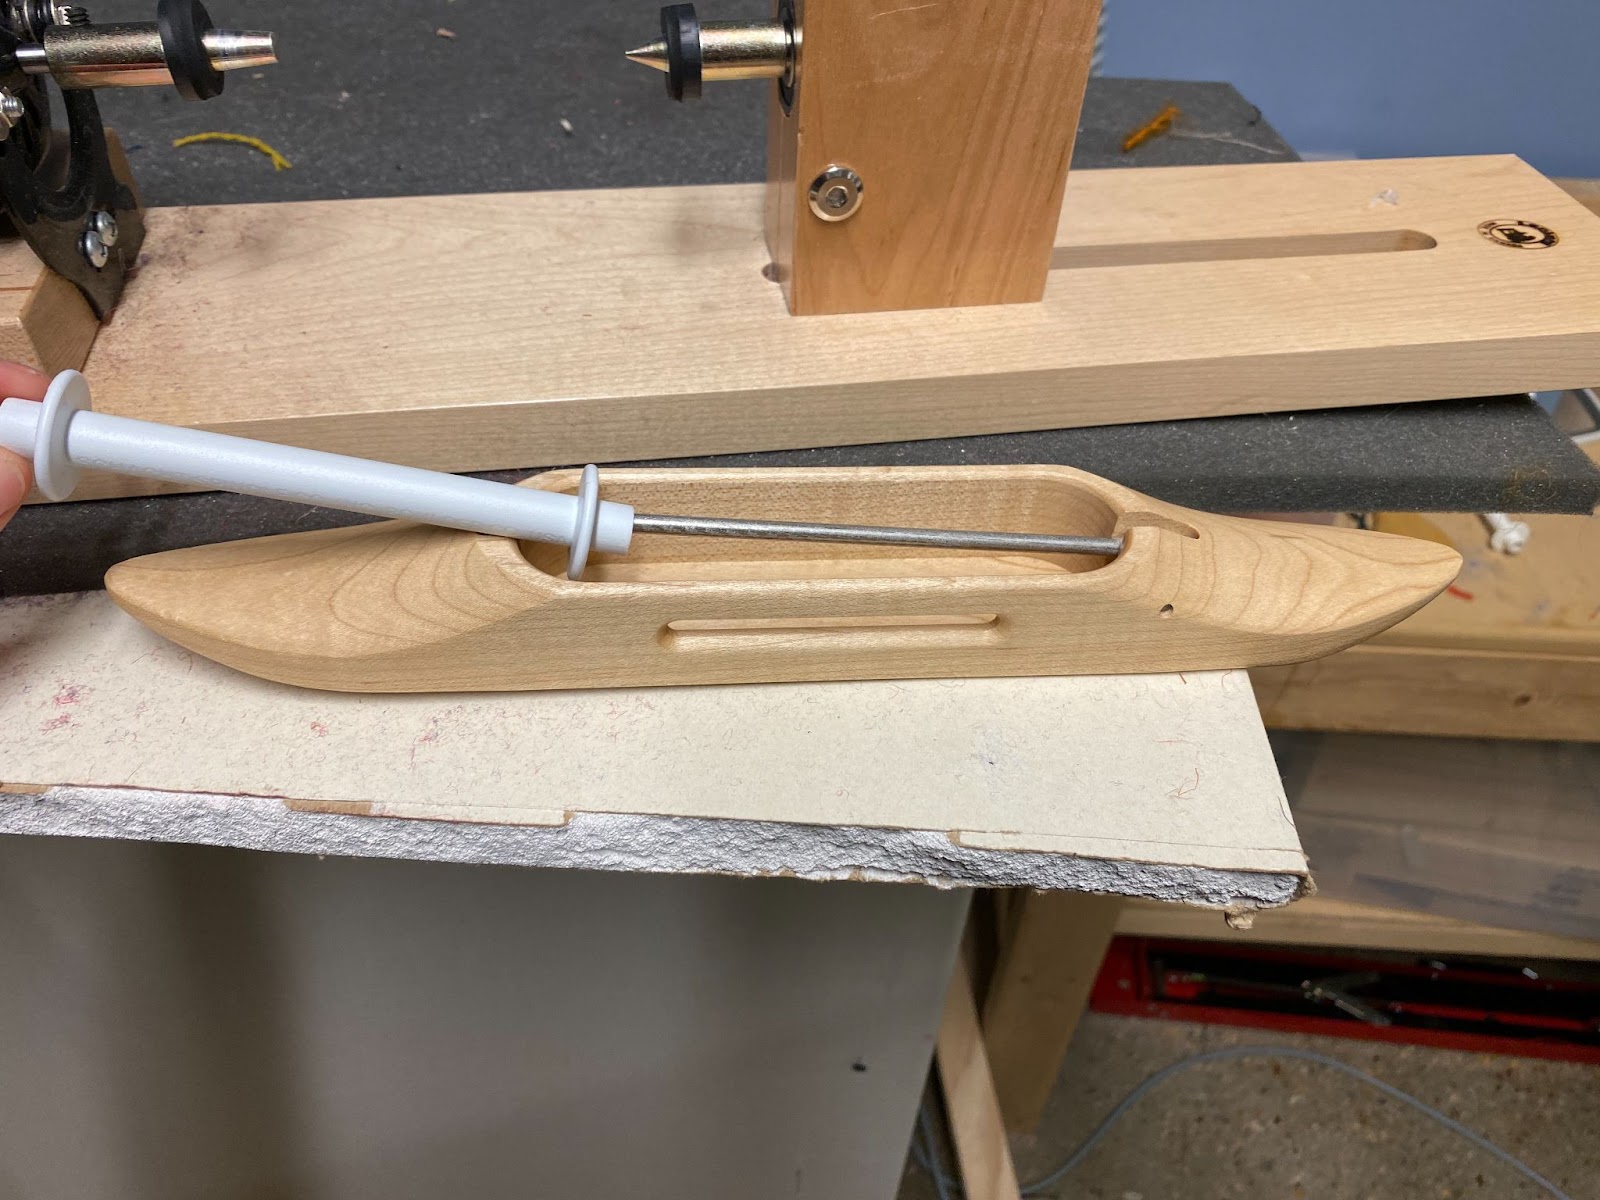
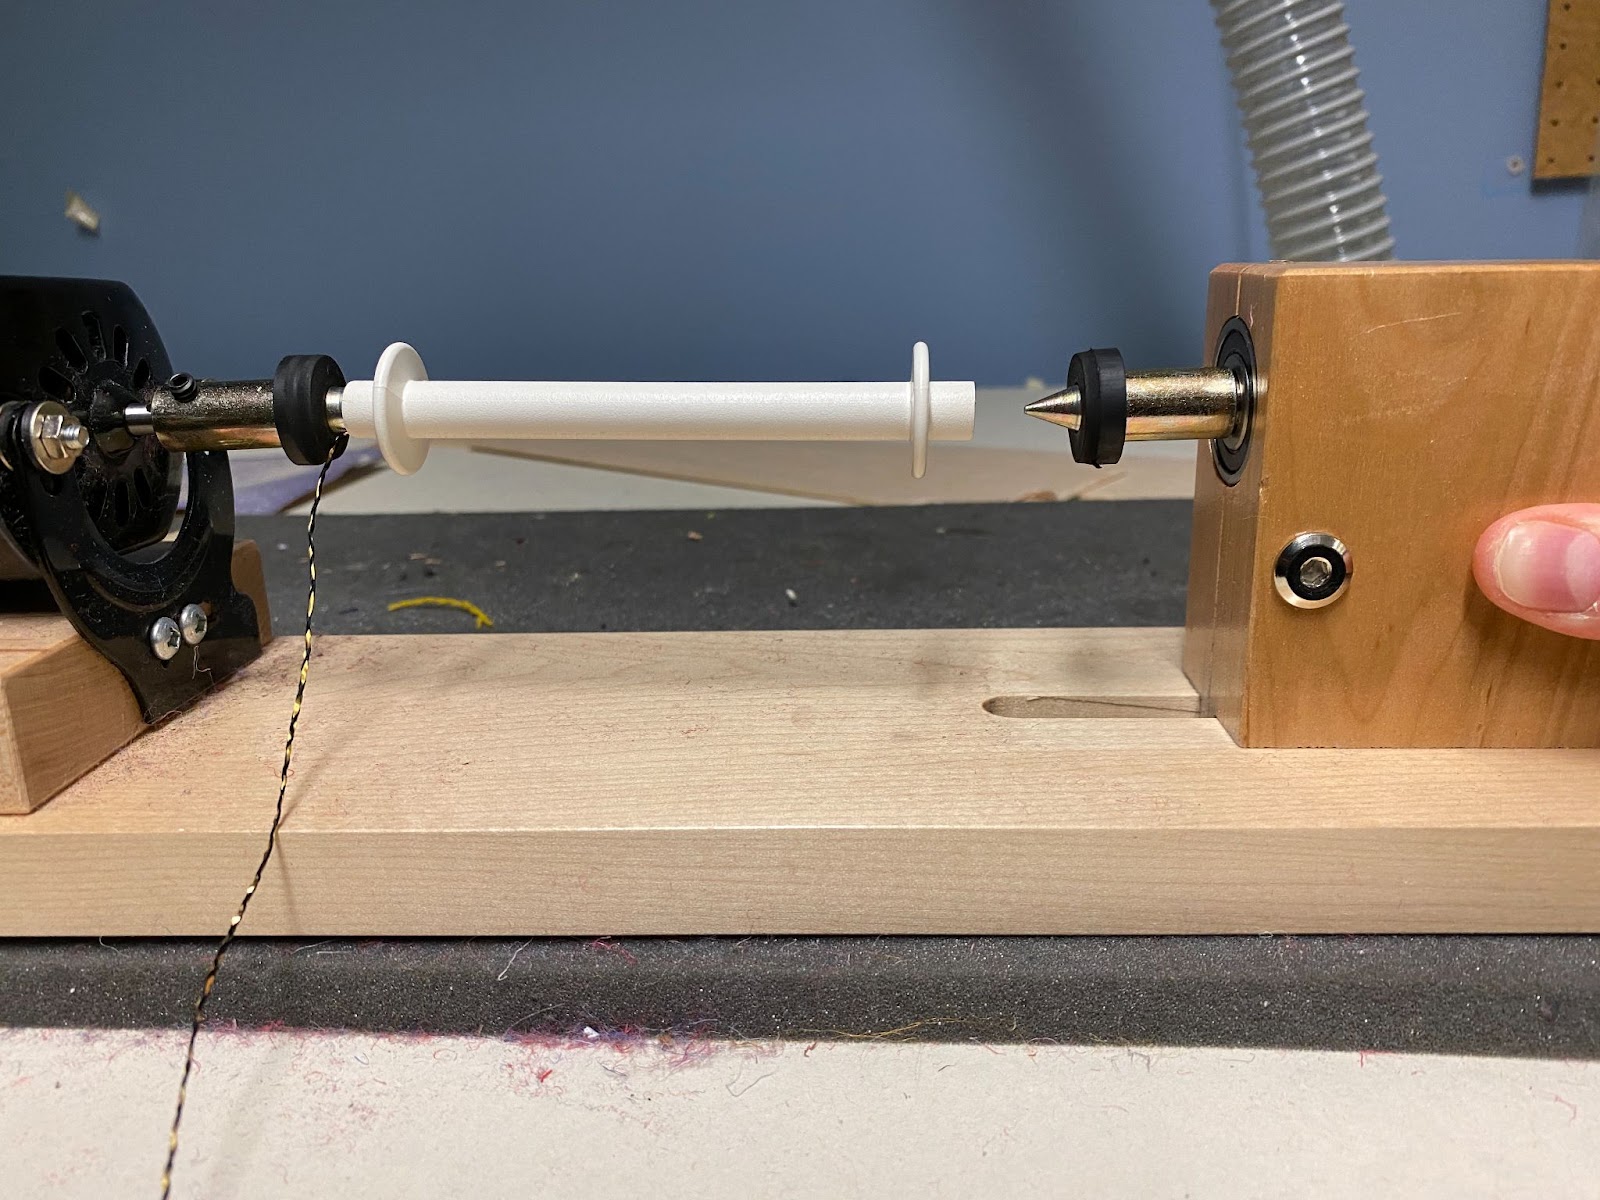
[3] Place the end of the bobbin with the string into the left end of the spinner. Pull back on the pointed end of the spinner to make room for the rest of the bobbin, then place the other end of the bobbin into the pointed end of the spinner.
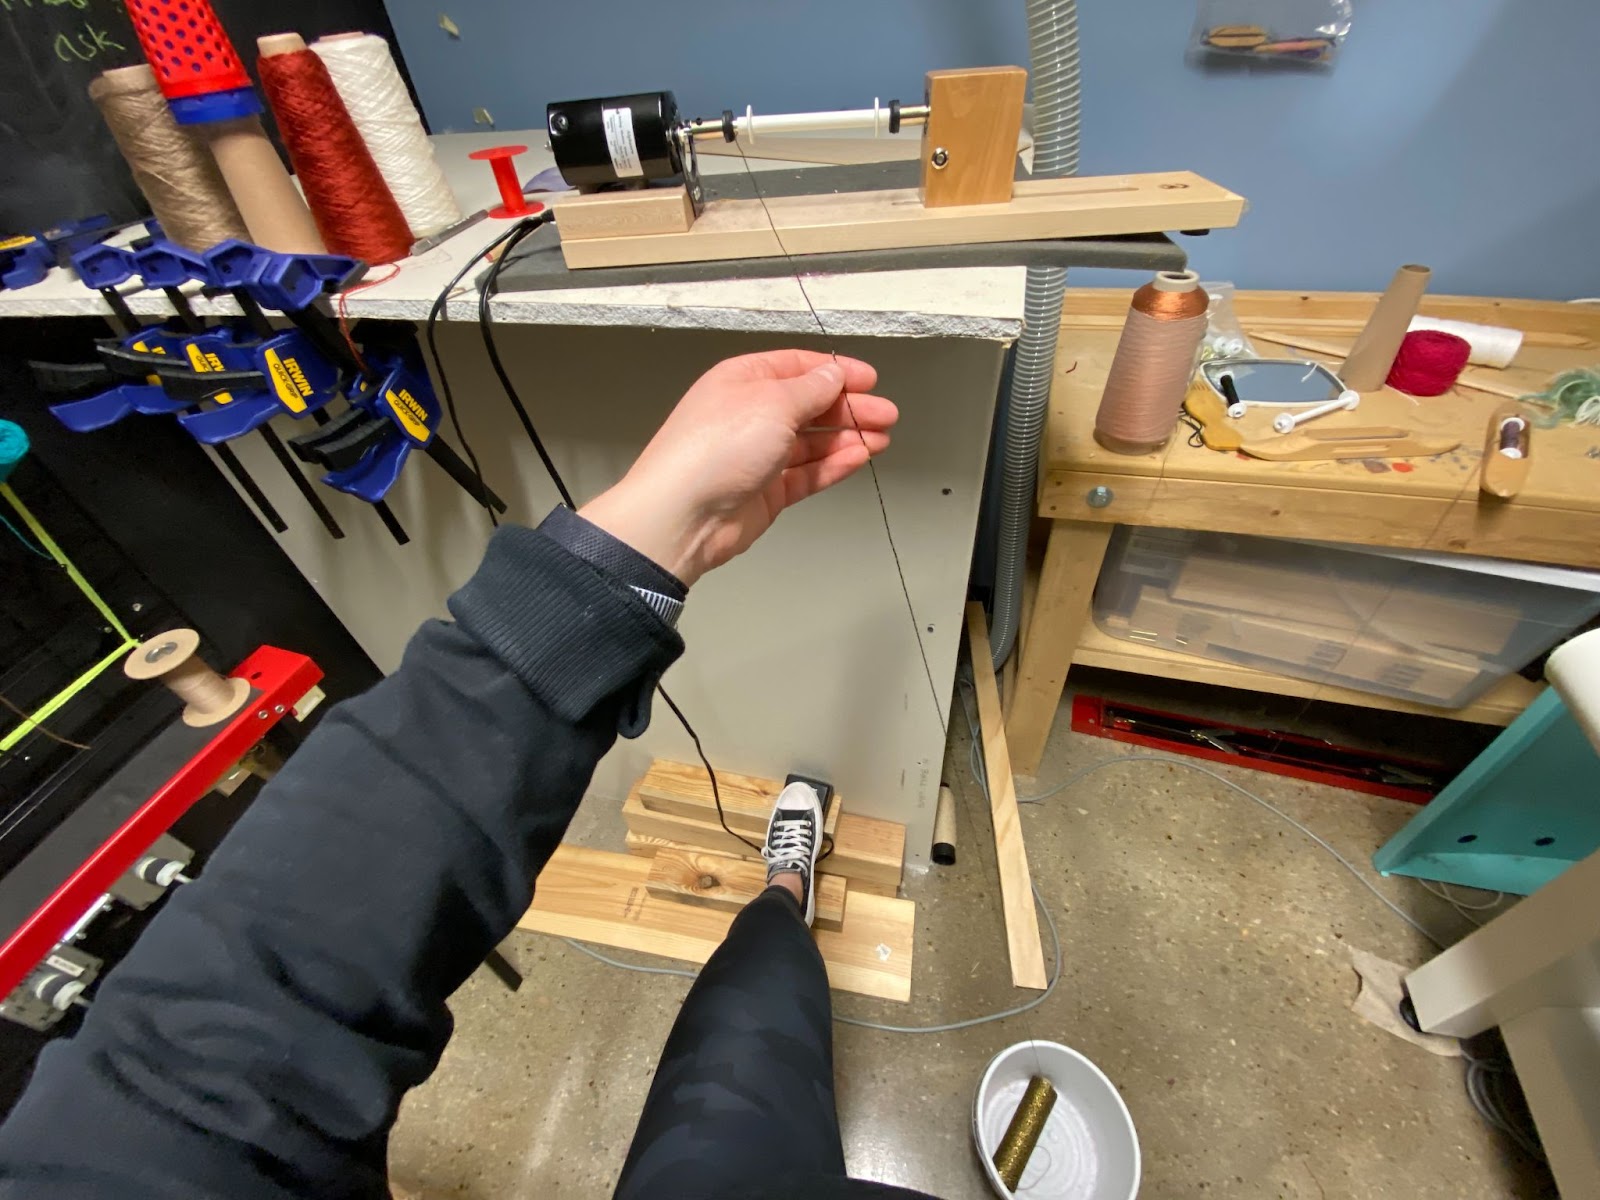
[4] Spin the yarn on the bobbin by pressing the pedal and moving the yarn back and forth so that it spreads evenly across the bobbin. CAUTION: The pedal is very sensitive! A little pressure goes a long way
[5] Once the yarn has been properly spun, take it off of the bobbin and place it back into the shuttle for weaving. Make sure to cut the small end of thread that was tucked into the end of the bobbin in step 3 to ensure the thread does not get caught in the when throwing the shuttle.
Weaving Process #

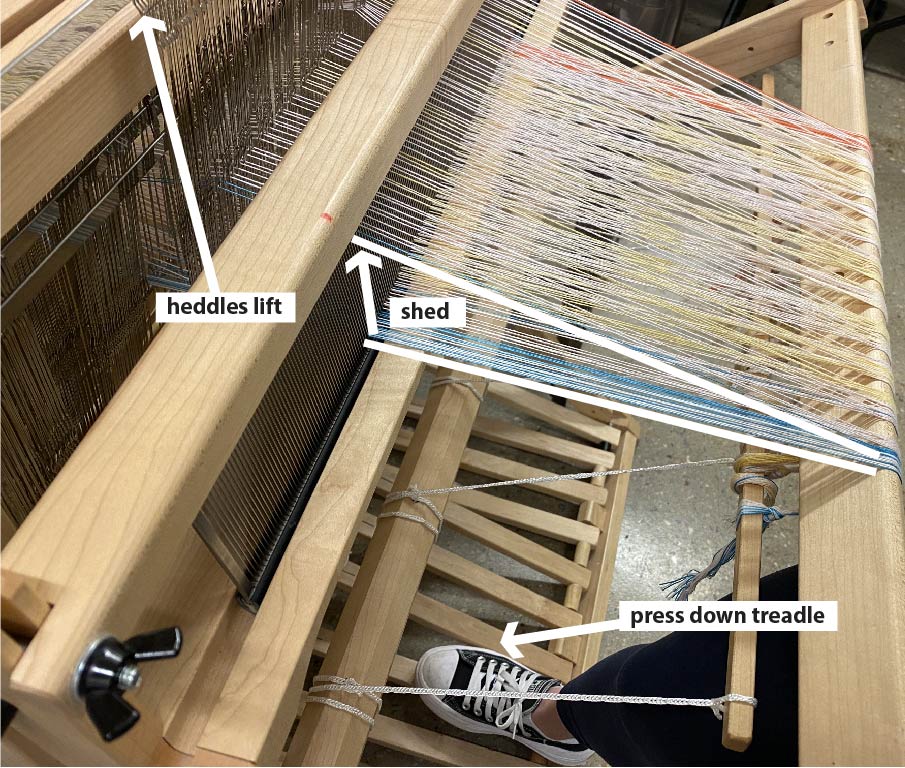
[1] Following your draft, raise a selection of warp threads by pressing down on the treadle
[2] When heddles are lifted, they raise the warp threads that are threaded through them, creating a shed. This is where the shuttle is thrown through.


[3] The shuttle, carrying the weft thread, is thrown through the shed. This adds a weft row, or pick, to the cloth.
[4] A weaver closes the shed (lowers all the warps) and beats, pressing the new weft on top of the previous weft. This pressing packs the weft yarns in the weave
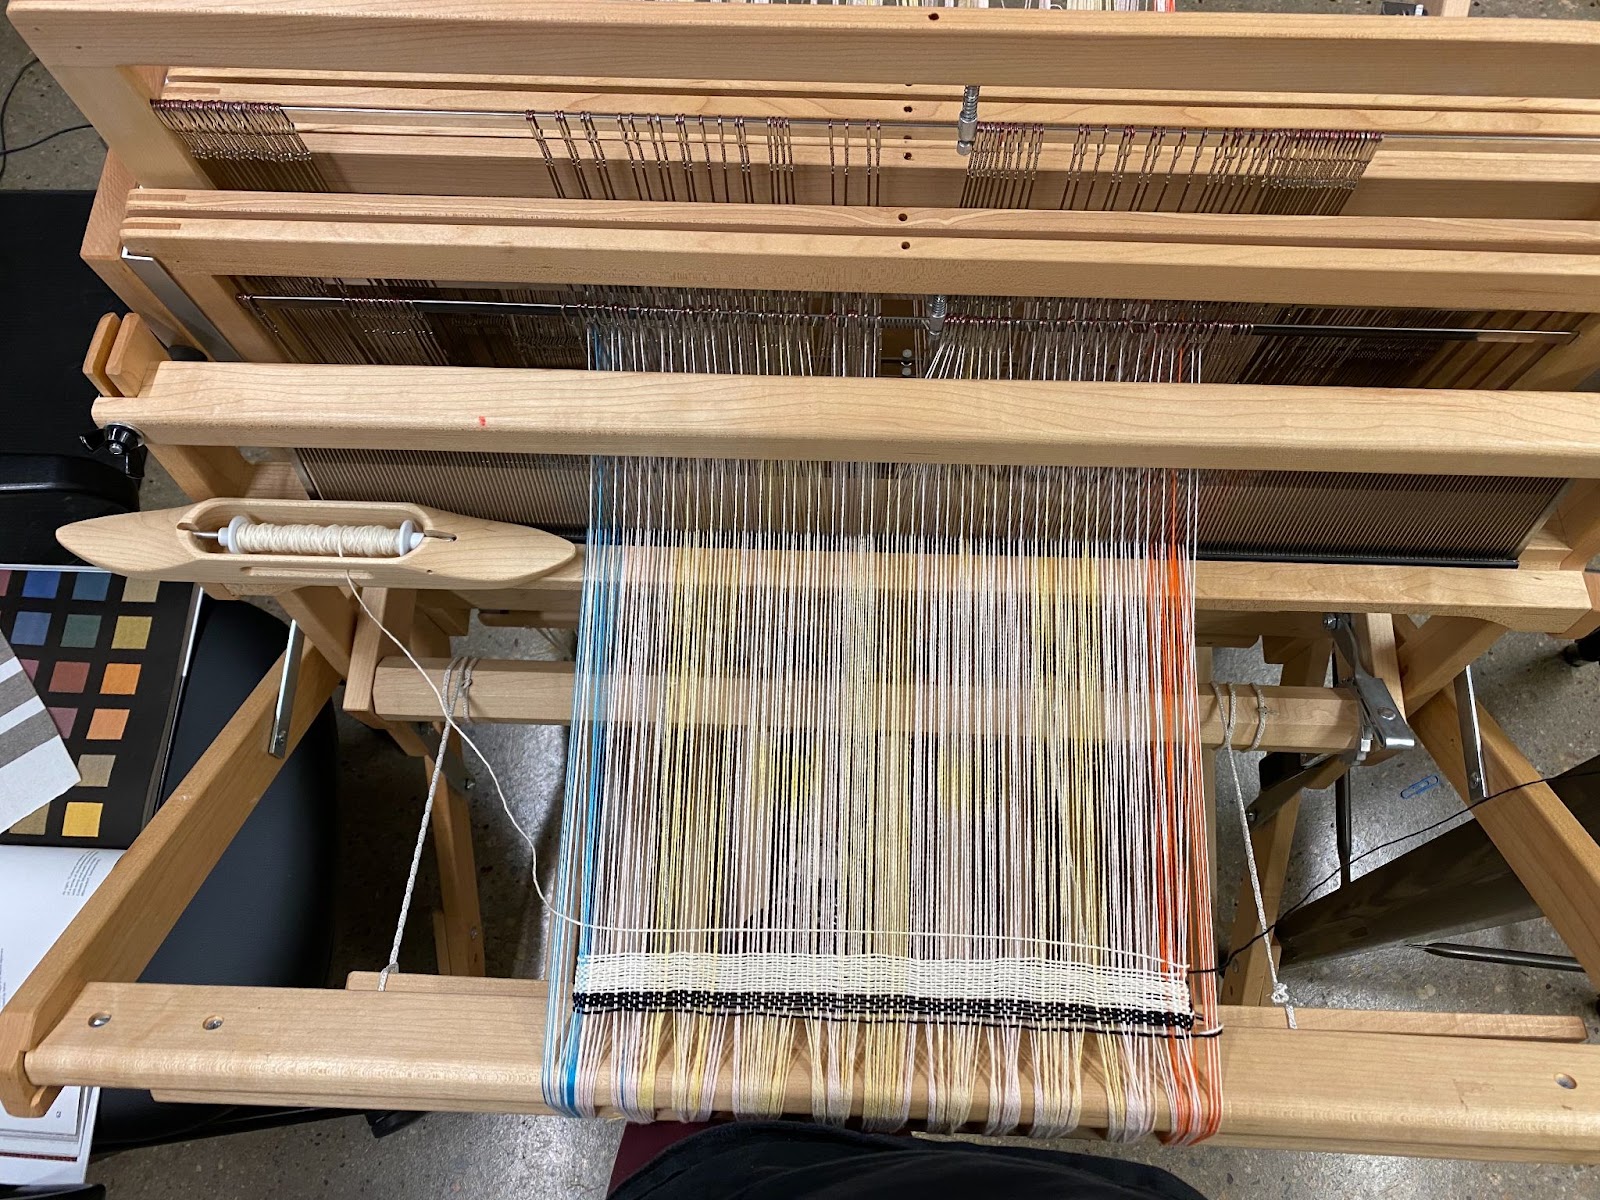
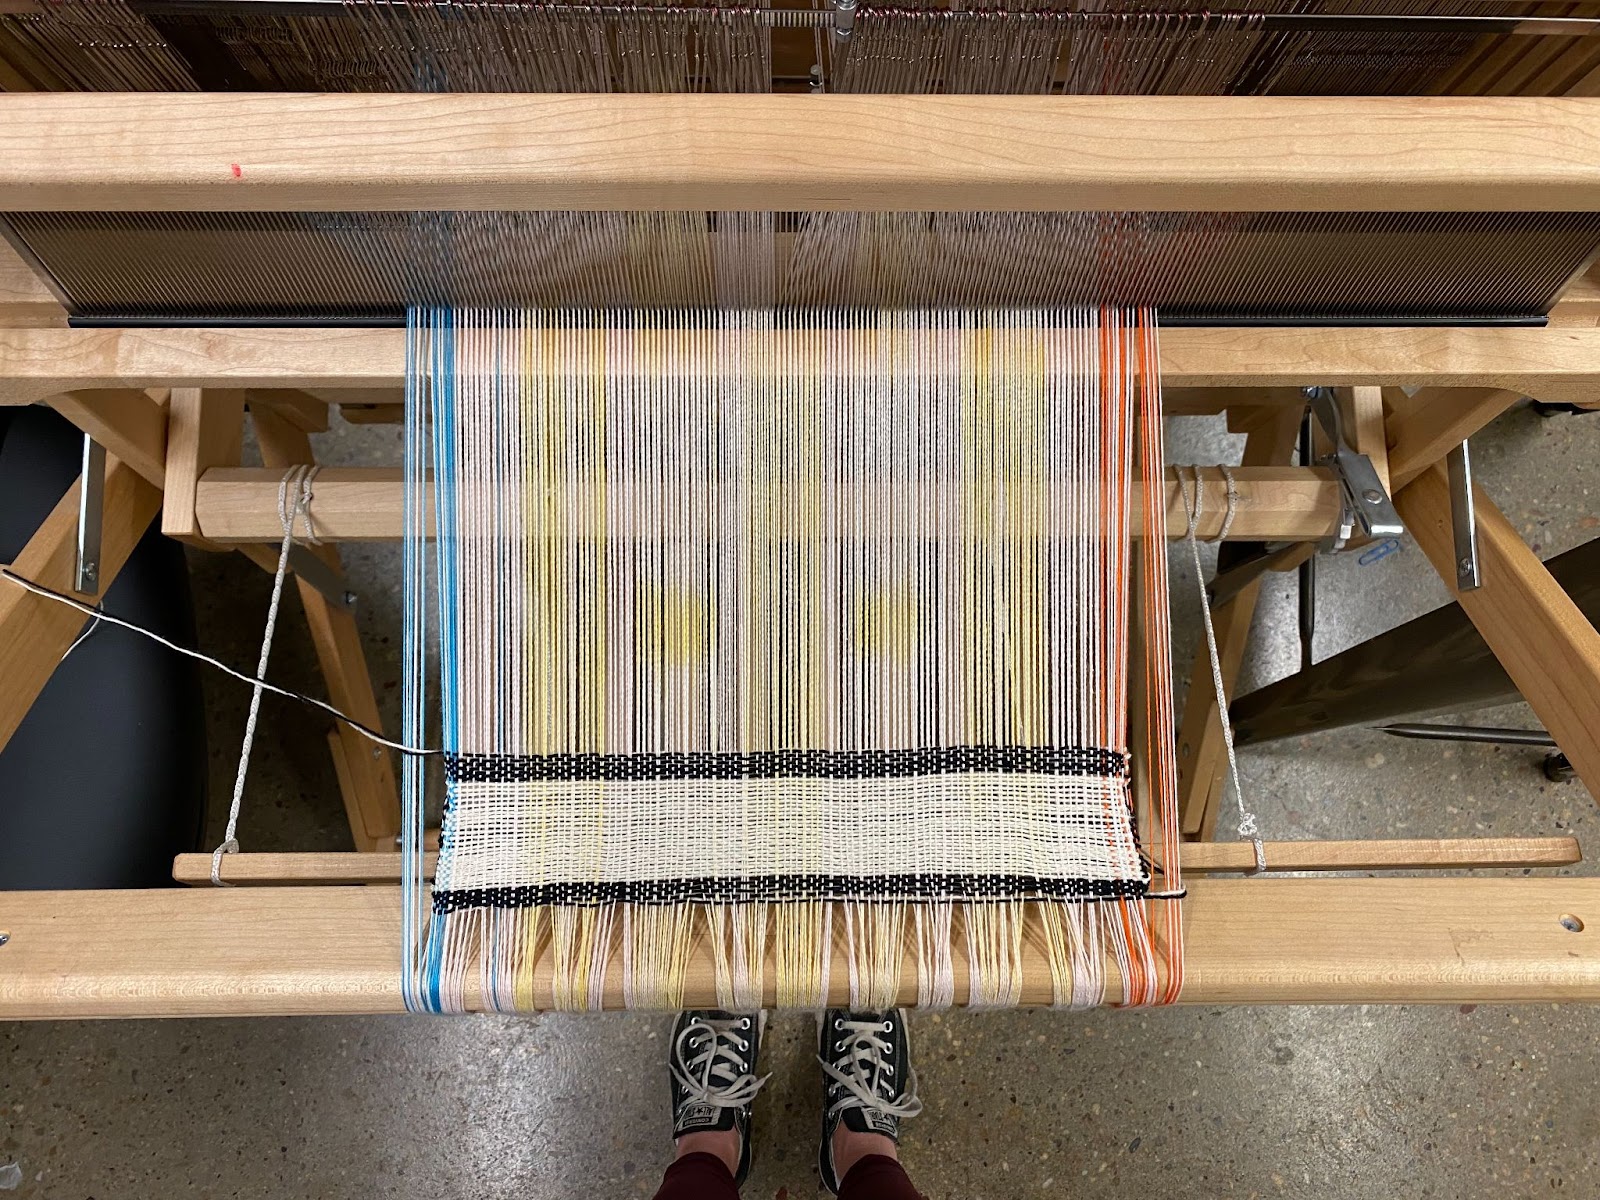
[5] Repeat this process until your piece is at the size you desire. See below demonstration for throwing the first pick

[6] Demo for the first pick. For the first pick, leave a little bit of extra thread on the end for finishing purposes later on.
Each pick after this (throwing the yarn and beating it) will look identical, the only difference is that your thread will line up with the edge of your piece at later rows as it wraps from one row to the next.
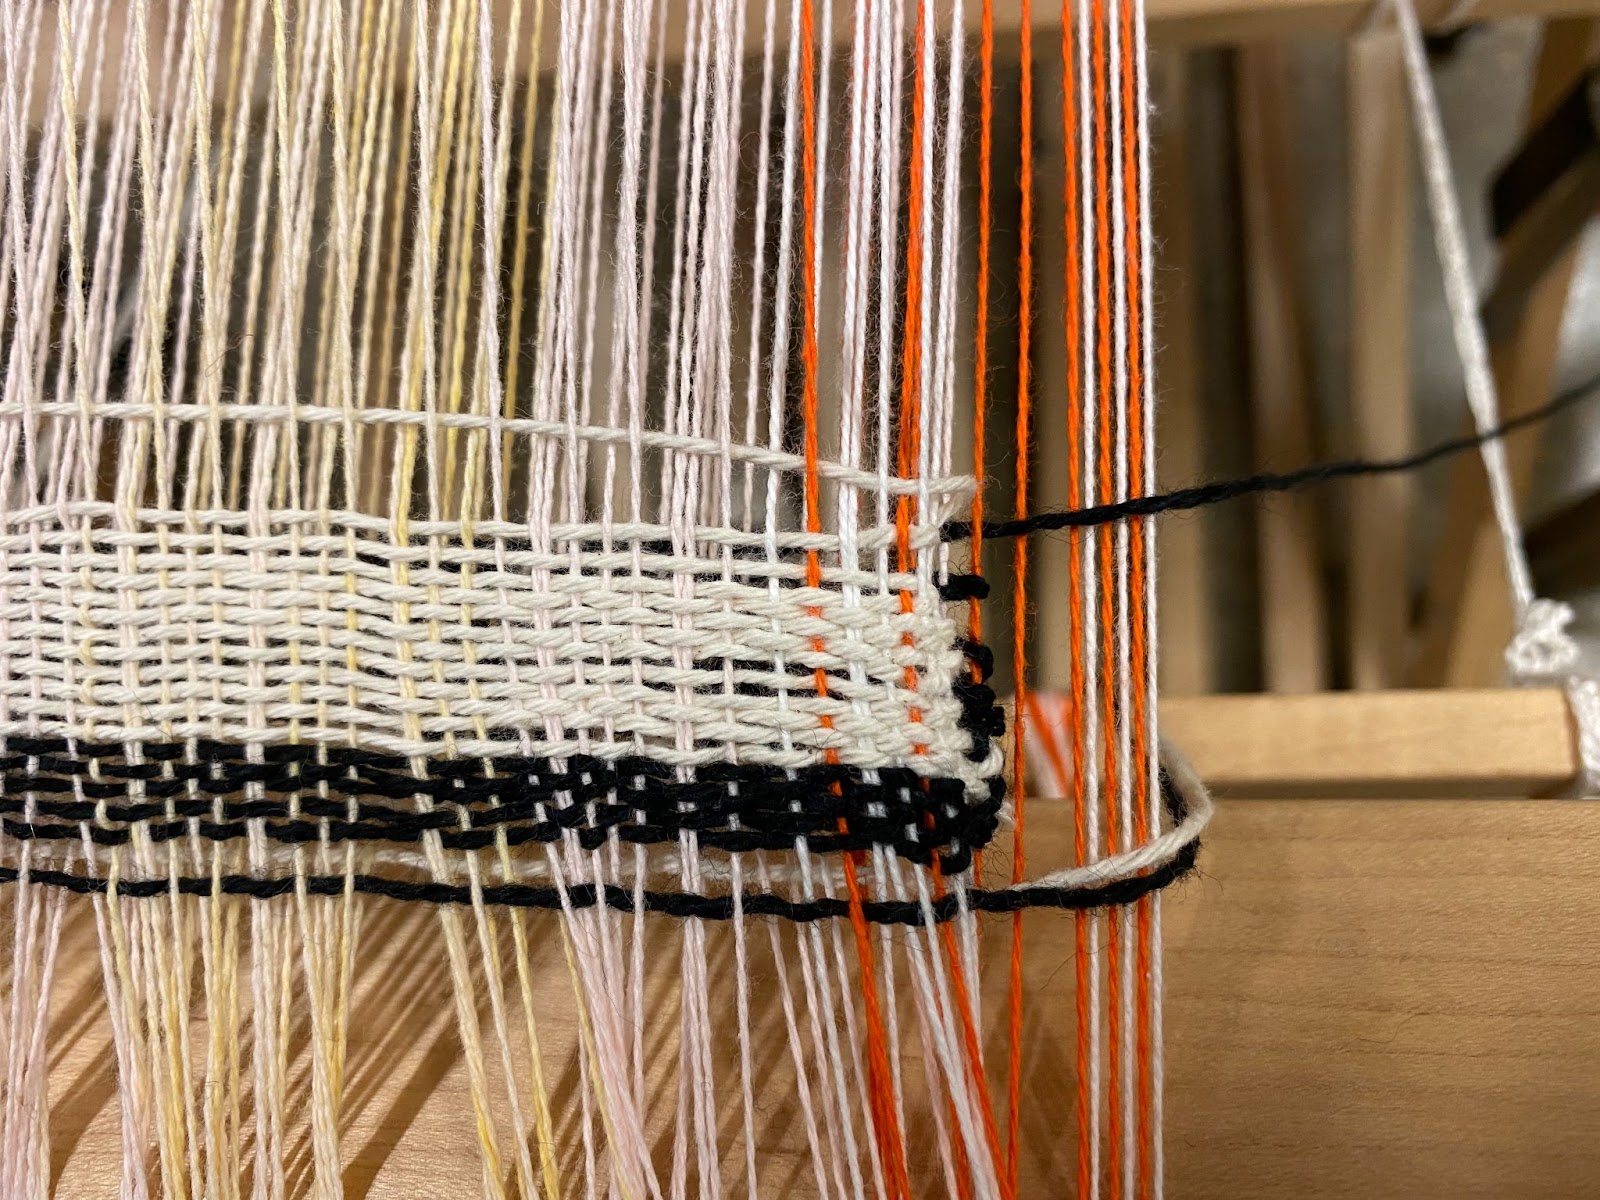
[7] Demo for a pick in the middle. To create a clean edge, try and pull your yarn close to the outermost warp thread after you throw the shuttle.
Finishing Your Piece
[1] Your piece is finished! You just threw your last pick and now you are ready to remove it from the loom. First, cut a long lead that removes your shuttles from your piece (about the same length as what you left on the first pick)
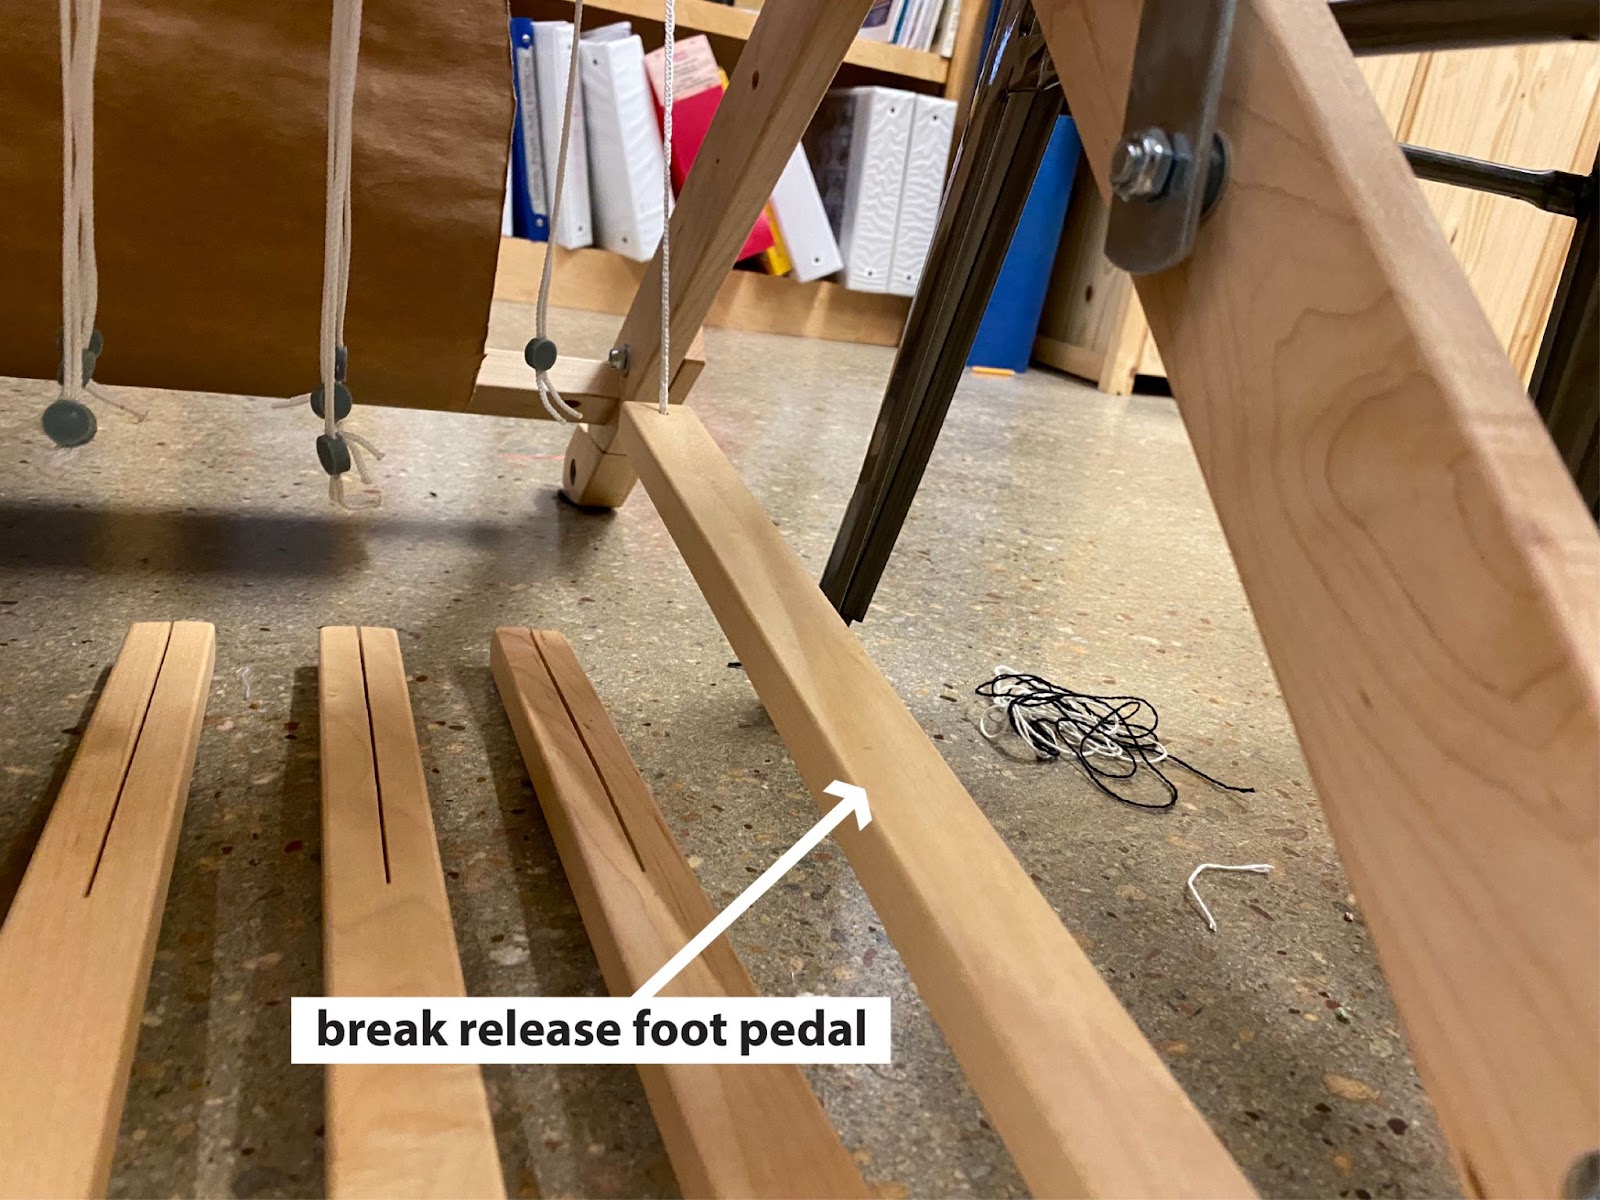
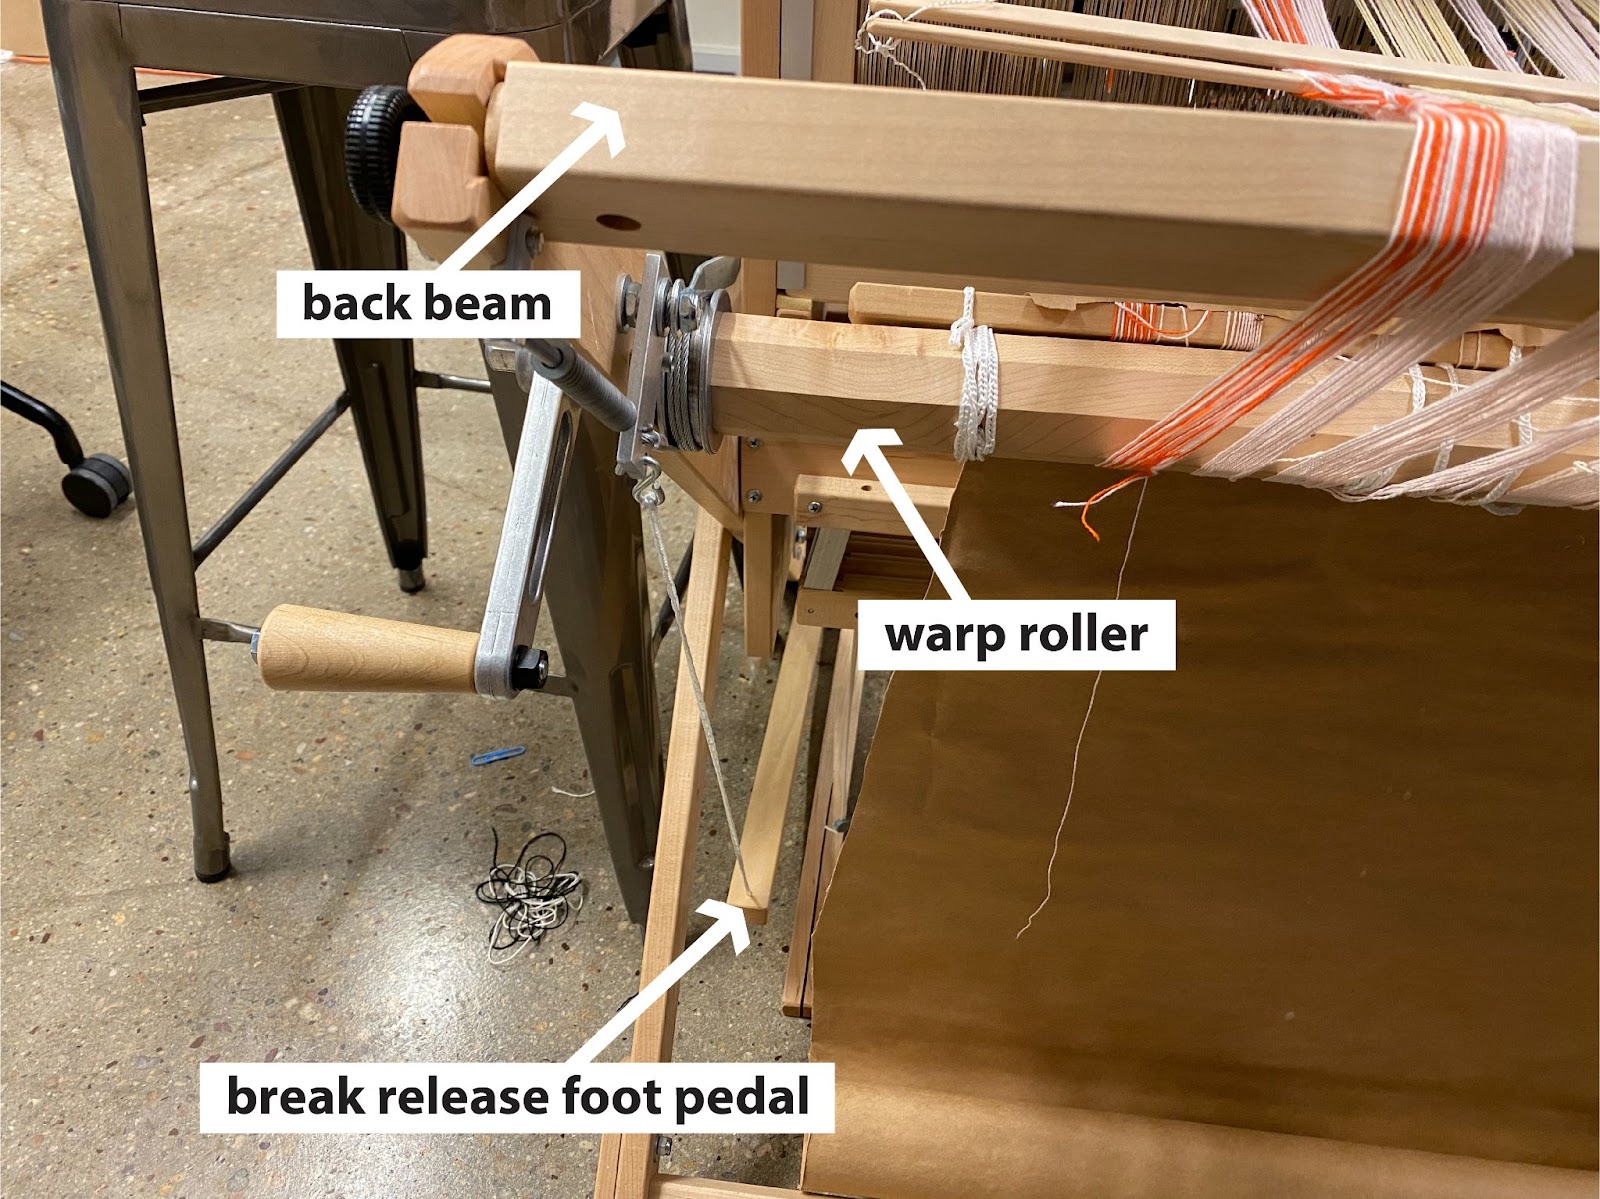
[2] Now, release the tension on the loom by pressing the break release foot pedal (rightmost treadle). This treadle is connected to the warp roller and slowly unwinds the warp, allowing more yarn to come forward for use.

[3] Now that the warp is loose, cut small portions at a time to release your piece from the loom. Leave a few inches of warp on your piece to ensure the last pick does not unravel
[4] At each cut, make a slip knot to keep the warp from falling out of the beater.
[5] Once your piece is cut loose, you should have all of your warp knots tied. Your piece will just be connected to the front apron rod.
[6] Next, you can slide your piece off of the front apron rod. You will have frayed edges that you can then finish. Run the piece through a sewing machine with a straight stitch to ensure the piece does not unravel.
TC2 Loom #
TC2 Loom Anatomy
TC2 Process Overview
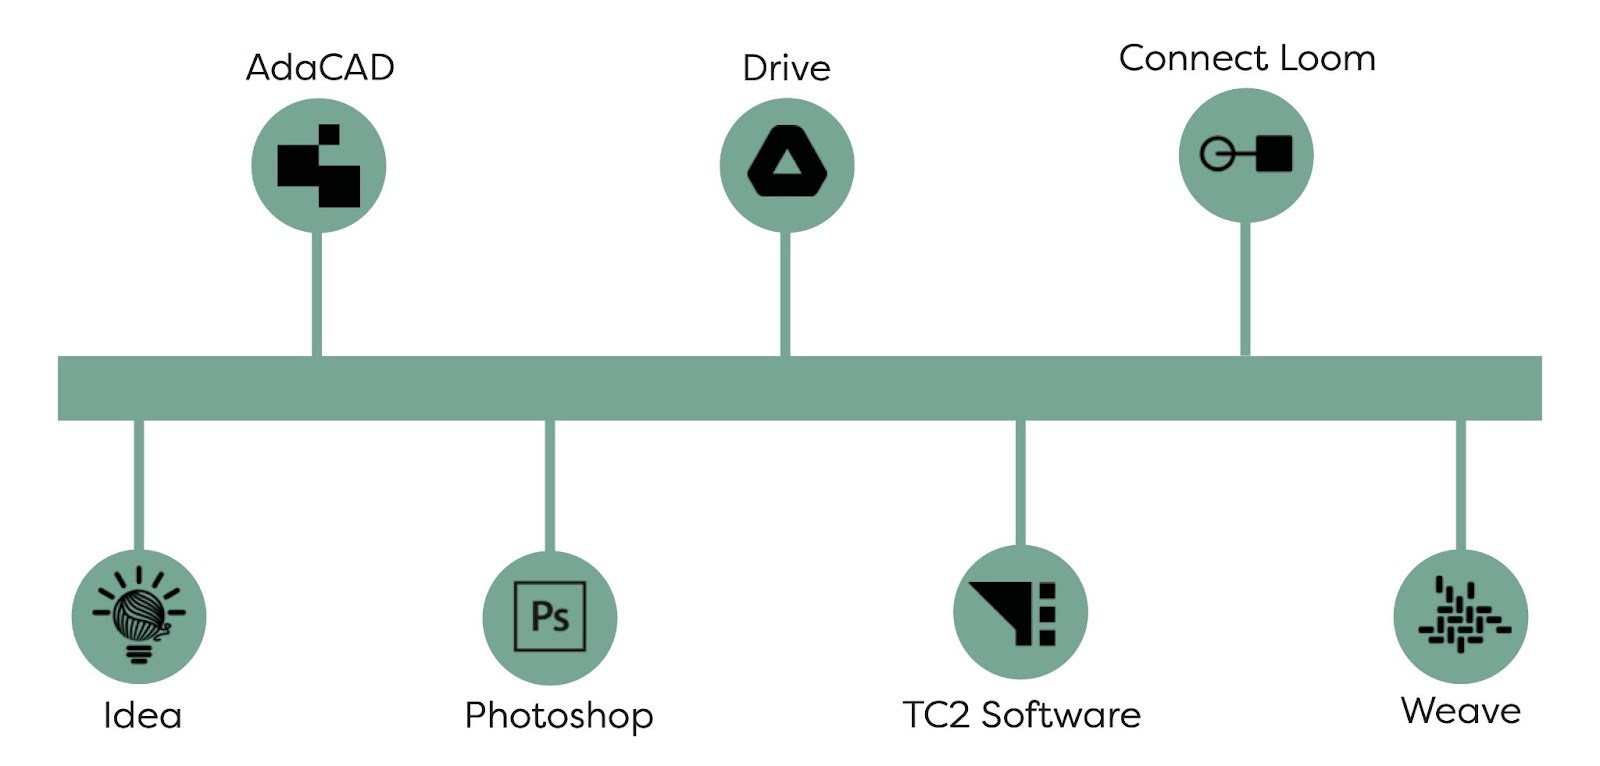
Idea Generation TODO
Adacad TODO
Photoshop TODO
Drive TODO
TC2 Software TODO
Weave TODO
Key Terms #
- beat/pack: action for closing the shed and pressing the new weft on top of the previous weft
- beater: packs the inserted weft yarns down. The weaver can control how hard to beat which affects how tightly packed the cloth will be
- bobbin: the cylinder upon which yarn is wound; placed within a shuttle
- draft: a blueprint telling the weaver/machine which heddles to raise and lower
- frame/shaft: holds a set of heddles through which warps are threaded. Lifting the gram lifts the weft yarns threaded through the heddle
- heddle: wire strips attached to frame that warp thread passes through
- pick: a row of weft that has been thrown across warp
- shed: the space between the raised and lowered warp threads
- shuttle: carries the weft yarn during the weaving process
- throw: action for sending the shuttle through the shed
- treadle: are manually attached to frames and “lift” the threads in the frame
- warp: parallel set of yarns held under tensions along the length of the loom
- weft: inserted into the warm in back and forth fashion